
Change Store Email Addresses - Mageplaza
3 mins read
|
04-02-2016

Vinh Jacker | 06-27-2016

Integrating DHL Shipping Methods into your Magento 2 store, your customers are allowed to ask for anything to ship, from goods to letters and documents, and more. The DHL is the perfect solution to focus on customer’s demands and free you from worries of shipping risks caused by unprofessional work.
In this post, let’s find out what credentials you need to connect your Magento 2 store to the DHL server. Moreover, we will also guide you in details about other methods in the topics including UPS, USPS, and FedEx.
Read more about Shipping Method configuration in Magento 2
Sales, select Shipping Methods.DHL section,
Enabled for Checkout field.Title for the name of the shipping method that is shown during the checkout process.Gateway URL to calculate the DHL shipping rate. The default is ready to use, and you don’t need to change.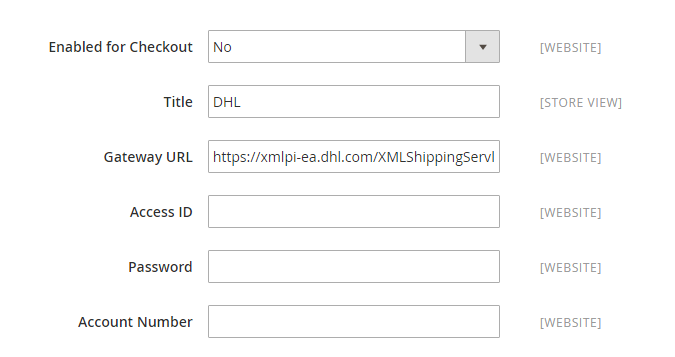
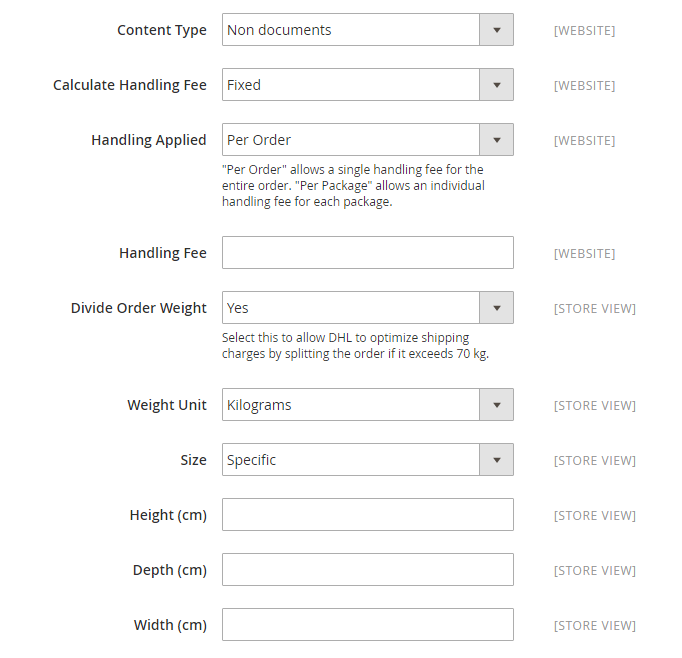
Content Type list, choose one for the type of package you ship: “Documents” or “Non documents”.Handling Fee as the following (optional)
Calculate Handling Fee to “Fixed” or “Percent”.Handling Applied field, allow specifying how to calculate the handling fee.Handling Fee.Divide Order Weight field, choose “Yes” if you allow the total order weight to be broken up to ensure an accurate calculation of shipping charges.Weight Unit to the unit of measurement as you need: “Pounds” or “Kilograms”.Size of the typical package: “Regular” or “Specific”.If you want to set a specific size, select Specific, then enter the Height, Depth, and Width of the package in centimeters.
Allowed Method list.Ready Time to ship the order after submission.Displayed Error Message box that will appear if UPS Shipping is not available.Free Shipping Amount Threshold field, select “Enable” to set the minimum number of the quantities for free USPS shipping in the next field.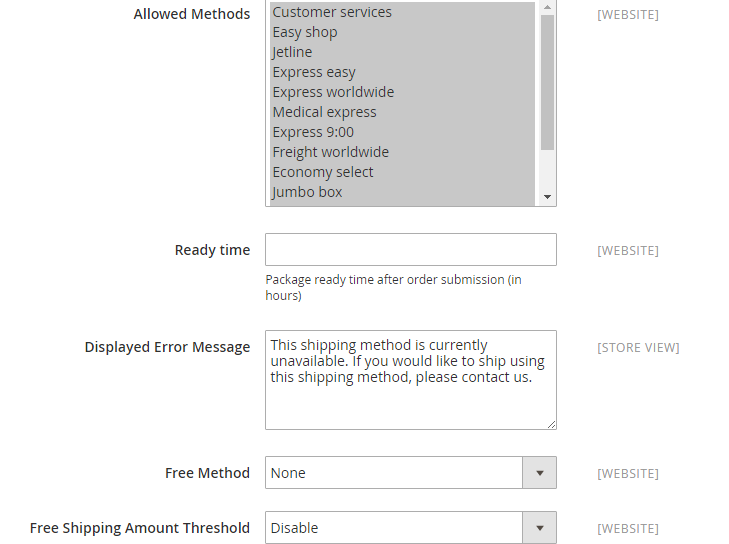
Ship to Applicable Countries to one of two options:
Show Method if Not Applicable to Yes if you want to show UPS Shipping all time.Debug to “Yes”.Sort Order on the Shipping Method on the checkout page.Save Config to finish.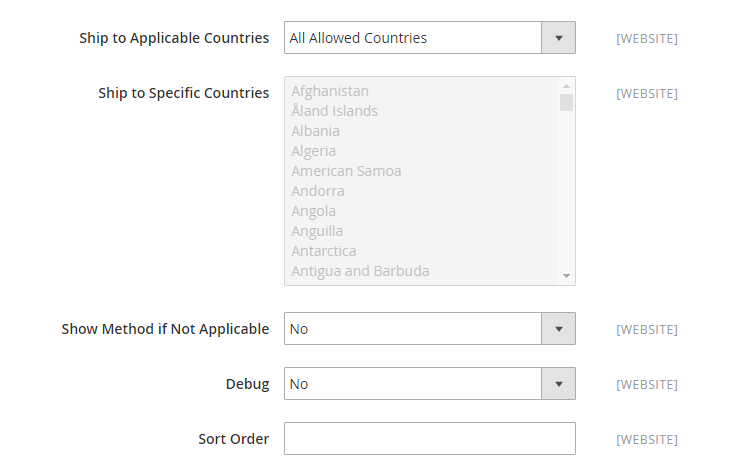
A good shipping carrier option can help effectively manage your orders and improve customers’ experience. DHL Carrier is a well-known shipping company who handles a large number of product types to different countries. Not only does it enable the standard shipping service, but it also calculates the shipping fee based on the parcel’s volume.
If you still have concerns about this tutorial or other shipping configuration issues, please leave comments below and we will be right back.
Related Post

Jacker is the Chief Technology Officer (CTO) at Mageplaza, bringing over 10 years of experience in Magento, Shopify, and other eCommerce platforms. With deep technical expertise, he has led numerous successful projects, optimizing and scaling online stores for global brands. Beyond his work in eCommerce development, he is passionate about running and swimming.
Related Post

Change Store Email Addresses - Mageplaza

Change Welcome Message - Mageplaza
Customize the welcome message on your store's homepage to provide a personalized touch for your customers. Improve the user experience with our step-by-step guide.

Configure Magento 2 Contact Form & Email: Detailed Guides - Mageplaza
Configure the email address for your Magento 2 store's contact form and ensure that your customers can easily get in touch with you with this informative guide

How to Install Magento 2 with Sample Data - Mageplaza
How to install Magento 2 with Sample Data. In this topic we will discuss about How to Install Magento 2 Step by Step in Manage Store topic

6 Steps To Stop Brute Force Attacks - Mageplaza
How To Stop Brute Force Attacks in Magento 1, 2. In this topic we will discuss about How To Stop Brute Force Attacks in Manage Store topic

How to set Locale, Language, and Country in Magento 2 - Mageplaza
Setup Locale State Country in Magento 2 provides setup your store information on Locale Options that determines the timezone, language, country and the days.
Change Store Email Addresses - Mageplaza
Change Welcome Message - Mageplaza
Customize the welcome message on your store's homepage to provide a personalized touch for your customers. Improve the user experience with our step-by-step guide.
Configure Magento 2 Contact Form & Email: Detailed Guides - Mageplaza
Configure the email address for your Magento 2 store's contact form and ensure that your customers can easily get in touch with you with this informative guide
How to Install Magento 2 with Sample Data - Mageplaza
How to install Magento 2 with Sample Data. In this topic we will discuss about How to Install Magento 2 Step by Step in Manage Store topic
6 Steps To Stop Brute Force Attacks - Mageplaza
How To Stop Brute Force Attacks in Magento 1, 2. In this topic we will discuss about How To Stop Brute Force Attacks in Manage Store topic
How to set Locale, Language, and Country in Magento 2 - Mageplaza
Setup Locale State Country in Magento 2 provides setup your store information on Locale Options that determines the timezone, language, country and the days.