

Change Store Email Addresses - Mageplaza
3 mins read
|
04-02-2016

Vinh Jacker | 06-28-2016
Setting up Magento Multi Store is one of the variable functionalities Magento 2 brings to store owners. This feature allows you to create stores as many as you need only in a single configuration. All stores share the same domain, be set up as subdomains of the same domain, or have an entirely different domain, yet possibly share the same backend for easier administration.
Learn more: Setup automatic change store view using Magento 2 Store Switcher
With different goals in mind, such as expanding your business or operating your business in different locations, you may want to create multiple stores. But multiple stores can bring you more amazing outcomes than that, such as:
Therefore, you can follow the instructions below to apply these awesome benefits to your store. Additionally, you can add multiple websites for each store you want to configure.
| Aspect | Magento Multisite | Magento Multistore |
|---|---|---|
| Definition | Multiple, separate websites from a single Magento installation | Multiple stores under a single website or domain |
| Example | Separate websites for the US, UK, and Canada | English and French stores on the same domain |
| Main purpose | Distinct websites for different brands, regions, or segments | Different store views or segments under one main website |
| Domains | Different domains or subdomains | Same domain with unique store views or subdirectories |
| Product Catalogs | Separate product catalogs | Shared product catalogs |
| Customer Databases | Separate customer databases | Shared customer databases |
| Design & Layout | Independent design and layout for each website | Different layouts possible, but generally shared design elements |
| Admin Panel | Separate admin panels | Centralized admin panel |
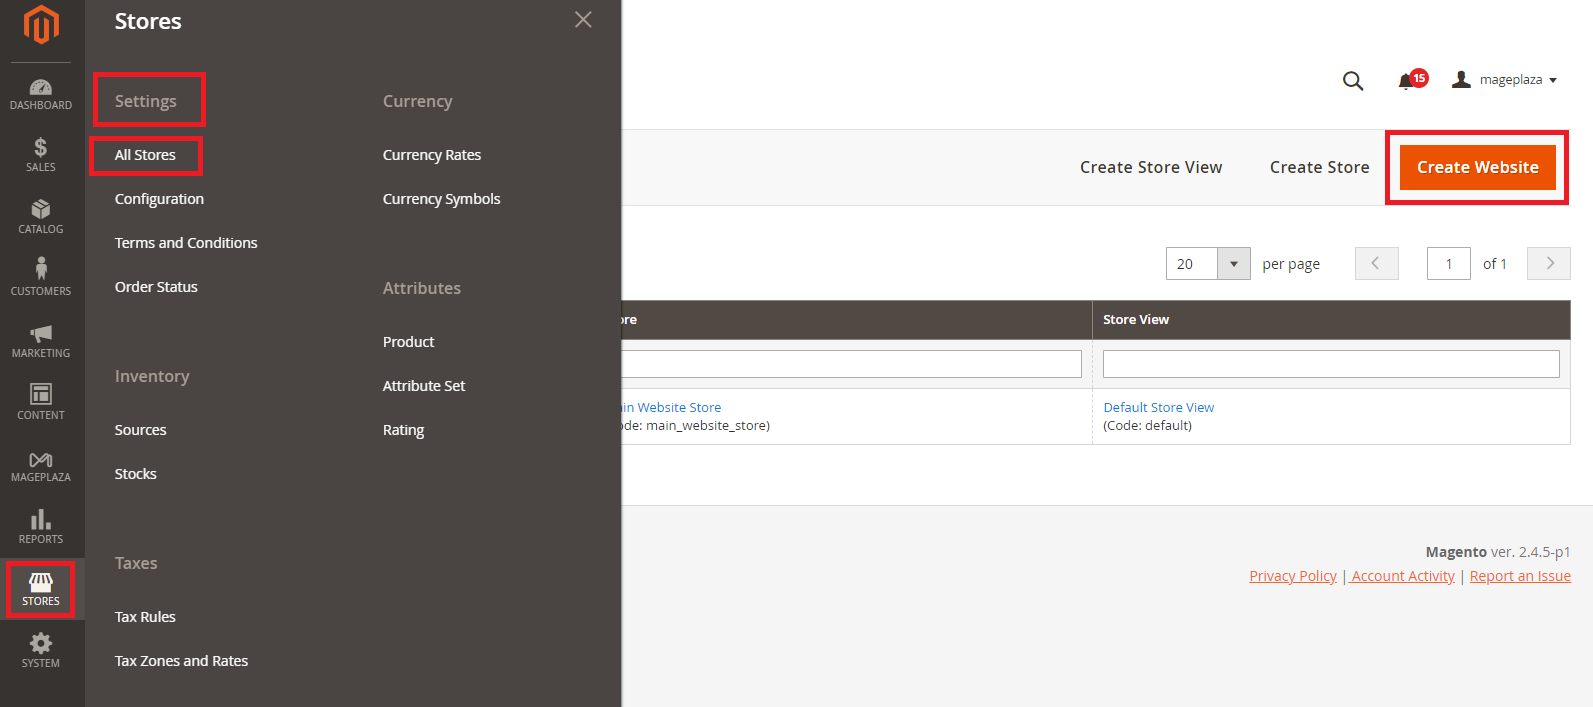
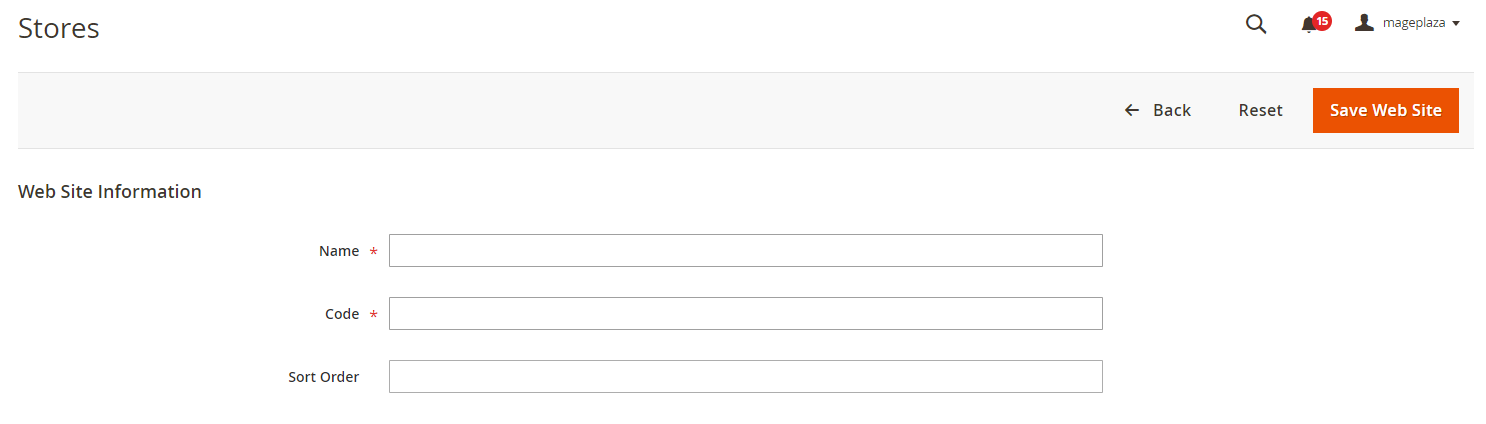
Go to Store > Settings > All Stores. Then, click on Create Website, and fill out the following fields:
In this step, you will fill in the required information about the new store in the ‘Store Information’ section.
Stores > Settings > All Stores.Create Store, then follow the below
Website that is the parent of the new store. If there is only one website, use the default “Main Website”.Name for the new store, just for internal reference.Root Category field, you will set the root category for the main menu of the new store. The created root categories are shown in the dropdown list, select one for the store.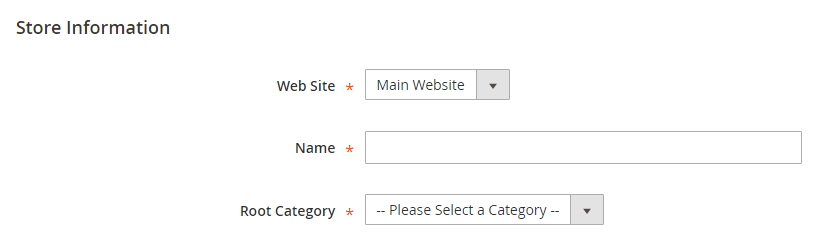
Save Store to complete.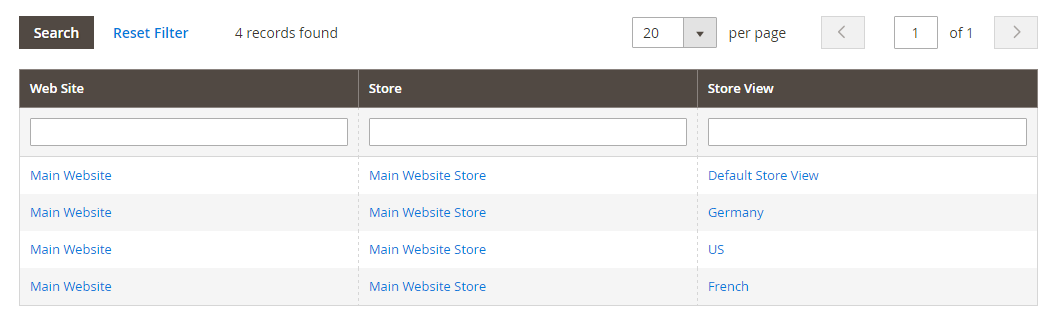
After adding the new store, you will now need to create the store view:
Create Store View, you can:
Store to the new store you’ve just created.Name for the store view.Code for the store view with lower characters.Status.Sort Order that is the position of the new store in the list.Save Store View to save all settings.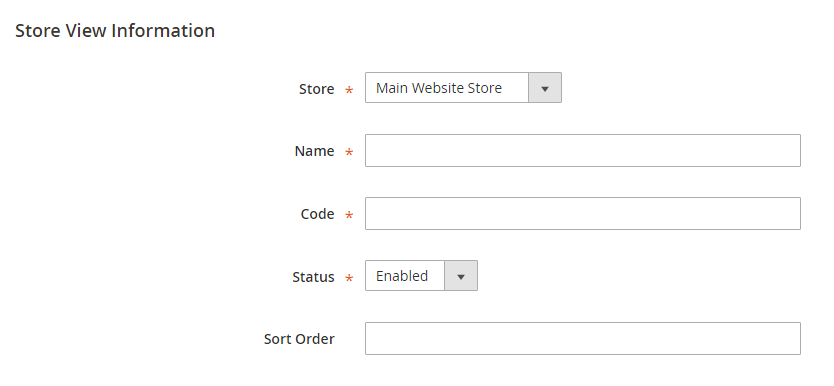
In this step, we will configure the Store URL.
Stores > Settings > Configuration.General, select Web.Store View to check the new store you added.OK to verify the scope switching.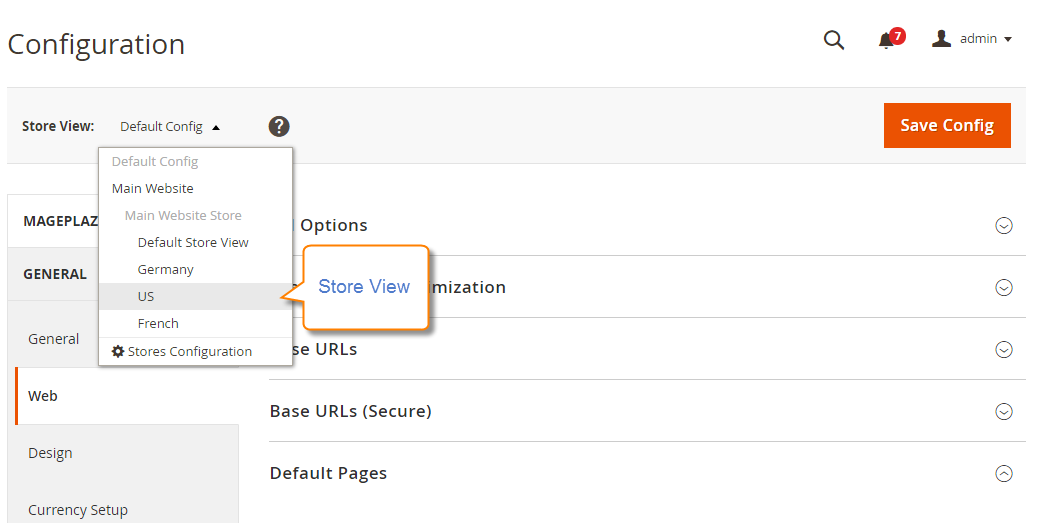
Base URLs section,
Base URL field.Base URL for the store.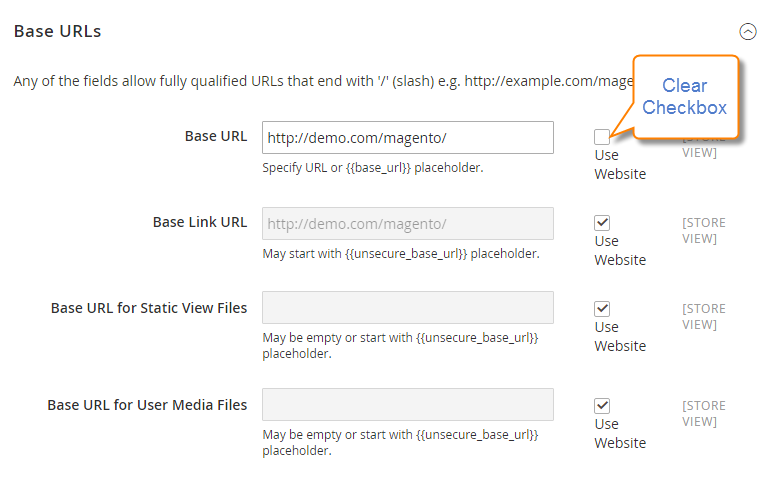
Secure Base URLs section below to set the store’s secure URL if needed.Save Config to complete.With Magento, admins can add a store code to the website’s base URL, simplifying the multistore setup process. Thanks to this feature, store owners can cut down the step of creating directories on the file system for storing index.php and .htaccess.
Additionally, this option helps prevent index.php and .htaccess from falling out of sync with the Magento source in future upgrades.
Stores > Settings > Configuration.General section, choose Web.Default Config.Url Options, fill it out.
Stores > Settings > Configuration. Under the General section, choose Web.Default Config.Base URLs section and insert your website’s base URL.Save Config button.Note: You might be confused that your access to the admin panel is no longer active after this step. Don’t panic, it will be accessible again soon after you finish the next step - configuring virtual hosts.
This is the final step to complete setting up Magento 2 multistore. At this point, store admins need to change a few things to the web server configuration. In detail:
Depending on the type of server you run, the process of creating a new virtual host for your new websites may differ.
Ex: With Apache 2.4 and above servers, the process requires modifying your /etc/httpd/conf/httpd.conf likethis:
<VirtualHost *:80>
   ServerName          mysite.mg
   DocumentRoot        /var/www/html/magento2/pub/
</VirtualHost>

<VirtualHost *:80>
   ServerName          french.mysite.mg
   DocumentRoot        /var/www/html/magento2/pub/
   SetEnv MAGE_RUN_CODE "french"
   SetEnv MAGE_RUN_TYPE "website"
</VirtualHost>

<VirtualHost *:80>
   ServerName          german.mysite.mg
   DocumentRoot        /var/www/html/magento2/pub/
   SetEnv MAGE_RUN_CODE "german"
   SetEnv MAGE_RUN_TYPE "website"
</VirtualHost>
After that, restart the web server by running:
Configure static routes to the host (Optional)
If you don’t have DNS configured for your store’s URLs, create static routes in the hosts file, following this format:
<ip address> <new website>
Note: If you want a separate checkout procedure, configure your Magento domains to use different IP addresses. That’s it! Your multi-stores are now ready.
1. Complexity in Managing Multiple Stores
2. Performance Issues
Challenge: Running multiple stores can lead to performance bottlenecks, affecting load times and overall user experience.
Solution: Optimize server performance by using a powerful hosting solution tailored for Magento. Implement caching strategies, optimize databases, and use Content Delivery Networks (CDNs) to enhance load times.
3. SEO Management
4. Content Duplication
5. Design Customization
Challenge: Creating and maintaining individual themes for each store can be time-consuming, especially when aiming for distinct brand identities.
Solution: Optimize theme management with a responsive, customizable framework. Reuse design elements across stores. Use Magento’s theme fallback system to inherit designs from a parent theme and customize each store as needed.
1. Can I use different themes for each store in Magento 2?
Yes, in Magento 2, you can use different themes for each store. This feature allows you to customize the appearance of each store independently to suit its branding or target audience. You can assign specific themes to individual stores or store views within your Magento 2 installation. This flexibility enables you to create unique and tailored experiences for customers visiting different stores under the same Magento 2 instance.
2. Is it possible to manage different settings for each store within Magento 2?
In Magento 2, you can handle separate settings for each store. You can adjust Magento settings and set different “website base URLs” for each store. This allows you to customize settings such as prices, products, and themes according to your needs.
3. Can you have several store views with different base URLs in Magento?
In Magento, you can make various store views with separate base URLs. This lets you customize the web server setup for each store view, guaranteeing each store has its distinct online identity.
4. How can I configure Magento for multiple storefronts?
To set up Magento for multiple stores, you can give each store its own web address. Make sure each new website has a designated host. Also, give each store a unique code to tell them apart. You can create as many stores as you want, each with multiple web addresses for better organization.
The need to set up Magento multi store has been increasing due to different business goals, and also because of the amazing benefits it can bring to online stores. If you also want to do it, start following this tutorial. Leave comments below to share your ideas and tell us about your concerns if any. See you in later posts!
Related Post

Jacker is the Chief Technology Officer (CTO) at Mageplaza, bringing over 10 years of experience in Magento, Shopify, and other eCommerce platforms. With deep technical expertise, he has led numerous successful projects, optimizing and scaling online stores for global brands. Beyond his work in eCommerce development, he is passionate about running and swimming.
Related Post

Change Store Email Addresses - Mageplaza

Change Welcome Message - Mageplaza
Customize the welcome message on your store's homepage to provide a personalized touch for your customers. Improve the user experience with our step-by-step guide.

Configure Magento 2 Contact Form & Email: Detailed Guides - Mageplaza
Configure the email address for your Magento 2 store's contact form and ensure that your customers can easily get in touch with you with this informative guide

How to Install Magento 2 with Sample Data - Mageplaza
How to install Magento 2 with Sample Data. In this topic we will discuss about How to Install Magento 2 Step by Step in Manage Store topic

6 Steps To Stop Brute Force Attacks - Mageplaza
How To Stop Brute Force Attacks in Magento 1, 2. In this topic we will discuss about How To Stop Brute Force Attacks in Manage Store topic

How to set Locale, Language, and Country in Magento 2 - Mageplaza
Setup Locale State Country in Magento 2 provides setup your store information on Locale Options that determines the timezone, language, country and the days.
Change Store Email Addresses - Mageplaza
Change Welcome Message - Mageplaza
Customize the welcome message on your store's homepage to provide a personalized touch for your customers. Improve the user experience with our step-by-step guide.
Configure Magento 2 Contact Form & Email: Detailed Guides - Mageplaza
Configure the email address for your Magento 2 store's contact form and ensure that your customers can easily get in touch with you with this informative guide
How to Install Magento 2 with Sample Data - Mageplaza
How to install Magento 2 with Sample Data. In this topic we will discuss about How to Install Magento 2 Step by Step in Manage Store topic
6 Steps To Stop Brute Force Attacks - Mageplaza
How To Stop Brute Force Attacks in Magento 1, 2. In this topic we will discuss about How To Stop Brute Force Attacks in Manage Store topic
How to set Locale, Language, and Country in Magento 2 - Mageplaza
Setup Locale State Country in Magento 2 provides setup your store information on Locale Options that determines the timezone, language, country and the days.