

Change Store Email Addresses - Mageplaza
3 mins read
|
04-02-2016

Vinh Jacker | 04-08-2016

If you are wondering how to set Locale, Language, and Country in Magento 2, this tutorial will cover everything you need. Locale Options in Magento 2 provides more details about your store. Setup your store information on Locale Options that determines the timezone, your language and official working days in your area. Also, others can identify your country, tax rate and guest some needed information related to your location.
With the information you can set from Magento 2 Locale Options, your store will become closer and friendlier to the audience. Also, you can take a closer step in operating your store in other countries. Follow this tutorial to know what you can do.
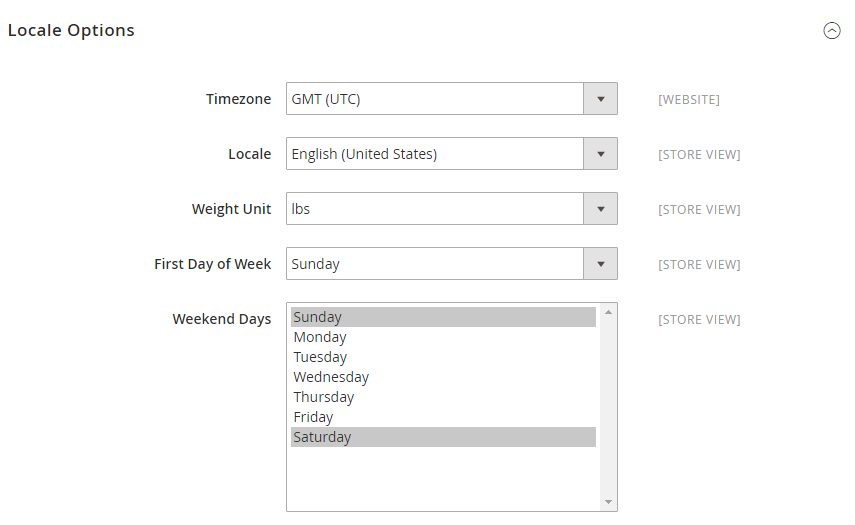
Stores. Then under Settings, choose Configuration.General, choose General.Locale Options section.Timezone from the list. Then, do the following:
Locale to the store language.Weight Unit to the unit of measurement that is typically used for shipments from your locale.First Day of the Week to the day that is considered to be the first day of the week in your area.Weekend Days list, select the days which fall on a weekend in your area. (To select multiple options, hold down the Ctrl (PC) or Command (Mac) key.)Save Config.Beside Locale Options, you can also configure State Options and Country Options clearly if you need. With Sate Options, the standard address format is different for every country, so fulfilling the state information is optional. In many countries, the state, province, or region is a required part of a postal address used for the shipping and billing information to calculate tax rates, and so on. On state options you can setup state required for the countries.
In addition, Country Options determines the country where your business is located, and which countries you accept payment.
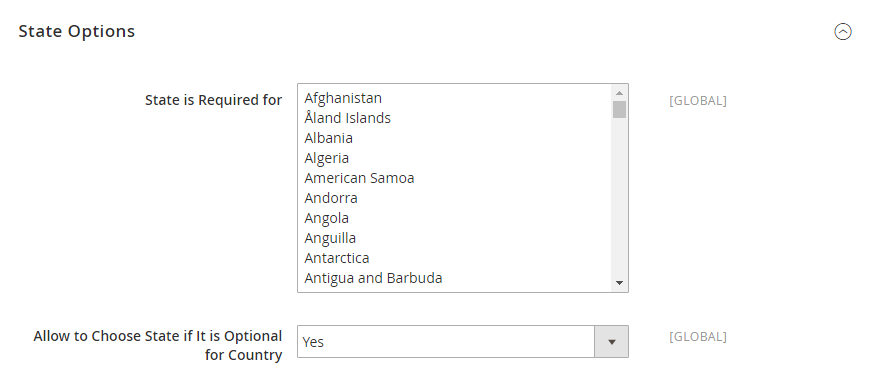
Configuring State options allows you to have better control on the details of the address requirement, as this information could be used to handle the orders more effectively. Follow these steps to start setting things up:
Stores. Then under Settings, choose Configuration.General, choose General.State is required for list, select each country where Region/State is a required entry.Allow to Choose State if It is Optional for Country field to one of the following:
Save Config.Your store may operate and ship orders to customers in different countries. Therefore, you can configure which countries to conduct business by doing the below steps:
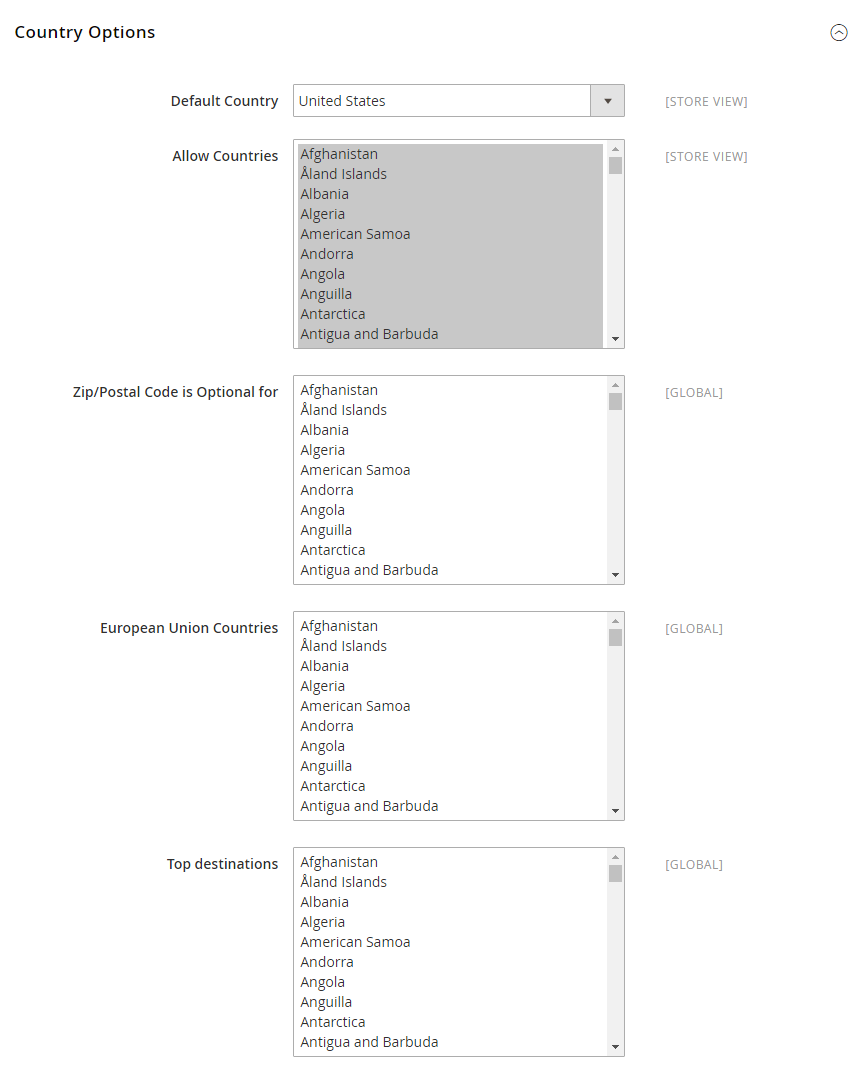
Stores. Then under Settings, choose Configuration.General, choose General.Country Options section, and do the following:
Default Country where your business is located.Allow Countries list, select each country from which you accept orders. By the default, all countries in the list are selected. To select multiple countries, hold down the Ctrl (PC) or Command (Mac) key.Zip/Postal Code is Optional for list, select each country where you conduct business that does not require a ZIP or postal code to be included as part of the street address.European Union Countries list, select each country in the EU where you conduct business. By the default, all EU countries are selected.Top Destinations list, select the primary countries that you target for sales.Save Config.You can check the final result on the fronend now. Before checking, please make sure you’ve tried with basic tips like reindex, flushing/clearing cache in your server/browser. Using incognito mode is also recommended.
Setting Locale options for your Magento 2 store can provide your customers with more details about you, so that you can easily build trust and a closer business-customer relationship. Moreover, you are also able to set state and country requirements to conduct your business, which is essential in operating on a global scale.
If you want to go further and display your multiple store locations on an interactive map for customers, you can use the Magento 2 Store Locator extension to make finding your physical stores effortless.
Related Topics

Jacker is the Chief Technology Officer (CTO) at Mageplaza, bringing over 10 years of experience in Magento, Shopify, and other eCommerce platforms. With deep technical expertise, he has led numerous successful projects, optimizing and scaling online stores for global brands. Beyond his work in eCommerce development, he is passionate about running and swimming.
Related Post

Change Store Email Addresses - Mageplaza

Change Welcome Message - Mageplaza
Customize the welcome message on your store's homepage to provide a personalized touch for your customers. Improve the user experience with our step-by-step guide.

Configure Magento 2 Contact Form & Email: Detailed Guides - Mageplaza
Configure the email address for your Magento 2 store's contact form and ensure that your customers can easily get in touch with you with this informative guide

How to Install Magento 2 with Sample Data - Mageplaza
How to install Magento 2 with Sample Data. In this topic we will discuss about How to Install Magento 2 Step by Step in Manage Store topic

6 Steps To Stop Brute Force Attacks - Mageplaza
How To Stop Brute Force Attacks in Magento 1, 2. In this topic we will discuss about How To Stop Brute Force Attacks in Manage Store topic
How to set Locale, Language, and Country in Magento 2 - Mageplaza
Setup Locale State Country in Magento 2 provides setup your store information on Locale Options that determines the timezone, language, country and the days.
Change Store Email Addresses - Mageplaza
Change Welcome Message - Mageplaza
Customize the welcome message on your store's homepage to provide a personalized touch for your customers. Improve the user experience with our step-by-step guide.
Configure Magento 2 Contact Form & Email: Detailed Guides - Mageplaza
Configure the email address for your Magento 2 store's contact form and ensure that your customers can easily get in touch with you with this informative guide
How to Install Magento 2 with Sample Data - Mageplaza
How to install Magento 2 with Sample Data. In this topic we will discuss about How to Install Magento 2 Step by Step in Manage Store topic
6 Steps To Stop Brute Force Attacks - Mageplaza
How To Stop Brute Force Attacks in Magento 1, 2. In this topic we will discuss about How To Stop Brute Force Attacks in Manage Store topic
How to set Locale, Language, and Country in Magento 2 - Mageplaza
Setup Locale State Country in Magento 2 provides setup your store information on Locale Options that determines the timezone, language, country and the days.