


Change Store Email Addresses - Mageplaza
3 mins read
|
04-02-2016

Vinh Jacker | 03-17-2025
PayPal Express Checkout Payment Method is the most convenient payment method on the internet nowadays. It is confirmed that integrating PayPal on your store can increase conversion rate twice and raise the overall customers up to 29%. PayPal is trusted and used widely for its fast checkout; utility when accepting debit card, credit card and almost currencies in the world; as well as absolute security. For all the reasons above, PayPal Express Checkout appear on every online store. To manage PayPal Express Checkout Payment Method on your Magento website, let’s follow the steps below.
Read How to Create Payment Methods in Magento 2
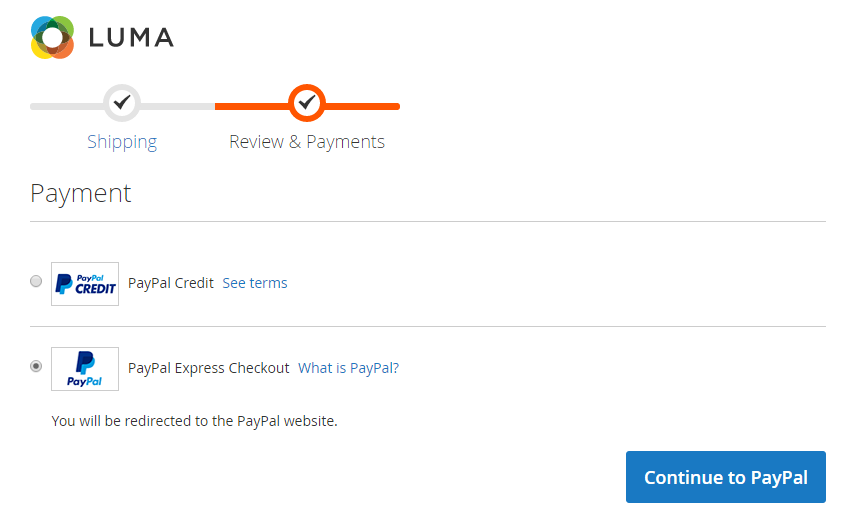
PayPal Express Checkout is different from other payment methods because it lets the customer check out from the item’s details page, the small cart, or the shopping cart at the start of the normal checkout process.
1. Customer makes an order: Customer hits or taps the PayPal button to pay.
2. Customer is transferred to the PayPal site: The customer is redirected to finish the transaction.
3. Customer signs in to their PayPal account: The customers must sign in to their PayPal account in order to finish the transaction. Their PayPal account is used to get their billing and shipping details by the payment method.
4. Customer goes back to the checkout page: The customer is taken back to your store’s checkout page to look over their order again.
5. A customer makes an order: The customer places the order, and PayPal gets the information about the sale.
6. PayPal settles the payment: PayPal gets the order and complete the transaction.
IMPORTANT NOTE: Orders with more than one address can’t be processed through PayPal Express Checkout. So you need to pay attention to get Pay Pal support for your order!
You should make sure that your PayPal account takes your PayPal account ID, email address, API username, API password, and API signature before you add PayPal to your store.
Working with a bank account is the first thing you should do:
Service Settings > Hosted Checkout Pages > Set Up, then, change “No” in the AVS field to “Yes” and “Yes” in the CSC field to “No.”Save.Save config to save the changes you want to make to the Basic and Advanced Settings. Then you can start working with the Magento site.IMPORTANT NOTE:
PayPal no longer supports sellingvirtual products through PayPal Express Checkout. If you want to process an order that includes digital goods, you should usePayPal Payments Standard or another PayPal payment method.
This step is used to build a basement for configuring PayPal Express Checkout.
Stores > Settings > Configuration.Sales > Payment Methods.Merchant Location and set your country to Merchant Country field. If this field is left blank, Default Country from General Config will be used.Configure.
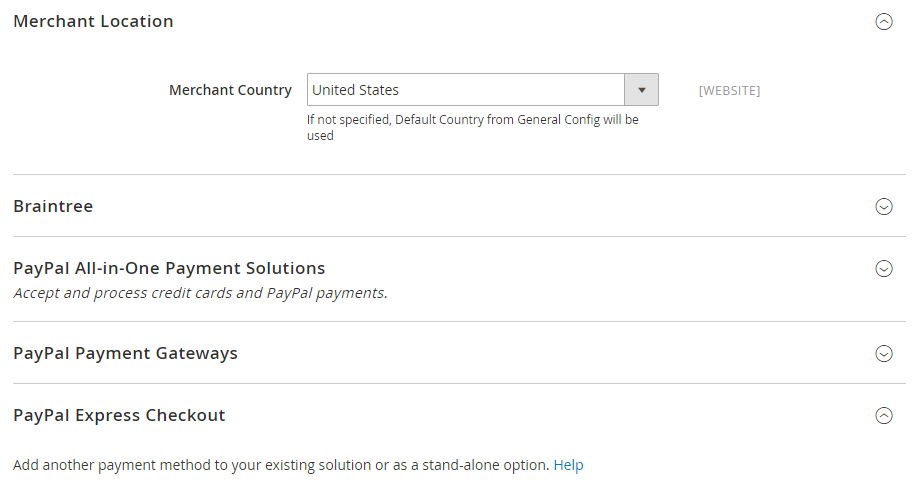
With Magento 2, you can use either PayPal Express Checkout or PayPal All-In-One deal. As soon as you set up one option, the other one stops working automatically. There are three parts to setting up PayPal Express Checkout and PayPal All-In-One: required settings, basic settings, and advanced settings. This guide only covers PayPal Express Checkout because of this.
Expand the Required PayPal Settings then Express Checkout section.
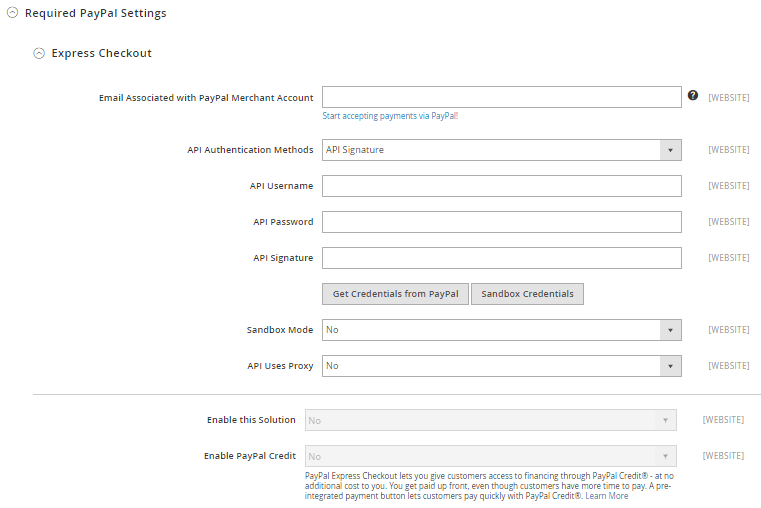
Get Credentials from PayPal or Sandbox Credentials if needed, a link to PayPal will be opened in a new window. You should log in and follow the instructions.Get Publisher ID from PayPal and take your account ID information then fill in the Publisher ID field.In this step, you will start to change how PayPal Express Checkout looks.
Checkout with PayPal button on the product page.

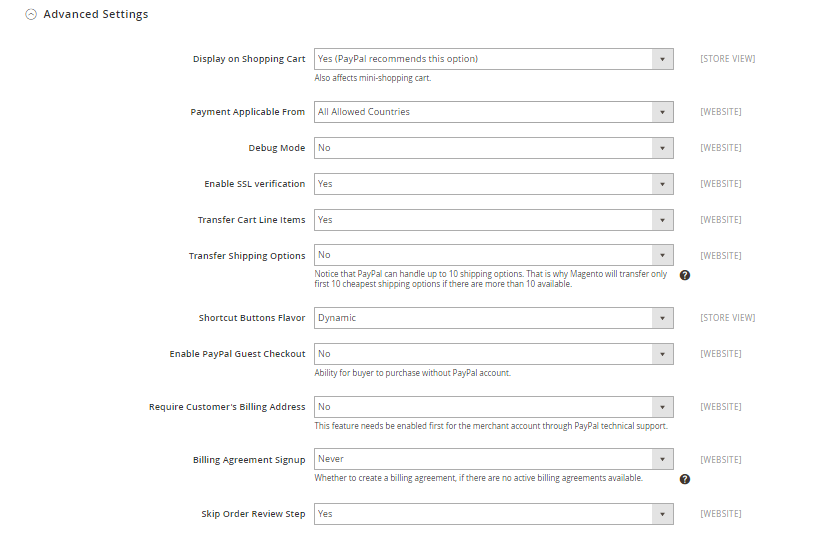
The advanced settings section includes of advanced configuration when integrating PayPal.
Checkout with PayPal button in the shopping cart.payments_payflow_advanced.log.Set Skip Order Review Step to “Yes” to let the customer complete the transaction from the PayPal site without returning to your Magento store for Order Review.
Save Config to save the process or continue with three more sections below if necessary for your store.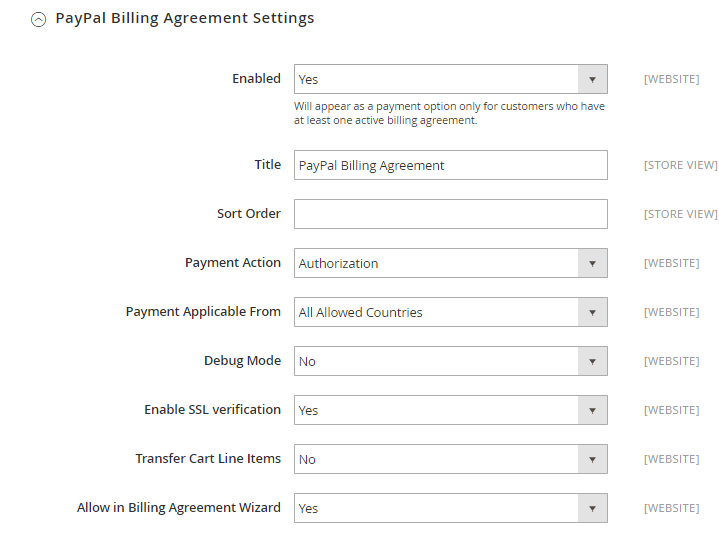
reports.paypal.com./ppreports/outgoing.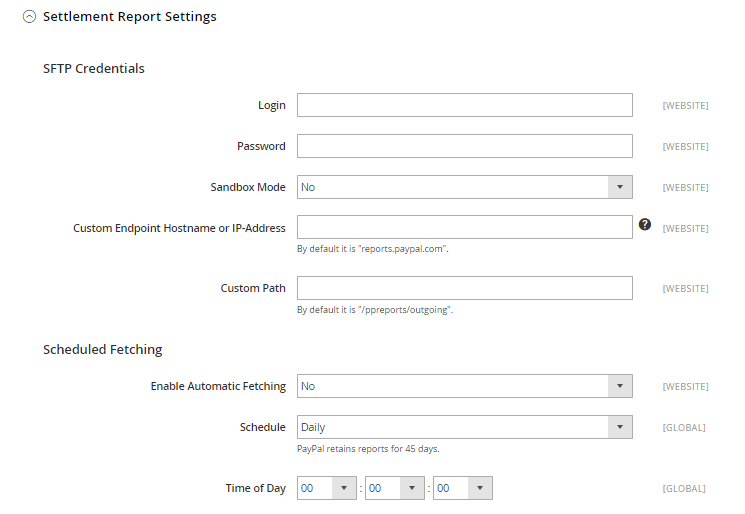
In the Header Background Color, Header Border Color and Page Background Color fields, enter the six-character hexadecimal code, without the “#” symbol to complete.
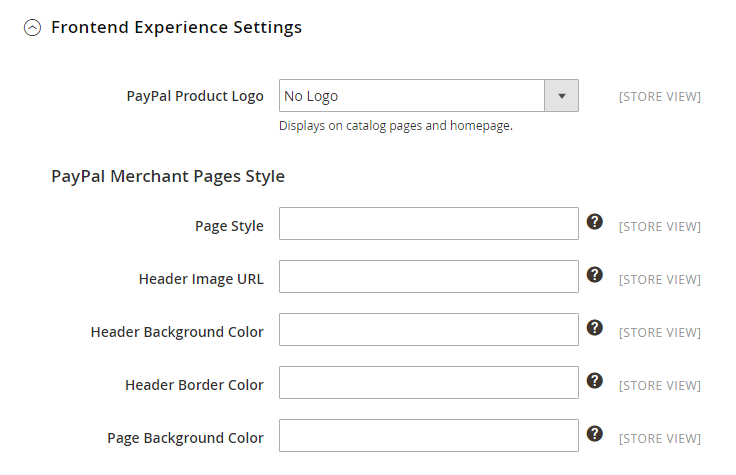
Save Config button in the upper-right corner when you are done.IMPORTANT NOTE:
For the best checkout experience, PayPal suggests you should add the Paypal One Touch/InContext Plugin for Magento. You can get this module for free.
Sometimes, you might encounter a few issues or challenges during this process, but don’t worry, we have prepared a list of common problems and suitable solutions for each of them.
1. API Credentials Invalid
Explanation: This error happens when the API credentials (like Username, Password, and Signature) entered in the Magento 2 configuration are incorrect or don’t match those linked to your PayPal Business Account.
Solution: Check the API credentials you’ve entered. Log into your PayPal account to confirm you’re using the correct credentials for the right environment (sandbox or live). Update them in Magento 2 if necessary.
2. Payment Action Configuration Mismatch
Explanation: This error occurs when the payment action settings in Magento 2 don’t match those in your PayPal account. For example, if Magento is set to “Sale” (authorize and capture) but PayPal has a different setting.
Solution: Make sure the payment action settings are consistent between Magento 2 and PayPal. If you want to capture payments immediately, both should be set the same way.
3. IPN Notifications Not Received
Explanation: Instant Payment Notification (IPN) allows PayPal to inform your Magento 2 store about transaction updates. If your store isn’t receiving these notifications, transaction statuses might not update correctly.
Solution: Check that IPN settings are correctly set up in your PayPal account. Verify the IPN URL in your PayPal settings matches the one provided by Magento 2. Also, ensure your server or firewall isn’t blocking IPN requests.
4. Currency Mismatch
Explanation: Errors may occur at checkout if the currencies allowed by PayPal don’t match those set in your Magento 2 store.
Solution: Align the currencies supported by PayPal with those configured in Magento 2. Ensure they are compatible to prevent currency conversion issues.
5. SSL Certificate Missing
Explanation: Without a valid SSL certificate (HTTPS), your Magento 2 store may struggle to communicate securely with PayPal, causing payment processing errors.
Solution: Install an SSL certificate on your server to enable HTTPS. This ensures secure data transmission and prevents browser warnings that could discourage customers.
What should I do if I receive an “API Credentials Invalid” error when setting up PayPal Express Checkout in Magento 2?
If you encounter an “API Credentials Invalid” error, it means the API credentials (Username, Password, Signature) entered in Magento 2’s configuration are incorrect or don’t match the ones associated with your PayPal Business Account. To resolve this, double-check the API credentials you’ve entered. Go to your PayPal account and ensure you’re using the correct API credentials for the appropriate environment (sandbox or live). Update the credentials in Magento 2’s configuration if needed.
How can I resolve a “Payment Action Configuration Mismatch” error when integrating PayPal Express Checkout with Magento 2?
A “Payment Action Configuration Mismatch” error occurs when the payment action settings in your Magento 2 configuration do not match the settings in your PayPal account. For instance, you might set Magento to “Sale” (authorize and capture) while PayPal is configured differently. To fix this, align the payment action settings between Magento 2 and PayPal. If you want to capture payments immediately, make sure both platforms are set accordingly. Consistency is key to avoiding conflicts.
What steps should I take if my Magento 2 store isn’t receiving IPN notifications from PayPal Express Checkout?
If your Magento 2 store isn’t receiving IPN notifications, it means Instant Payment Notification (IPN) settings are not properly configured in your PayPal account. First, ensure the IPN URL provided by Magento 2 is correctly set up in your PayPal settings. Also, check if your server or firewall isn’t blocking incoming IPN requests. Proper IPN configuration is crucial for transaction statuses to update correctly.
When it comes to payment methods, PayPal is still a popular one due to its fast speed, high security, and multiple currency approvals. If you aim at increasing conversion rates and attracting more customers, setting up the PayPal Express Checkout Payment Method can be a good tactic to follow. We have included everything you have to do in this post, so don’t hesitate to start doing it now. In case you would like to install other payment options, related posts will serve your needs. And if you want something we do not have already, feel free to chat with us.
Related Posts:

Jacker is the Chief Technology Officer (CTO) at Mageplaza, bringing over 10 years of experience in Magento, Shopify, and other eCommerce platforms. With deep technical expertise, he has led numerous successful projects, optimizing and scaling online stores for global brands. Beyond his work in eCommerce development, he is passionate about running and swimming.
Related Post

Change Store Email Addresses - Mageplaza

Change Welcome Message - Mageplaza
Customize the welcome message on your store's homepage to provide a personalized touch for your customers. Improve the user experience with our step-by-step guide.

Configure Magento 2 Contact Form & Email: Detailed Guides - Mageplaza
Configure the email address for your Magento 2 store's contact form and ensure that your customers can easily get in touch with you with this informative guide

How to Install Magento 2 with Sample Data - Mageplaza
How to install Magento 2 with Sample Data. In this topic we will discuss about How to Install Magento 2 Step by Step in Manage Store topic

6 Steps To Stop Brute Force Attacks - Mageplaza
How To Stop Brute Force Attacks in Magento 1, 2. In this topic we will discuss about How To Stop Brute Force Attacks in Manage Store topic

How to set Locale, Language, and Country in Magento 2 - Mageplaza
Setup Locale State Country in Magento 2 provides setup your store information on Locale Options that determines the timezone, language, country and the days.
Change Store Email Addresses - Mageplaza
Change Welcome Message - Mageplaza
Customize the welcome message on your store's homepage to provide a personalized touch for your customers. Improve the user experience with our step-by-step guide.
Configure Magento 2 Contact Form & Email: Detailed Guides - Mageplaza
Configure the email address for your Magento 2 store's contact form and ensure that your customers can easily get in touch with you with this informative guide
How to Install Magento 2 with Sample Data - Mageplaza
How to install Magento 2 with Sample Data. In this topic we will discuss about How to Install Magento 2 Step by Step in Manage Store topic
6 Steps To Stop Brute Force Attacks - Mageplaza
How To Stop Brute Force Attacks in Magento 1, 2. In this topic we will discuss about How To Stop Brute Force Attacks in Manage Store topic
How to set Locale, Language, and Country in Magento 2 - Mageplaza
Setup Locale State Country in Magento 2 provides setup your store information on Locale Options that determines the timezone, language, country and the days.