

Change Store Email Addresses - Mageplaza
3 mins read
|
04-02-2016

Vinh Jacker | 04-15-2016
Gathering many simple standalone products into a group is called Group Product, a type of Magento products. It is possible to base on the variation of simple product to create a set of different products. You can consider the purpose of building a group product like a set of Sprite Yoga Strap.
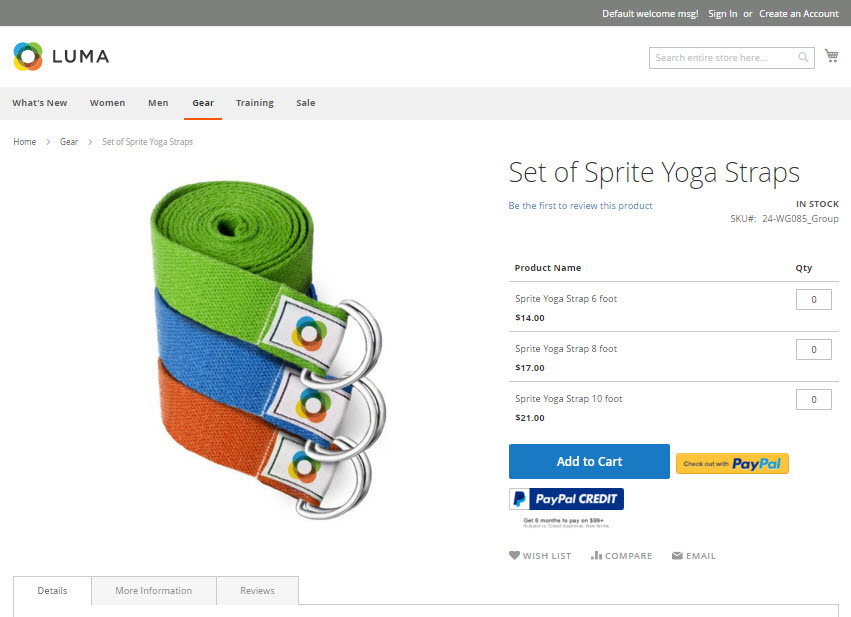
Thus, creating Grouped Product is the helpful solution to enhance customer’s shopping experience and give the items related to each other that the customer wants to add to the order. Each product can be shown and sold separately or together in the group as needed; however, they are definitely listed separately in the shopping cart. This tutorial will guide you through 8 steps to create Group Products in Magento 2.
Explore Product Types in Magento 2
To create Grouped Product 2, please take the following steps:
Products > Inventory > Catalog.Add Product menu, select Grouped Product.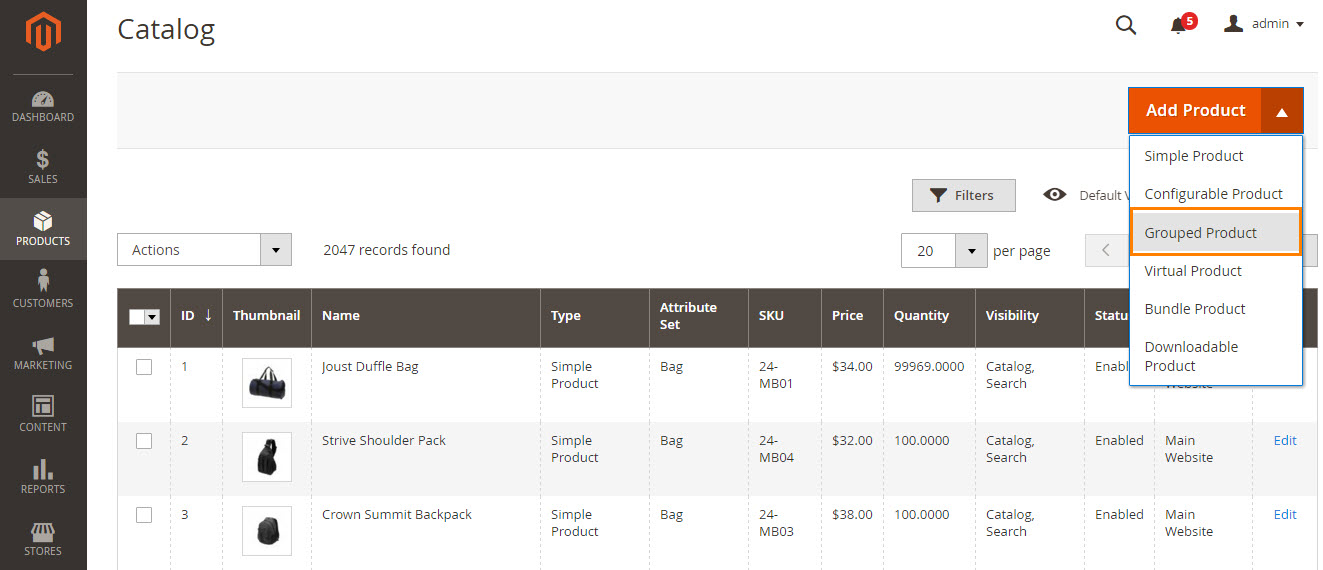
Follow one of two ways to select the product template:
Search box, enter the needed name of the template.In the list, select one of the templates you want to use
The corresponding form will be shown to configure.

Product Detail section, need to do:
Name.SKU for the product, or offer another value.Product Online.Camera tile in the Images and Videos box.In the Images and Video box, click on Camera title and feel free to choose the desired image from the file on your computer.
A placeholder appears until a product image is uploaded.
Quantity is unavailable because the product group is made up of the individual product.Search box to find and select a match.Show List icon to see the category tree, then click on any available category you want to assign to the product.Category Name and assign to the Parent Category, then click on Create Category.
Submit. You can also use the WYSIWYG Editor for additional control.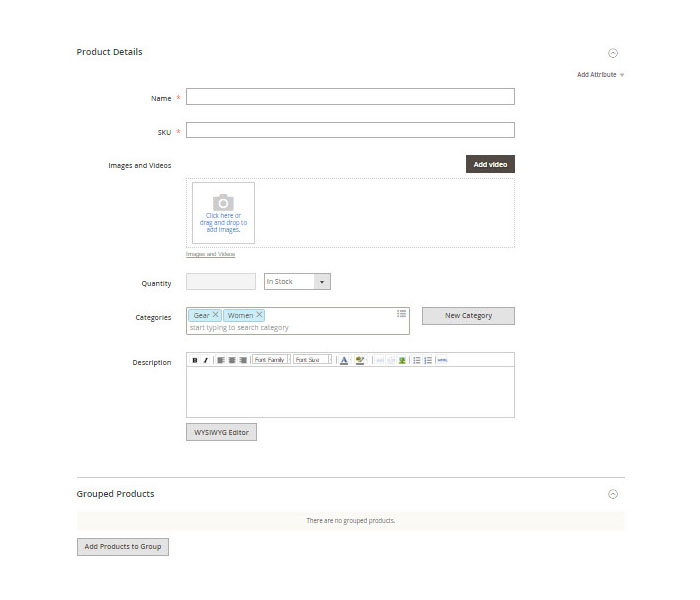
Grouped Products section. Then, click on Add Products to Group.Search.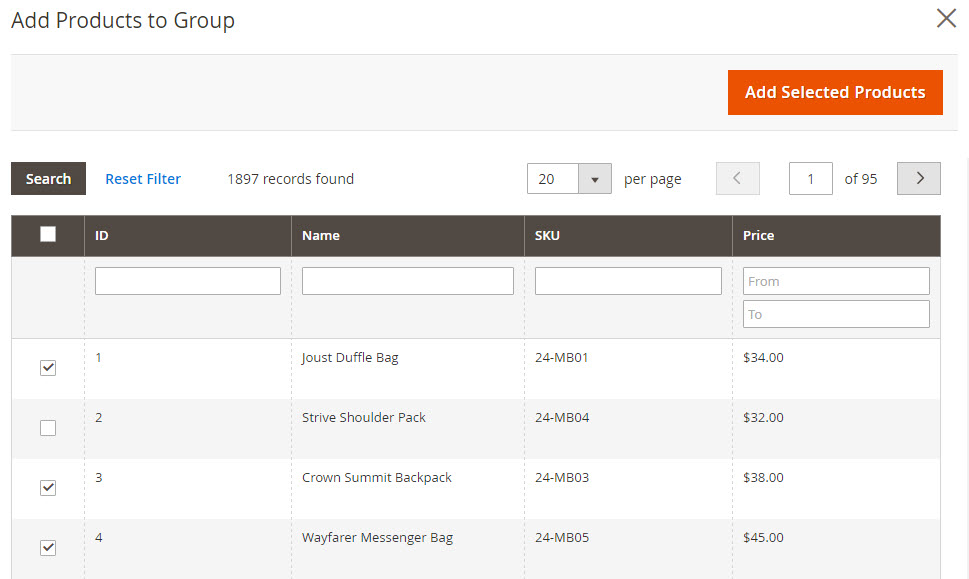
Default Qty field.Delete icon.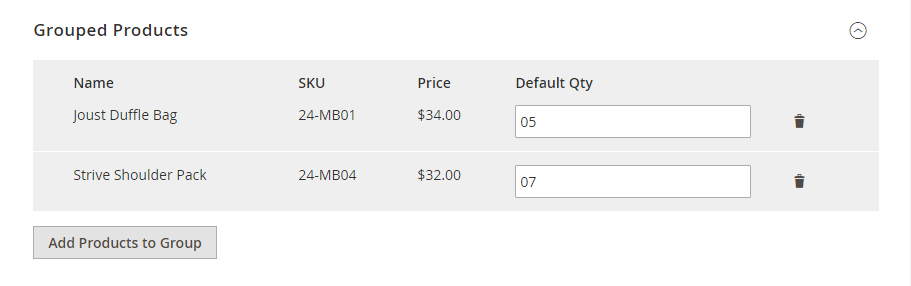
Save & Close on the Save menu.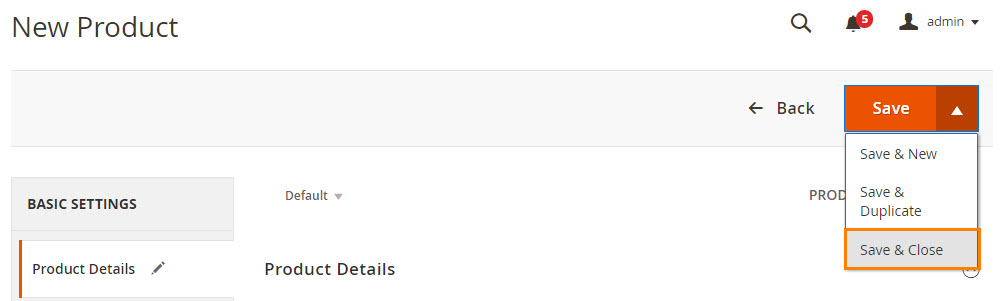
Approve to set a different image for each variation in the shopping cart thumbnail if you need.
Stores. Then under Settings, choose Configuration.Checkout. Then, expand the Shopping Cart section.Grouped Product Image, select “Product Thumbnail Itself”.Save Config to complete.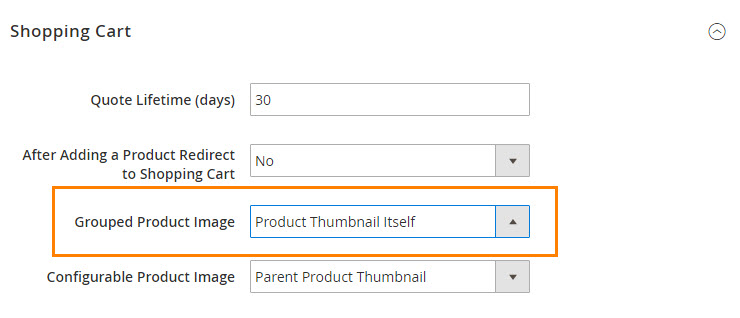
On the Admin menu, choose Customer View.

Creating Grouped Products, a combination of products that compliment each other, can be used as a wise strategy to increase sales for any Magento 2 store. We hope that this tutorial will be helpful for you. In case you still have any questions, please send it to us here. Other posts in the Product Series can be found below as well.
Happy reading!
Creating Products Series in Manage Store:
Reference: Magento 2 User Guide

Jacker is the Chief Technology Officer (CTO) at Mageplaza, bringing over 10 years of experience in Magento, Shopify, and other eCommerce platforms. With deep technical expertise, he has led numerous successful projects, optimizing and scaling online stores for global brands. Beyond his work in eCommerce development, he is passionate about running and swimming.
Related Post

Change Store Email Addresses - Mageplaza

Change Welcome Message - Mageplaza
Customize the welcome message on your store's homepage to provide a personalized touch for your customers. Improve the user experience with our step-by-step guide.

Configure Magento 2 Contact Form & Email: Detailed Guides - Mageplaza
Configure the email address for your Magento 2 store's contact form and ensure that your customers can easily get in touch with you with this informative guide

How to Install Magento 2 with Sample Data - Mageplaza
How to install Magento 2 with Sample Data. In this topic we will discuss about How to Install Magento 2 Step by Step in Manage Store topic

6 Steps To Stop Brute Force Attacks - Mageplaza
How To Stop Brute Force Attacks in Magento 1, 2. In this topic we will discuss about How To Stop Brute Force Attacks in Manage Store topic

How to set Locale, Language, and Country in Magento 2 - Mageplaza
Setup Locale State Country in Magento 2 provides setup your store information on Locale Options that determines the timezone, language, country and the days.
Change Store Email Addresses - Mageplaza
Change Welcome Message - Mageplaza
Customize the welcome message on your store's homepage to provide a personalized touch for your customers. Improve the user experience with our step-by-step guide.
Configure Magento 2 Contact Form & Email: Detailed Guides - Mageplaza
Configure the email address for your Magento 2 store's contact form and ensure that your customers can easily get in touch with you with this informative guide
How to Install Magento 2 with Sample Data - Mageplaza
How to install Magento 2 with Sample Data. In this topic we will discuss about How to Install Magento 2 Step by Step in Manage Store topic
6 Steps To Stop Brute Force Attacks - Mageplaza
How To Stop Brute Force Attacks in Magento 1, 2. In this topic we will discuss about How To Stop Brute Force Attacks in Manage Store topic
How to set Locale, Language, and Country in Magento 2 - Mageplaza
Setup Locale State Country in Magento 2 provides setup your store information on Locale Options that determines the timezone, language, country and the days.