

Change Store Email Addresses - Mageplaza
3 mins read
|
04-02-2016

Vinh Jacker | 04-15-2016
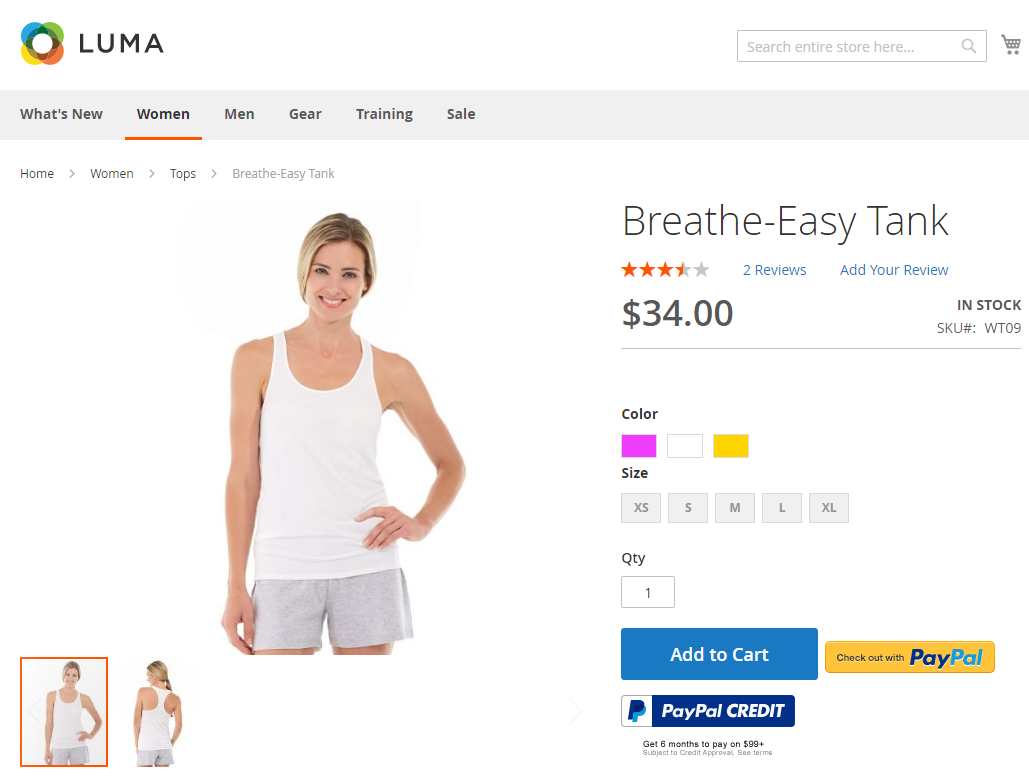
Creating a configurable product in Magento 2 allows you to offer multiple variations of a product, such as different sizes or colors, from a single product page. This not only enhances the shopping experience for your customers but also simplifies your product management. In this guide, we’ll walk you through the steps to create a configurable product in Magento 2, ensuring your store can cater to diverse customer preferences seamlessly.
Before diving into configurable products, you might also want to explore how to manage different product types in Magento:
Although the configurable product includes many options which need to be set up, it is incorrect if its settings are said to be difficult and complicated. This tutorial will give a clear guide to completing the task easily.
Step 1: Select a Magento product type: Configurable Product
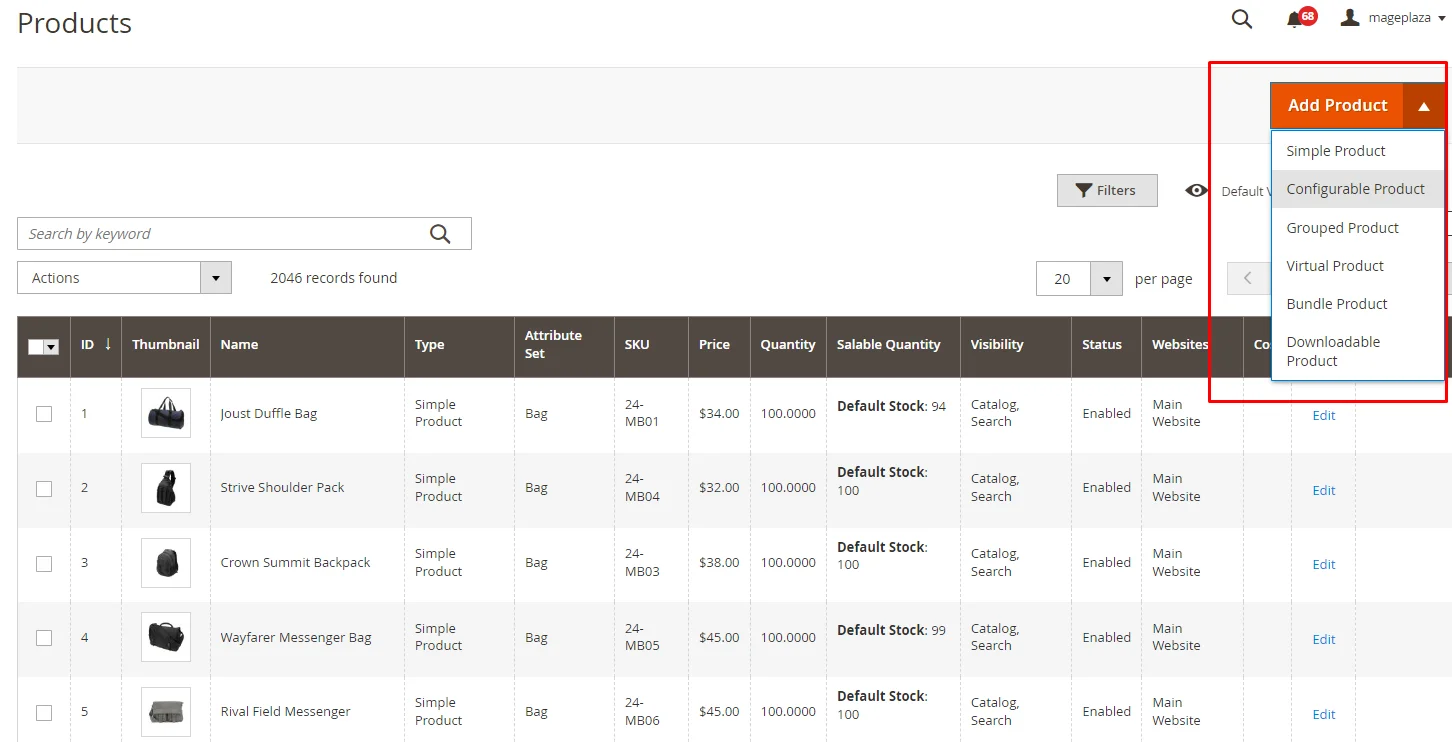
On the Admin panel, navigate to Catalog > Products > Add Product > Configurable Product
Step 2: Choose the attribute set and complete all fields
After clicking on Configurable Product, the backend will display the configuration page as follows:
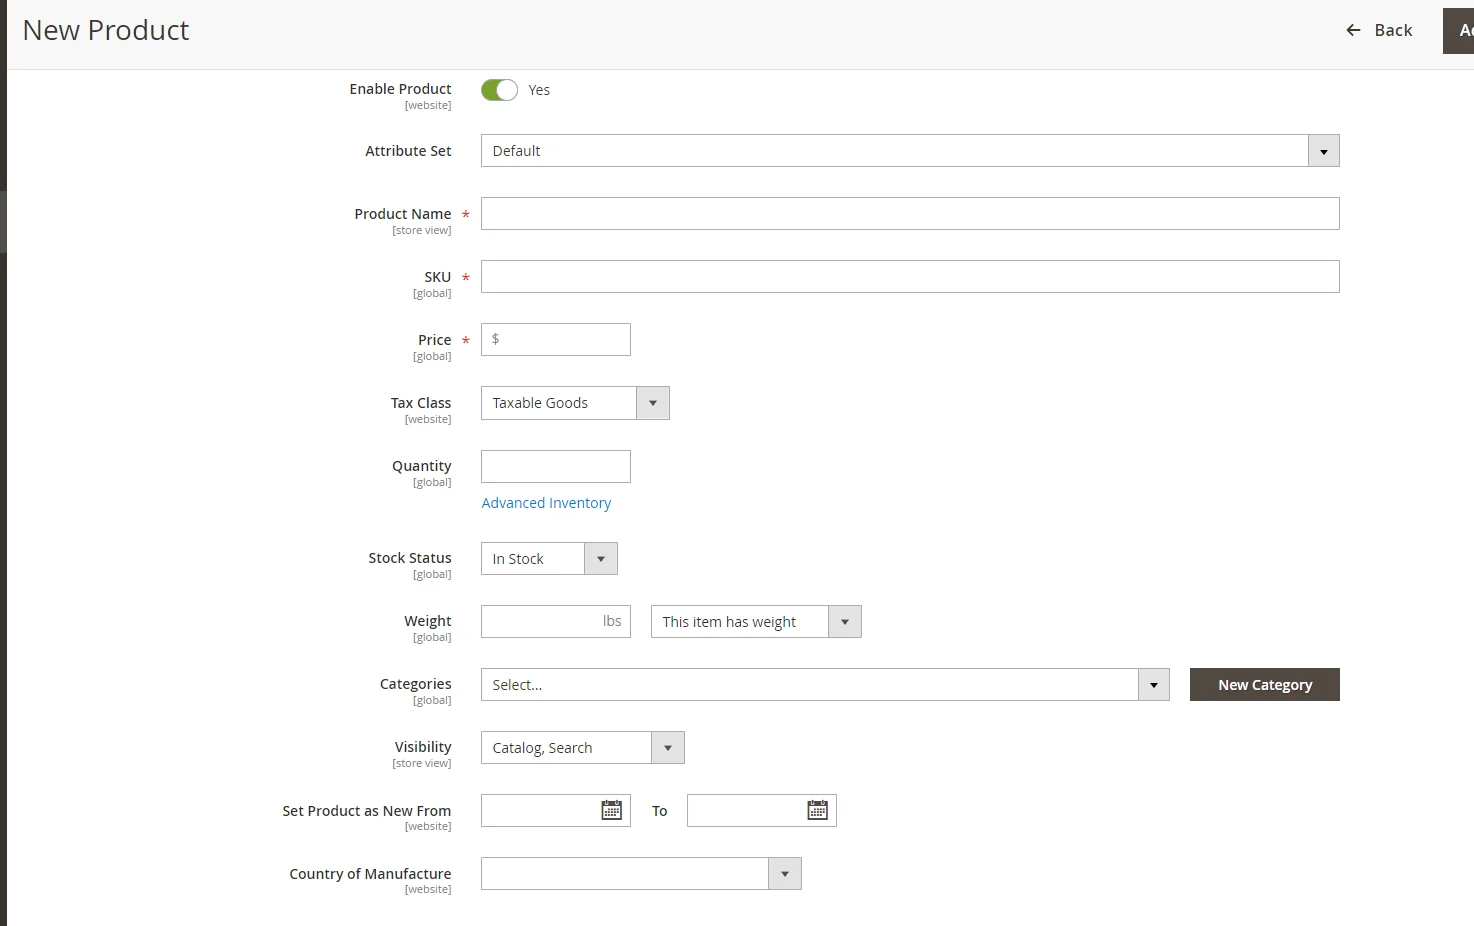
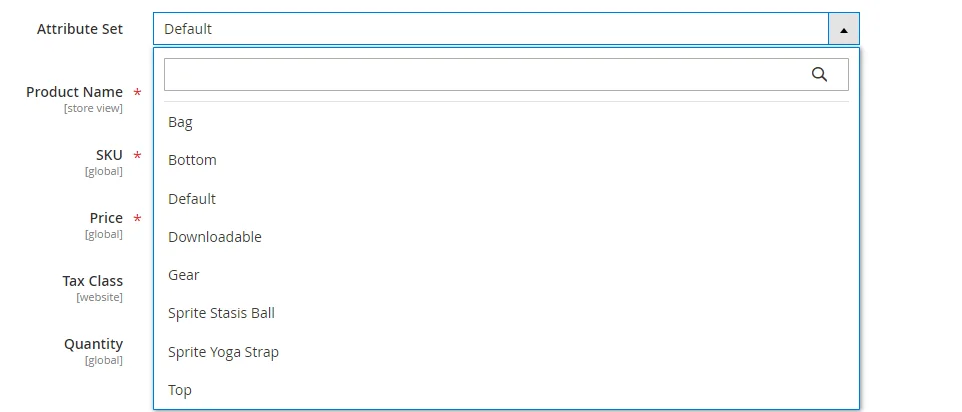
Fill in the product name
Enter SKU, or it will be automatically set based on the product name
Add the product pricing
Select Enable Product to No until it’s ready to publish
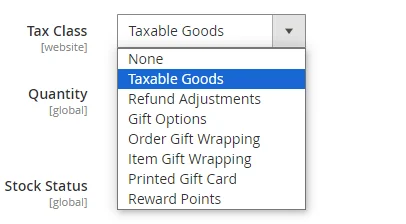
Set Tax Class from the list
Fill in the Quantity and Stock Status. The quantity can be left blank as the product variations identify it.
Enter the product Weight and Country of Manufacture
Keep the default Visibility setting as "Catalog, Search.
Promote new products by selecting Set Product as New From and specify the time range for featuring them on your website.
Step 3: Assign categories to the product
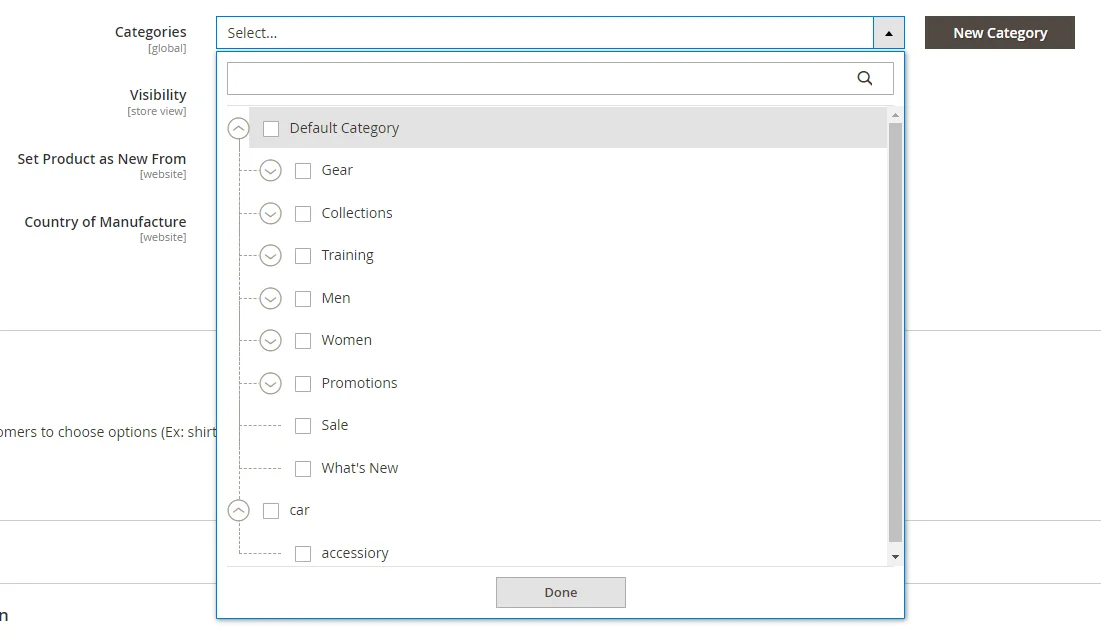
You can choose to select an existing category or add new categories.
To add new categories:
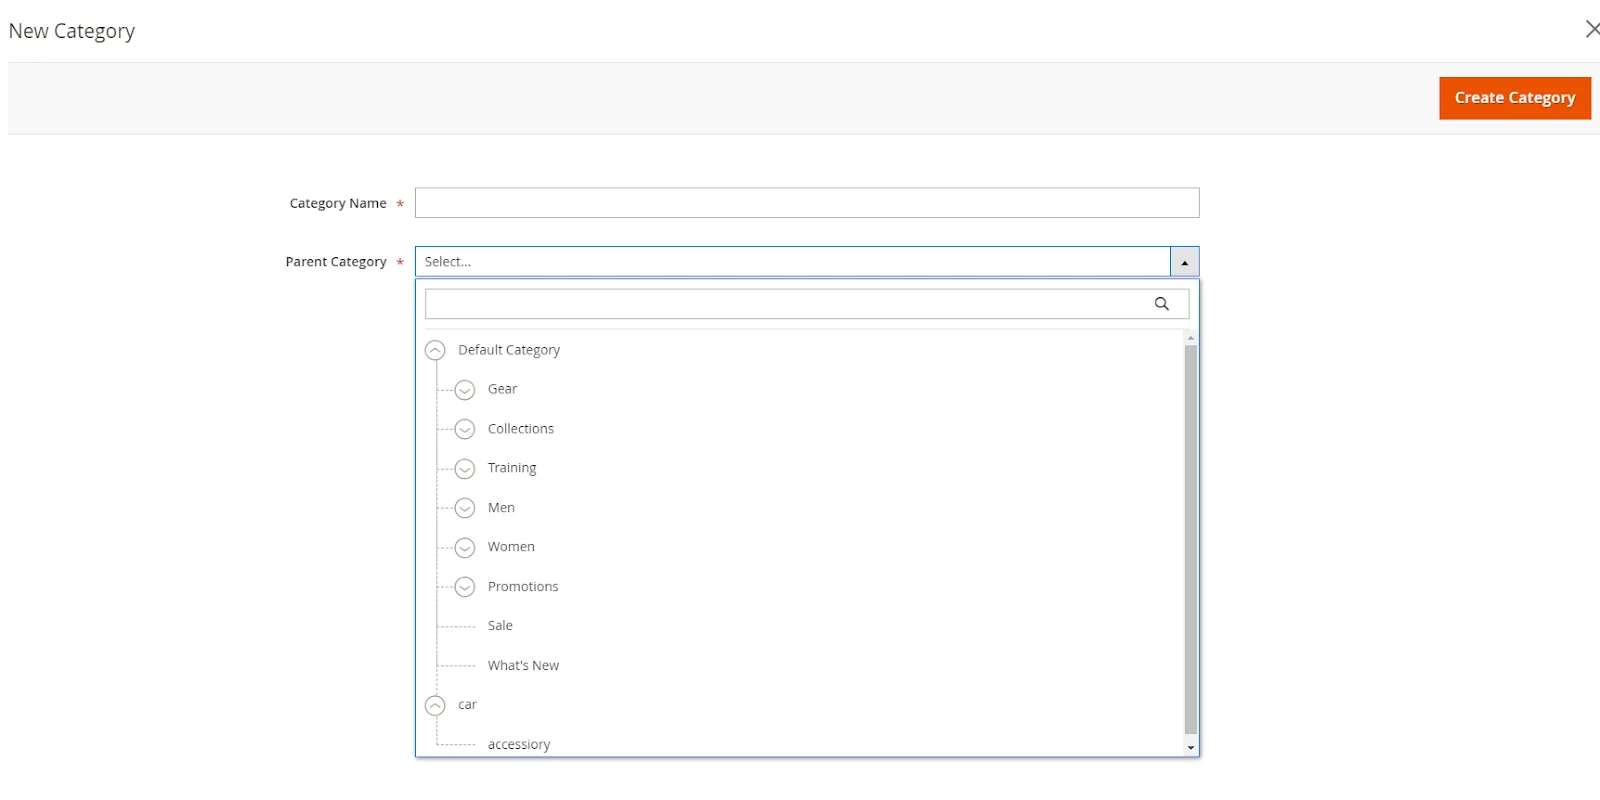
New Category at the top right cornerCategory Name in the provided fieldParent Category to determine the product’s position in the menuCreate Category buttonStep 4: Save changes
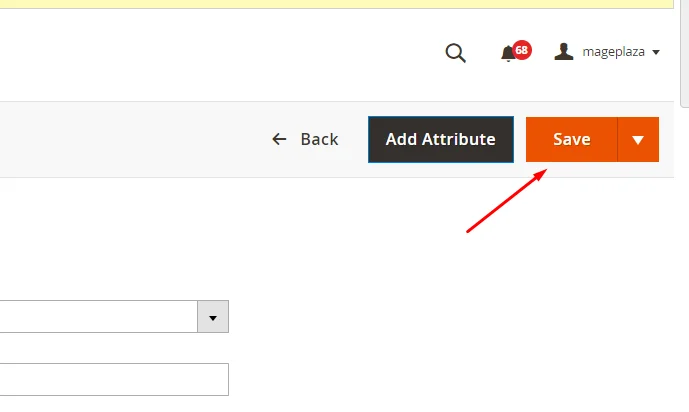
Click Save in the upper-right corner to save all your changes
Step 1: Select the attributes
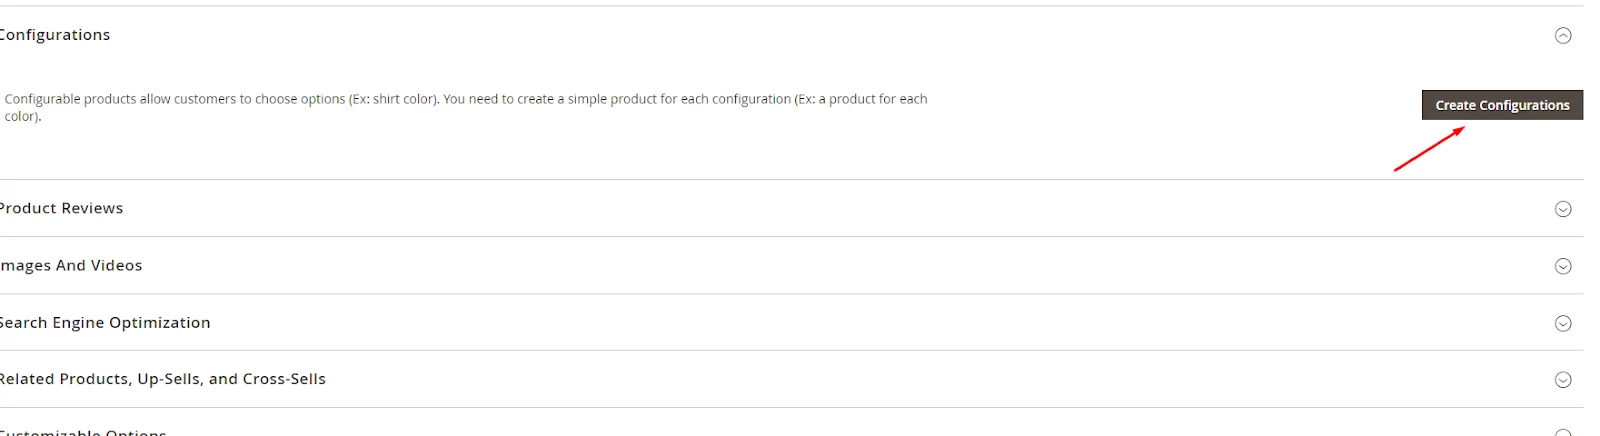
Configurations > Create Configurations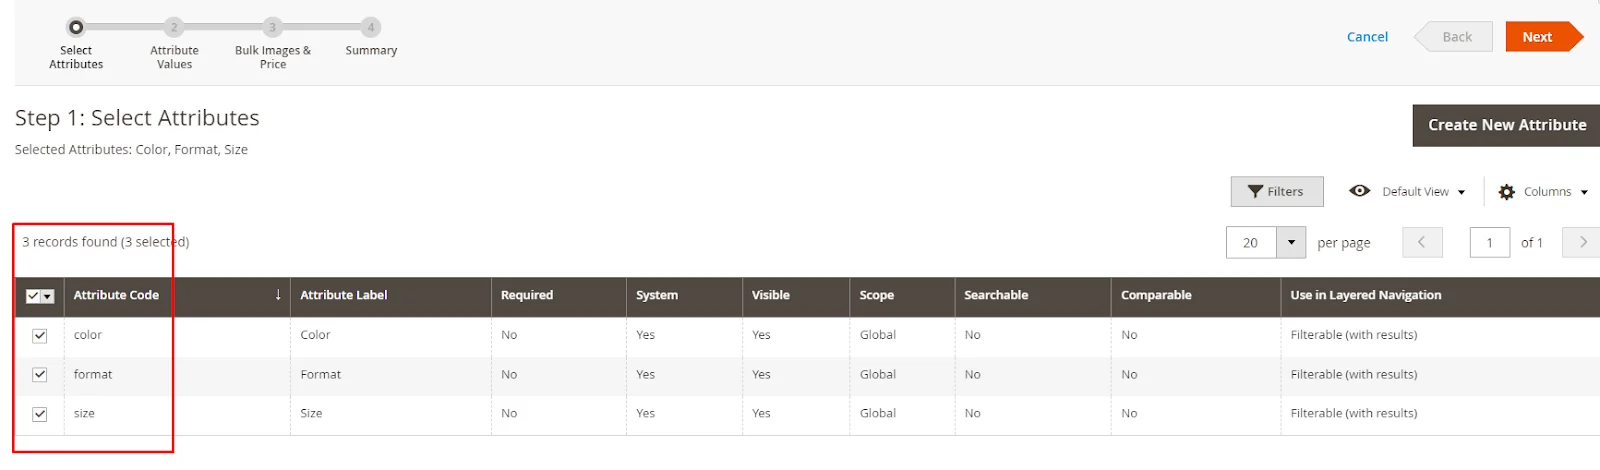
To add a new attribute, follow these steps after selecting Create New Attribute:
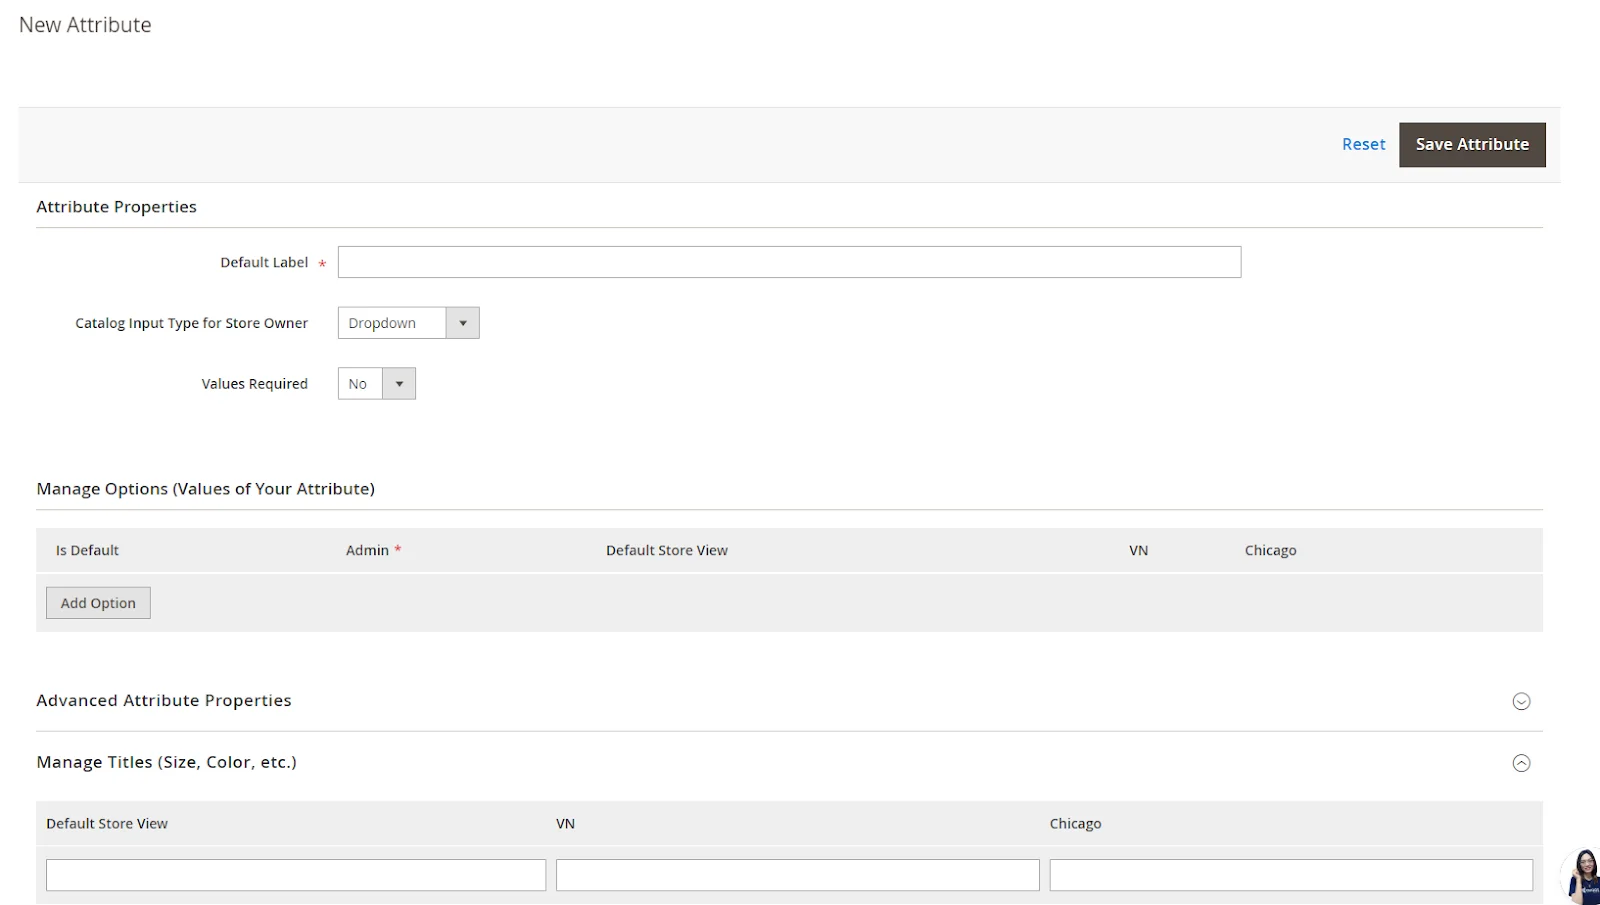
Complete the attribute properties
Click Save Attribute
Select the attribute by checking the checkbox
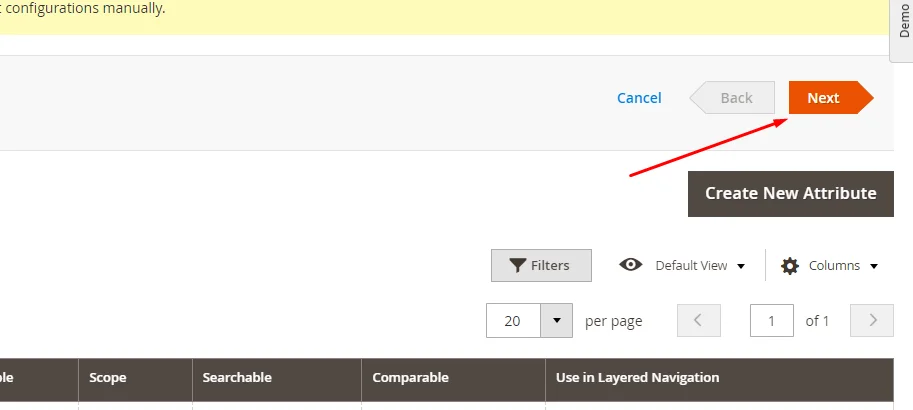
NextStep 2: Fill in the attribute value
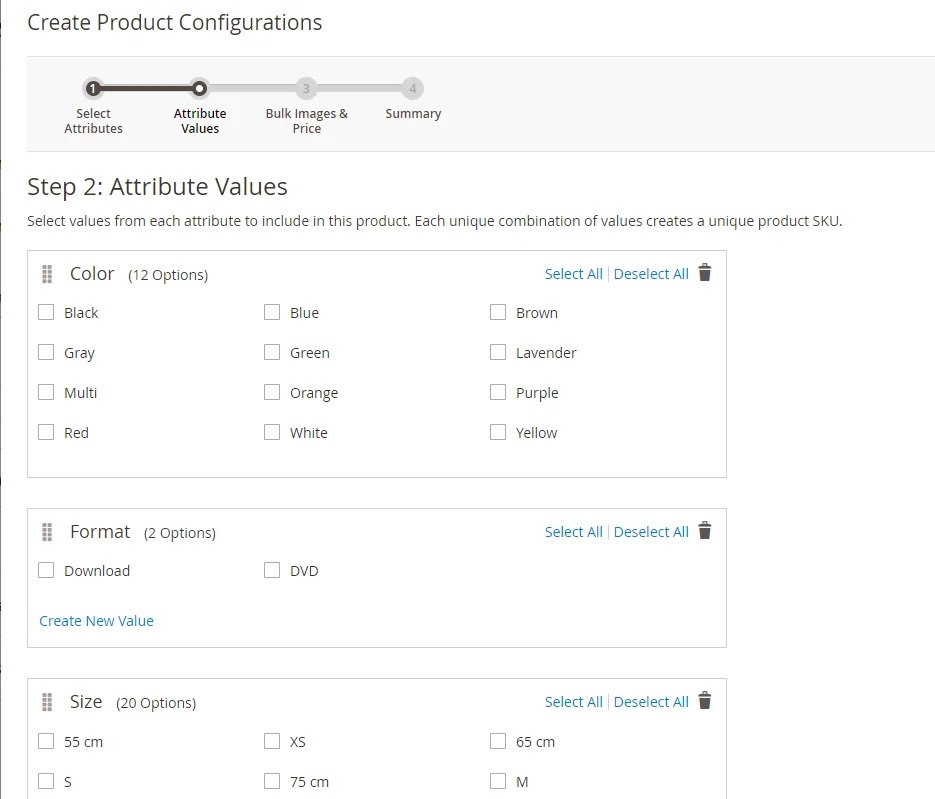
Step 3: Set the product images, prices, and quantity
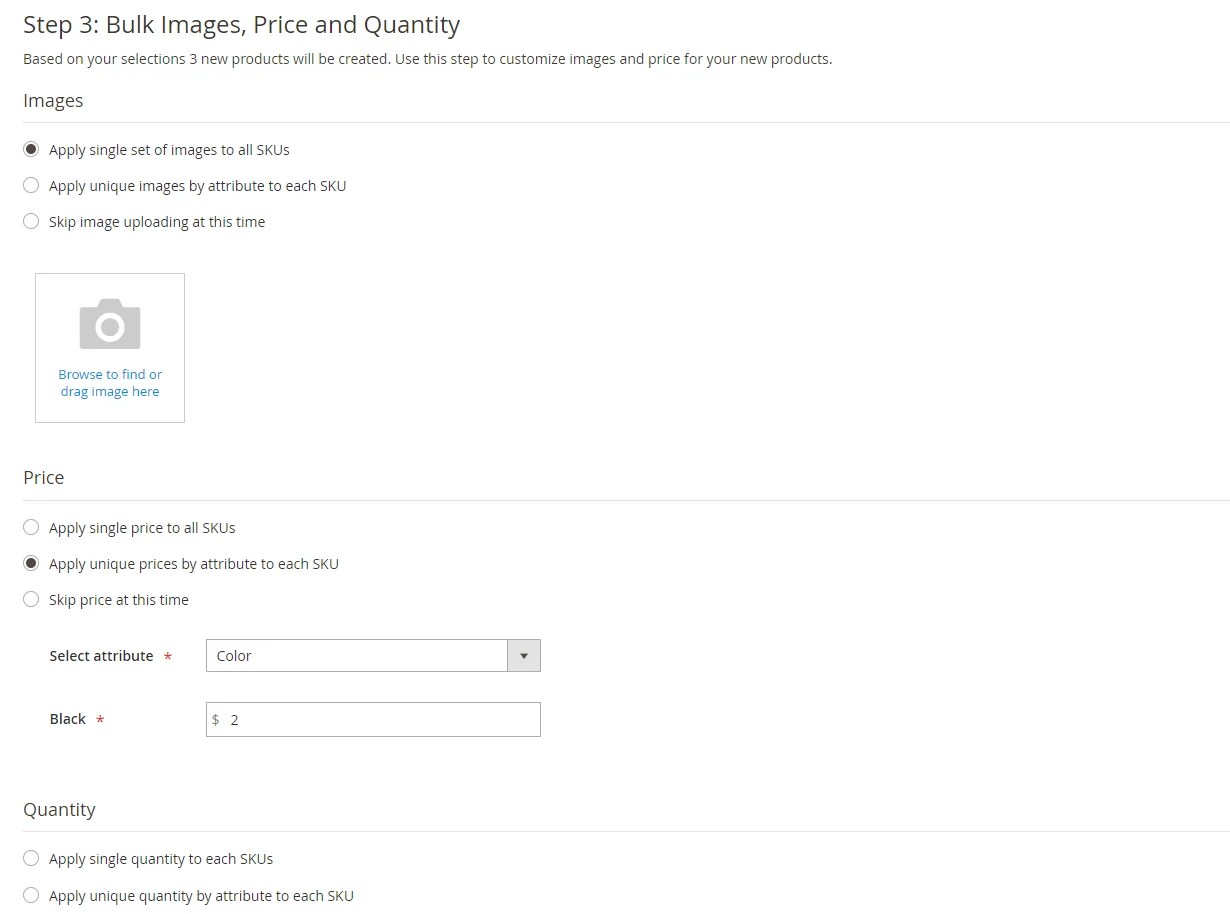
Magento 2 lets you either apply a single setting to all SKUs or customize different settings for each SKU based on attributes.
Product Images
There are two options:
Product Prices
You have two options to choose:
Product Quantity
You have two options:
Additionally, if there are any items you don’t want to configure right now, you can choose Skip and come back to complete them later.
Step 4: Generate product configurations
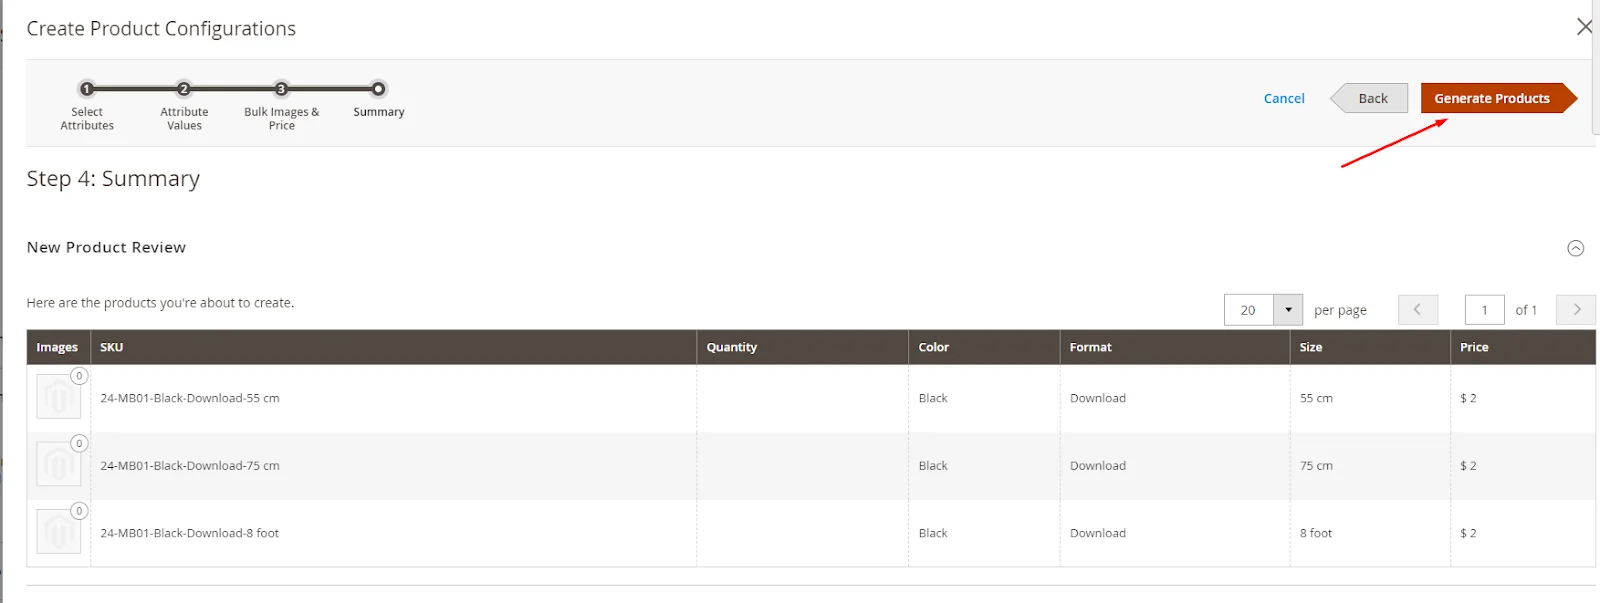
In this step, you’ll see a list of products. If everything looks correct, click Generate Products. If you need to make changes, click Back.
Step 5: Fill in more product details
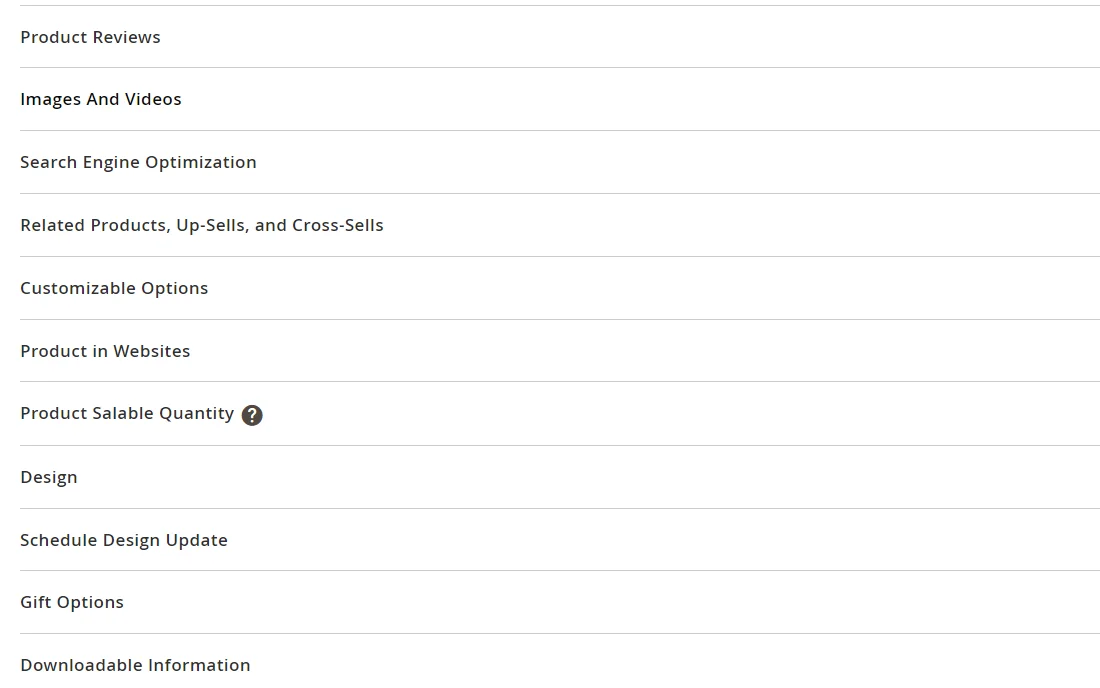
Expand your product information by adding sections for Content, Design, Cross-selling, Upselling, Related Products, and other relevant details.
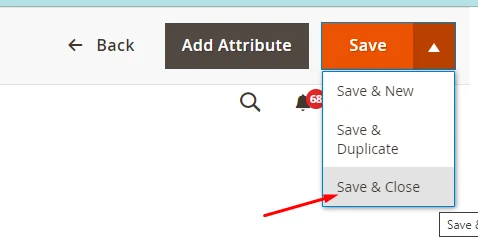
Step 6: Publish the product
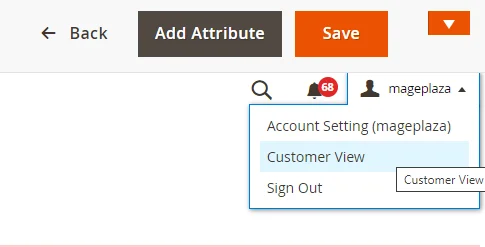
Click on the Save button to save changes
Access the Customer View from the Admin menu to preview the product on the frontend
If you’d prefer not to preview now, simply click Save and Close to exit.
Step 7: Set Cart Thumbnail
This is optional. However, if you have different images for each variation, you need to add settings to display the correct images for shopping cart thumbnails.
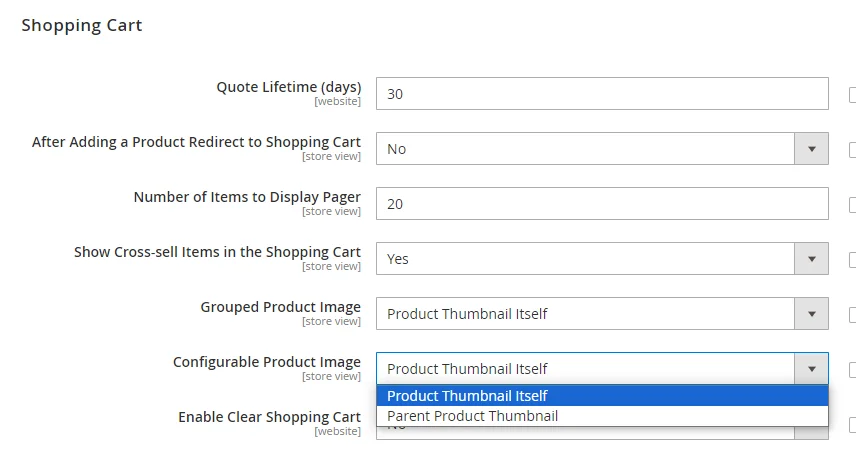
In the Admin sidebar, go to Stores > Settings > Configuration > Sales > Checkout.
Open the Shopping Cart section.
On the Configurable Product box, choose Product Thumbnail Itself
Click on Save config
You have now completed all the steps to create a Configurable Product in Magento 2.
Creating Products Series in Manage Store:
If you’re working with APIs or want to automate product creation, see our detailed guide on how to create configurable products using Magento 2 API.
1. How do I add attribute options to a configurable product?
To add attribute options to a configurable product:
2. I encountered an error while creating a configurable product, how do I resolve it?
You can try some tips below:
3. What is the maximum number of product variations I can create in Magento 2?
In short, both Magento Open Source and Magento Commerce have no product limit, but performance varies based on your hosting, your server, and configuration, the database used, and the Type of database system used on the backend of Magento 2 (MySQL-Percona or Oracle might be better). Moreover, Magento 2 EE’s split database helps maintain performance with large catalogs, unlike CE, which may slow down with over 100,000 products.
4. How can I optimize the performance of creating configurable products?
Making customizable items in Magento faster requires refining the process and decreasing the system load. Here are some effective performance-enhancing strategies:
5. I can’t find the configurable product in the store, how can I fix it?
Try to add the configurable options one at a time and clean the cache at every step to ensure that the latest changes are reflected on the website as well as identify at which point the process might break down. Moreover, you can check theme compatibility. The theme itself might have a coding error or a compatibility issue that’s causing problems with displaying or interacting with configurable products, or not compatible with your current Magento version.
6. Is there a way to automatically generate product variations in Magento 2?
Yes, in addition to leveraging the power of Magento 2 - but in this case, it will require a high level of skill in script coding or using Magento from your backend, you can consider using extensions that support this feature for ease and convenience. One of the most effective options in the market nowadays is Product Options for Magento 2 by Mageplaza.
7. Which instructional resources should I refer to when creating configurable products in Magento 2?
There’s no shortage of resources for you to refer to, especially as Magento 2 is becoming increasingly popular. However, to ensure reliability and content value, there are two types of documents you should prioritize:
The guides from Adobe, the current provider of Magento. These documents are detailed, use easy-to-understand language, and describe each step, making them easy to follow.
The devdocs from the providers of Magento services or extensions you are using, as they will be the ones who understand best how what you are using works, and can provide you with the most valuable information.
Creating configurable products in Magento 2 helps you offer customers more options without cluttering your catalog. It also simplifies inventory tracking and improves the overall shopping experience.
By following this guide, you can set up configurable products smoothly and even enhance your store with advanced features like preselected options or automated creation using APIs. Now it’s your turn—start adding product variations and give your customers a better way to shop!
Reference: Magento 2 User Guide

Jacker is the Chief Technology Officer (CTO) at Mageplaza, bringing over 10 years of experience in Magento, Shopify, and other eCommerce platforms. With deep technical expertise, he has led numerous successful projects, optimizing and scaling online stores for global brands. Beyond his work in eCommerce development, he is passionate about running and swimming.
Related Post

Change Store Email Addresses - Mageplaza

Change Welcome Message - Mageplaza
Customize the welcome message on your store's homepage to provide a personalized touch for your customers. Improve the user experience with our step-by-step guide.

Configure Magento 2 Contact Form & Email: Detailed Guides - Mageplaza
Configure the email address for your Magento 2 store's contact form and ensure that your customers can easily get in touch with you with this informative guide

How to Install Magento 2 with Sample Data - Mageplaza
How to install Magento 2 with Sample Data. In this topic we will discuss about How to Install Magento 2 Step by Step in Manage Store topic

6 Steps To Stop Brute Force Attacks - Mageplaza
How To Stop Brute Force Attacks in Magento 1, 2. In this topic we will discuss about How To Stop Brute Force Attacks in Manage Store topic

How to set Locale, Language, and Country in Magento 2 - Mageplaza
Setup Locale State Country in Magento 2 provides setup your store information on Locale Options that determines the timezone, language, country and the days.
Change Store Email Addresses - Mageplaza
Change Welcome Message - Mageplaza
Customize the welcome message on your store's homepage to provide a personalized touch for your customers. Improve the user experience with our step-by-step guide.
Configure Magento 2 Contact Form & Email: Detailed Guides - Mageplaza
Configure the email address for your Magento 2 store's contact form and ensure that your customers can easily get in touch with you with this informative guide
How to Install Magento 2 with Sample Data - Mageplaza
How to install Magento 2 with Sample Data. In this topic we will discuss about How to Install Magento 2 Step by Step in Manage Store topic
6 Steps To Stop Brute Force Attacks - Mageplaza
How To Stop Brute Force Attacks in Magento 1, 2. In this topic we will discuss about How To Stop Brute Force Attacks in Manage Store topic
How to set Locale, Language, and Country in Magento 2 - Mageplaza
Setup Locale State Country in Magento 2 provides setup your store information on Locale Options that determines the timezone, language, country and the days.