
Change Store Email Addresses - Mageplaza
3 mins read
|
04-02-2016

Vinh Jacker | 05-10-2016
The Root Category in the category tree is like the doyen in a family with many offsprings. You will see that the category tree has the upside-down structure because the root is on the top with many subcategories in the lower level. And each category contains many products in it. You can see the following category tree:
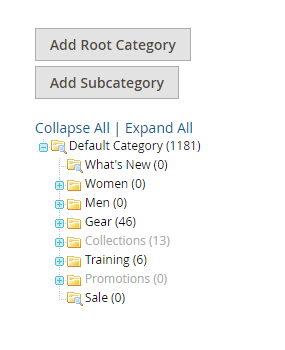
In the example, Default Category is the root category and it has many subcategories such as Women, Men, Gear, Training.
To create new category in Magento 2, allowing store admins to create as many root categories with different structures, different stores and different views as needed but there is only one root category that is applied for your store at a time. Moreover, customers can not view the root category and there is no URL Key supported for it
Take a look at the following steps to help you create a new Root Category in Magento 2
To create a new Root Category in Magento 2 as the following steps:
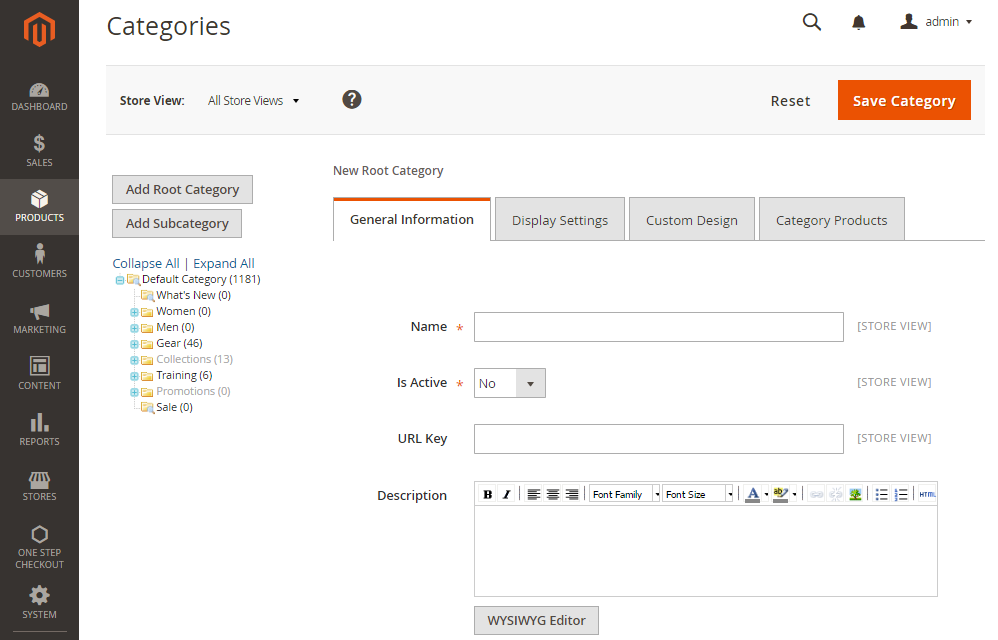
First, start with creating a new root category:
Product > Inventory > Categories.General Information tab, you need:
Name field.Is Active field to activate the root.URL Key for the new root.Description about the root category (Optional).Choose File button to upload an image.Page Title, Meta Keywords, and Meta Description of the new root for better SEO.Include in Navigation Menu field.General Information, move to the Display Settings tab and choose Yes for the Is Anchor.Save Category to use the new root category.Now, let’s move on to creating subcategories:
Add Subcategory.Name field.Is Active field.Save Category to complete.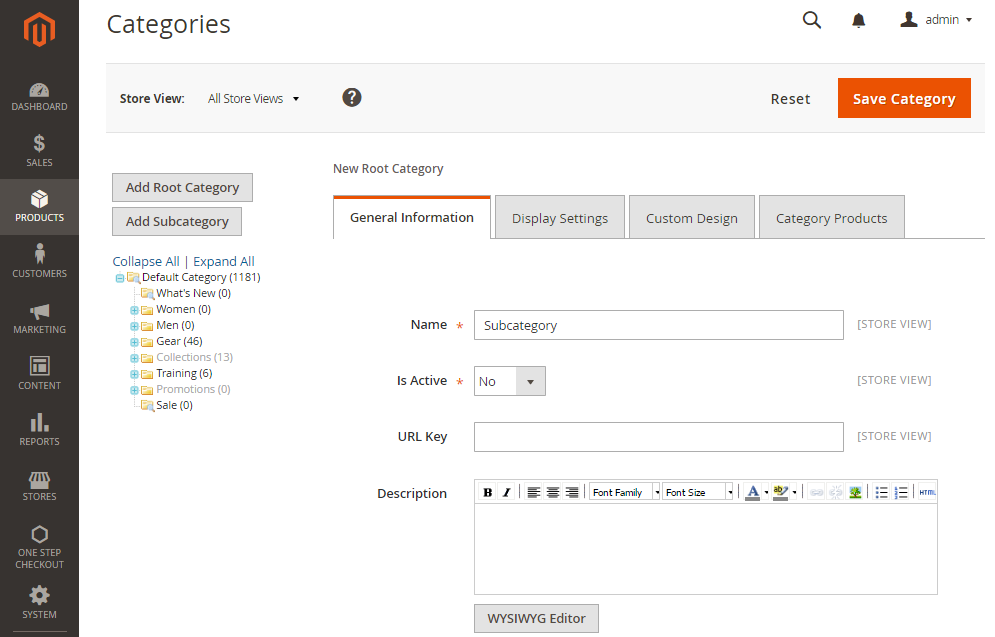
Finally, activate the new root category you’ve just created.
Stores > Settings > All Stores.Main Website Store link.Root Category, choose the new root category.Save Store on the top right corner to apply the category.That’s all for today. We hope you can create a new root category in Magento 2 easily. If not, please give us a message, we are more than happy to support you. Mageplaza also offers you various extensions to assist your business. If you want to find solutions you need, click here.
Related Post

Jacker is the Chief Technology Officer (CTO) at Mageplaza, bringing over 10 years of experience in Magento, Shopify, and other eCommerce platforms. With deep technical expertise, he has led numerous successful projects, optimizing and scaling online stores for global brands. Beyond his work in eCommerce development, he is passionate about running and swimming.
Related Post

Change Store Email Addresses - Mageplaza

Change Welcome Message - Mageplaza
Customize the welcome message on your store's homepage to provide a personalized touch for your customers. Improve the user experience with our step-by-step guide.

Configure Magento 2 Contact Form & Email: Detailed Guides - Mageplaza
Configure the email address for your Magento 2 store's contact form and ensure that your customers can easily get in touch with you with this informative guide

How to Install Magento 2 with Sample Data - Mageplaza
How to install Magento 2 with Sample Data. In this topic we will discuss about How to Install Magento 2 Step by Step in Manage Store topic

6 Steps To Stop Brute Force Attacks - Mageplaza
How To Stop Brute Force Attacks in Magento 1, 2. In this topic we will discuss about How To Stop Brute Force Attacks in Manage Store topic

How to set Locale, Language, and Country in Magento 2 - Mageplaza
Setup Locale State Country in Magento 2 provides setup your store information on Locale Options that determines the timezone, language, country and the days.
Change Store Email Addresses - Mageplaza
Change Welcome Message - Mageplaza
Customize the welcome message on your store's homepage to provide a personalized touch for your customers. Improve the user experience with our step-by-step guide.
Configure Magento 2 Contact Form & Email: Detailed Guides - Mageplaza
Configure the email address for your Magento 2 store's contact form and ensure that your customers can easily get in touch with you with this informative guide
How to Install Magento 2 with Sample Data - Mageplaza
How to install Magento 2 with Sample Data. In this topic we will discuss about How to Install Magento 2 Step by Step in Manage Store topic
6 Steps To Stop Brute Force Attacks - Mageplaza
How To Stop Brute Force Attacks in Magento 1, 2. In this topic we will discuss about How To Stop Brute Force Attacks in Manage Store topic
How to set Locale, Language, and Country in Magento 2 - Mageplaza
Setup Locale State Country in Magento 2 provides setup your store information on Locale Options that determines the timezone, language, country and the days.