

Change Store Email Addresses - Mageplaza
3 mins read
|
04-02-2016

Vinh Jacker | 06-20-2016
Configuring the sitemap in Magento 2 Admin allows you to apply an awesome Magento tool with a document file which contains all of website’s URL and possibly direct people to any page on Magento stores quickly. In addition to the utility of direction, Magento 2 sitemap is also an easy way to point what pages are ready for crawling to any search engines, that is very useful for your better SEO.
Moreover, for the visitors, the sitemap is the same as a traditional geographical map in the real world because the Magento sitemap will help them visit pages they are looking for without wasting time looking around a website. Thus, configuring the sitemap on your store is very necessary, but it is not required if a store is too small and uncomplicated in the page organization.
Stores. In the Settings section, select Configuration.Catalog in the panel on the leftCategories Options section, and continue with following: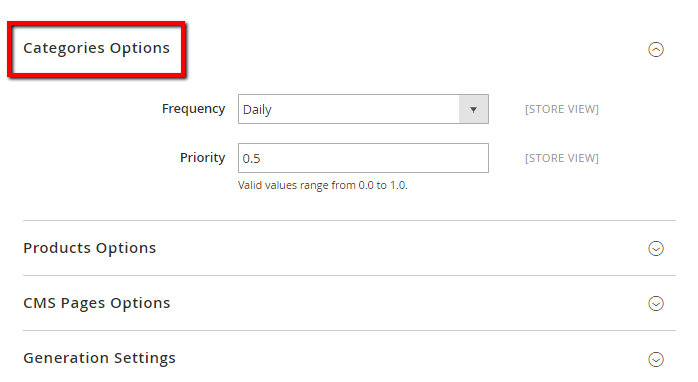
Frequency field, select one of the following:
In the Priority field, enter a value between 0.0 and 1.0. Set Zero if the priority is the lowest
Products Options section.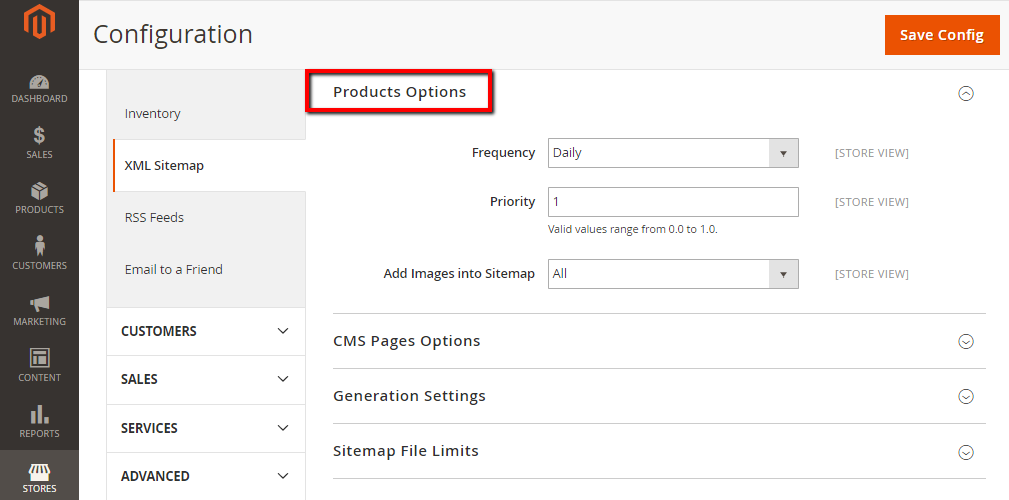
Frequency and Priority settings as mentioned aboveIn the Add images into Sitemap field, select one of the following to determine the extent that images are included in the sitemap
Open the CMS Pages Options section, complete the Frequency and Priority settings as mentioned above
Save Config.Generation Settings section.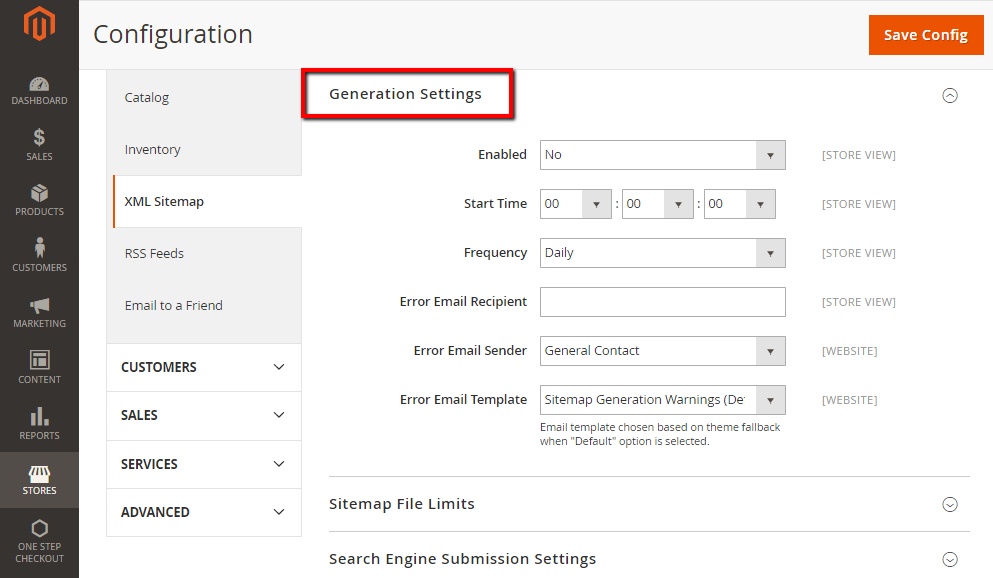
Set Enabled field into Yes and follow the guide below
Start Time field, choose the hour, minute and second that update the sitemapFrequency field, choose one of the following
Error Email Recipient field, enter the email address of the person who will be received notification whenever an error occurs during a sitemap update.Error Email Sender field, choose one of the following:
Sitemap File Limits section.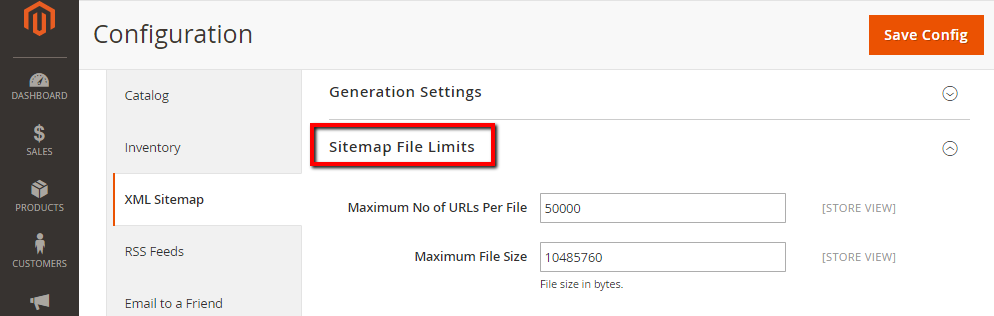
Maximum No of URLs Per File field, enter the maximum number of URLs per file. The default limit is 50,000.Maximum File Size field, enter the maximum file size in bytes. The default size is 10,485,760 bytes.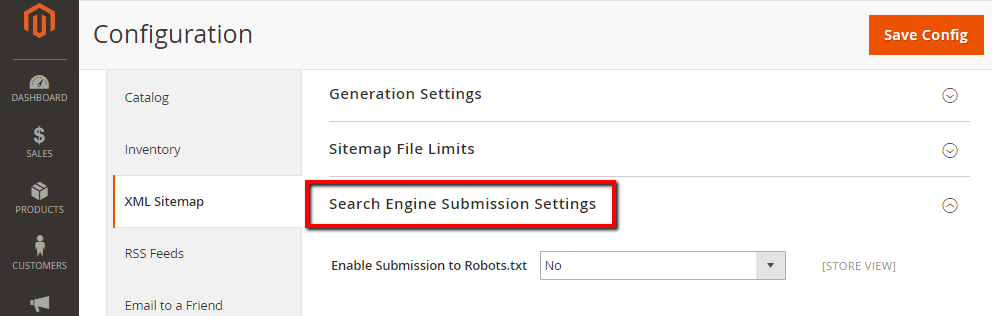
Open the Search Engine Submission Settings section.
In the Enable Submission to Robots.txt field, select Yes to provide instructions to search engines that crawl your site by using a robots.txt file.
When complete, click Save Config.
Read How to configure Robots.txt in Magento 2
Now you know how to use Magento 2 sitemap to boost up the SEO performance for your website. In addition, you can add Google XML Sitemap, HTML sitemap to your Magento 2 store, available on Github for free. We hope you can configure Magento 2 Sitemap with ease and contact us in case of any problems. Also, please check out the SEO-related posts below for more information.
Related Post

Jacker is the Chief Technology Officer (CTO) at Mageplaza, bringing over 10 years of experience in Magento, Shopify, and other eCommerce platforms. With deep technical expertise, he has led numerous successful projects, optimizing and scaling online stores for global brands. Beyond his work in eCommerce development, he is passionate about running and swimming.
Related Post

Change Store Email Addresses - Mageplaza

Change Welcome Message - Mageplaza
Customize the welcome message on your store's homepage to provide a personalized touch for your customers. Improve the user experience with our step-by-step guide.

Configure Magento 2 Contact Form & Email: Detailed Guides - Mageplaza
Configure the email address for your Magento 2 store's contact form and ensure that your customers can easily get in touch with you with this informative guide

How to Install Magento 2 with Sample Data - Mageplaza
How to install Magento 2 with Sample Data. In this topic we will discuss about How to Install Magento 2 Step by Step in Manage Store topic

6 Steps To Stop Brute Force Attacks - Mageplaza
How To Stop Brute Force Attacks in Magento 1, 2. In this topic we will discuss about How To Stop Brute Force Attacks in Manage Store topic

How to set Locale, Language, and Country in Magento 2 - Mageplaza
Setup Locale State Country in Magento 2 provides setup your store information on Locale Options that determines the timezone, language, country and the days.
Change Store Email Addresses - Mageplaza
Change Welcome Message - Mageplaza
Customize the welcome message on your store's homepage to provide a personalized touch for your customers. Improve the user experience with our step-by-step guide.
Configure Magento 2 Contact Form & Email: Detailed Guides - Mageplaza
Configure the email address for your Magento 2 store's contact form and ensure that your customers can easily get in touch with you with this informative guide
How to Install Magento 2 with Sample Data - Mageplaza
How to install Magento 2 with Sample Data. In this topic we will discuss about How to Install Magento 2 Step by Step in Manage Store topic
6 Steps To Stop Brute Force Attacks - Mageplaza
How To Stop Brute Force Attacks in Magento 1, 2. In this topic we will discuss about How To Stop Brute Force Attacks in Manage Store topic
How to set Locale, Language, and Country in Magento 2 - Mageplaza
Setup Locale State Country in Magento 2 provides setup your store information on Locale Options that determines the timezone, language, country and the days.