
Change Store Email Addresses - Mageplaza
3 mins read
|
04-02-2016

Vinh Jacker | 06-04-2018
Containing billions of transaction data of more than 650,000 stores worldwide, Magento 2 platform is being targeted to attack the security wall as an attractive prey for unwelcome visitors - anonymous hackers. As soon as possible, awaring the essential of security building should be taken into your account while hackers are low-key improving tricks under their sleeves to steal your precious data.
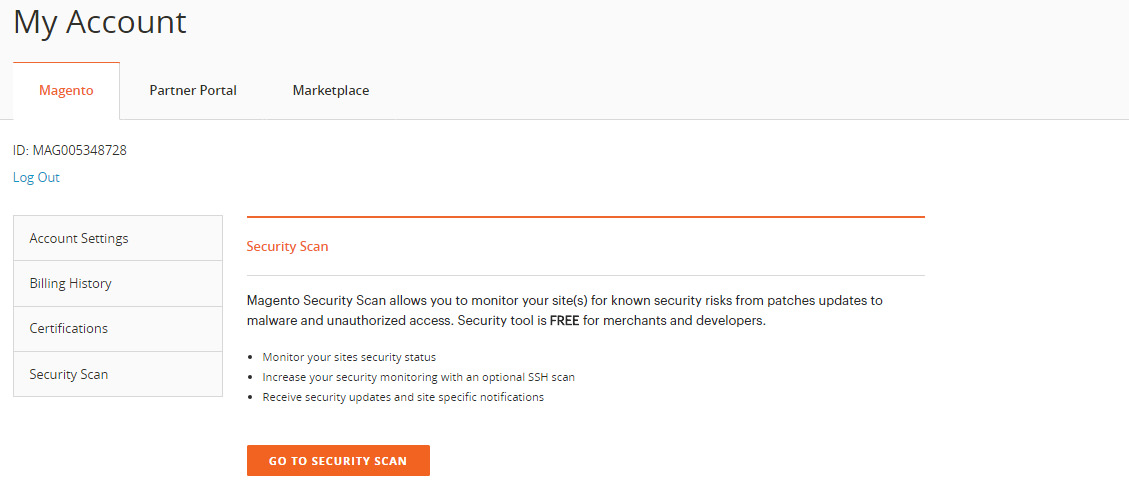
Beside having a Magento 2 Security extension, Security Scan is a new light of making no room for intrusive actions by enabling the ability to keep track of the latest patch updates/upgrades along with security notifications. It’s a totally free tool provided by professional developer teams from Magento 2. It’s provided with:
Learn how to configure Security Scan in Magento 2:
Go to Security ScanStep 1, you will be redirected to Monitered Websites. If you have more than one sites with different domains, you should set up individual scan for each of domain.Content > Design: Configuration. Find your site in the list and click Edit.HTML Head > Scripts and Style Sheets, paste the code in thereVerify Confirmation Code.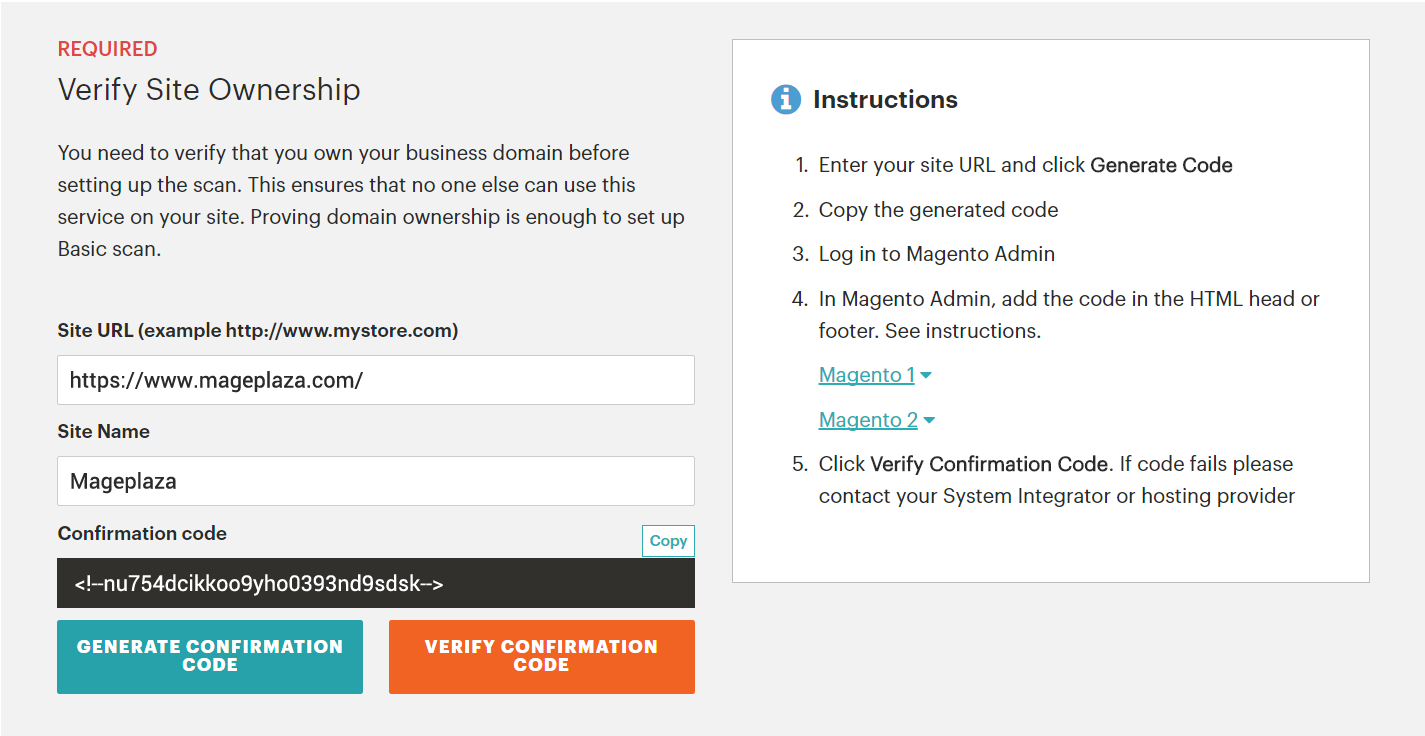
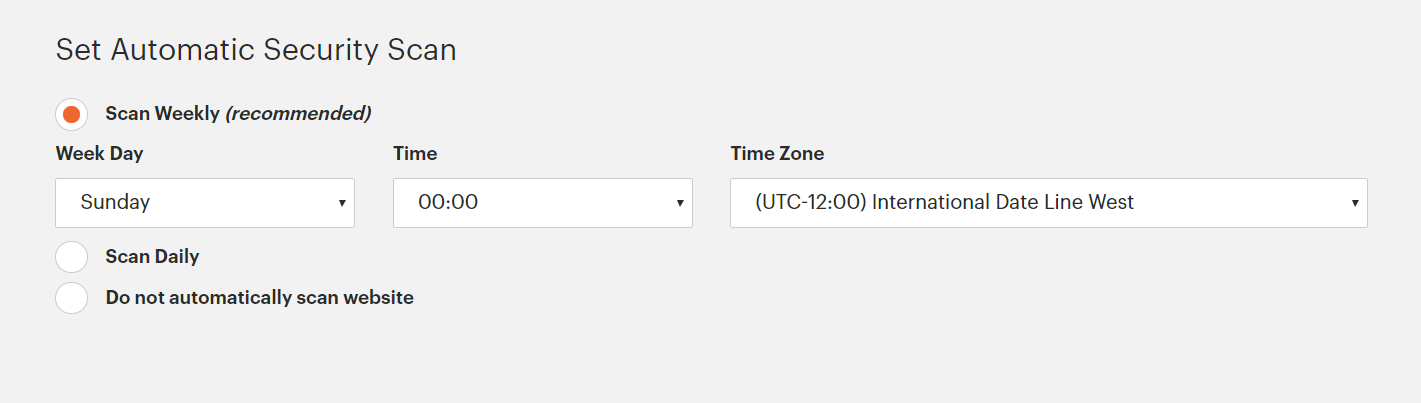
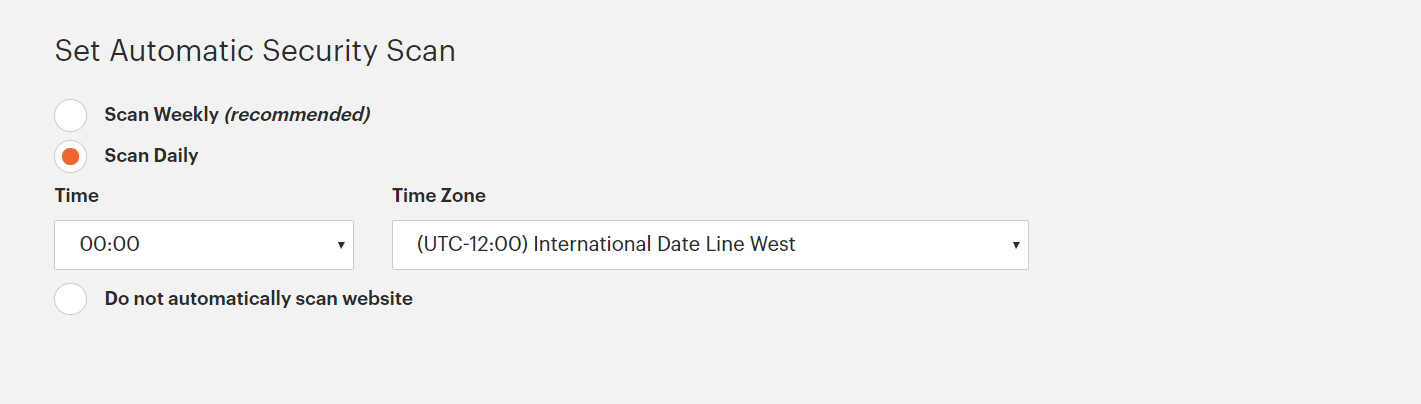
You can choose one of two modes to protect your store carefully.
Submit is the final step.This is the guidance for each of domain only. For other domain, please carefully follow this tutorial once more.
Reference:

Jacker is the Chief Technology Officer (CTO) at Mageplaza, bringing over 10 years of experience in Magento, Shopify, and other eCommerce platforms. With deep technical expertise, he has led numerous successful projects, optimizing and scaling online stores for global brands. Beyond his work in eCommerce development, he is passionate about running and swimming.
Related Post

Change Store Email Addresses - Mageplaza

Change Welcome Message - Mageplaza
Customize the welcome message on your store's homepage to provide a personalized touch for your customers. Improve the user experience with our step-by-step guide.

Configure Magento 2 Contact Form & Email: Detailed Guides - Mageplaza
Configure the email address for your Magento 2 store's contact form and ensure that your customers can easily get in touch with you with this informative guide

How to Install Magento 2 with Sample Data - Mageplaza
How to install Magento 2 with Sample Data. In this topic we will discuss about How to Install Magento 2 Step by Step in Manage Store topic

6 Steps To Stop Brute Force Attacks - Mageplaza
How To Stop Brute Force Attacks in Magento 1, 2. In this topic we will discuss about How To Stop Brute Force Attacks in Manage Store topic

How to set Locale, Language, and Country in Magento 2 - Mageplaza
Setup Locale State Country in Magento 2 provides setup your store information on Locale Options that determines the timezone, language, country and the days.
Change Store Email Addresses - Mageplaza
Change Welcome Message - Mageplaza
Customize the welcome message on your store's homepage to provide a personalized touch for your customers. Improve the user experience with our step-by-step guide.
Configure Magento 2 Contact Form & Email: Detailed Guides - Mageplaza
Configure the email address for your Magento 2 store's contact form and ensure that your customers can easily get in touch with you with this informative guide
How to Install Magento 2 with Sample Data - Mageplaza
How to install Magento 2 with Sample Data. In this topic we will discuss about How to Install Magento 2 Step by Step in Manage Store topic
6 Steps To Stop Brute Force Attacks - Mageplaza
How To Stop Brute Force Attacks in Magento 1, 2. In this topic we will discuss about How To Stop Brute Force Attacks in Manage Store topic
How to set Locale, Language, and Country in Magento 2 - Mageplaza
Setup Locale State Country in Magento 2 provides setup your store information on Locale Options that determines the timezone, language, country and the days.