


5 mins read
|
07-30-2026
How to Enable/Disable Cache in Magento 2
Vinh Jacker | 03-17-2025
You will frequently use Disable/Enable Cache Command Line in Magento 2.. Magento 2 has 10 cache types by default. There are 5 simple commands to manage cache in the command line. In this post, I will show you how to run each command line step by step. Refer to my previous post about flush Magento Cache via command line.
First of all, we need to know what is cache?
What is Cache in Magento 2
When first using Magento 2, you may wonder why cache management is important?
With the demand of expanding business size and the support of modern eCommerce technologies, you are able to add as many items as you want to sell online.
This is a good chance for you to embrace the market but it also comes with some typical risks. For example, a huge number of products will slow down your website performance, which negatively reduces customers’ shopping experience and conversion rate. Caching is one of the mightiest ways to enable your customers to access what they need quickly without waiting for a page to load.
Magento 2 helps you solve this issue by Full Cache Page. Your store will be fresh and quickly functioning after being cached.
So what exactly is the cache in the backend?
Cache is simply a place in which information or accessed data gets stored. Content will be updated and the site performance will be improved by the time you flush the cache.
You can access cache management in Magento 2 through settings under System > Cache Management.
When you first install your Magento store, the file system caching is enabled by default. You can frequently enable or disable all cache types by using the command line. And for better visibility into system behavior while managing cache, make sure your store is in Developer Mode to see detailed error messages during development.
To change it, you can edit the env.php in app/etc folder. Find the cache_types and change the value of the array_key value (1 or 0).
The settings should look like this:
'cache_types' =>
    array (
        'config' => 1,
        'layout' => 1,
        'block_html' => 1,
        'collections' => 1,
        'db_ddl' => 1,
        'eav' => 1,
        'full_page' => 0,
        'translate' => 1,
        'config_integration' => 1,
        'config_webservice' => 1,
        'config_integration_api' => 1,
    ),
);
How to Disable/Enable Cache in Backend
Step 1: Open Cache Management
Firstly, open your Magento backend. Then follow this System > Tools > Cache Management.
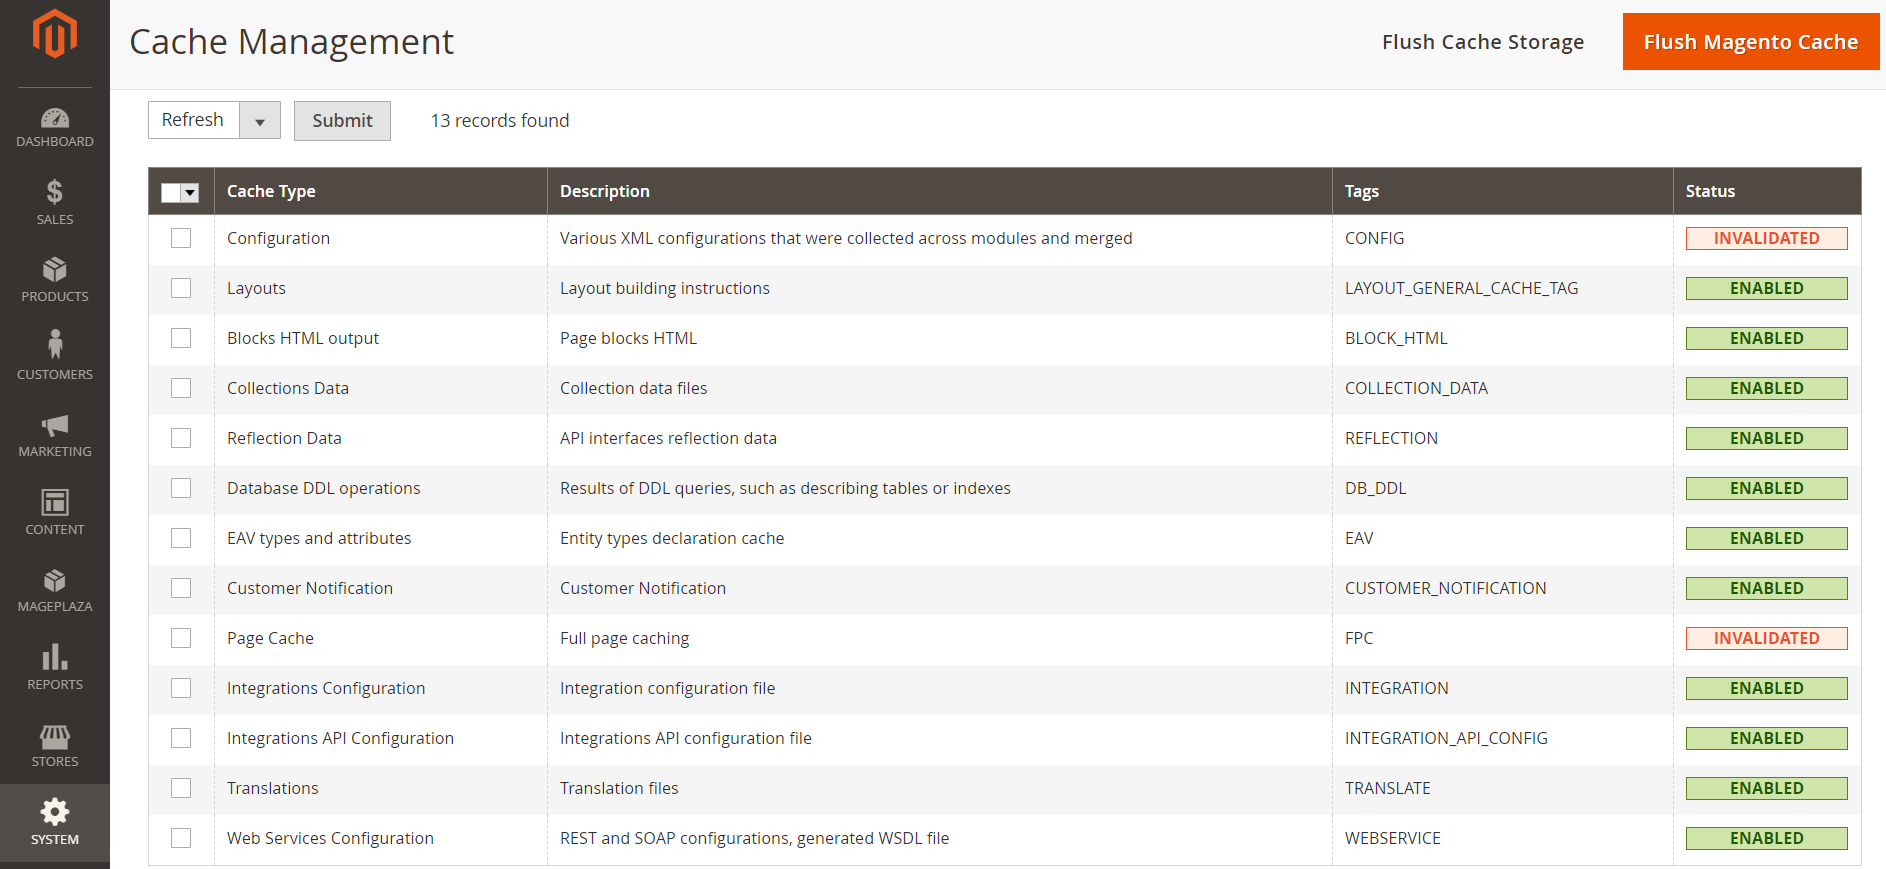
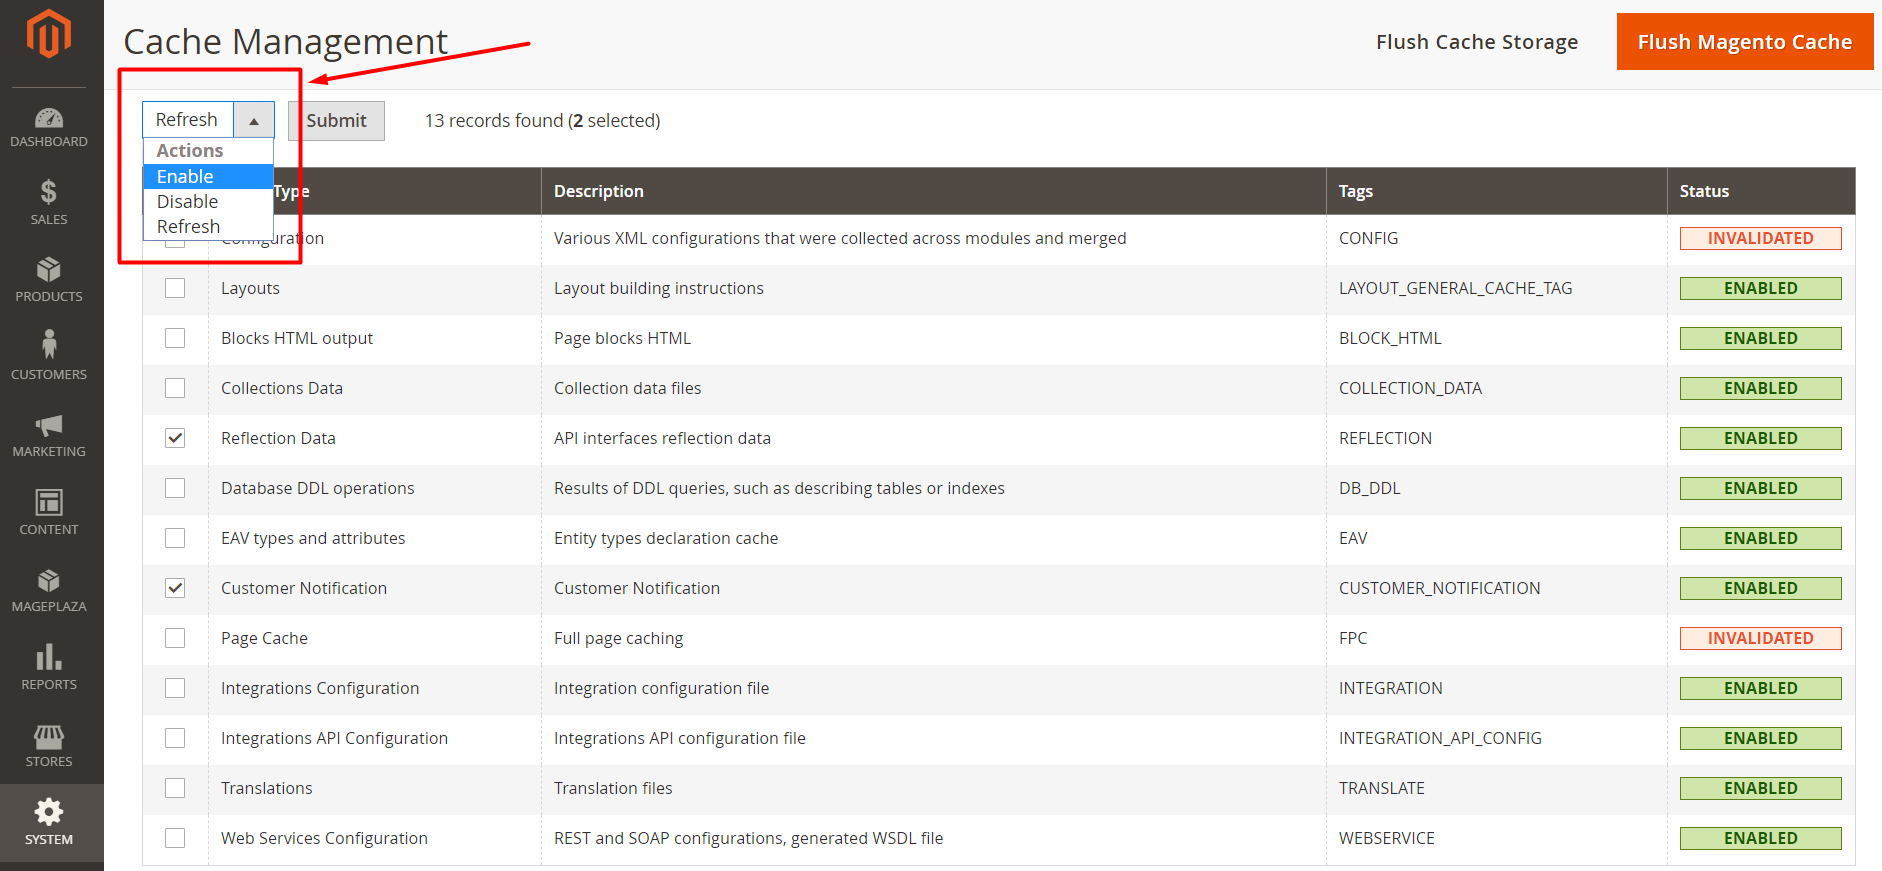
Step 2: Enable/ Disable cache type
In the Cache Management, you will see a table. Click on the box of the cache type that you want to enable or disable. Then, you will see a drop-down list on the left corner on the top of the screen. Choose the action you want and click the Submit button which is right next to it.
How to Disable/Enable Cache Command Line
Disable Cache command line
The following command will disable all cache types
php bin/magento cache:disable
If you would like to disable specific cache type, you should type the command line
php bin/magento cache:disable CACHE_TYPE
Example:
php bin/magento cache:disable config
Enable Cache command line
It is similar to how to Disable cache all types and specific cache type
Enable all cache types
php bin/magento cache:enable
Enable specific cache type
php bin/magento cache:enable CACHE_TYPE
Example
php bin/magento cache:enable layout
Related topics:
- Configure Full Page Cache
- 10 Cache Types: How to Manage Cache
- Service Temporarily Unavailable
- Exception printing is disabled by default for security reasons
- 404 Error Page Not Found
- You Don’t Have Permission To Access / On This Server
Wrap up
Caching is important in Magento 2. If you worry about your store performance and customer experience, it’s time to keep an eye on your cache management. I hope this is a helpful tutorial. In case of any issues, feel free to contact us. We’ll get back to you as soon as possible.
x

Jacker is the Chief Technology Officer (CTO) at Mageplaza, bringing over 10 years of experience in Magento, Shopify, and other eCommerce platforms. With deep technical expertise, he has led numerous successful projects, optimizing and scaling online stores for global brands. Beyond his work in eCommerce development, he is passionate about running and swimming.
Related Post

7 mins read
|
06-30-2026

How to Enable DebugView in GA4 for your Magento 2 store - Mageplaza
Step-by-step guide to enabling GA4 DebugView for Magento 2 merchants — verify your GA4 events are firing correctly before trusting your data.
9 mins read
|
06-09-2026

Table Rate Shipping in eCommerce: A Practical Guide
Master Magento 2 Table Rate Shipping. Learn how to configure an accurate, automated shipping matrix to optimize your checkout and boost sales.
11 mins read
|
06-02-2026
3 mins read
|
05-30-2026

Google Analytics Ecommerce Reports for Magento Merchants: What to track & Tips
A practical guide to GA4 ecommerce reports for Magento merchants, covering what to track, how to read each report, and specific tips to turn data into revenue decisions.
19 mins read
|
05-20-2026
5 mins read
|
07-30-2026
7 mins read
|
06-30-2026
How to Enable DebugView in GA4 for your Magento 2 store - Mageplaza
Step-by-step guide to enabling GA4 DebugView for Magento 2 merchants — verify your GA4 events are firing correctly before trusting your data.
9 mins read
|
06-09-2026
Table Rate Shipping in eCommerce: A Practical Guide
Master Magento 2 Table Rate Shipping. Learn how to configure an accurate, automated shipping matrix to optimize your checkout and boost sales.
11 mins read
|
06-02-2026
3 mins read
|
05-30-2026
Google Analytics Ecommerce Reports for Magento Merchants: What to track & Tips
A practical guide to GA4 ecommerce reports for Magento merchants, covering what to track, how to read each report, and specific tips to turn data into revenue decisions.
19 mins read
|
05-20-2026