
Integrate Quickbooks with Magento 2
QuickBooks is a cloud accounting software which is suitable for small and medium-sized businesses to track expenses, create and customize invoices anywhere on multiple devices. It is a smarter tool for Magento 2 store owners to manage their businesses. However, Magento 2 can not integrate directly with QuickBooks. To solve this problem, Mageplaza develops Webhook extension to integrate QuickBooks with Magento 2 conveniently
What Is Webhook?
Webhook is a helpful tool which allows online stores to configure to send an API request to a configurable destination (URL) such as other servers or applications in cases trigger events including new order, customer login, abandoned carts, etc occur. As a result, store owners can instantly update important notifications and have suitable activities shortly.
Webhook Extension for Magento 2
Unlock the power of Magento 2 Webhook today and enhance the flexibility and interactivity of your website!
Check it out!Table Of Content
- What Is Webhook?
- About Quickbooks
- How To Integrate Quickbooks With Magento 2 With Webhook
- The Result Shown In QuickBooks
- These Available Body Templates
- Conclusion
These entities of Magento which Webhook supports:
- Customer
- Order
- Invoice
- Shipment
- Credit Memo
- Product
- Category
- Abandoned Cart
These entities which QuickBooks supports:
- Account
- AccountListDetail
- APAgingDetail
- APAgingSummary
- ARAgingDetail
- ARAgingSummary
- Attachable
- BalanceSheet
- Batch
- Bill
- BillPayment
- Budget
- CashFlow
- ChangeDataCapture
- Class
- CompanyCurrency
- CompanyInfo
- CreditMemo
- Customer
- CustomerBalance
- CustomerBalanceDetail
- CustomerIncome
- Department
- Deposit
- Employee
- Entitlements
- Estimate
- Exchangerate
- GeneralLedger
- InventoryValuationSummary
- Invoice
- Item
- JournalCode
- JournalCode
- JournalEntry
- JournalReport
- Payment
- PaymentMethod
- Preferences
- ProfitAndLoss
- ProfitAndLossDetail
- Purchase
- PurchaseOrder
- PurchaseOrder
- RefundReceipt
- SalesByClassSummary
- SalesByCustomer
- SalesByDepartment
- SalesByProduct
- SalesReceipt
- TaxClassification
- TaxCode
- TaxRate
- TaxService
- TaxSummary
- TaxAgency
- Term
- TimeActivity
- TransactionList
- Transfer
- TrialBalance
- Vendor
- VendorBalance
- VendorBalanceDetail
- VendorCredit
- VendorExpenses
How To Integrate QuickBooks With Magento 2 With Webhook
Instructions For Registering And Using QuickBooks
Instructions For Registering QuickBooks
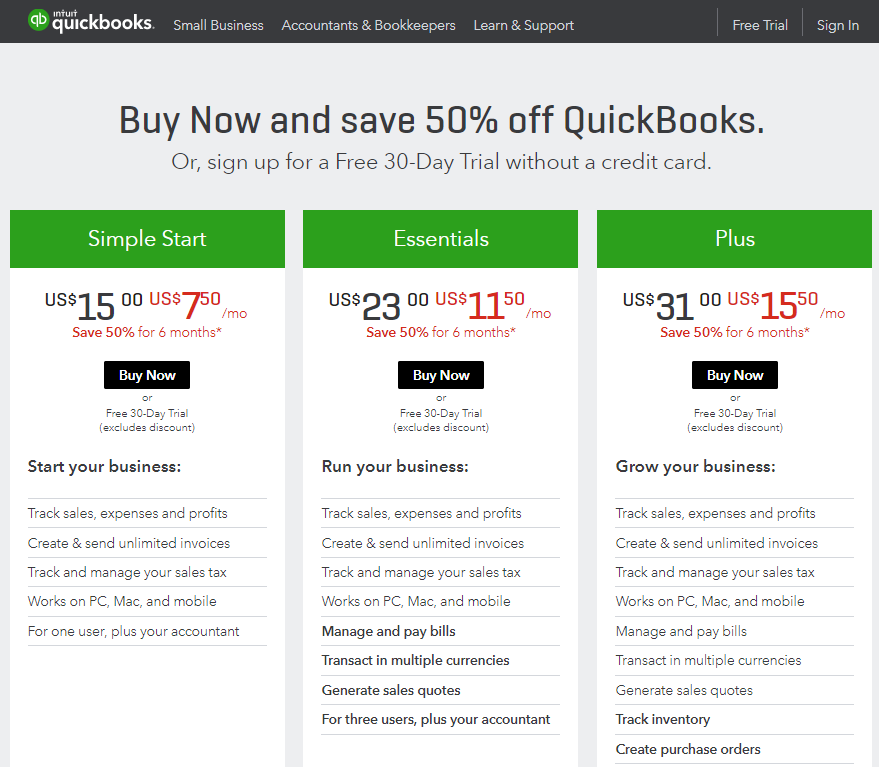
Access to here, click the Free Trial button on the right corner to sign up for trial or you can use paid packages:
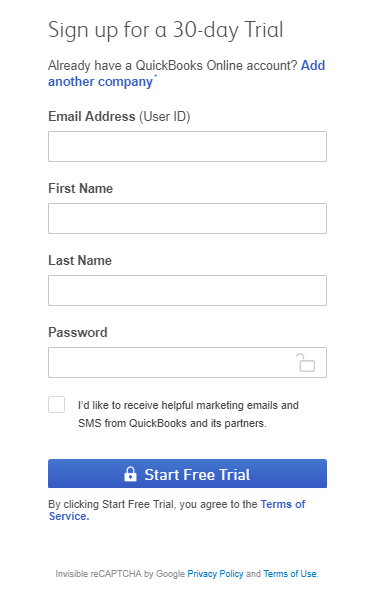
Fill information in the below form completely
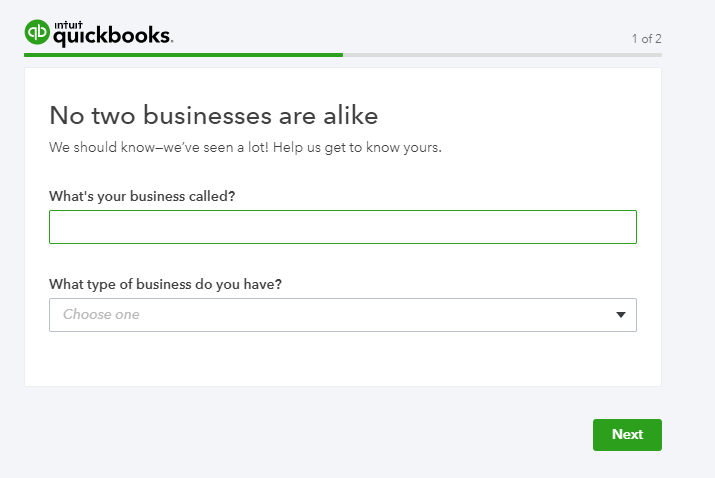
Then, enter information about your business
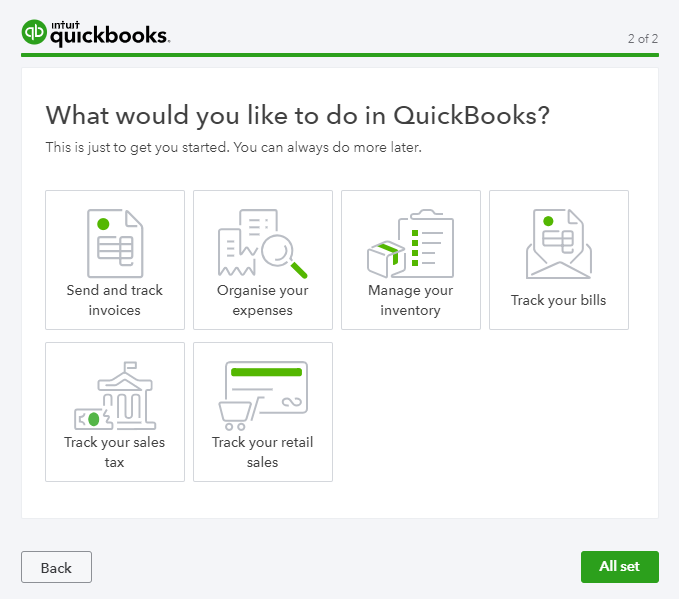
Choose these activities you like to do in QuickBooks
Get OAuth 2CRM0 Token
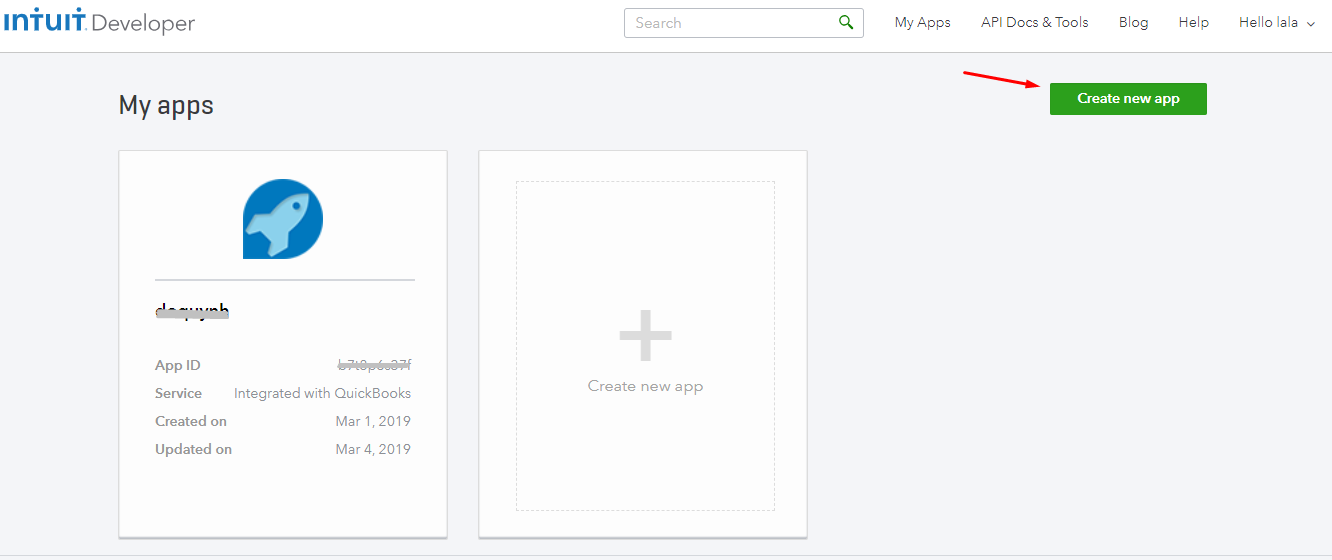
After signing up the QuickBooks account successfully, access to here > Click the Create new app button to create a new app.
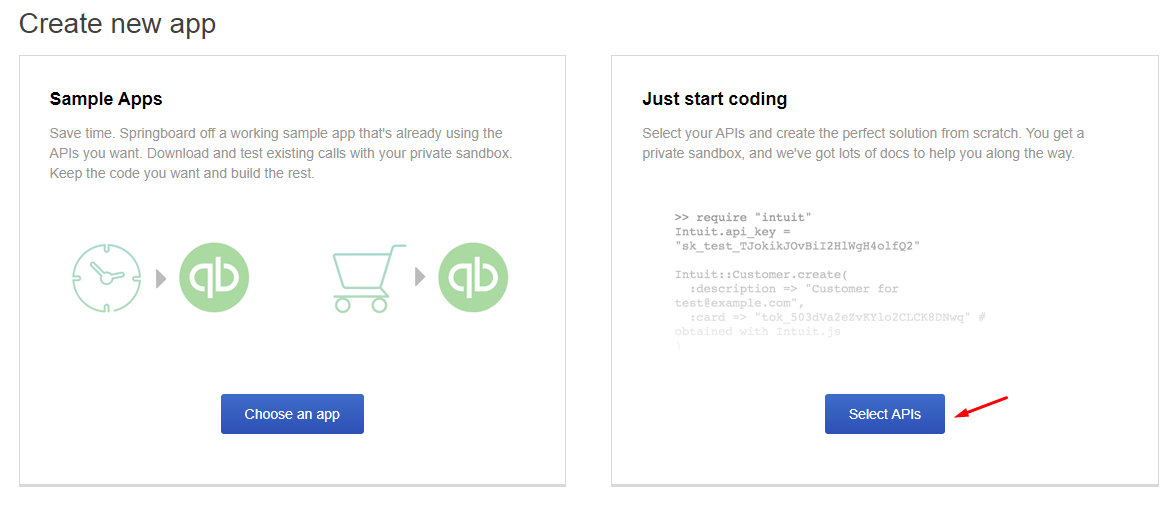
Click the Select API button
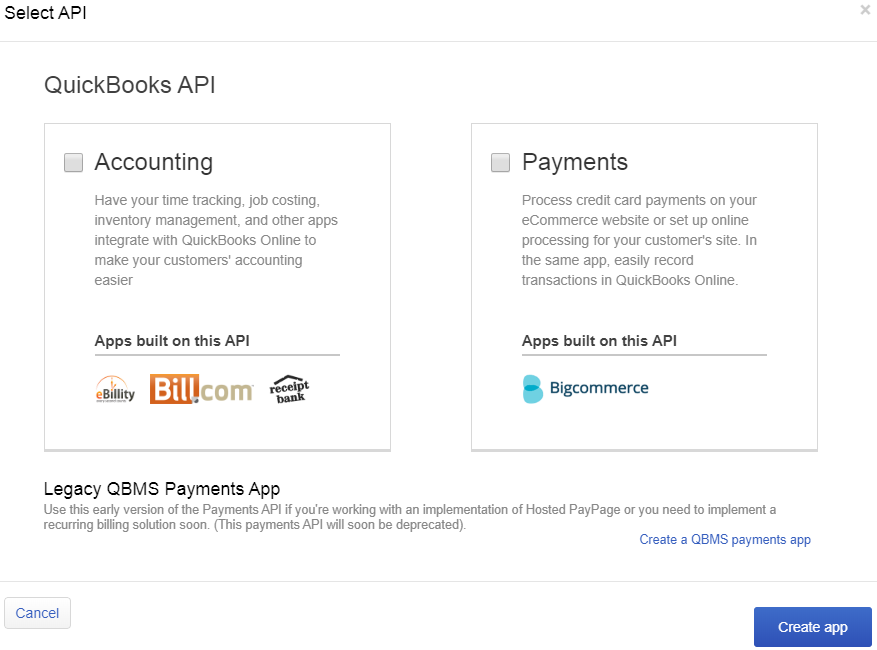
Select the type of app which you want to create > Click the Create app button
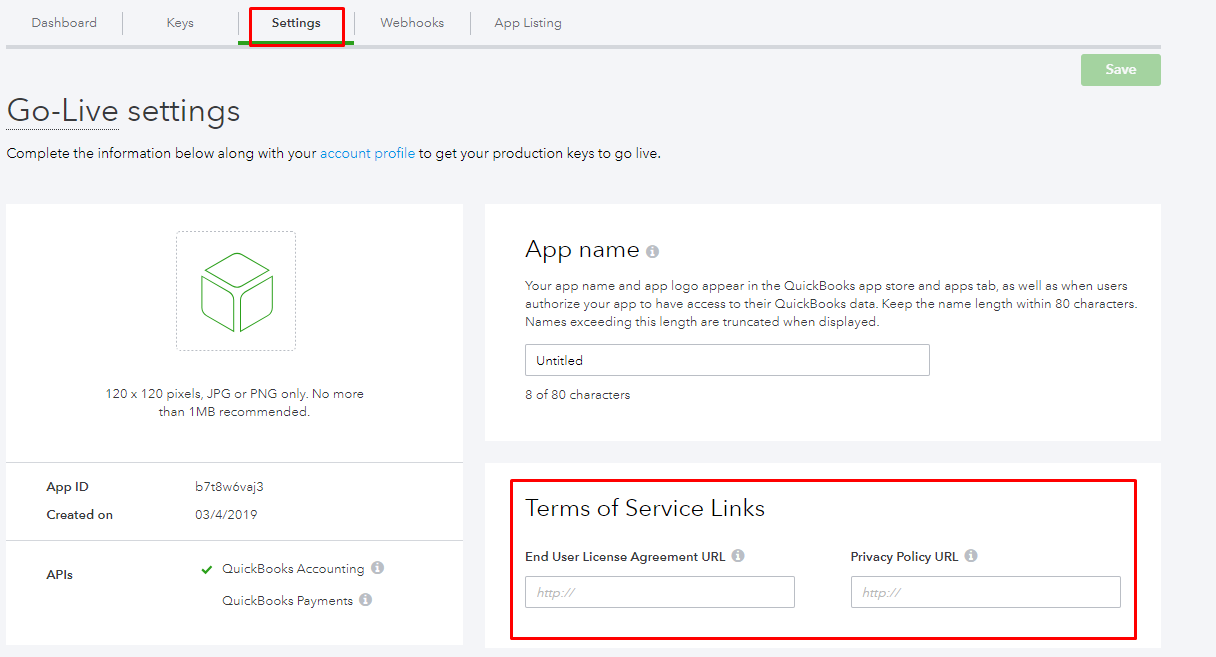
Click Setting > Terms of Service Links, then enter all information in Terms of Service Links (marked with the red rectangle), as below image:
You will see Production Keys, as below image:

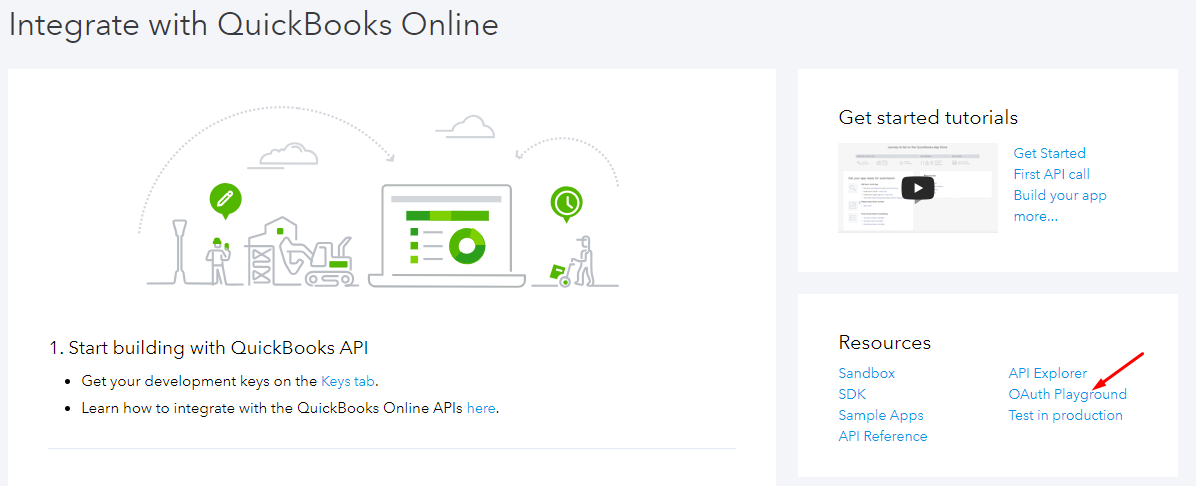
Then you need to come back Dashboard > Resources > OAuth Playground
Select Production company > Select Scopes > Get authorization code
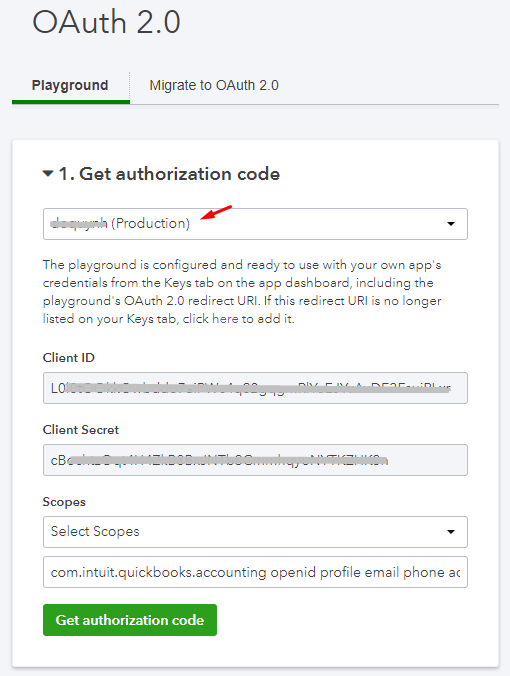
Then you will see Authorization Code và Realm ID
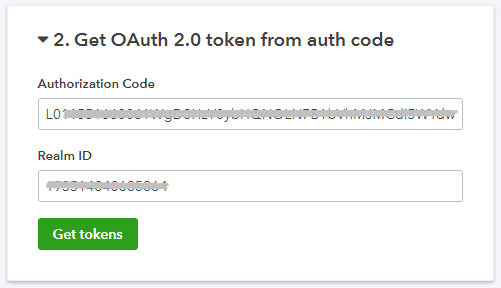
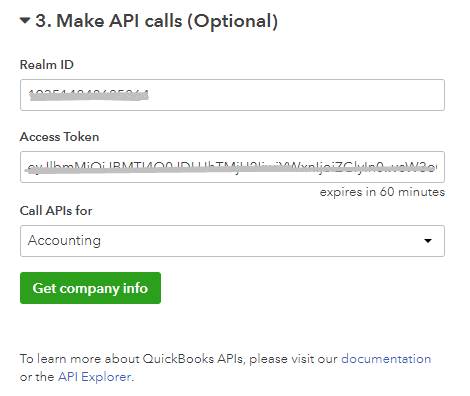
Click the Get tokens button, you will see Access Token and be able to make API calls to get company info.
These Fields Of QuickBooks:
To view the latest fields of QuickBooks, you can click here
Instructions For Creating Hook
How to create a new customer in QuickBooks via Magento 2
- Required fields: (at least one of these below fields is required)
- Title
- GivenName
- MiddleName
- FamilyName
- Suffix
- DisplayName
- Option fields
- FullyQualifiedName
- PrimaryEmailAddr
- Address
- Notes
- PrimaryPhone
- FreeFormNumber
- CompanyName
- BillAddr
- CountrySubDivisionCode
- City
- PostalCode
- Line1
- Country
In this part, I will give detail instructions on how to configure Webhook which helps Magento 2 integrate with QuickBooks.
From the Admin Panel, go to System > Webhook > Manage Hooks, select Add New on the right corner, then you will see many options including New Order, New Customer, Update Customer, Delete Customer, etc.
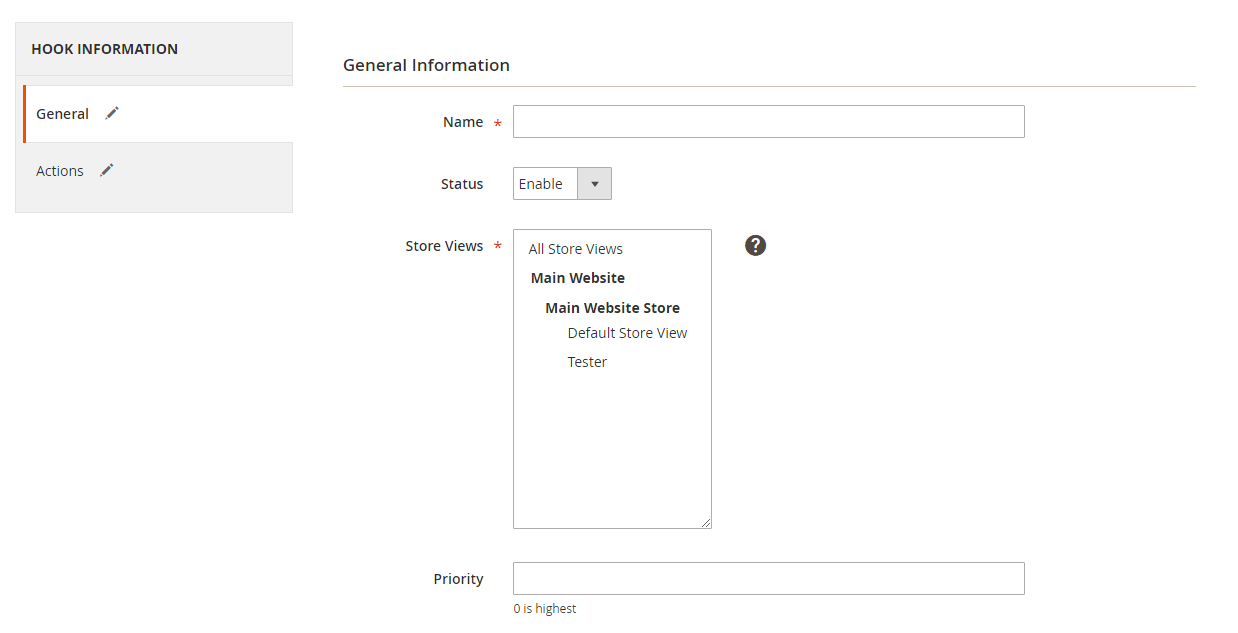
Step 1: Fill all information in the General Information tab
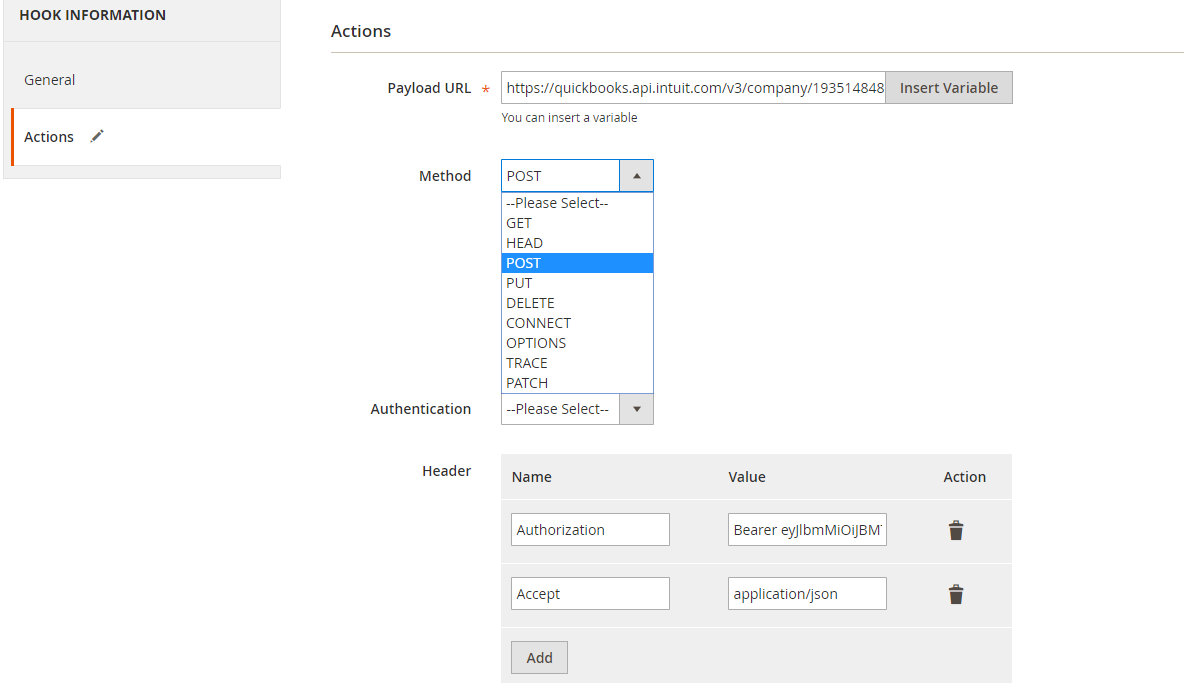
Step 2: Enter the data on the Action tab
Note:
- Payload URL: POST method (add new customer): https://quickbooks.api.intuit.com/v3/company//customer/?minorversion=. Where:
-
: Realm ID which you can get according to the above instruction (Get OAuth 2.0 token instruction)
-
: the version of QuickBooks Online API which you view here
-
- Header: Click Add button to add the value of headers such as Name and Value. Here, you need to fill the value of the Name-Value pair, as below:
- Name: Authorization, Value: Bearer {token} where {token} is found according to the above instruction (Get OAuth 2.0 token instruction)
- Name: Accept, Value: application/json
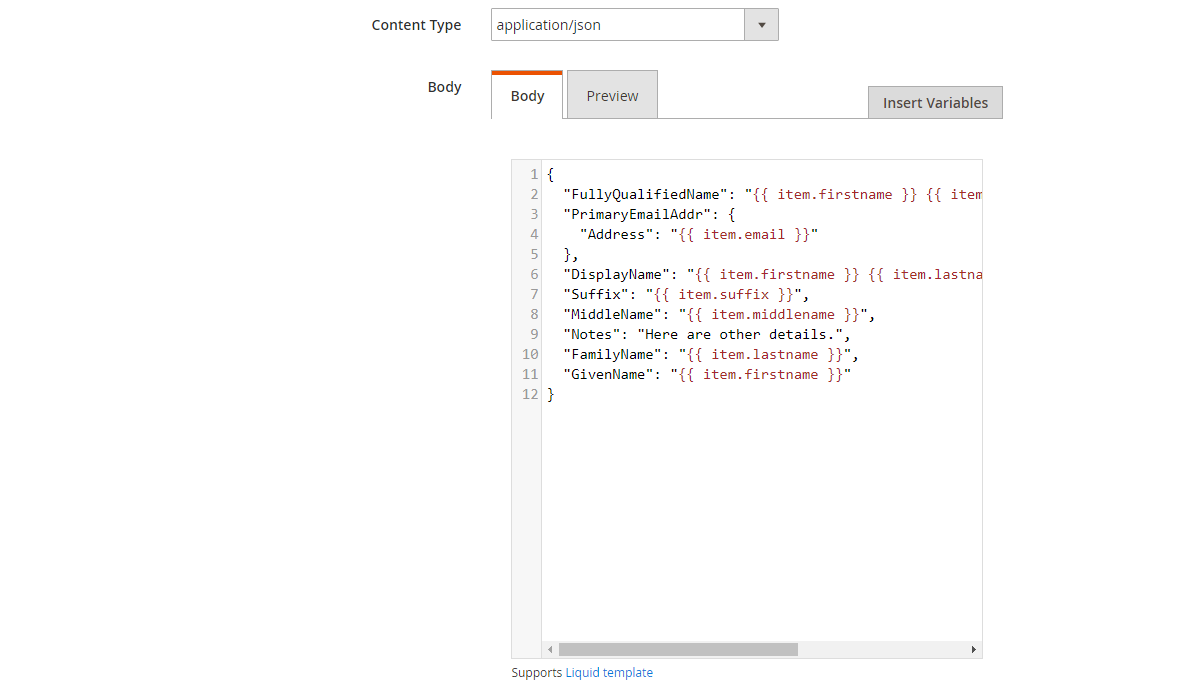
- Content Type: application/json
- Body: With POST or PUT method, you need to add content on the Content section to send the request. Click Insert Variable to choose variable.
- For example: If you want that when you add a new customer in Magento 2, the customer will be added compatibly in QuickBooks, you need to insert the following content into the body section:
{
  "FullyQualifiedName": "Adelia Alice Harris",
  "PrimaryEmailAddr": {
    "Address": "[email protected]"
  },
  "DisplayName": "Adelia Harris",
  "Suffix": "Ac",
  "MiddleName": "Alice",
  "FamilyName": "Adelia",
  "GivenName": "Harris"
}
Note: If you want to get any data field, you need to change the value of this data field with variable coming from Insert Variable.
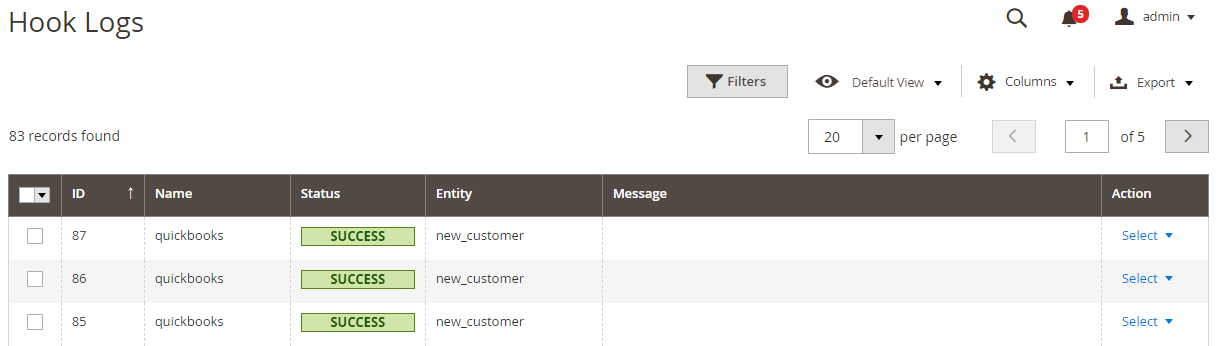
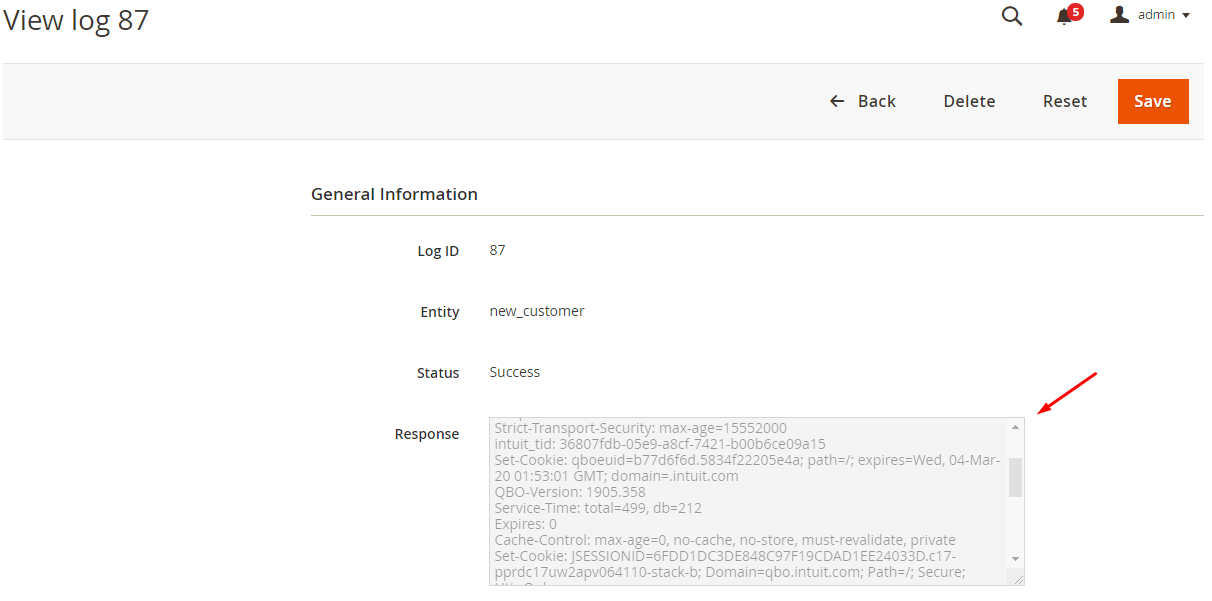
The results of creating a hook:
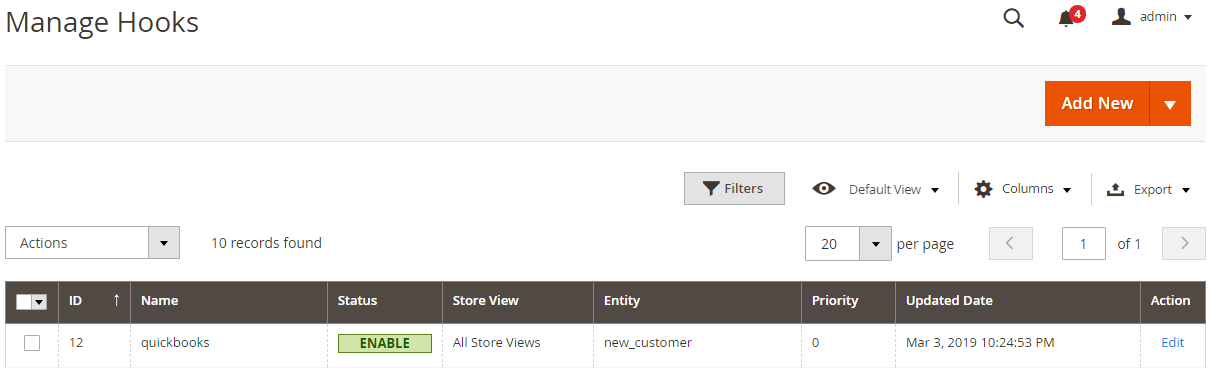
When you add new customers in Magento, the information data will be saved in Hook Logs
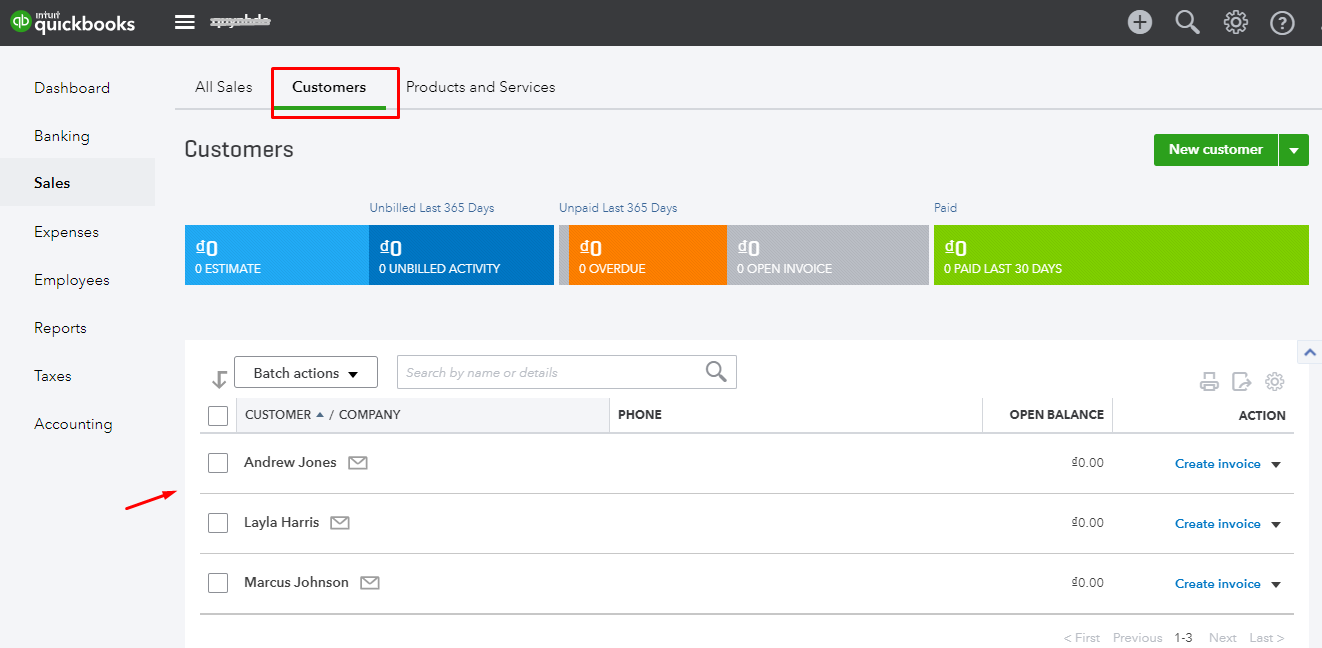
The Result Shown In QuickBooks
These Available Body Templates:
New Invoice
Endpoint: POST /v3/company/
- Required fields
- CustomerRef
- value
- Line [0..n]
- DetailType
- SalesItemLineDetail
- Amount
- CurrencyRef
- value
- CustomerRef
- Option fields
- CustomerRef
- name
- CurrencyRef
- Name
- CustomerRef
Body template
{
  "Line": [
    {
      "DetailType": "SalesItemLineDetail",
      "Amount": 100.0,
      "SalesItemLineDetail": {
        "ItemRef": {
          "name": "Services",
          "value": "1"
        }
      }
    }
  ],
  "CustomerRef": {
    "value": "1",
    “name”:”Layla Harris”
  }
}
Note: If you want to get any data field, you need to change the value of this field with variable coming from Insert Variable.
Conclusion
In this tutorial, we introduce how to register QuickBooks, create Hook with Mageplaza Webhook Extension, and integrate QuickBooks with Magento 2 via Webhook. In addition, you can refer to other useful extensions for your store here.
Magento API Integration Service by Mageplaza
Connect your store with any 3rd-party software and boost customer experience quickly and efficiently.
Learn more
Back Ask Mageplaza