How To Integrate 2Checkout Payment Gateway to Shopify
Summer Nguyen | 05-23-2024
Are you interested in broadening the payment options available in your e-commerce store and simplifying the checkout experience for your customers?
Integrating 2Checkout Payment Gateway with Shopify might just be the solution you need. With its global reach, robust security features, and support for various payment methods, 2Checkout can enhance your Shopify store’s capabilities and help you capture more sales.
In this guide, we’ll walk you through the process of integrating 2Checkout Shopify step-by-step. Let’s delve into and explore the answers to these questions while learning how to integrate the 2Checkout Payment Gateway effectively with your Shopify store.
What is 2Checkout Shopify?
2Checkout Shopify refers to the integration between Shopify, a popular e-commerce platform, and 2Checkout, a payment gateway provider. This integration allows Shopify merchants to accept payments from customers using 2Checkout’s payment processing services.
Through the integration of 2Checkout, Shopify merchants can present their customers with an extensive array of payment methods, including credit and debit cards, PayPal, and various local payment options depending on the customers’ geographical location. This integration provides flexibility and convenience for merchants and customers, enabling secure online transactions and streamlining the checkout process.
Read more: Shopify Payments: Everything You Need To Know
Benefits of Using 2Checkout Shopify

The integration of 2Checkout Shopify offers several benefits to merchants, enhancing their e-commerce capabilities and providing a better shopping experience for customers. Here are some of the key benefits:
- Global payment acceptance: 2Checkout supports various payment methods, allowing Shopify merchants to accept payments from customers worldwide.
- Security and compliance: 2Checkout is PCI Level 1 compliant, ensuring that all payment transactions are processed securely and in compliance with industry standards.
- Easy integration: The integration between 2Checkout and Shopify is straightforward, allowing merchants to set up and accept payments on their online stores quickly.
- Streamlined checkout process: With 2Checkout, customers can enjoy a seamless checkout process, leading to higher conversion rates and fewer abandoned carts.
- Multiple currency support: 2Checkout enables merchants to accept payments in multiple currencies, allowing them to cater to customers from different regions without the need for currency conversion.
- Subscription and recurring billing: Shopify allows merchants to automate billing processes and easily manage customer subscriptions directly within Shopify.
- Analytics and reporting: Merchants using 2Checkout gain access to robust analytics and reporting tools, empowering them to monitor sales performance, monitor transaction data, and gain insights into customer behavior.
- Dedicated support: Shopify merchants using 2Checkout can access dedicated customer support from both Shopify and 2Checkout. Merchants can rely on knowledgeable support teams to assist them.
How Much Does It Cost to Integrate 2Checkout to Shopify?
The total monthly cost of integrating 2Checkout into Shopify for a typical small to medium-sized business could range from around $50 to $500 or more.
The cost of integrating 2Checkout Shopify can vary depending on transaction volume, payment methods, and any additional services opted for. Here’s a general overview of potential costs:
- Transaction fees: 2Checkout typically charges transaction fees ranging from around 4.5% + $0.45 per transaction for US merchants to slightly higher rates for international transactions or alternative payment methods.
- Monthly subscription fee: While Shopify itself charges a monthly subscription fee for using its platform, integrating 2Checkout doesn’t usually incur an additional fee from 2Checkout directly. However, there might be associated costs if you opt for additional services such as subscription management or fraud protection.
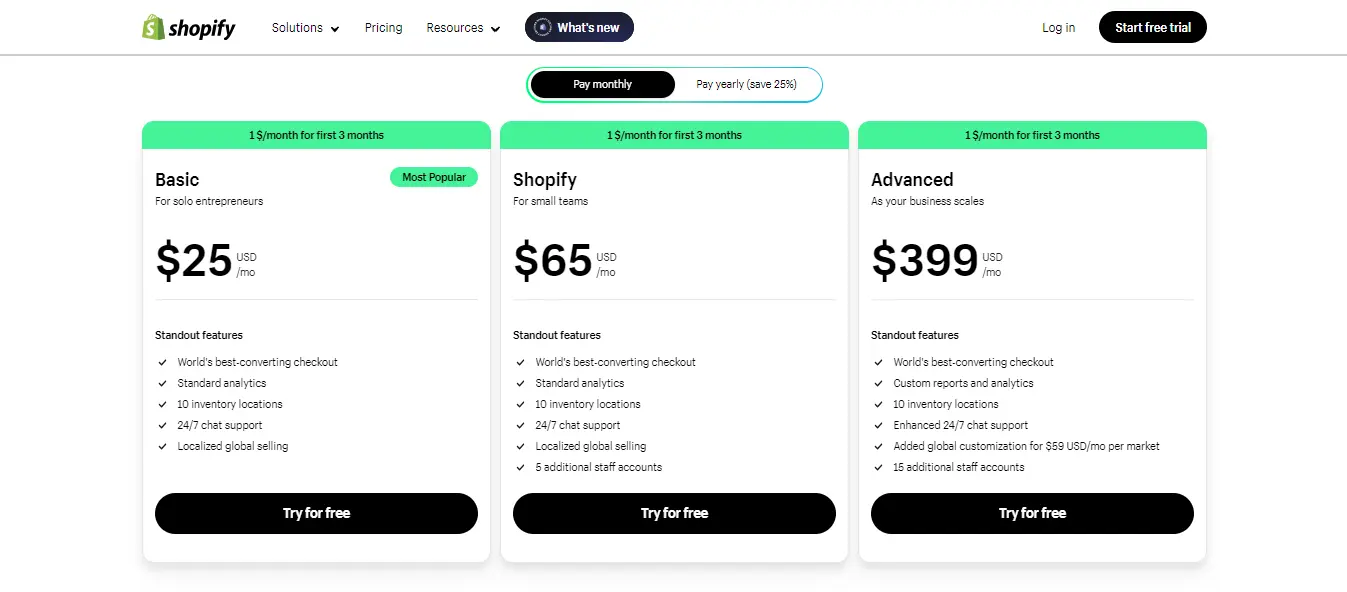
- Customization and support: If you require customization or additional support beyond the standard offerings, you may incur additional costs. These could include fees for development work or premium support packages.
- Chargeback fees: In the event of chargebacks, 2Checkout and Shopify may charge additional fees. These fees can vary but are typically incurred on a per-occurrence basis.
To get a precise understanding of the costs involved for your specific business needs, it’s recommended to consult the pricing details provided by both Shopify and 2Checkout directly. Additionally, consider factors such as your anticipated transaction volume, average order value, and the types of payment methods you’ll be accepting to estimate your overall integration costs accurately.
How to Integrate 2Checkout to Shopify
Integrating 2Checkout with Shopify is relatively straightforward, and there are primarily two easy methods to do so:
Method 1: Integrate Directly
Direct 2Checkout Shopify integration involves several steps to enable seamless payment processing on your Shopify store. Here’s a guide on how to integrate 2Checkout with Shopify:
Step 1: Create a 2Checkout Account
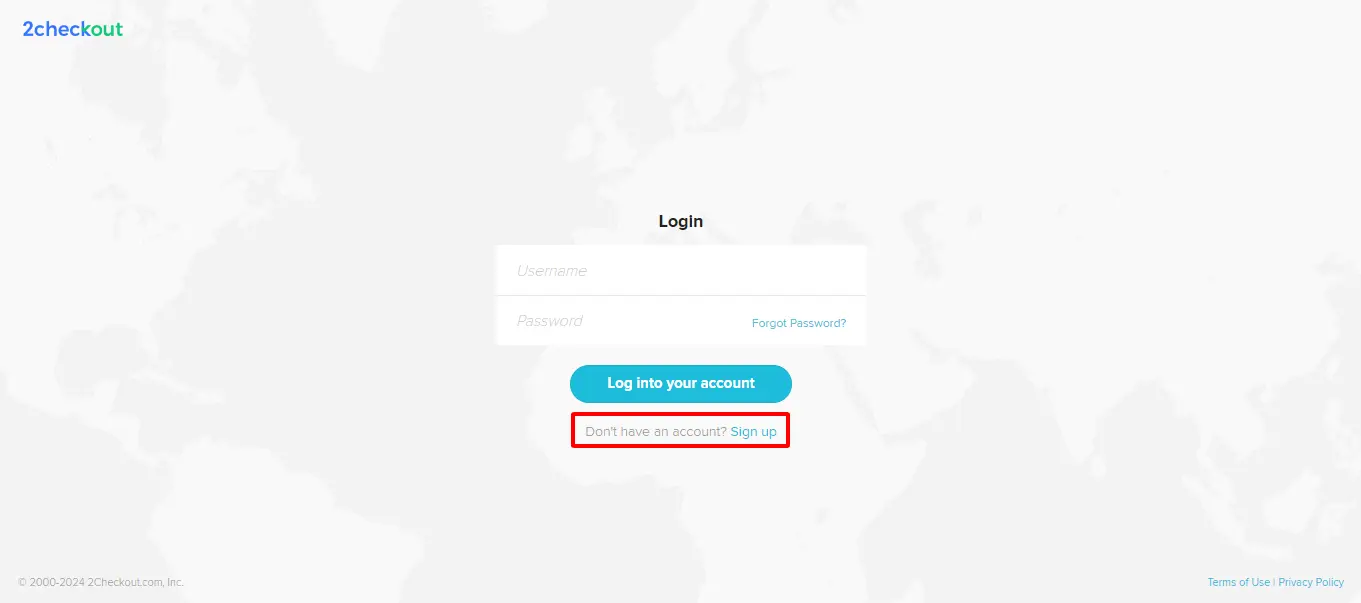
- Visit the 2Checkout website: Open your web browser and navigate to the official 2Checkout website.
- Sign up or register: Look for the sign-up or register option on the website’s homepage. It’s usually prominently displayed. Click on it to begin the registration process.
- Provide business information: Fill in the required information about your business. This typically includes details such as your company name, business address, contact person, email address, and phone number. You may also need to specify your business type and industry.
- Create account credentials: Choose a username and password for your 2Checkout account. Make sure to select a strong password to enhance security.
- Verify email (if required): Depending on the platform, you might need to verify your email address by selecting the hyperlink sent to the email you provided during registration.
- Complete registration: Follow the prompts to complete the registration process. Review the terms of service and any other relevant agreements before proceeding. Once done, you’ll receive confirmation that your 2Checkout account has been successfully created.
Step 2: Get API Keys
- Log in to your 2Checkout account: Log in to your newly created 2Checkout account using the credentials you set up during registration.
- Access integration settings: Once logged in, navigate to the “Integrate” or “Account Settings” section within the dashboard. This is where you’ll find options related to integrating 2Checkout with other platforms.
- Generate API keys: Look for an option to generate API keys. API keys are necessary for connecting 2Checkout to other platforms, such as Shopify. You’ll typically need to generate your Merchant Code, Secret Key, and Account Number/API Key. Follow the instructions provided to generate these keys.
- Note down API keys: Once the API keys are generated, make sure to note them down or save them in a secure location. You’ll need these keys later when configuring the integration with Shopify.
Step 3: Log in to Shopify
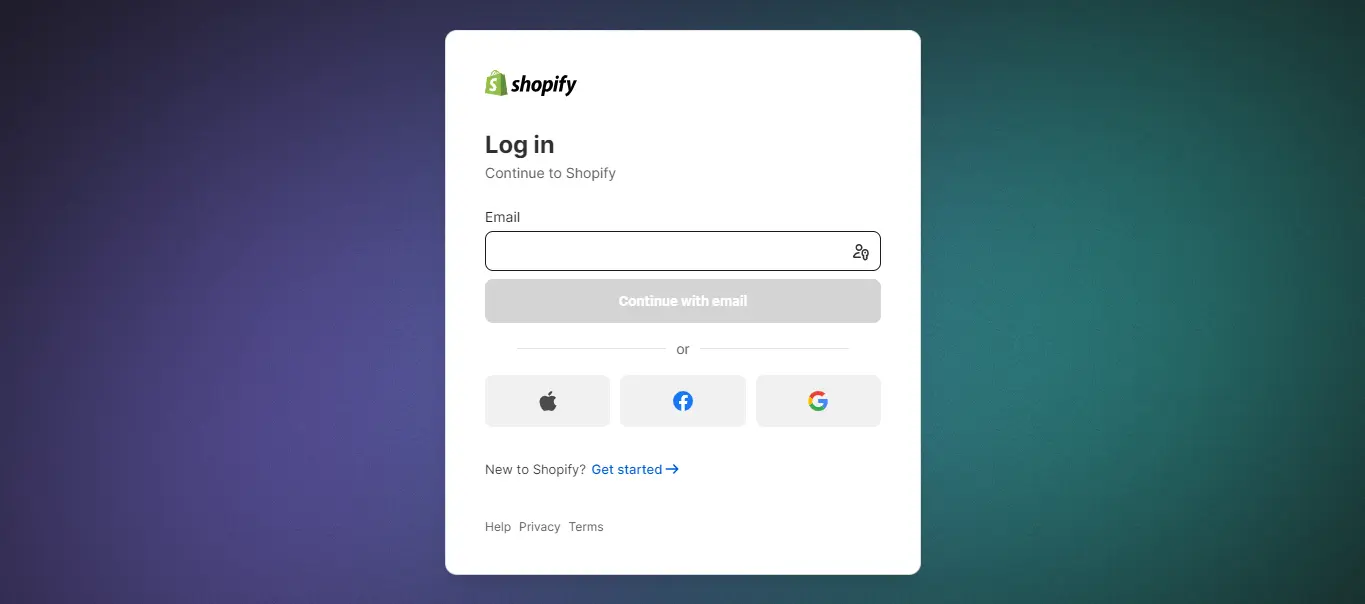
Open your web browser and navigate to the Shopify website. Log in to your Shopify admin dashboard using your credentials.
Read more: 2023 Ultimate Guide on How to Create a Shopify Store
Step 4: Add 2Checkout as a Payment Provider
- Access payment settings: In your Shopify admin dashboard, navigate to “Settings” and then click on “Payments” to configure the payment methods for your Shopify store.
- Choose third-party provider: Scroll down to the “Additional payment methods” section of the Payments settings page. Under the “Add payment method” section, click on “Search by provider” or a similar option.
- Select 2Checkout: Look for 2Checkout in the list of available third-party payment providers. Click on 2Checkout to select it as your payment provider.
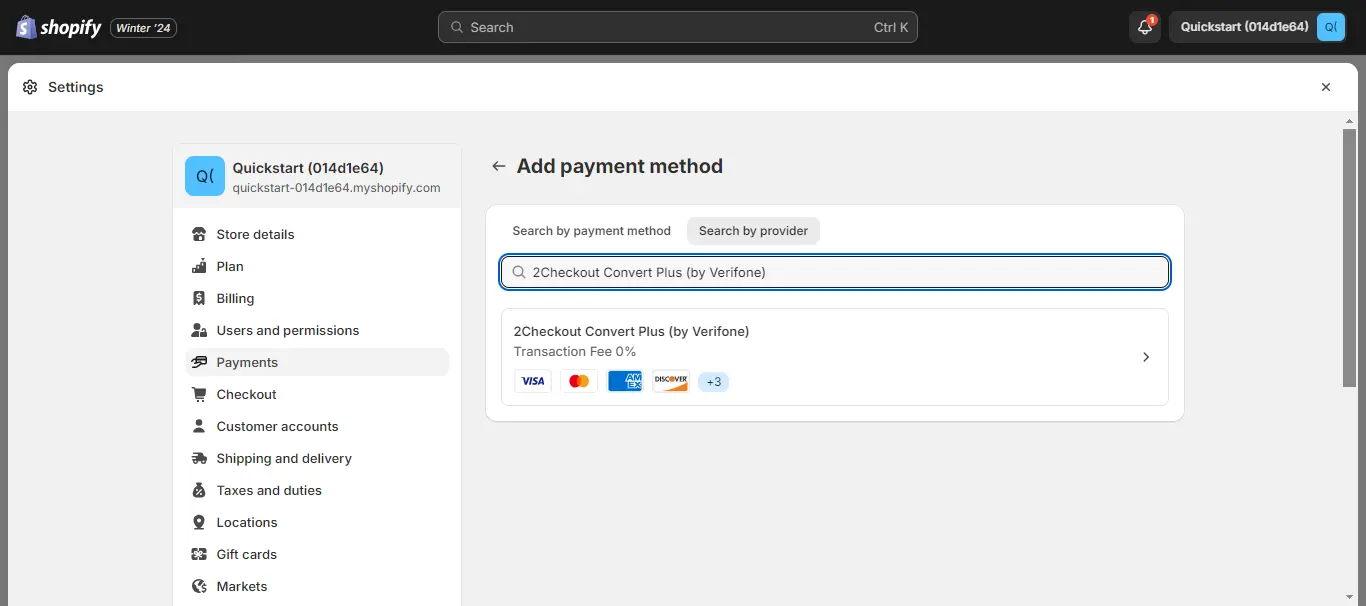
- Enter 2Checkout account details: Once you’ve selected 2Checkout, you’ll be prompted to enter your 2Checkout account details. This typically includes your Merchant Code, Secret Key, and Account Number/API Key. Enter these details in the provided fields.
- Save changes: After entering your 2Checkout account details, save your changes to enable 2Checkout as a payment provider for your Shopify store.
Step 5: Enable 2Checkout
- Enter 2Checkout account details: After selecting 2Checkout as a payment provider, you’ll be prompted to enter your 2Checkout account details. This typically includes your Merchant Code, Secret Key, and Account Number/API Key. Ensure you enter these details correctly as they are crucial for the integration.
- Save changes: Once you’ve entered your 2Checkout account details, save your changes to enable 2Checkout as a payment provider for your Shopify store. This action confirms that you want to integrate 2Checkout with Shopify.
Step 6: Configure 2Checkout Settings
- Access payment settings: Navigate back to the Payments settings page in your Shopify admin dashboard.
- Configure payment settings: Find the section related to 2Checkout and click on it to access the settings. Here, you can configure various aspects of the integration, such as accepted currencies, enabled payment methods, and any additional features offered by 2Checkout.
- Customize checkout settings (optional): Depending on your preferences and business requirements, you may have the option to customize your customers’ checkout experience. This could include customizing the look and feel of the 2Checkout payment page to match your Shopify store’s branding.
- Save changes: Once you’ve configured your settings, make sure to save your changes to apply them. Review your settings carefully to ensure they align with your business needs.
Step 7: Test Transactions
- Enable test mode: Many payment gateways, including 2Checkout, offer a sandbox or test mode for this purpose. Enable test mode in your 2Checkout account settings.
- Perform test transactions: With test mode enabled, you can simulate transactions without processing real payments. Experiment with different scenarios, such as using various payment methods and order totals, to ensure that the integration functions as expected.
- Verify transaction results: After performing test transactions, verify that they are processed correctly. Check for any errors or inconsistencies in the transaction details. This step helps ensure that your customers will have a smooth checkout experience when making real purchases.
Step 8: Go Live
- Disable test mode: Once you’ve successfully tested the integration, disable test mode in your 2Checkout account settings. This action switches the integration from test mode to live mode, allowing you to accept real payments from customers.
- Monitor transactions: After going live, monitor your transactions and payment processing closely. Identify any potential issues, such as failed transactions or payment disputes, and address them promptly.
- Optimize checkout experience: Continuously optimize the checkout experience for your customers to maximize conversions and minimize friction. Consider implementing features such as one-click checkout and offering multiple payment methods to enhance the user experience.
- Stay updated: Stay current with any updates or changes to the integration by regularly checking Shopify and 2Checkout documentation or announcements. This ensures that you’re aware of any new features or improvements that may benefit your business.
Method 2: Use Shopify Integration Service
If you’re new to Shopify integration, connecting 2Checkout to your Shopify store might seem daunting. That’s where Mageplaza steps in!
With Mageplaza’s 2Checkout Shopify integration, you’ll find a straightforward solution tailored for efficiency and ease of use. Renowned for our expertise in optimizing e-commerce platforms, Mageplaza offers an intuitive and effective 2Checkout Shopify integration service.
Opting for Mageplaza’s 2Checkout Shopify integration, as well as our broader Shopify API integration solutions, brings a host of advantages to your online business. Here are some key benefits:
- Expert integration: Our team comprises seasoned professionals specializing in e-commerce integration, ensuring reliable and expert support.
- Quality assurance: We prioritize delivering high-quality integration solutions, guaranteeing precise handling of your data.
- Swift implementation: Designed for efficiency, our solutions streamline the Shopify integration process, saving you valuable time.
- Enhanced security: Your data and customer information are safeguarded through robust security measures implemented by our team.
- Dedicated support: Our support team is committed to providing seamless integration experiences, ready to assist with any queries you may have.
- Flexible pricing: We offer a range of cost-effective plans designed to accommodate businesses of any scale, thus ensuring accessibility for a diverse user base.
Moreover, Mageplaza offers a complimentary 1:1 consultation program and a 30-day free trial for all Shopify apps.
Ready to elevate your e-commerce operations? Discover the unmatched benefits of Mageplaza’s Shopify API integration solutions today!
CONSULT WITH SHOPIFY EXPERTS FOR FREE NOW
Tips for Using 2Checkout Shopify
- Understand the fees: Familiarize yourself with the transaction fees charged by both 2Checkout and Shopify. Understand how these fees are calculated and how they will impact your profit margins. Consider factors like sales volume and average transaction value to optimize your cost-effectiveness.
- Optimize checkout experience: Customize your Shopify store’s checkout process to provide a seamless experience for customers. Decrease friction by streamlining the purchase process with fewer steps and providing multiple payment options. 2Checkout provides tools for customizing the checkout page to match your brand’s aesthetics and improve conversion rates.
Optimize checkout experience
- Offer multiple payment methods: Take advantage of 2Checkout’s support for various payment methods to cater to diverse customer preferences. Offer major credit and debit cards, PayPal, and localized payment options to accommodate customers from different regions.
- Utilize fraud protection: Enable these features and configure them according to your risk tolerance to minimize chargebacks and fraud-related losses.
- Enable subscription billing: If you sell subscription-based products or services, leverage 2Checkout’s subscription management capabilities. Set up recurring billing for your subscriptions and automate the renewal process to streamline operations and improve customer retention.
- Monitor performance metrics: Use the reporting and analytics tools provided by both Shopify and 2Checkout to track key performance metrics. Monitor sales trends, transaction volumes, and customer behavior.
- Stay updated: Keep abreast of any updates, new features, or changes to the integration between 2Checkout and Shopify. Regularly check for announcements, release notes, or documentation updates from both platforms to ensure that you’re leveraging the latest functionalities and optimizations.
- Provide excellent customer support: Offer responsive and helpful customer assistance to address any questions related to payments or the checkout process. Promptly assist customers with payment issues or inquiries to maintain customer satisfaction and loyalty.
- Test and iterate: Continuously test different configurations, payment methods, and checkout flows to optimize your conversion rates and improve the overall shopping experience.
By following these tips and leveraging the capabilities of both 2Checkout and Shopify, you can effectively manage payments, enhance the checkout experience, and drive growth for your e-commerce business.
Conclusion
Integrating 2Checkout Payment Gateway with Shopify opens up a world of opportunities for e-commerce merchants. With its global payment acceptance, robust security features, and user-friendly interface, 2Checkout empowers Shopify store owners to provide a seamless checkout experience for customers globally.
By following the steps outlined in this guide, you can easily set up and start reaping the benefits of expanded payment options and increased sales.
So why wait? Take your Shopify store to the next level by integrating 2Checkout today and unlock new possibilities for growth and success.


![Top 20+ Must-have Shopify Apps for 2025 [Free & Paid] - Mageplaza](https://cdn2.mageplaza.com/media/blog/must-have-shopify-apps/top-must-have-shopify-apps.png)
![[2025 Updates] Top 10+ Upsell Apps for Shopify - Mageplaza](https://cdn2.mageplaza.com/media/blog/best-upsell-shopify-app/cover.png)