




5 mins read
|
07-30-2026
Lazy Loading in Magento 2: What is it & How to enable - Mageplaza
Vinh Jacker
|
07-02-2026


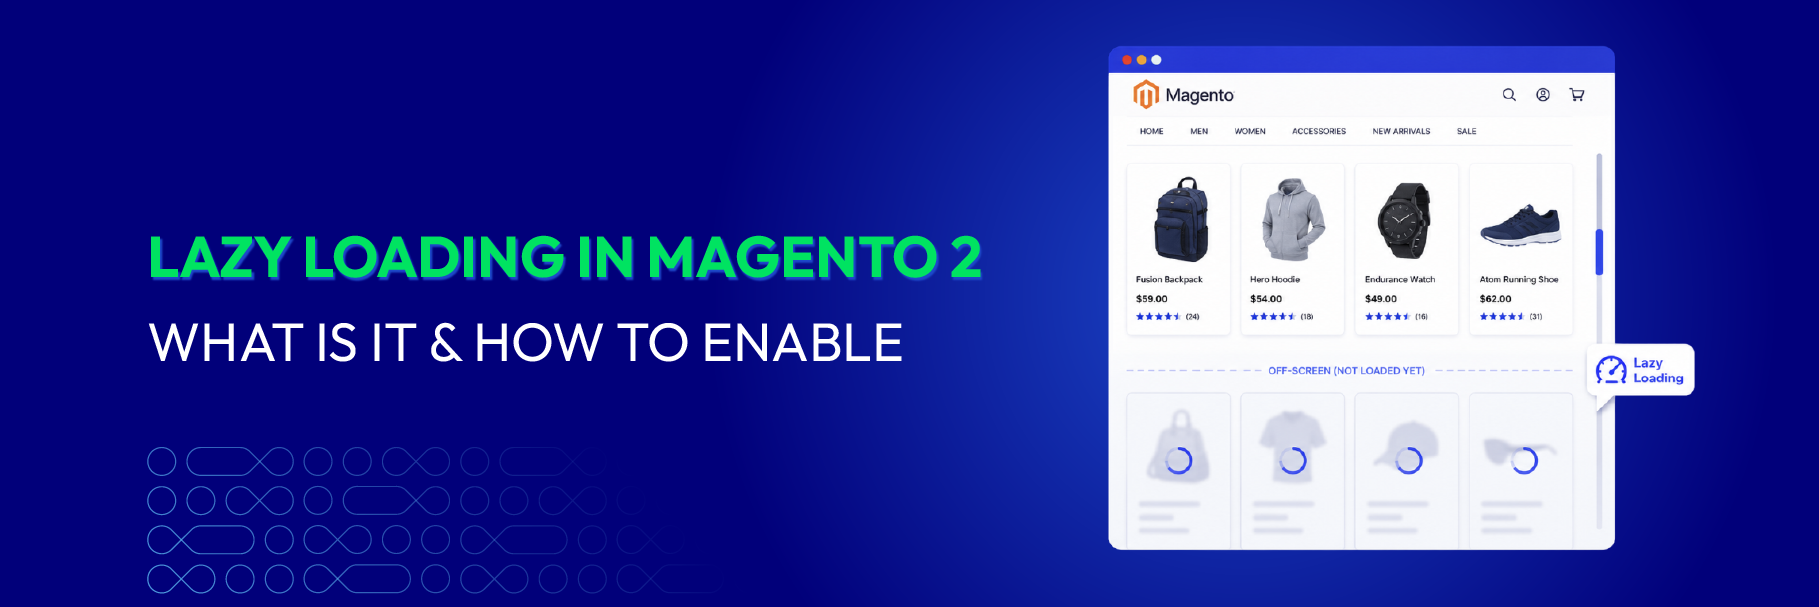
For many websites, slow page loading time is one of the critical issues that have a negative impact on user experience. Among many reasons leading to this undesirable situation, images — the most popular type of content on the web — are also cited, as images take up about 78% of a webpage’s total size ( Tenet ), making them the biggest reason for slow performance.
Resizing and compressing your images properly before their upload is a must-do if you want to get your page loading fast. But what happens after images are uploaded? Is there a method to optimize them a bit more and improve page loading time?
In today’s post, we will introduce to you a beneficial technique that defers the loading of non-critical resources (images, for example), leaving them “off-screen” until you need them — Lazy Loading.
Now, let’s get started!
What is Lazy Loading?
Known as on-demand loading, Lazy Loading is an optimization technique for online content, be it a website or a web app. The basic idea behind the use of Lazy Loading is to load only the required section and delay the remaining until the user needs it. That means users will not need to wait for all images on the page to be loaded and can start using the web page sooner.
Here is what happens when a lazy loading script is applied to your images:
- Users start scrolling through the content of the page
- Instead of having an image immediately appear in the viewport, they will see a blurry placeholder image
- Right after that, the original image quickly replaces the placeholder
Advantages of Lazy Loading
-
Reduce perceived and real loading time: Loading images only when they reach the viewport, instead of all at once, lessens page weight and speeds up loading.
-
Bandwidth conservation: Images load only when scrolled into view, saving data for mobile users and slow connections.
-
Save system resources: Avoids unnecessary JavaScript execution and code processing, conserving both server and client resources.
-
Improve shopping experience: Faster loading plus smooth animated image transitions create a polished browsing experience.
-
Lower bounce rate: About 50% of users expect a page to load in under 2 seconds, and a 1-second delay can cut viewers by 11%. Lazy loading helps lower the bounce rate.
-
Boost SEO: Faster sites improve SEO and search performance. Poorly implemented lazy loading can hurt indexing since crawlers may miss placeholder content — adding links to lazy loaded content lets crawlers follow and index it properly.
How to Enable Lazy Loading via Image Optimizer
Lazy Loading is now included right inside Magento 2 WebP Image Optimizer, along with image compression, WebP conversion, bulk optimization, and cron scheduling. That means one less module to install and keep track of!
Step 1: Install Image Optimizer
Follow our step-by-step guide to installing Magento 2 extensions via Composer to get Image Optimizer up and running on your store.
Step 2: Configure Lazy Loading Settings
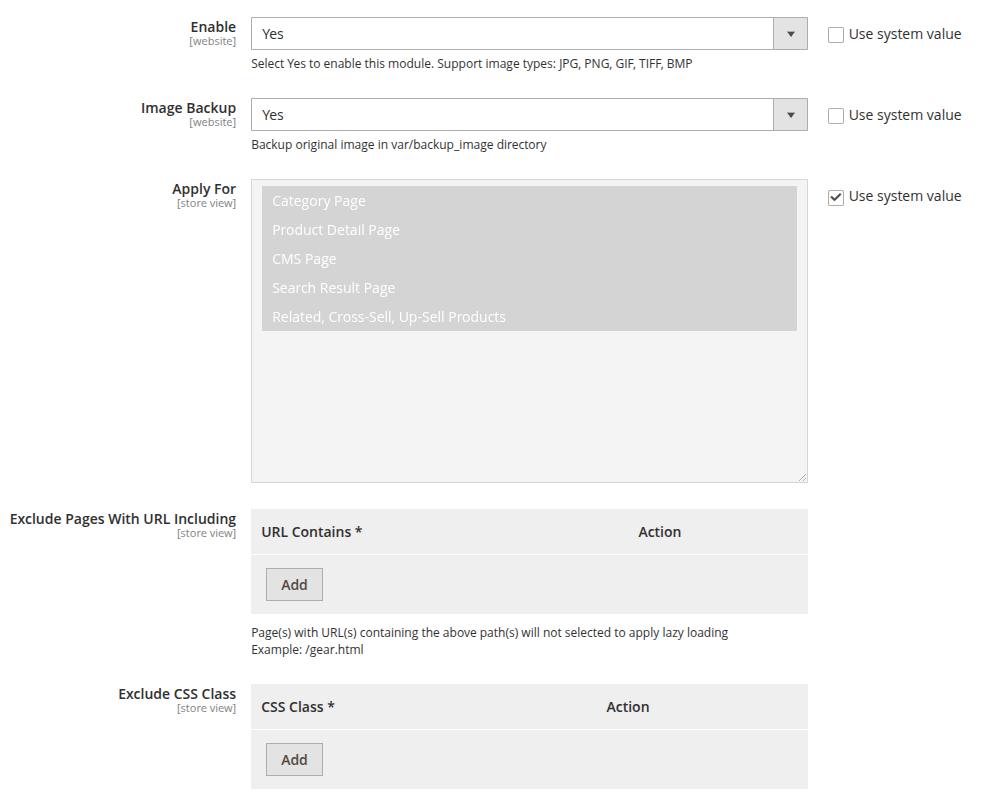
Navigate to Stores > Webp Images > Configuration. Lazy loading settings are located inside the General section:
- Enable: Select
Yesto activate the module, including lazy loading. - Backup Image: Select
Yesto automatically back up the original image tovar/backup_imagebefore it is optimized. This allows you to restore images at any time.
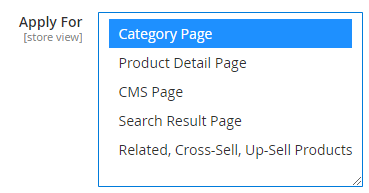
- Apply For: Select which pages lazy loading should be applied to — you can choose one or multiple pages at the same time, including Category Page, Product Detail Page, CMS Page, Search Result Page, and Related/Up-sell/Cross-sell product blocks.
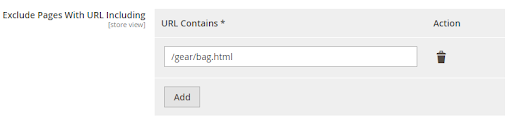
- Exclude Pages With URL Including: Click Add to enter the path of any page you do not want lazy loading applied to. For example:
/gear.html.
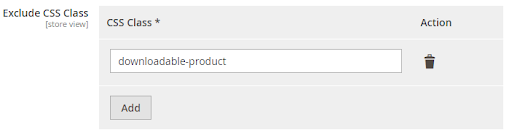
- Exclude CSS Class: Click Add to enter the CSS class name of images you want to exclude. For example, images with
class="downloadable-product"will not have lazy loading applied.
-
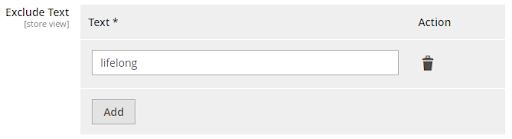
Exclude Text: Click Add to enter the
titleoraltvalue of images to exclude. For example, images withtitle="lifelong"will be skipped. -
Loading Threshold: Set the distance (in pixels) from the viewport at which lazy loading is triggered. Images within this range will begin loading before the user scrolls to them.

-
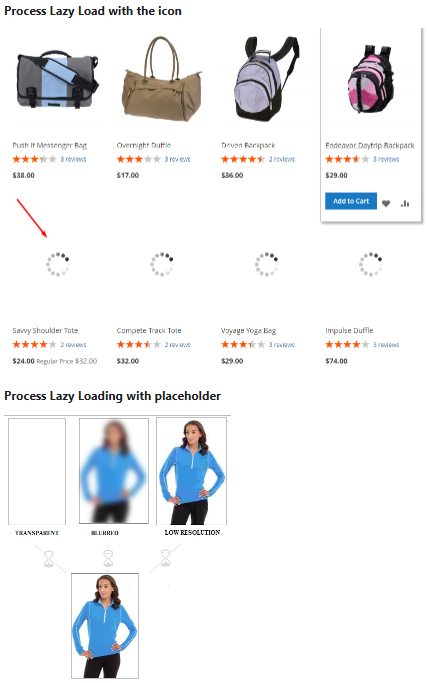
Loading Type: Choose the placeholder style shown while images load:
-
Icon: Upload a custom loading icon (supports gif, png, jpg, svg). Set the icon width and height — default is 64px for both.
-
Placeholder: Choose a visual loading effect:
- Blurred: image is blurred until fully loaded
- Low Resolution: image quality is reduced during loading
- Transparent: a transparent placeholder is shown until the image loads
-
Here’s how it looks on the frontend:
Conclusion
Lazy Loading is a powerful technique that benefits your business in many ways — reducing site loading time, improving customers’ shopping experience, and decreasing the bounce rate caused by slow page loads.
With Lazy Loading now built into Mageplaza Image Optimizer, you can enable it alongside image compression and WebP conversion from a single extension — with no extra installation needed. View the full user guide of Image Optimizer here to get the full performance package for your Magento 2 store.
Table of content

Jacker is the Chief Technology Officer (CTO) at Mageplaza, bringing over 10 years of experience in Magento, Shopify, and other eCommerce platforms. With deep technical expertise, he has led numerous successful projects, optimizing and scaling online stores for global brands. Beyond his work in eCommerce development, he is passionate about running and swimming.
Related Post

7 mins read
|
06-30-2026

How to Enable DebugView in GA4 for your Magento 2 store - Mageplaza
Step-by-step guide to enabling GA4 DebugView for Magento 2 merchants — verify your GA4 events are firing correctly before trusting your data.
8 mins read
|
06-09-2026
Table Rate Shipping in eCommerce: A Practical Guide
Master Magento 2 Table Rate Shipping. Learn how to configure an accurate, automated shipping matrix to optimize your checkout and boost sales.
10 mins read
|
06-02-2026
3 mins read
|
05-30-2026

Google Analytics Ecommerce Reports for Magento Merchants: What to track & Tips
A practical guide to GA4 ecommerce reports for Magento merchants, covering what to track, how to read each report, and specific tips to turn data into revenue decisions.
18 mins read
|
05-20-2026
5 mins read
|
07-30-2026
7 mins read
|
06-30-2026
How to Enable DebugView in GA4 for your Magento 2 store - Mageplaza
Step-by-step guide to enabling GA4 DebugView for Magento 2 merchants — verify your GA4 events are firing correctly before trusting your data.
8 mins read
|
06-09-2026
Table Rate Shipping in eCommerce: A Practical Guide
Master Magento 2 Table Rate Shipping. Learn how to configure an accurate, automated shipping matrix to optimize your checkout and boost sales.
10 mins read
|
06-02-2026
3 mins read
|
05-30-2026
Google Analytics Ecommerce Reports for Magento Merchants: What to track & Tips
A practical guide to GA4 ecommerce reports for Magento merchants, covering what to track, how to read each report, and specific tips to turn data into revenue decisions.
18 mins read
|
05-20-2026