


2 mins read
|
07-30-2026
How to Configure Product Attachments in Magento 2?
Vinh Jacker
|
03-17-2025


Product attachments is a great way to make it easier for customers to understand your products. You can include essential files and documents on the product page to give customers more detailed information that can remove clients’ concerns and provide more outstanding points about the items.
One way to implement product attachments is using the Product Attachments extension . By using this extension, managers can improve the entire purchasing experience by allowing consumers to view or download files online while keeping track of their activities.
Today, we are going to walk you through setting up the Product Attachments extension in your Magento 2 store. To ensure that your customers have access to all the information they require to make informed purchasing decisions, follow these steps for a seamless integration of attachments.
Steps to set up product attachments in Magento 2
First and foremost, you need to install the Product Attachments for Magento 2 extension. Then, follow our detailed instructions below.
Step 1
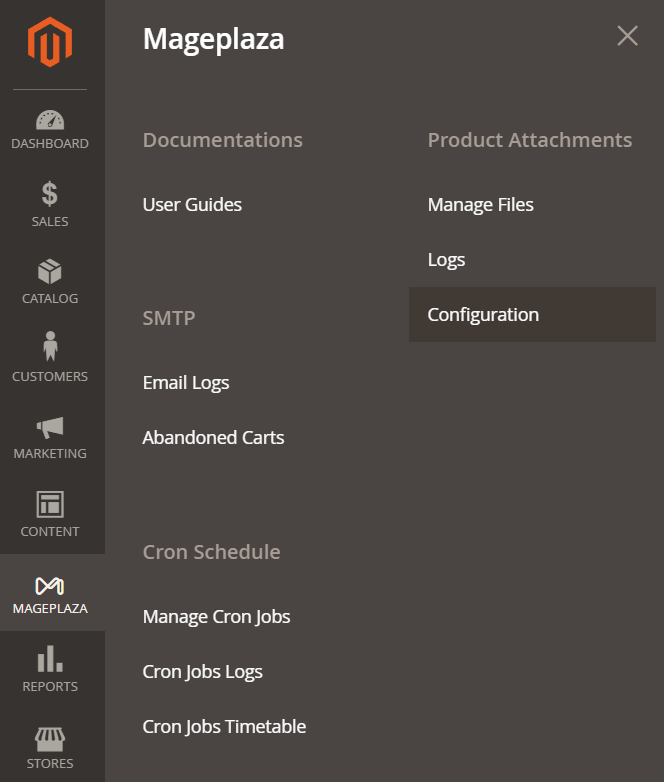
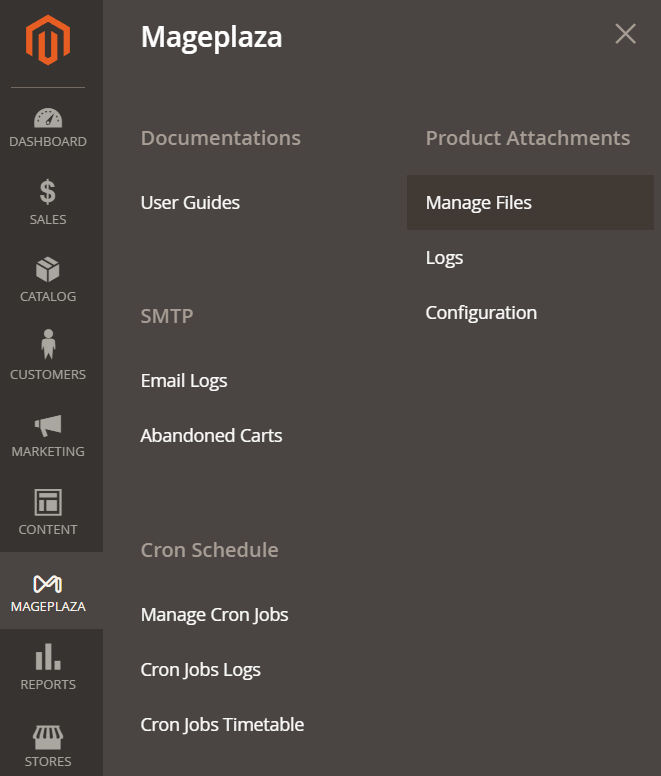
Log in to the Magento Admin, navigate to Mageplaza > Product Attachments > Configuration
Step 2
In the General section, fill out the following fields
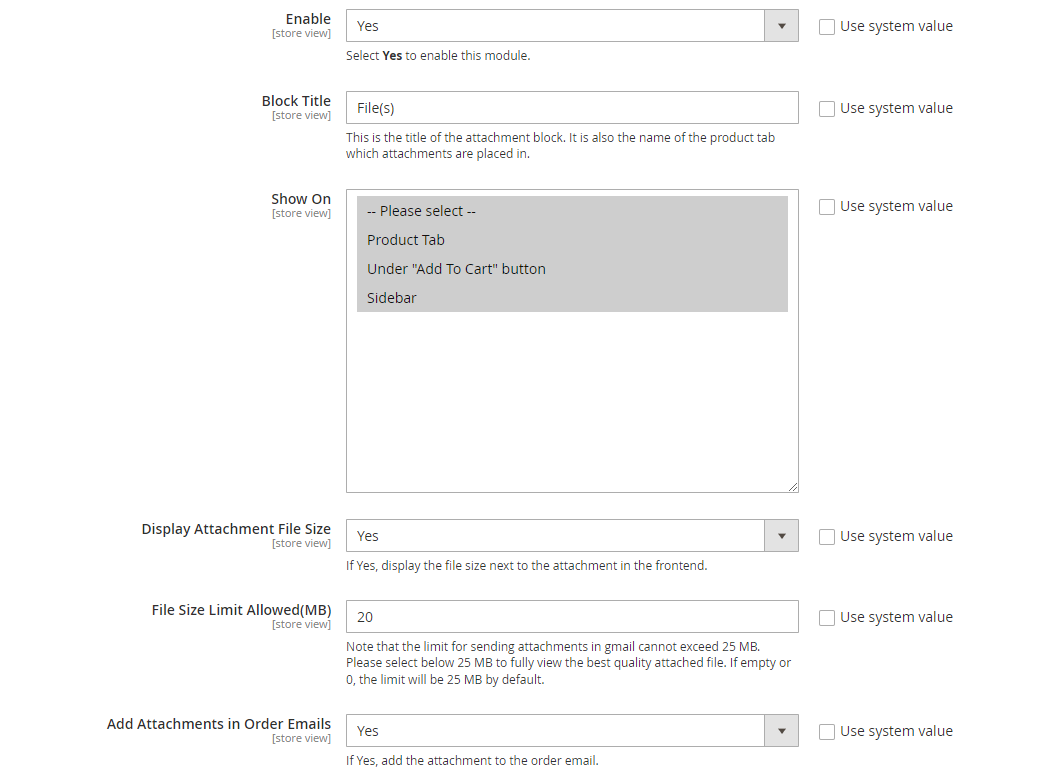
- Enable: Select Yes to enable this module
- Blog Title: Provide the content you want to display for the attachment block on the website frontend
- Show On: You have 3 options to show Product Attachments:
- Product Tab
- Under “Add To Cart” button
- Sidebar
- Display Attachments File Size: When you choose Yes, it will show the file size right next to the attachments
- File Size Limit Allowed (MB): Keep in mind that sending attachments using Gmail has a 25 MB limit. To view the attached file in its full quality, please select the 25 MB option below. By default, the limit will be 25 MB if it is empty or 0.
- Add Attachments in Order Emails: Choose Yes to attach the file to the order email.
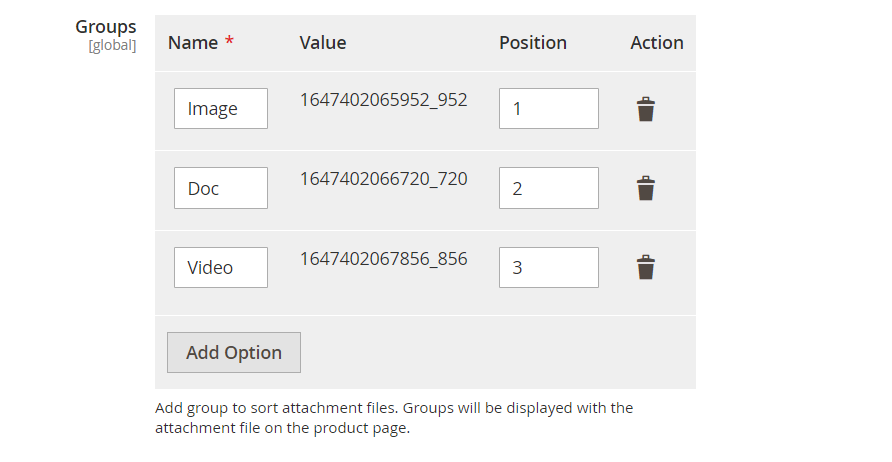
- Groups: Here’s where you can arrange attachments’ order. On the product page, these groups will be displayed with the attachment files.
![]()
- Manage Icon:
- You can choose which icons to include here.
- Whenever a file is added or edited, these icons will appear in the dropdown menu.
- It will be better to use SVG files or icons with recommendation size of 64x64.
Step 3
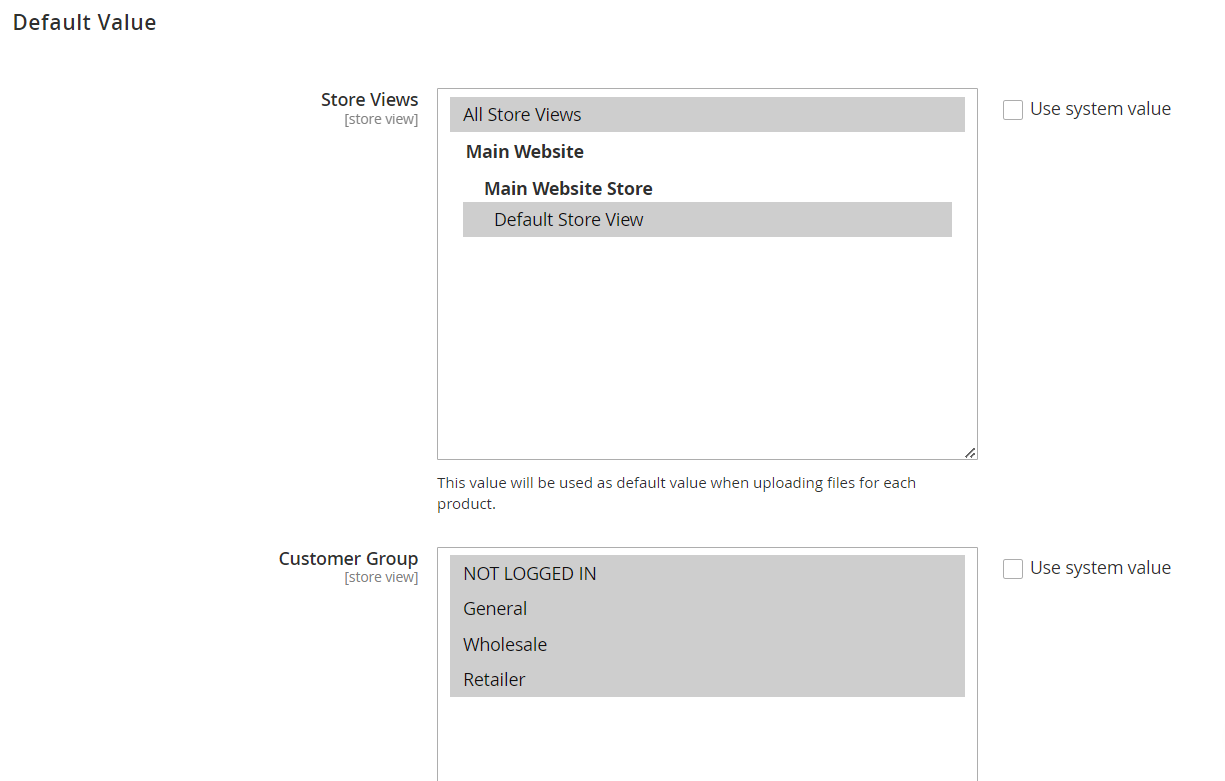
Set up the Default Value to adjust customer behaviors :

-
All values selected in this section are taken as the default value of the product attachment when they are uploaded
- These values will be selected by default when adding new files, but you can change them while editing/adding new files.
- Store View: Specify which store views will display the product attachment on the frontend.
- Customer Group: Define which customer groups can take specific actions.
- Customer must login to download file: If set to Yes, customers must log in to access/download the attachment.
- Only available for verified buyers: If set to Yes, customers must have at least one order of the product to access/download the attachment.
- Customer Action: Allow customers to view attachments only or able to download them.
- View Online
- Download
Step 4
Next, the Snippet feature provides the solution to bring your attachments in any place you want.
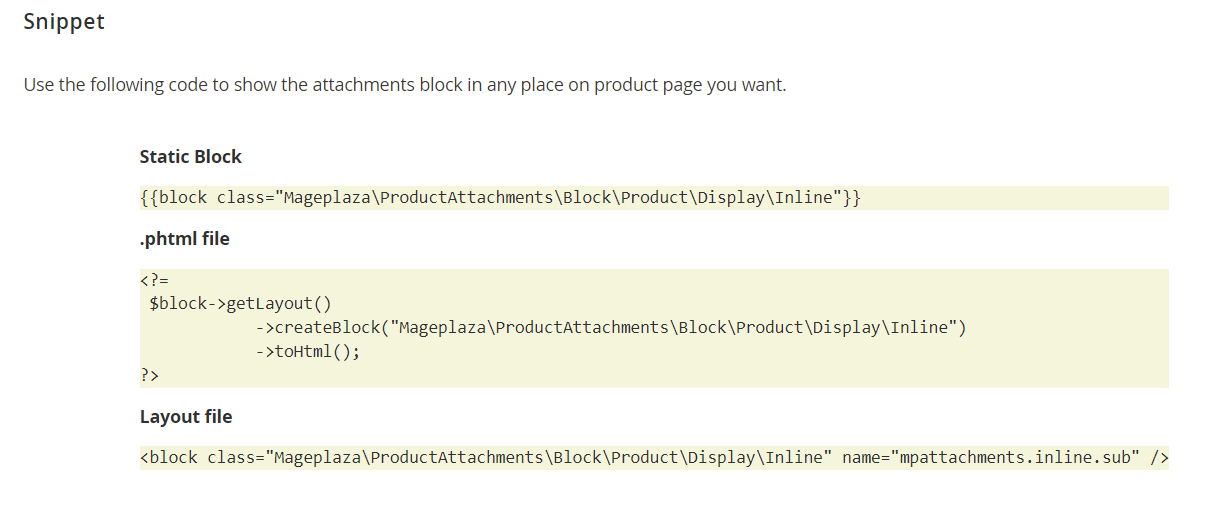
- For CMS Page/Static Block: Copy and paste the code into the pages within the Content > Page section.
- For the Template.phtml file: Copy and paste the code into any Magento or other extension’s.phtml file that you want to use to display Product Attachments.
- For Layout file: Copy and insert the code into the .xml files of Magento or other extensions where you intend to display Product Attachments.
How to add a new product attachment
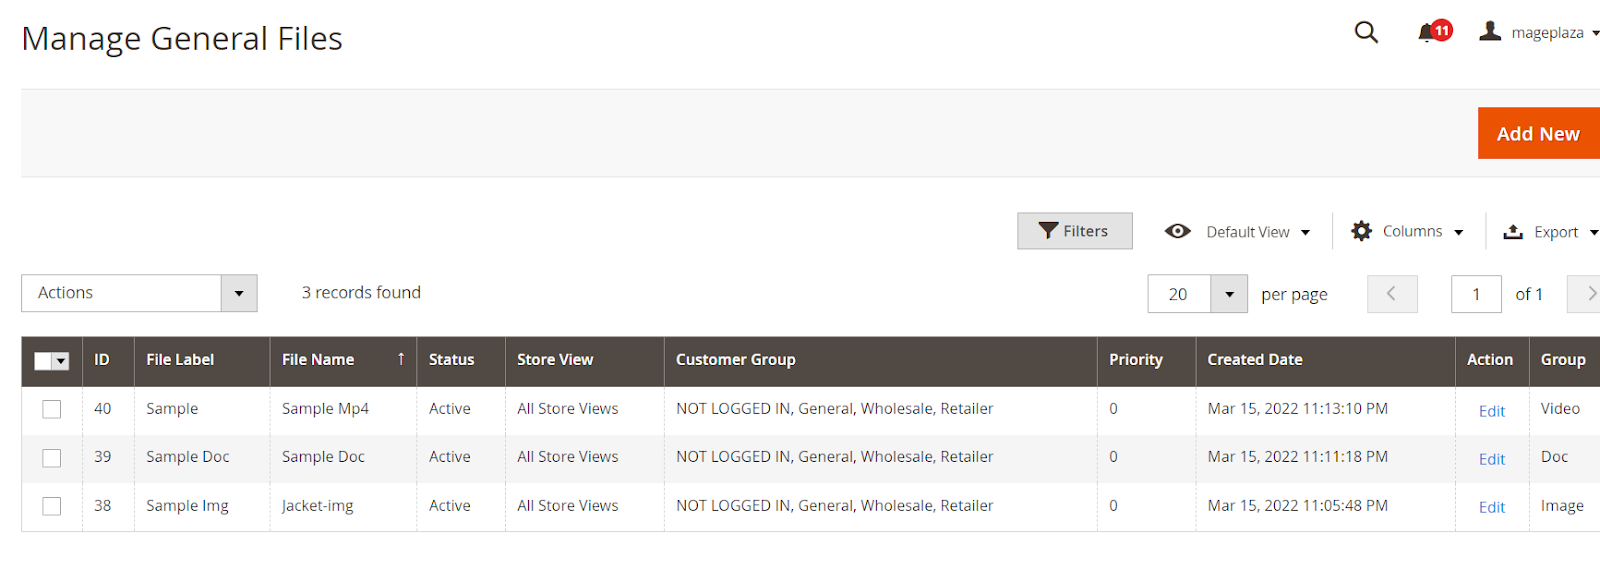
After finishing the configuration set-up, just go back to Product Attachments and choose Manage Files to add a new product attachment.
All attached files should be saved here and included in the product. Now you need to create a new file that is suitable for the main product. Click Add New.
 Set up general fields


- File Label:
- Select the label that should appear on the Frontend with the files that are attached so that users may understand it before they view or download it.
- File Name:
- Assign a name to the file, which will replace the original file name upon upload. This name will be visible on the frontend when customers click on the attached files for viewing/downloading.
- Please note that hieroglyphs such as Chinese, Japanese, Korean, Russian, etc., are not supported.
- If left blank, the system will automatically use the name of the uploaded file name.
- File Type:
- Link other: Displays the File Link field with the links.
- File in Store: Shows the File field with uploaded files.
- File link:
- Attach links using protocols like http://, https://, or ftp://.
- File:
- Upload files from your PC.
- If no file name is provided, the uploaded file name will display on the Frontend.
- Icon:
- The icon will automatically update based on the file format upon upload.
- You can customize the icon if you have one.
- To upload a new icon, you need to install it in the configuration.
- Status:
- Select Enable to display the attached file on the frontend.
- Store Views:
- Choose the store views in which the Product Attachment will be displayed.
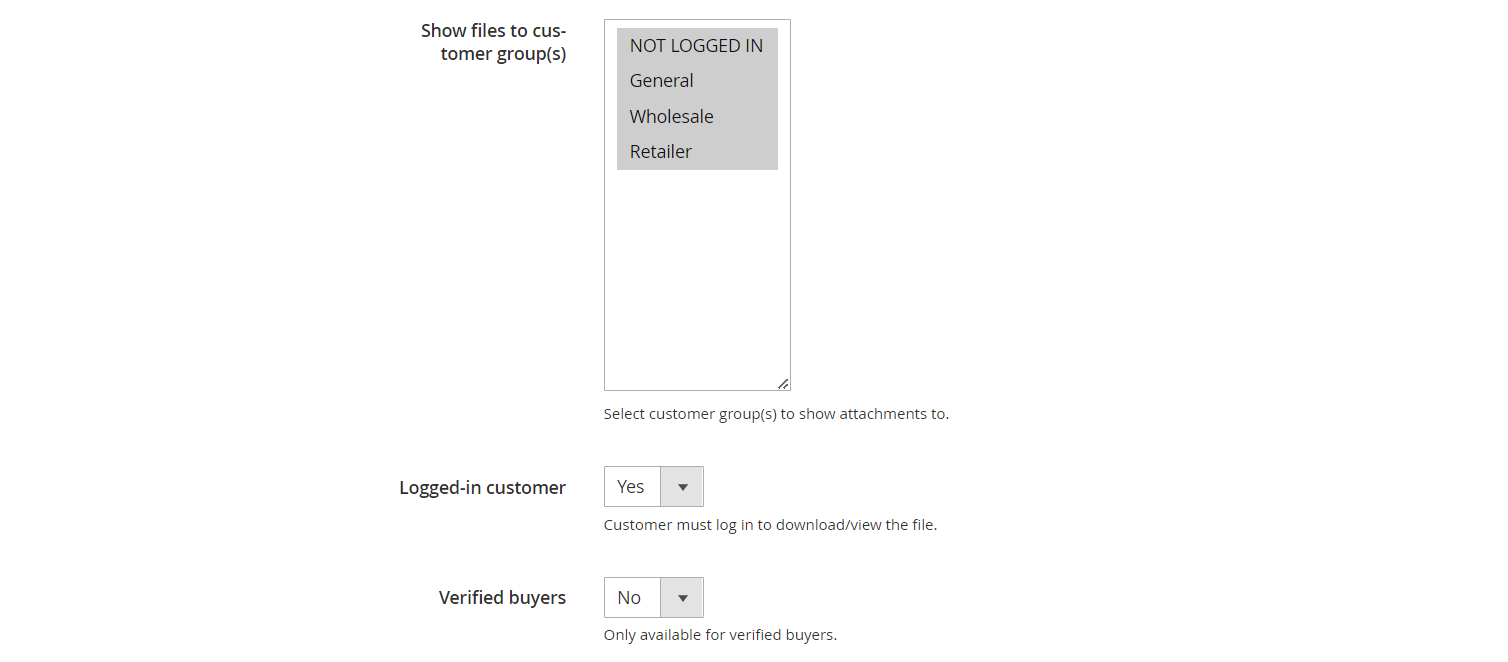
- Show files to Customer Group(s):
- Specify which customer group(s) can access the attached file.
- Show files to Customer Group(s):
- Specify which customer group(s) can access the attached file.
- Logged-in Customer:
- Select “Yes” to allow only logged-in customers to view/download the file.
- Verified buyers:
- Select “Yes” to restrict file access to customers who have purchased the product.
- If “Logged in Customer” is set to “No,” customers do not need to purchase the product to access the file.
- Order Status:
- Select the order status that enables customers to view/download attached files.
- Customer Action:
- View Online: Customers meeting the conditions of Store, Group, Login, and Verification can view the contents of the attached file online.
- Download: Customers meeting the conditions of Store, Group, Login, and Verification can download attachments.
- Select Group:
- Specify which customer group(s) can access the attached file.
- Priority:
- Attachments with higher priority values will be sorted first at the same location.
- A priority of 0 indicates the highest priority.
- Attachments added directly in the Edit Product section will be displayed first. Once all attachments in Edit Product are shown, attachments in Manage Files will be rearranged based on their priority.
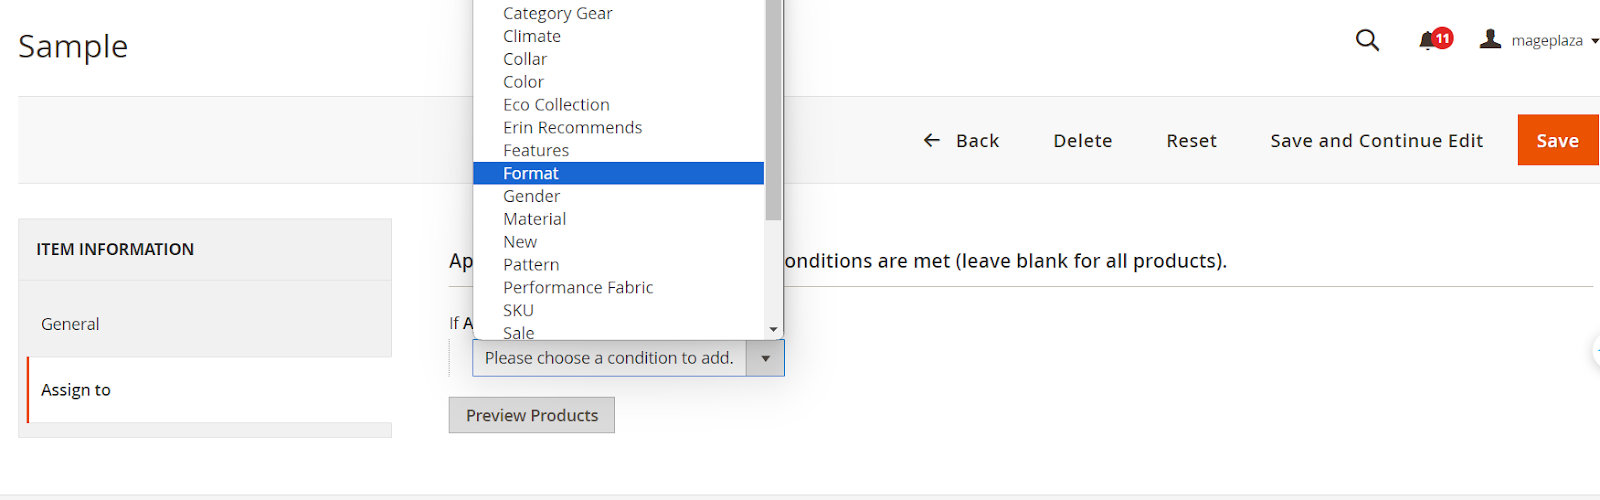
Now, go to the Assign to section

- This area lets you pick the conditions for the rule. The rule applies only to selected products.
- You can add a new condition by clicking “+” or remove one by clicking “-”.
- You can change the condition status to true/false by clicking bold text.
- Only you can see which products meet the condition by clicking “Preview Products.”

Wrap up
And that’s how to use the Magento 2 Product Attachment extension to provide customers with a more detailed picture of your products, motivating them to make purchasing decisions faster. If you have any questions related to the articles or our module, don’t hesitate to contact us.
Table of content

Jacker is the Chief Technology Officer (CTO) at Mageplaza, bringing over 10 years of experience in Magento, Shopify, and other eCommerce platforms. With deep technical expertise, he has led numerous successful projects, optimizing and scaling online stores for global brands. Beyond his work in eCommerce development, he is passionate about running and swimming.
Related Post

7 mins read
|
06-30-2026

How to Enable DebugView in GA4 for your Magento 2 store - Mageplaza
Step-by-step guide to enabling GA4 DebugView for Magento 2 merchants — verify your GA4 events are firing correctly before trusting your data.
8 mins read
|
06-09-2026

Table Rate Shipping in eCommerce: A Practical Guide
Master Magento 2 Table Rate Shipping. Learn how to configure an accurate, automated shipping matrix to optimize your checkout and boost sales.
10 mins read
|
06-02-2026
3 mins read
|
05-30-2026

Google Analytics Ecommerce Reports for Magento Merchants: What to track & Tips
A practical guide to GA4 ecommerce reports for Magento merchants, covering what to track, how to read each report, and specific tips to turn data into revenue decisions.
18 mins read
|
05-20-2026
2 mins read
|
07-30-2026
7 mins read
|
06-30-2026
How to Enable DebugView in GA4 for your Magento 2 store - Mageplaza
Step-by-step guide to enabling GA4 DebugView for Magento 2 merchants — verify your GA4 events are firing correctly before trusting your data.
8 mins read
|
06-09-2026
Table Rate Shipping in eCommerce: A Practical Guide
Master Magento 2 Table Rate Shipping. Learn how to configure an accurate, automated shipping matrix to optimize your checkout and boost sales.
10 mins read
|
06-02-2026
3 mins read
|
05-30-2026
Google Analytics Ecommerce Reports for Magento Merchants: What to track & Tips
A practical guide to GA4 ecommerce reports for Magento merchants, covering what to track, how to read each report, and specific tips to turn data into revenue decisions.
18 mins read
|
05-20-2026