


5 mins read
|
07-30-2026
How to configure Import Export CMS pages | Updated
Vinh Jacker
|
03-17-2025


Overview
Magento 2 was born in 2015 which is integrated with more advanced features than Magento 1. For the stores who want to migrate their system to Magento 2, they need to transfer everything include CMS pages and blocks. In this post, we would like to introduce the need to have this useful tool and also guide users to configure Magento 2 Import Export CMS module.
What is Import Export CMS function?
Import Export CMS tool allows admins to transfer all the data of any CMS pages and blocks from Magento 1 sites to Magento 2 sites or among various Magento 2 stores. Admins now can import and export data in bulk via csv format. For example, you could use this extension to transfer existing CMS Pages such as Home Page, Customer Service, About us, etc., from either a Magento 1 installation or a 3rd party data source and import them directly into your new Magento 2 installation. It could also be used to update and maintain existing cms pages and can be a really helpful tool for medium to large sites that could have hundreds of cms pages.
Why Magento 2 stores need Import Export CMS tool?
Exchange the CMS data among different systems
The data of CMS pages and blocks can be transferred efficiently and effectively between Magento 1 to Magento 2 sites, or from Magento 2 to any other platforms. This will help stores’ admin save time and effort when migrating their system. Also, this is a safer way to protect stores’ data and prevent any mistake occurs rather than manually import/export CMS contents.
Quickly update CMS/Block data
Some popular CMS Pages including Home Page, Privacy Policy, About Us or common CMS Blocks as Sales block, Giftcard block, Footer link blocks often have the new changes along with the sites updating over the time. Hence, Import Export CMS is built to support store owners to update these pages easily.

Automatic Import/Export technology
Be integrated with advanced tools such as AJAX and pop-up, Import Export CMS function will become helpful and brings admin great experience when managing their online stores. This helps admins keep staying on the current pages/blocks grid, not being redirected to another site. As a result, this simplifies the processes of import and export and improve the user experience.
Also, store admins can export data to both CMS and XML files. Meanwhile, they can use both types to import data to the system easily.
How to Configure Magento 2 Import Export CMS extension
In this post, we would like to introduce Mageplaza’s Import Export CMS extension, which is easy to configure and brings in excellent features for stores’ admin.
I. Configuration
Go to the Magento Admin, select Store> Configuration> Mageplaza> Import Export CMS

1. General
- Enable: Choose “Yes” to turn on the Extension
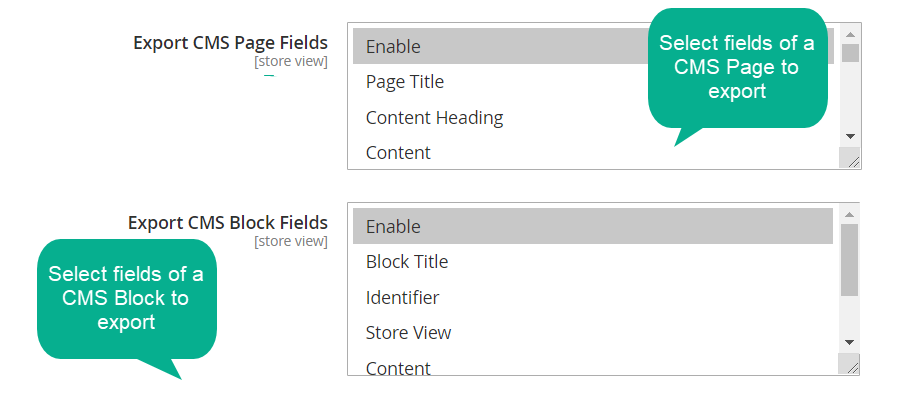
- Export cms page Fields: Admin chooses the required field when exporting CMS pages. The fields which are not selected when the file is exported, the field and its data will not be displayed in the CMS page.
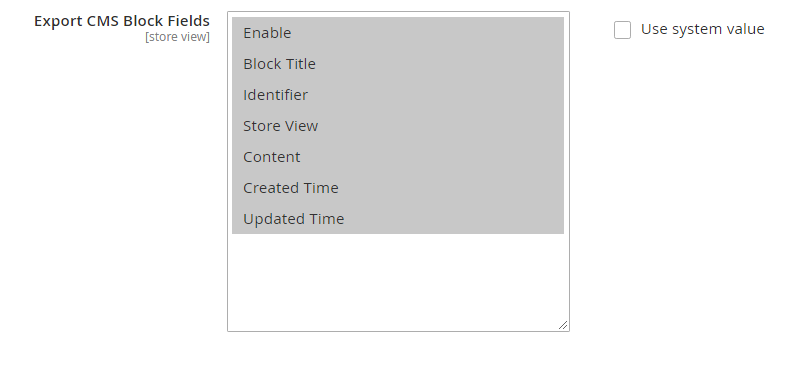
- Export cms block Fields: Admin chooses the required fields when exporting CMS blocks. The fields which are not selected when the file is exported, the field and its data will not be displayed in the CMS block.
II. Pages
1. Export Pages
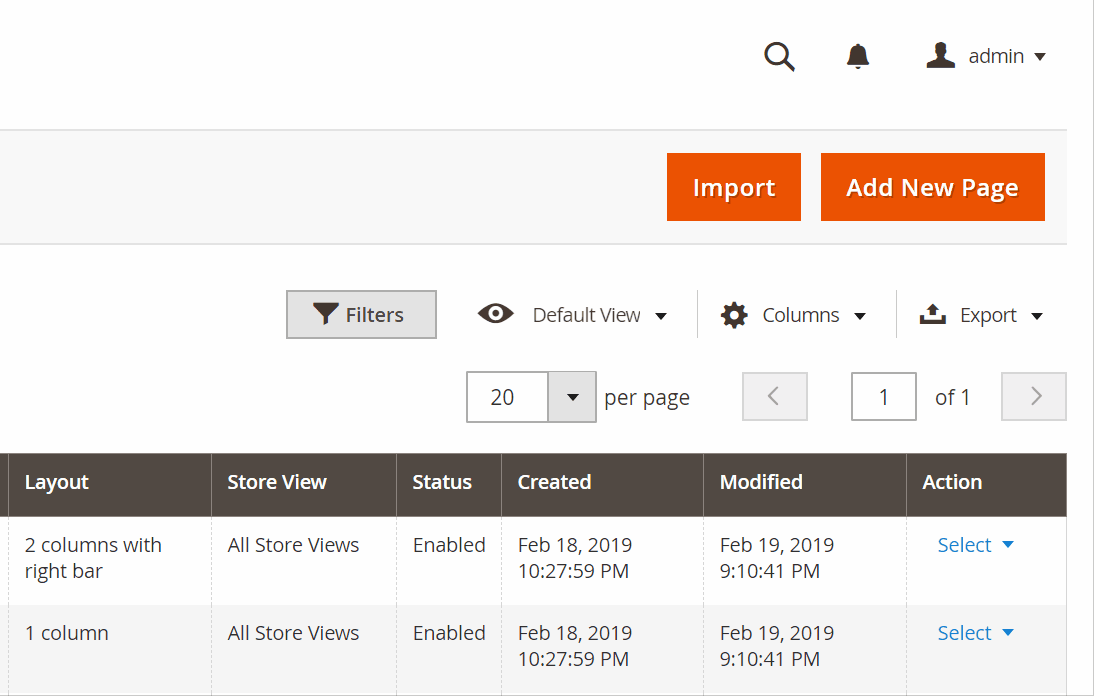
Go to the Magento Admin, select Content> Pages> Export. This is the section where the information of the created pages is recorded.
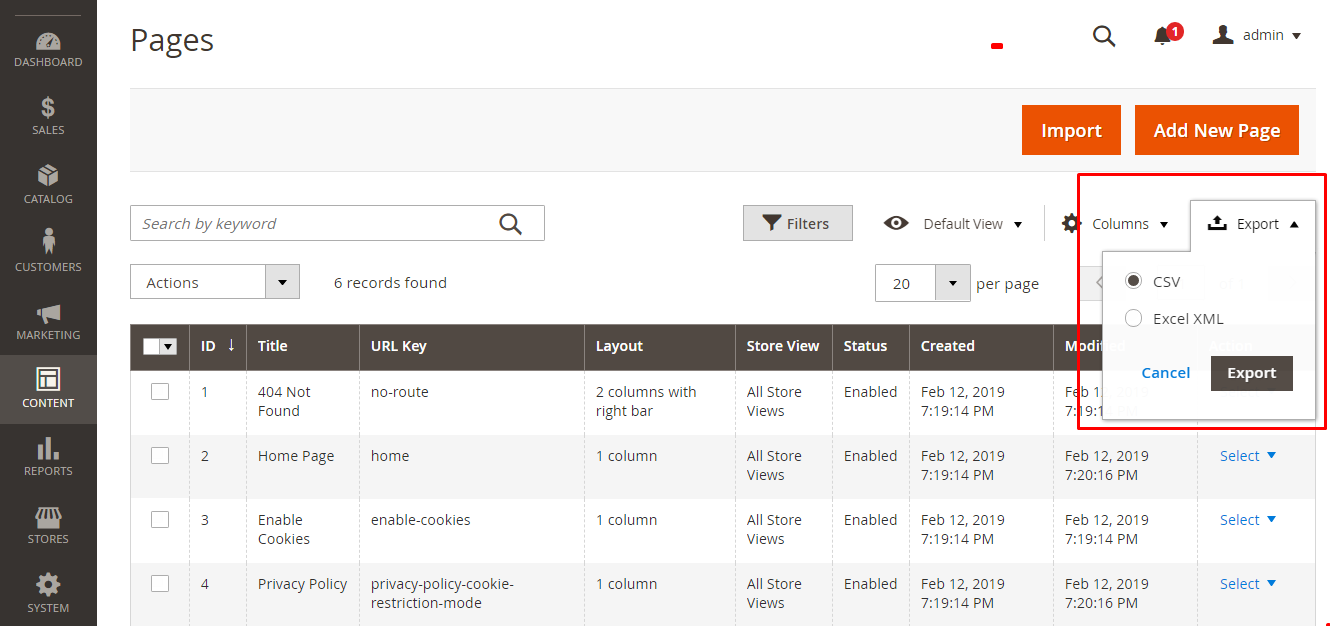
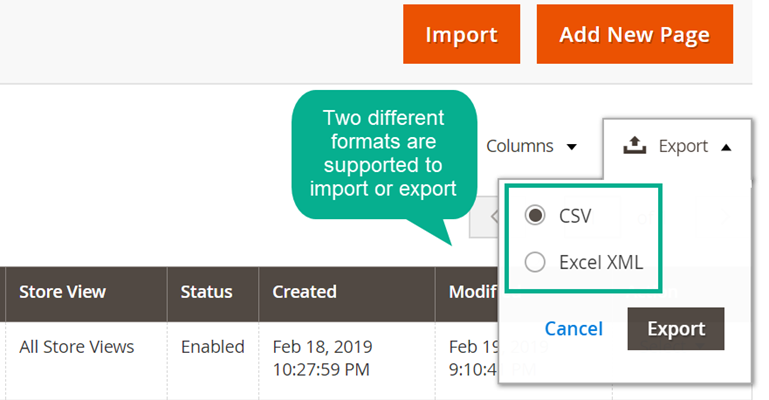
- Choose the page you want to export the file
- Choose the format of the file you want to export (CSV or Excel XML)
- Click
Exportto make the output file that you want. If you left it blank, no page selection would execute the entire page, and the exported data will be entirely based on the fields you have chosen to export the file to the page in the Export cms page Fields field at the Configuration step above. - The exported file contents are based on the chosen fields in the Configuration section.
- Click Cancel to stop export the file
2. Import Pages
Step 1: Prepare data
Go to the Magento Admin, select Content> Pages> Import.
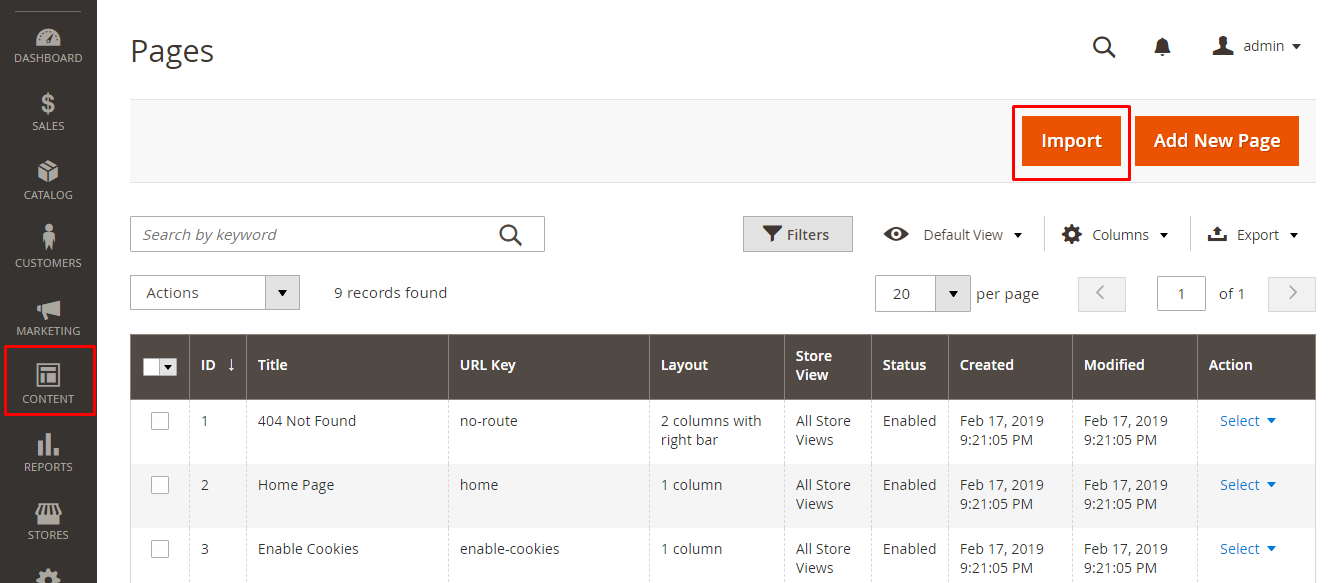
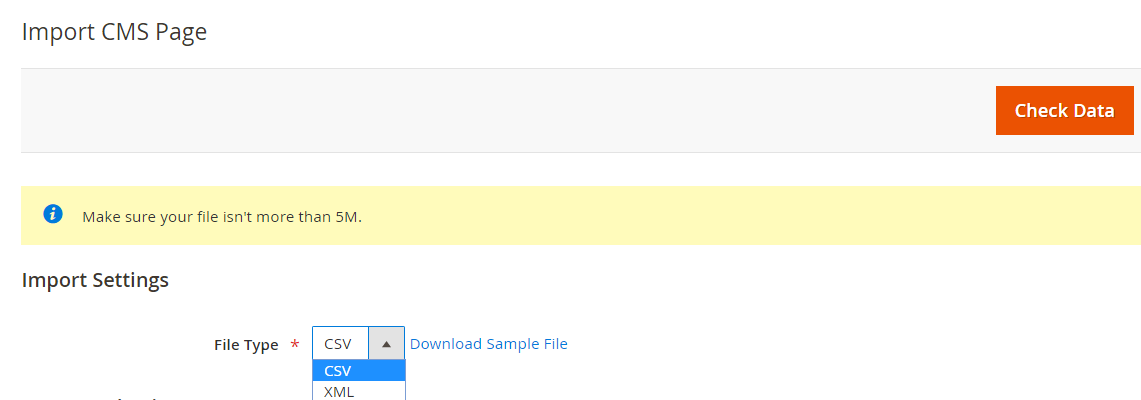
- In the Import CMS Page section, choose File Type and then click Download Sample File to download the file that you want.
- Select file type:
- We support 2 file types which admin can use to import which are CSV and XML
- For every file type, to ensure that the sample file can be imported correctly, the admin needs to download and edit it.
- Select file type:
- Remember to check that the input file size does not surpass the limit which is shown in the message which is 5M.
- In the template file, you can edit the information that you want to import

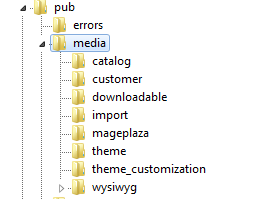
If the path to the product image is included in the input data, the image files then must be uploaded to the appropriate location. ** pub/media/** is the default location on the Magento server.
Step 2: Configure Import Behavior
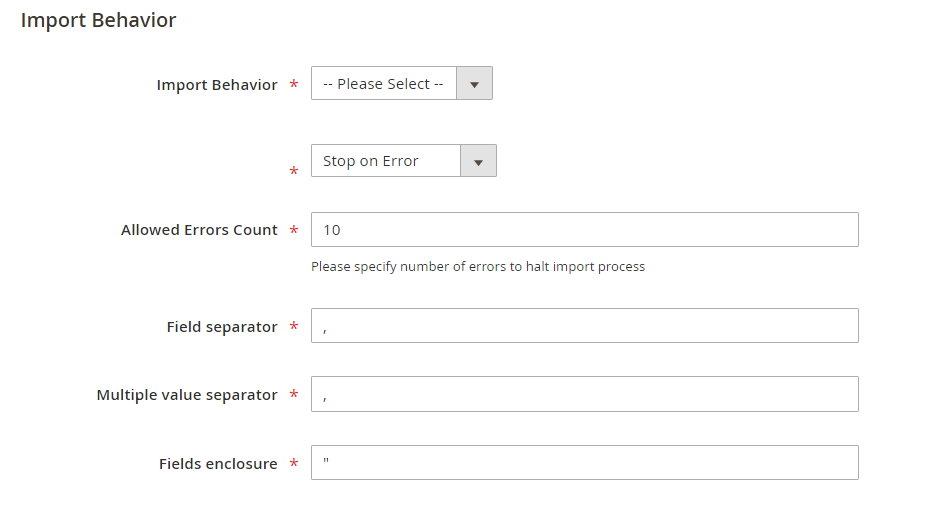
- In Import Behavior,
- Choose the action you want when data is imported in the Import Behavior field:
- Add/ Update
- Replace
- Delete
- The data stream is compared and executed according to the identity of each imported page
Stop on ErrororSkip Errorcan allow you to stop importing when an error occurs or ignore the error and continue importing
- Choose the action you want when data is imported in the Import Behavior field:
- Then, in the
Allowed Errors Countfield, enter the error number to stop the import process. 10 is the default value. - In the field separator field:
- Field separator: Enter a marker to separate the field in the column. A comma (,) is the default value
- Multiple value separator: Enter the mark to separate various values in the cell of 1 column. A comma (,) is the default value
- Note: In a CSV file, the default delimiter is a comma. To choose a different character, make sure that the data in the CSV file needs to match the character that you specify.
- Fields enclosure: To enclose the value in the column enter a mark. Apostrophe (“) is the default value
- If you choose “File Type = XML”, the “Field separator”, “Multiple value separator” fields, and “Fields enclosure” will be hidden.
Step 3: Choose File to Import

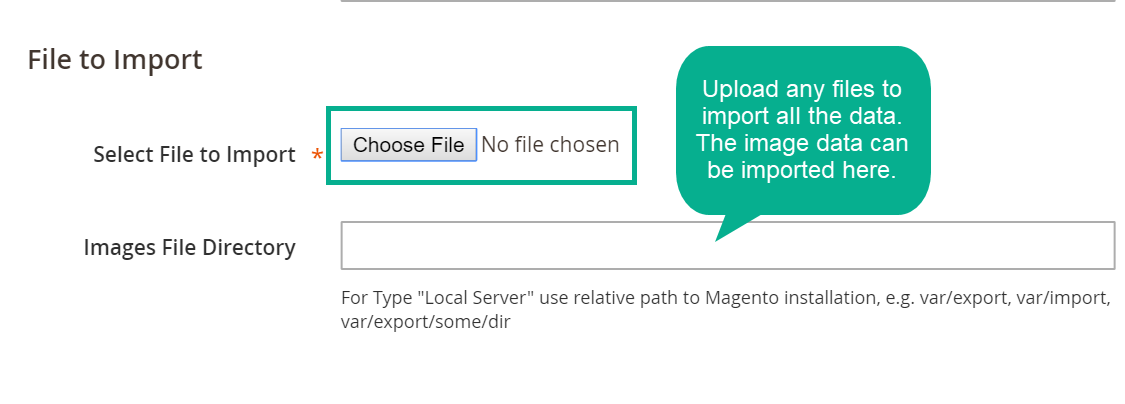
- In the Select File to Import section, click “Choose File” to choose your page input file.
- Note: If you choose
File Type = CSV (or XML), your input file have to be a CSV (or XML) file.
- Note: If you choose
- If the input includes a path to the product image, in the Images File Directory field, you need to enter the path to the image uploaded to the server. For instance: var/ export, var/ import, …
- Note: pub/ media is two paths that Mageplaza supports to lead images to the server:
Step 4: Check data and finish data entry
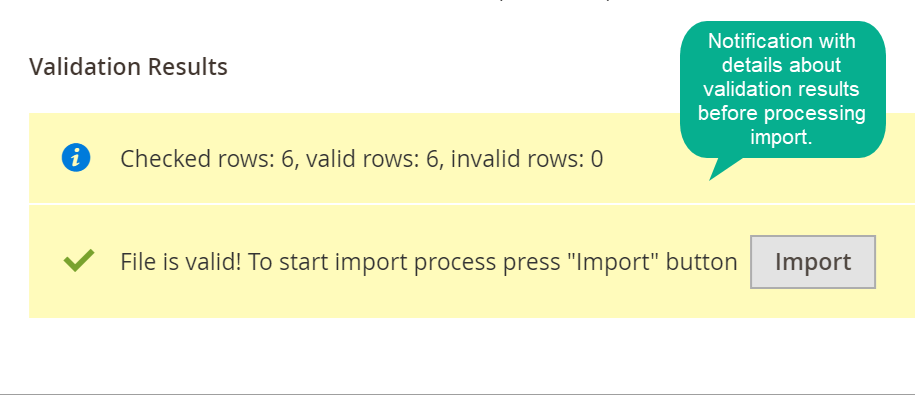
- After filling in the above information, choose “Check Data” at the top right of the popup to see if the data you entered is correct or not.
- Click “Import” which is displayed in the Validation Results section, if the file is valid

- If the upload file is invalid, please correct the error which is reported in the message and try one more time.
- Example of the error message:

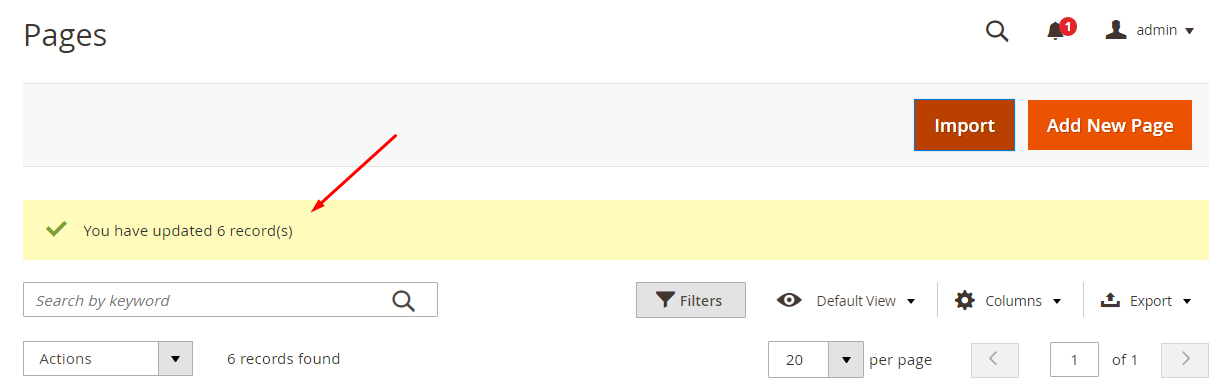
- When the import process is completed, the system will turn off the popup and displays your action message to the grid.
- Example of displaying message success on the grid.
III. Blocks
1. Export Blocks
Go to the Magento Admin, select Content> Blocks> Export. This is where the information about the created blocks is recorded.
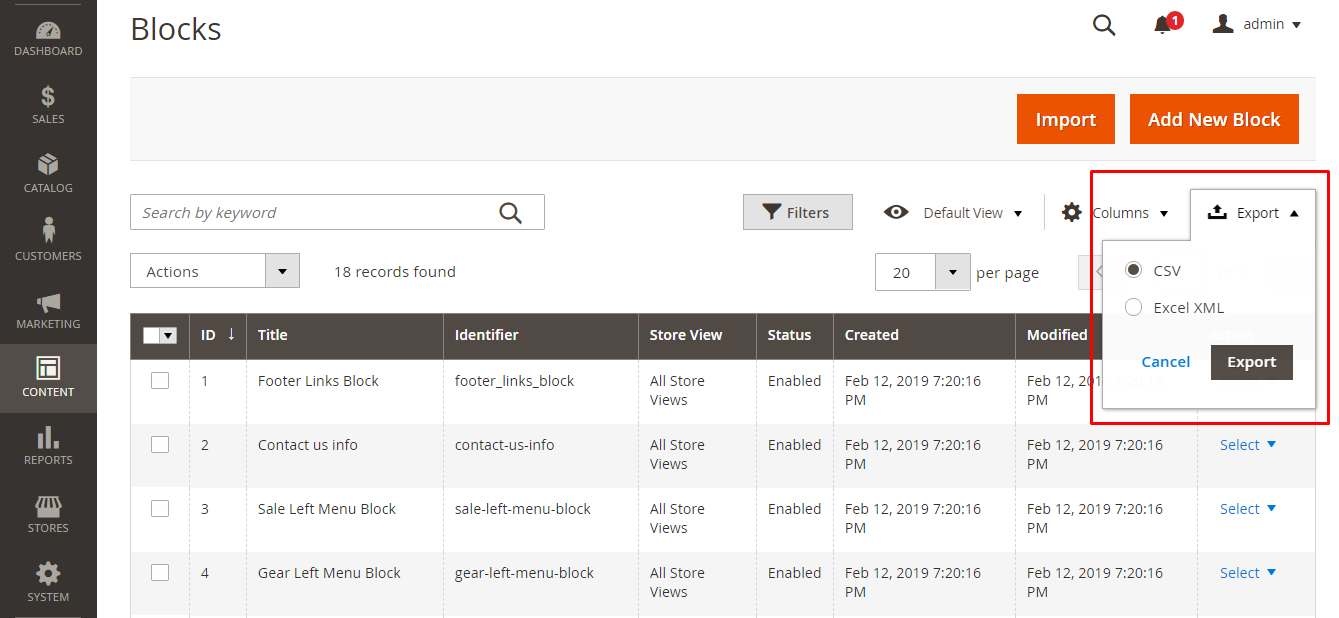
- Choose the block that you want to export the file
- Choose the file format which you want to export (CSV or Excel XML)
- To make the output file you want, click
Export. If you left it blank, no block selection would execute the entire block and the exported information will depend on the fields you have selected to export the file to the block in the Export cms block Fields field at Configuration above. - The exported file contents depend on the chosen fields in the Configuration section.
- Click Cancel to stop export the file
2. Import Blocks
Step 1: Prepare data
Go to the Magento Admin, select Content> Blocks> Import.
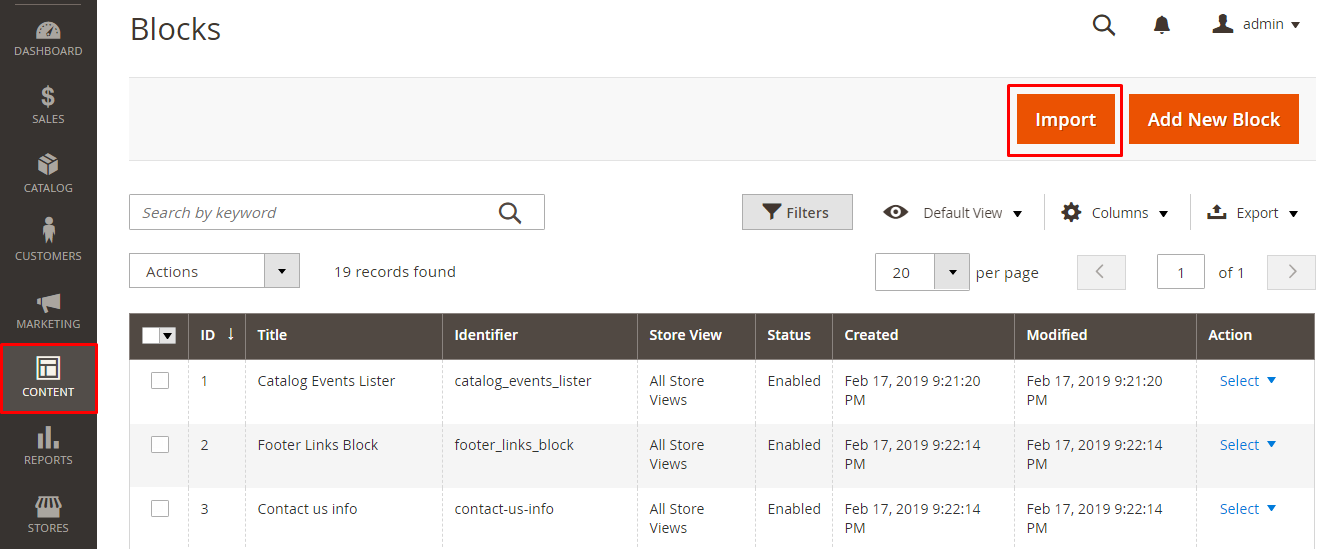
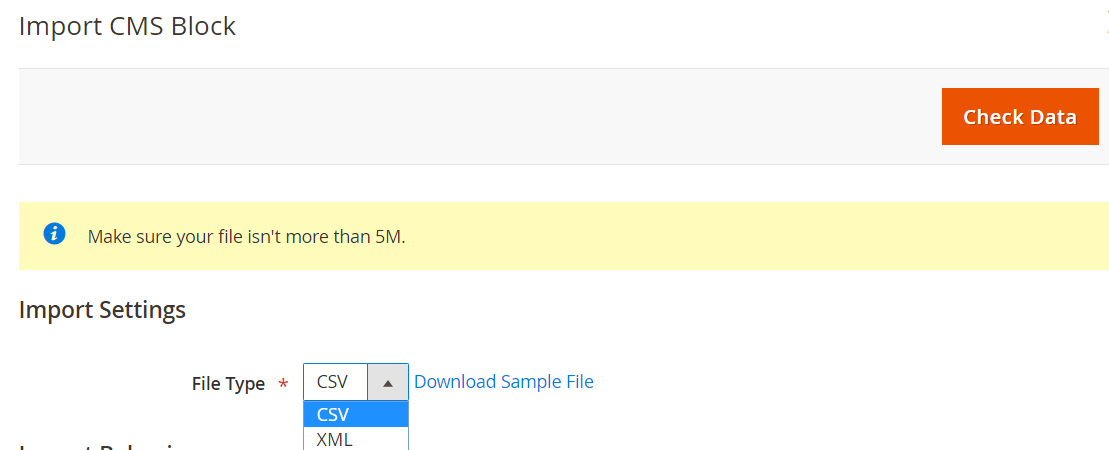
- In Import CMS Block, choose File Type and then click Download Sample File to download the file that you want.
- Select file type:
- CSV and XML are 2 file types which admin can use to import that are supported
- For every file type, to make sure that the sample file can be imported correctly, the admin needs to download and edit it.
- Select file type:
- Check to ensure that the input file size is not larger than the limit which is shown in the message which is 5M.
- In the template file, edit the information that you want to import.
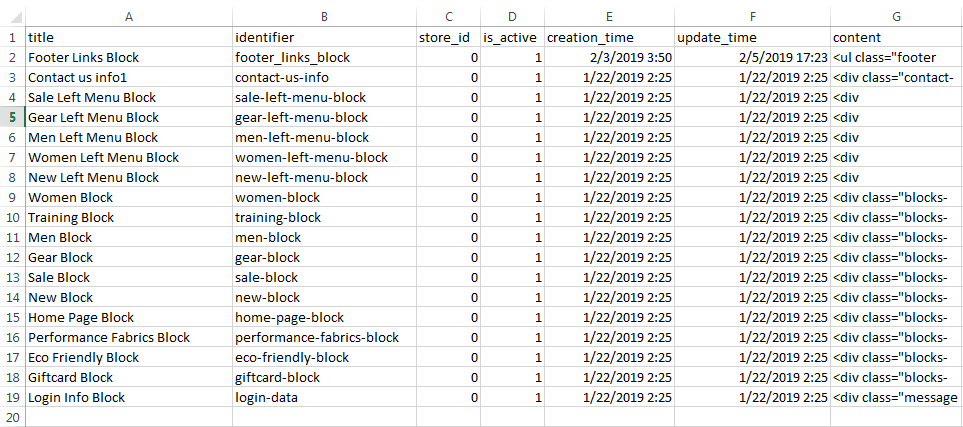
If the input data contains the path to the product image, the image files have to be uploaded to the appropriate location. ** pub/media/** is the default location on the Magento server.

Step 2: Configure Import Behavior
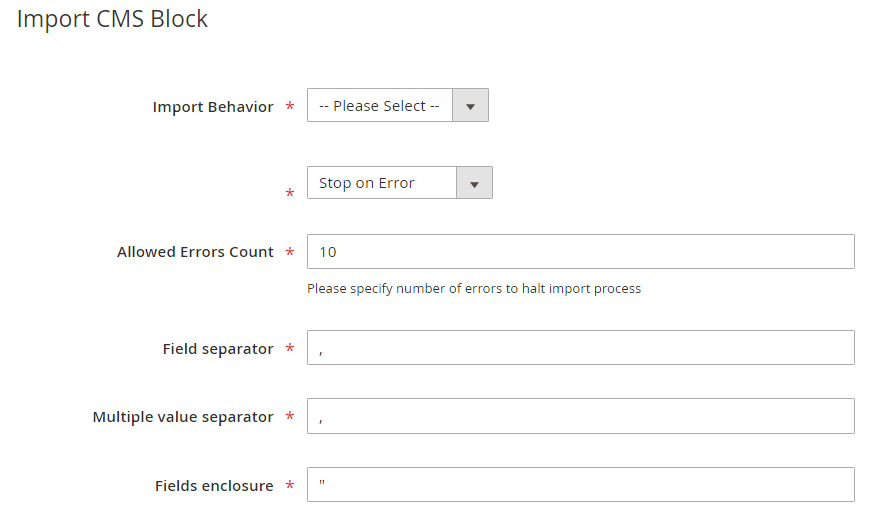
- In Import Behavior,
- Choose the action you want when you import data in the Import Behavior field:
- Add/ Update
- Replace
- Delete
- The data stream is compared and executed based on the identity of each imported block
Stop on ErrororSkip Errorcan be used to stop importing when you notice an error or ignore that error and continue importing
- Choose the action you want when you import data in the Import Behavior field:
- Then, in the
Allowed Errors Countfield, enter the error number to stop the import process. 10 is the default value. - In the field separator field:
- Field separator: Enter a marker to separate the field in the column. A comma (,) is the default value
- Multiple value separator: Enter the mark to separate multiple values in the cell of 1 column. A comma (,) is the default value
- Note: In a CSV file, the default delimiter is a comma. To use another character, make sure that the CSV file data matches the character that you specify.
- Fields enclosure: Enter a mark to enclose the value in the column. Apostrophe (“) is the default value
- If you choose “File Type = XML”, the “Field separator”, “Multiple value separator” fields and “Fields enclosure” will be hidden.
Step 3: Select File to Import
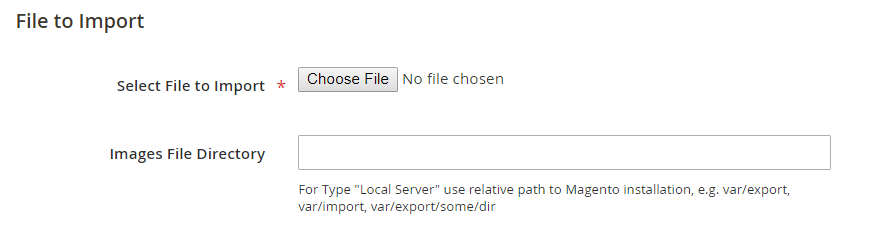
- In Select File to Import, click “Choose File” to choose your block input file.
- Note: If you choose
File Type = CSV (or XML), your input file have to be a CSV (or XML) file.
- Note: If you choose
- If the input includes a path to the product image, please enter the path to the image uploaded to the server in the Images File Directory field. For instance: var/ export, var/ import, …
- Note: The path which Mageplaza supports to lead images to the server is: pub/ media
Step 4: Check data and finish data entry
- Click on “Check Data” which is at the top right of the popup to verify if the data you entered is correct if all the information above has been entered.
- If the file is valid, click “Import” is which displayed in the Validation Results section.

- If the upload file is invalid, correct the error which reported in the message and try one more time.
- Example of the error message:

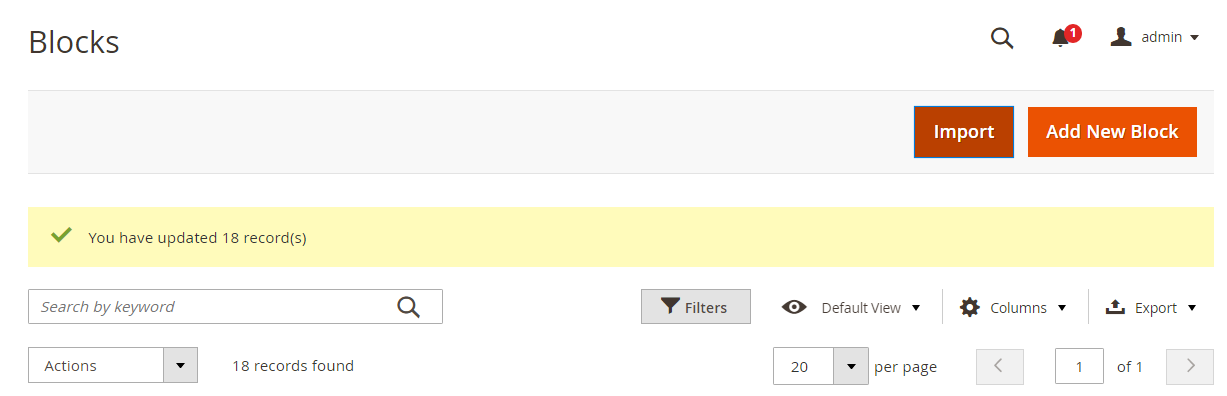
- When the import process is complete, the system would turn off the popup and displays your action message to the grid.
- Example of displaying message success on the grid.
- NOTE: If you want the page (or block) format to be removed, you should switch to a file to notepad to remove the page, to avoid any data or comma that would not remove the page.
How to reduce workload by Import Export CMS tool
Provide Flexibility Using Multiple Formats
Having the support of this module, store admins can now easily import and export data from all the pages and blocks in two common format which are CSV and XML.
Support Ajax And Pop-up
Thanks to the support of Ajax and pop-up, redirecting or page reloading actions will no longer happen when you import or export data.
In addition, once you have selected the page or block, the export file can be downloaded immediately with just one click. In the meantime, admins can upload a CSV or XML file on the pop-up, then one-click for the data to be validated. The CMS pages/blocks grid will update automatically without reloading.
As a result, the user experience would be increased significantly during working.
All Information Can Be Imported
Using this extension, store admins can import all CMS Pages or Blocks information. The data which is imported between sources are fully transferred after the admins upload any file. This would help prevent the information from being missed, especially the small ones.
Moreover, this module also supports admins to import data which includes the images of products
Select Attributes To Export
Because there are numerous fields in a CMS page or block admins would want to export only some specific data which are necessary. With Import Export CMS extension by Mageplaza, this can be done with ease.
From the backend, admins can choose particular fields in a page or a block such as Page Title, Content, URL key, Identifier, etc.
Display Detailed Validation Notification
This is an advanced feature of this extension. The notification about the validation results will be displayed in a clear and detail way.
Consequently, this can help notice the admins promptly whenever there are errors during the process as well as when the files are valid to import.
Full Features List of Import Export CMS extension
General Configuration
- Enable/ Disable the module
- Choose CMS page fields to export
- Choose CMS block fields to export
Export Cms Pages/ Blocks
- Choose a specific page/block to export data
- Export files in CSV or XML format
Import Cms Pages/ Blocks
- Choose the type of file to import data
- Download and edit the file
- Add, Update, Replace, or Delete the import process
- Stop the import process or ignore errors when they happen
- Enter the error number to stop the import process
- Allow separating fields in a column, in the value of a cell by entering the marker
- Allow enclosing the value in a column by entering the marker
- Upload the input file in order to import data
- Input the location for the image files if they are included in the input data
- Review data and view validation results
- Fix the errors or go ahead with importing if there is no error
Final Words
Nowadays, more and more business use e-commerce sites. Therefore, shop owners have to cooperate with various suppliers to add products to their stores. With Magento 2 Import Export CMS extension, customers can easily transfer CMS data from one Magento 2 site to another by using the Import/Export function.
Table of content

Jacker is the Chief Technology Officer (CTO) at Mageplaza, bringing over 10 years of experience in Magento, Shopify, and other eCommerce platforms. With deep technical expertise, he has led numerous successful projects, optimizing and scaling online stores for global brands. Beyond his work in eCommerce development, he is passionate about running and swimming.
Related Post

7 mins read
|
06-30-2026

How to Enable DebugView in GA4 for your Magento 2 store - Mageplaza
Step-by-step guide to enabling GA4 DebugView for Magento 2 merchants — verify your GA4 events are firing correctly before trusting your data.
8 mins read
|
06-09-2026

Table Rate Shipping in eCommerce: A Practical Guide
Master Magento 2 Table Rate Shipping. Learn how to configure an accurate, automated shipping matrix to optimize your checkout and boost sales.
10 mins read
|
06-02-2026
3 mins read
|
05-30-2026

Google Analytics Ecommerce Reports for Magento Merchants: What to track & Tips
A practical guide to GA4 ecommerce reports for Magento merchants, covering what to track, how to read each report, and specific tips to turn data into revenue decisions.
18 mins read
|
05-20-2026
5 mins read
|
07-30-2026
7 mins read
|
06-30-2026
How to Enable DebugView in GA4 for your Magento 2 store - Mageplaza
Step-by-step guide to enabling GA4 DebugView for Magento 2 merchants — verify your GA4 events are firing correctly before trusting your data.
8 mins read
|
06-09-2026
Table Rate Shipping in eCommerce: A Practical Guide
Master Magento 2 Table Rate Shipping. Learn how to configure an accurate, automated shipping matrix to optimize your checkout and boost sales.
10 mins read
|
06-02-2026
3 mins read
|
05-30-2026
Google Analytics Ecommerce Reports for Magento Merchants: What to track & Tips
A practical guide to GA4 ecommerce reports for Magento merchants, covering what to track, how to read each report, and specific tips to turn data into revenue decisions.
18 mins read
|
05-20-2026