How to Build a Website in 2024: A Complete Guide for Beginners
Summer Nguyen | 07-12-2019

The Most Popular Extension Builder for Magento 2
With a big catalog of 224+ extensions for your online store
Constructing your own website may seem daunting, especially if you’re new to the process. Even for a basic site, you’ll need to navigate web hosting, purchase a domain, and decide on the technology for building it. Additionally, there’s the learning curve of mastering the chosen technology and setting everything up before you can publish content.
The reassuring news is that creating a website is now more accessible than ever, thanks to numerous tools designed to simplify these tasks. While any web project demands effort, you don’t have to be a developer to craft an impressive website. Patience and time are key as you navigate through the necessary steps.
This article aims to guide beginners through the entire website-building process. Let’s get started!
Starter Pack Infosheet for Magento 2
An all-in-one solution for every new Magento 2 store

Is it easy to build a website?
Creating your own website has become more accessible than ever, even if you lack any coding experience.
If the idea of building a personal or business website seems daunting, there’s reassuring news: it’s a task you can effortlessly tackle.
As a complete beginner, you have several options for building your website or create a blog, and the process can be an enjoyable experience!
This step-by-step tutorial will walk you through choosing the most suitable approach for building your website and provide precise instructions on how to achieve it.
How to Build a Website: 9 Steps for Beginners
Step 1: Pick a Domain Name
When it comes to how to build a website, a domain name, the part of the URL identifying a web page, such as websitebuilderexpert.com, is crucial for your website. While you can register it separately on sites like Domain.com, many website builders offer to handle it for you, often for free initially.

Choosing a domain name requires careful consideration as it plays a significant role in how your site is perceived on the internet. Follow these guidelines when selecting a domain:
-
Relevance: Ensure the domain aligns with your site’s content. For instance, if your company is about clothes, a domain like sheshoes.net would not be a perfect choice.
-
Conciseness and Memorability: Opt for a short or at least memorable domain. Lengthy domains with numerous characters can appear awkward and are easily forgettable.
-
Avoid Numbers: Steer clear of using numbers in your domain, as it tends to look unprofessional and adds complexity for users to recall.
-
Consider Expansion: Plan for the future by choosing a business and domain name that allows for growth. For example, “Bakes Cakes” limits you to selling cakes, whereas “Baking & Sodas” provides room for expansion into various baking areas.
-
Check for Existing Branding: With millions of websites already in existence, verify that your chosen domain stands out and doesn’t conflict with existing branding. Research its uniqueness before finalizing your decision.
Step 2: Select Website Hosting or Builder
Website Builder
A Ai website builder is an online tool that lets you create a website easily from templates without coding. It handles technical aspects like hosting, making it a time-saving and beginner-friendly option.
For those with coding knowledge, hosting is an alternative. You choose a provider and build the site using platforms like WordPress for more creative freedom, though it’s more technical.
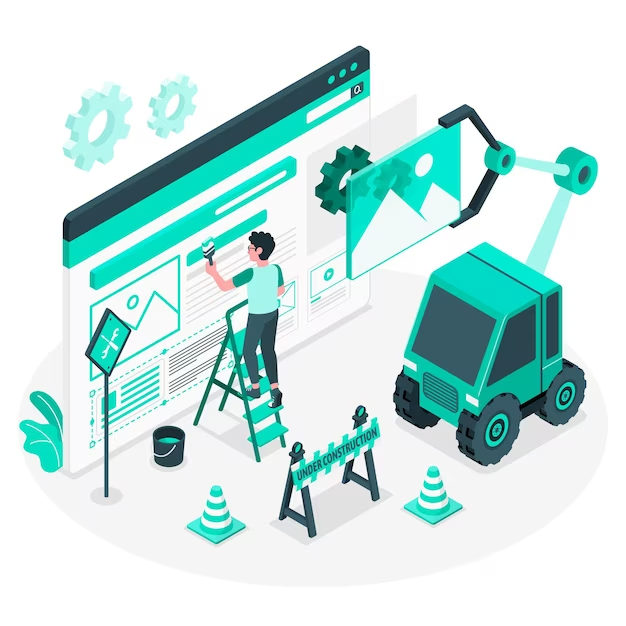
Another option is hiring a web designer, but it’s costlier than a website builder subscription.
Our researched list affirms that a website builder is the best option – affordable, less intensive, and offering design choices. Let’s explore some top-reviewed website builders: Shopify

Shopify, a user-friendly no-code website builder, empowers you to effortlessly create a recognizable online storefront, complemented by a custom domain for brand establishment.
Shopify offers versatility with thousands of themes, connectivity to 8,000+ apps, and tools like centralized inventory tracking, ecommerce SEO, SSL certificates, and more.
Pros:
-
Low entry barrier
-
A vast app marketplace
-
Seamless social media selling
Cons:
-
Lack of email hosting
-
Transaction fees for non-Shopify payment gateways
Wix
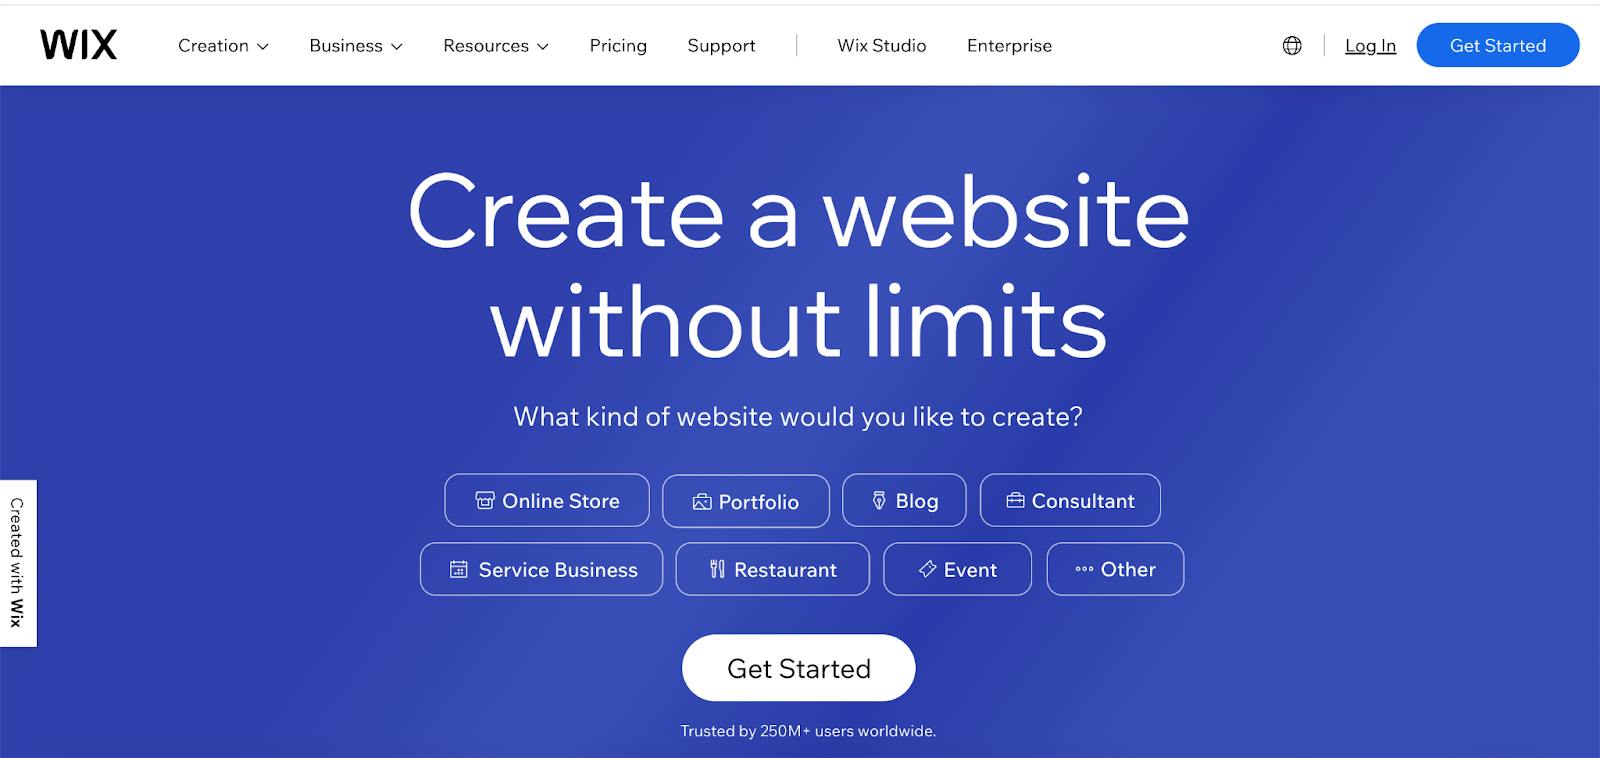
Wix is an ideal choice for starting an ecommerce website, featuring an easy-to-use drag-and-drop builder for complete online stores, complemented by product categorization, discount promotions, and customer reviews.
Wix offers a library of pre-made templates, allowing you to create a unique website reflecting your brand’s voice. Advanced features include abandoned cart emails, inventory tracking, customer segmentation, and support for various business models.
Pros:
-
Intuitive interface
-
Eye-catching imagery
-
Customizable business models
Cons:
-
Limited storage in the free plan
-
Challenges in integrating third-party services
BigCommerce

BigCommerce is an all-in-one ecommerce platform designed for high-growth online stores, boasting omnichannel capabilities and a robust architecture capable of handling high traffic and sales volumes without compromising speed.
With features like FeedAi™ and FeedDNA™ for automatic categorization, BigCommerce integrates with tools like Feedonomics and Codisto, enabling sales expansion across digital marketplaces, social commerce platforms, and search engines.
Pros:
-
Time-saving AI features
-
Great for SEO
Cons:
-
Steeper learning curve
-
Pricing plans come with annual sales thresholds that automatically trigger upgrades
WooCommerce

WooCommerce, an open-source plugin for WordPress, seamlessly turns your existing WordPress site into a feature-rich ecommerce store, making it an excellent choice for businesses prioritizing content marketing or already relying on WordPress.
Customization options include free or paid themes, multiple languages, currency options, and numerous plugins for additional features. WooCommerce supports over 70 payment gateways and offers regular updates for security.
Pros:
-
Integration with existing Wordpress sites
-
Live shipping rates
-
Multiple secure payment options
Cons:
-
Incurring potential additional costs
-
Businesses have to handle hosting and security measures
Hosting Provider
Another approach to building your website involves using a hosting provider and constructing your site through WordPress. By choosing a hosting provider, you pay for space and storage on a server, and then leverage the flexibility of WordPress to develop your website.
WordPress differs from traditional website builders in that it doesn’t rely on standard templates. Instead, every element of a WordPress site can be edited through coding, offering unlimited creative freedom for those with coding skills. Although this method requires more effort than using a website builder, some users appreciate its versatility and cost-effectiveness. Notably, around 43% of all websites use WordPress.
Hosting providers offer various plans based on size, with options ranging from shared hosting for smaller sites to VPS for small-to-medium sites like online boutiques. Dedicated hosting is reserved for the largest sites and online stores. Additionally, many providers provide specialized managed hosting plans for WordPress and e-commerce, offering dedicated support and assistance with technical aspects.

Step 3: Sign Up For a Plan
After selecting a website builder, the next step on how to build a website is to sign up for a suitable plan. Website builders typically offer multiple plans to accommodate different site needs, ensuring you only pay for the features and tools you require.

According to Forbes, these plans come with varying prices, generally falling in the range of $10 to $40 per month, often offering an all-inclusive package. If you’re on a budget, you can opt for a free website builder plan, although it’s essential to be aware of their limitations, which we’ll discuss shortly. Alternatively, you can explore our list of the most affordable website builders.
As compared to hiring a web developer, using a website builder allows you to create a fully functional website at a fraction of the cost, making it a cost-effective and accessible option for individuals and small businesses.
Step 4: Customize Your Template
After selecting a website builder, signing up for a plan, and registering a domain, it’s time to create your website. Website builders offer templates that serve as a framework for your site’s design. Choose from a variety of templates based on your plan, with options for fitness, photography, restaurants, online stores, and more. Pre-made designer templates by Hostinger provide a wide array of responsive and beautifully designed options that cater to various needs, from personal portfolios to comprehensive eCommerce sites. Each template is designed for success, allowing you to customize and launch your own website in minutes.
Think of templates as the “clothes” for your website. If one doesn’t suit you, switch to another for a fresh look. Customization options are abundant in modern website builders, offering flexibility. You can:
-
Add new pages to your navigation
-
Adjust the size, colors, and fonts of buttons
-
Integrate new elements like contact forms and menus
-
Edit images in your homepage gallery
-
Choose a different color palette
-
Link or embed social media channels
Consider building a website like cooking a meal—templates provide a recipe, and customization adds your unique flavor. The best website builders guide you through customization, making web design accessible. Don’t hesitate to experiment; you’ll be surprised by what you can achieve.
Step 5: Add Website Features
No matter what functionalities you require for your website, you can be assured that there is an application or alternative method to incorporate the specific features you need. Applications enable you to enhance your website effortlessly, instantly providing additional features like forms and social media integrations.
Integrating Apps into Your Website
The process of installing these applications is extremely straightforward – just visit the App Market (or equivalent platform) for your website builder. Similar to the App Store, this marketplace displays the cost (though many apps are free), functionality details, and user ratings for each application.
Creating Contact Forms
If your goal is to encourage potential customers or clients to reach out for more details, a contact form with their information is essential. Typically, website builders include this feature in the “Contact” page. If it’s not there, adding it is a simple task.
Just create a “Contact” page, add a new section, and search for “contact form” to access a variety of pre-designed form templates alternatively, you can use a form builder. Some of these templates may include Google Maps for customers to locate your physical business, while others provide sections for email and phone information, which is beneficial for online-only businesses.
These same steps can be applied to incorporate email subscriptions and social media integrations into a page. Just add a new section and search for the desired features. If the website builder lacks pre-designed contact forms or if you’re not satisfied with the available styles, you can create your own. Simply include the necessary information on the page, along with form boxes for:
-
Business address (if you run an offline store)
-
Business opening hours
-
Business phone number
-
Business email address
-
Customer’s name
-
Customer’s email
-
Message box for customer input
-
Business social media links and other contact information
Adding a Blog or News Section Using a Website Builder
While each website builder is unique, many top performers offer the option to add a blog during the initial setup. If not, you can easily include a blog or news section by creating a new page and selecting “Blog.” Once added, you can edit the style of your blog as you would any other webpage.
Setting Up E-commerce Functionality
Numerous website builders provide the option to integrate an online store into your website. Typically, you’ll need to subscribe to a plan to start selling. Some builders, like Shopify, are specifically designed for various store sizes and inventory needs. Shopify also includes features such as AI to assist in writing product descriptions.
This is particularly advantageous for managing a large category of items with distinct descriptions. By clicking on the three stars, you can provide the AI with a few keywords, and it will generate text in the preferred tone. Always review AI-generated content for accuracy before adding it to your website.
Step 6: Create and Upload Engaging Content
To engage visitors effectively on your website, focus on capturing and maintaining their attention through optimized and diversified information delivery. Begin by exploring the array of content types your website can host, including text, images, videos, and animations.

Organize Your Content Hierarchy
To enhance the browsing experience, maintain a well-organized site. Prioritize placing attention-grabbing and crucial content above the fold, ensuring it’s visible without scrolling. Recognize that some visitors skim content, so optimize design for easy consumption. Utilize media features like videos, images, and infographics to make written information more digestible. Highlight key details with larger fonts or contrasting colors.
Leverage AI Tools for Content Creation
Consider employing AI tools to expedite content creation. Explore the capabilities of AI website builders to streamline your website development.
Emphasize SEO
Implement search engine optimization (SEO) to enhance your site’s visibility on search engine result pages. Set up your site for success from the beginning to increase the likelihood of attracting prospective clients, driving product sales, or gaining readership for your blog.
Optimize for Mobile
Acknowledge the prevalence of mobile internet use, with over 50% web traffic originating from smartphones and tablets, according to Google. Prioritize mobile-first indexing for better search engine rankings. Invest time in mobile-friendly features and design for an intuitive user experience on smaller screens. Choose a website builder with a mobile editor, ensuring adjustments for mobile devices won’t affect the desktop version.
Ensure the quality of your website’s content is at its peak – explore our tips for additional insights:
-
Crafting an Effective Call to Action: Discover techniques to prompt visitors to click on your CTA buttons.
-
Creating an About Us Page: Explore 9 dos and don’ts for a successful About Us page.
-
Perfecting Product Descriptions: A must-read for those establishing an online store.
-
Writing for the Web: Uncover essential writing tips for your online business.
Step 7: Make Your Site SEO Friendly
Once your website is ready for launch, it’s crucial to carefully consider its release strategy. With over a billion websites competing for attention, many of which may share similarities with yours, preparing and optimizing your site before going live is essential to gain a competitive edge.
This optimization process, known as SEO (Search Engine Optimization), involves various tasks aimed at earning favor from Google and increasing your site’s visibility online, ultimately attracting more traffic. Google prioritizes sites with quality content that satisfies visitors, avoiding low-quality or bot-filled sites. Even before implementing an SEO strategy, your website should include:
- Quality Copy: Invest effort in crafting compelling and informative content, as visitors engage with the words on the screen. Every aspect of your website’s copy should be well-crafted.
Good User Experience (UX): The way visitors navigate your website significantly impacts their experience. Poor UX can lead to site abandonment, so ensure clear labels and easy navigation throughout.
-
Images: Incorporate visuals to showcase information rather than relying solely on text. Images not only enhance understanding but also break up large blocks of text, preventing monotony.
-
Correctly Titled Headings: Maintain a clear hierarchy in your content structure, assigning appropriate titles and headings. Google penalizes sites with disorganized heading structures, so ensure consistency, with each heading level appropriately labeled (e.g., H1, H2, etc.).
There are some tools that can support to your SEO optimization process:
Keyword Planner Utilize Google Ads’ free Keyword Planner, a powerful tool for identifying search trends and competitor targeting. Optimize your content by incorporating high-traffic keywords naturally, avoiding overuse to prevent potential ranking issues.
Google Analytics Track your website’s visitor sources and behaviors with Google Analytics. Monitor daily visits, assess page popularity, and understand visitor demographics. Set it up early to gather valuable insights from day one, as most website builders offer easy integration.
Step 8: Test Your Website
Once you’ve selected and customized your template, polished your content, and optimized it for search engines, the excitement to publish your website may be overwhelming. However, it’s crucial to exercise caution and not rush into publishing blindly. Follow these steps before making your website live:
-
Preview Changes: Before publishing, check how your site looks and functions on desktop and mobile devices.
-
Spelling and Grammar: Verify content for errors that may impact professionalism and impressions.
-
Test Menu Buttons: Ensure smooth navigation by confirming the functionality of menu buttons.
-
Assess Purpose: Reevaluate if your website fulfills its intended purpose and aligns with goals.
-
Consistent Formatting: Check for a uniform and visually appealing appearance across the site.
-
SEO Optimization: Double-check meta tags, keywords, and other SEO elements for enhanced visibility.
-
Desktop and Mobile Functionality: Test site functionality on both desktop and mobile screens for a seamless experience.
-
Loading Speed: Verify that your website loads quickly to prevent user frustration and potential SEO impacts.
By addressing these key questions and conducting thorough testing, you can ensure that your website is polished, functional, and ready for a successful launch. Taking the time to review these elements will help you avoid the disappointment of publishing an unfinished or flawed site after all your hard work.
Step 9: Publish Your Website
Fantastic! Everything is set, and it’s time to hit the “Publish” button. Your site is officially live, and it’s ready to be explored by a global audience.
Remember, making changes to your site after publication is a straightforward process. However, keep in mind that some website builders may restrict the ability to switch templates once your site is live. Always check the platform’s guidelines to ensure a seamless experience as you continue refining and improving your online presence. Now that your website is out there, enjoy the journey of sharing your content and connecting with your audience!
How to create a user-friendly website?
Understand your targeted audience

In the process of how to build a website, prioritizing your customers is crucial. If you’ve gained offline customers, it’s a strong foundation for your website idea.
Plan carefully, considering user experience to retain both old and new customers. Choose a platform that suits your products/services, ensuring it’s user-friendly (to achieve this opt for user friendly website builders from day one). Connect with new customers by radiating trust and showcasing expertise in your field. Demonstrate the value they can derive from the website, making it a comfortable and convenient experience.
Tips:
-
Ask your audience. Let them leave feedback or rate the friendliness of your website
-
Surf around the internet for alike websites. You will learn a lot from your competitors
Make a smart-looking and responsive website
First impressions on your website are crucial, influencing customer decisions to stay or leave. Efficiently organize content, prioritize customer service elements, and include a user-friendly search function. Ensure readability with font considerations. Customize your theme to match your brand and stand out, avoiding excessive sliders for a positive user experience.

Tips:
- Pick a relevant theme. See theme collections for Magento 2
- Employ chatbots if necessary
- Feature a friendly instant search box (AJAX technology is preferred)
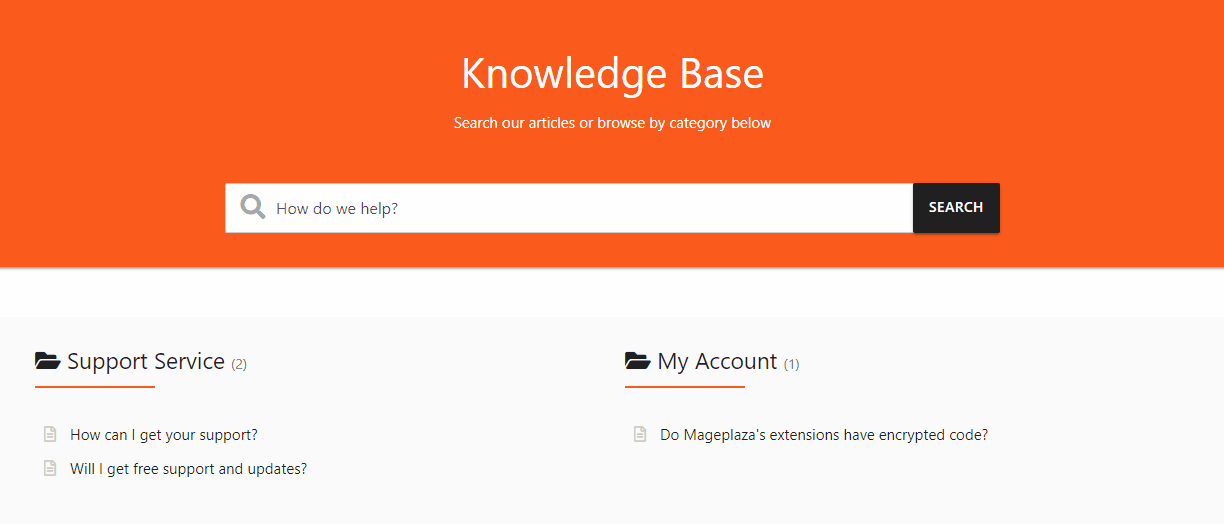
- Re-design and try to optimize your FAQ page
- You can ask for support from a team of reputable web design experts
Crucial business information should be prioritized
For many visitors, when surfing an online store, they might not find products but the company’s basic information first. You have to display your business information such as name, contact info, addresses, social media, what your company is about, your missions so that new customers can have an overview of your business and gradually conceive their trust.

You may want to show some great comments of your biggest partners or customers on the home page to raise credibility. Or some infographic about your company’s ranking (if it is helpful) can be a plus point to prove your excellent business.
Clear navigation is in need
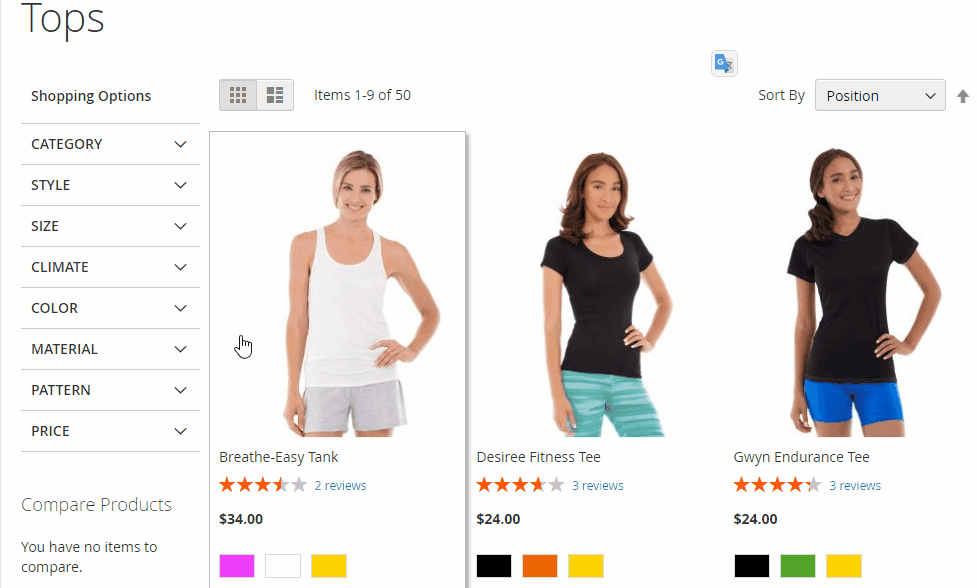
Ensure your customers don’t get lost by maintaining a straightforward navigation bar. Keep it basic to avoid overwhelming them. Cleverly label content pages based on your navigation strategy and what customers might find most convenient. Consider the standard tendency for vertical navigation on the left and horizontal navigation on top. Choose what suits your site best for simplicity and user-friendliness. In e-commerce, layered navigation is essential, particularly for stores with numerous products. Prioritize clear and user-friendly navigation to enhance the customer experience.
Tips:
Don’t play with your visitors’ familiarity with the navigation. They will always prefer the left sidebar Keep the navigation and menu bar simple and easy to search for products AJAX loading in layered navigation is good for loading speed
Fewer choices but with more details
Simplicity is key. Focus on what sets you apart and stay within your capabilities for efficiency. Understand your ideal customers to provide what they truly need, making your products and services more profitable for a prosperous business.
To reduce customer confusion, provide detailed information. Clear product descriptions, feedback, and tutorial videos enhance customer comfort. According to Forbes, 65% of senior executives visit a vendor’s website after watching a video. Professionalism builds trust, encouraging customers to engage with your business.

A useful blog

This is where customers may justify whether you take care of your website or not. A blog can share other helpful content to support your customers. Fresh content should be created regularly on the blog so that you can keep your customers up-to-date. Do not hesitate to be creative, you can insert videos, photos, graphics or any new form of content to make your blog an interesting place to read.
Tip: If you’re looking for a free tool to build your blog on Magento 2, take a look at Better Blog extension.
Pay attention to mobile version

Many companies make the mistake of prioritizing desktop websites and neglecting the mobile version. With the prevalence of smartphones and tablets for online shopping, overlooking mobile users can lead to losing potential customers. Ensure your website caters to smartphone users to avoid missing out on a significant audience. Optimize the checkout function for mobile users by making it quick and simplified, considering limited screen size for enhanced convenience.
Loading speed

The speed of loading your website is crucially important. Customers may want to stop visiting your site if they get irritated by slow-loading process. You should assess and invest in how your website loads on both mobile and desktop devices. Ask your programmers to fix it if there is any problem occurs. This is a technical issue that can totally be handled, so you must improve it immediately. If you need assistance with optimizing your website’s loading speed, consider consulting with a professional web development chicago agency. They have the expertise and knowledge to enhance your website’s performance and ensure a seamless user experience.
Tips:
- Optimize images appeared on your website. See tools which help.
- Minimize HTTP requests
- Prioritize lazy loading
- Uninstall unnecessary plugins on your site
- Reduce redirects
- Monitor the speed over time, and don’t forget to test the speed on mobiles
Website Security

A lot of customers are always in worry because of security problems on many websites. You should have an HTTPS certificate to ensure your collected data is safe from hackers. Some situation that you need to collect sensitive data of your visitor such as credit card information or personal contacts, make sure that they cannot be stolen. This is why you can use a good WordPress table plugin to make sure the data sets are presented properly and safely.
Learn more: Security for Magento 2 - a tool to secure and protect your online store
Conclusion
If you’re hesitant about creating a website, don’t be scared! While it can be a lengthy and occasionally frustrating process, making a website has never been easier. You don’t need coding skills to create an impressive site, and the bulk of the work comes after publishing the pages.
For beginners, we suggest using WordPress, a highly versatile CMS suitable for small and large-scale websites. Its customizable features and user-friendly visual editor make page-building remarkably simple.

