

8 mins read
|
09-30-2026
How to Add & Configure Gift Wrap in Magento 2
Vinh Jacker
|
06-30-2026


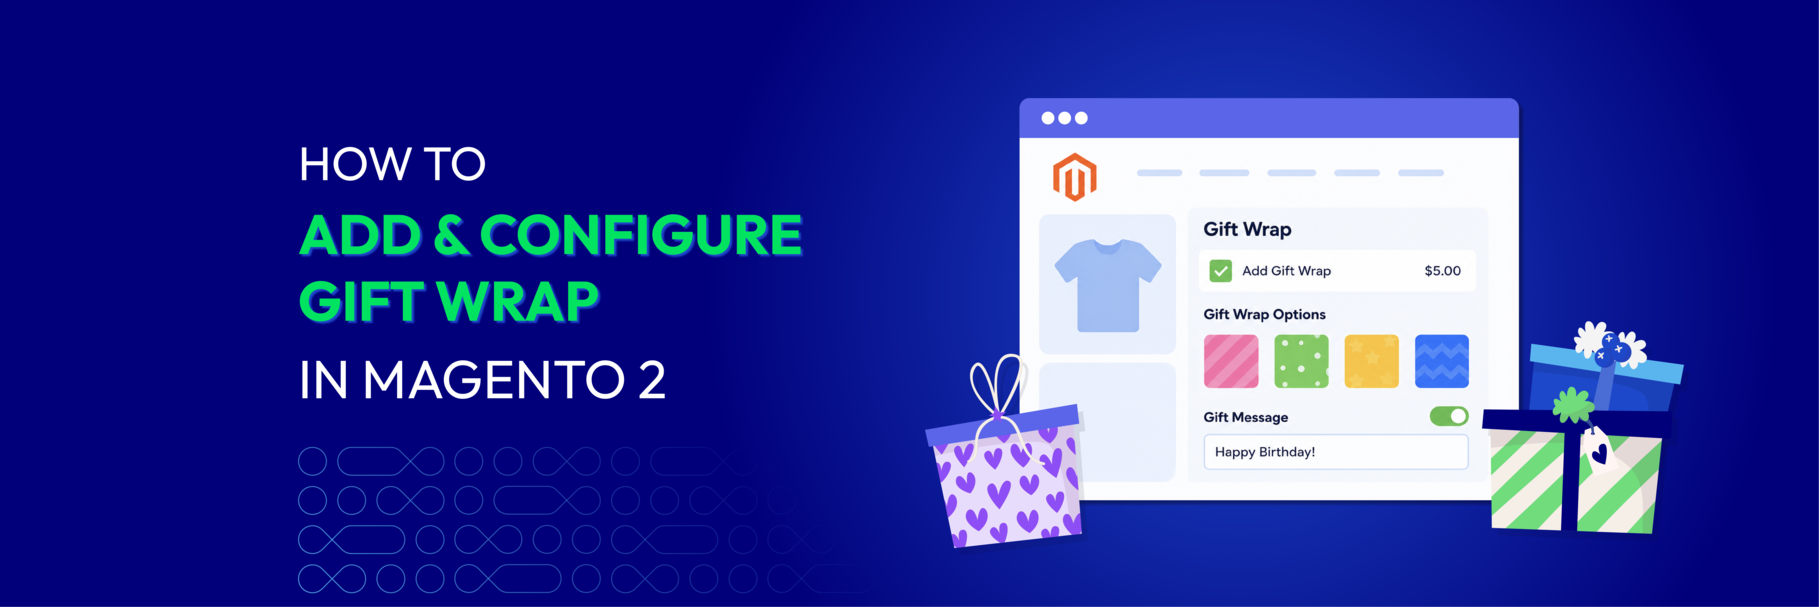
Imagine this: your customer has just found the perfect birthday gift for their best friend. They complete the order, close their laptop with relief, and then realize the gift will arrive in a plain brown cardboard box. No wrapping. No ribbon. No greeting card. That alone can take away half the excitement.
That’s exactly why the Gift Wrap feature matters.
For Magento 2 stores, this is a simple but valuable opportunity to improve the customer experience. By letting shoppers choose wrapping paper, add greeting cards, and write personal messages at checkout, you can turn a standard package into a more thoughtful and memorable gift.
With Gift Wrap for Magento 2, this setup becomes quick and easy. Here’s the complete guide from A to Z.

How to Add & Configure Gift Wrap in Magento 2 using Mageplaza extension
Before getting started, make sure you’ve installed the Mageplaza Gift Wrap extension. Download it here and follow the installation guide if needed. Once done, everything lives under Marketing > Gift Wrap in your Admin Panel.
1. General Configuration
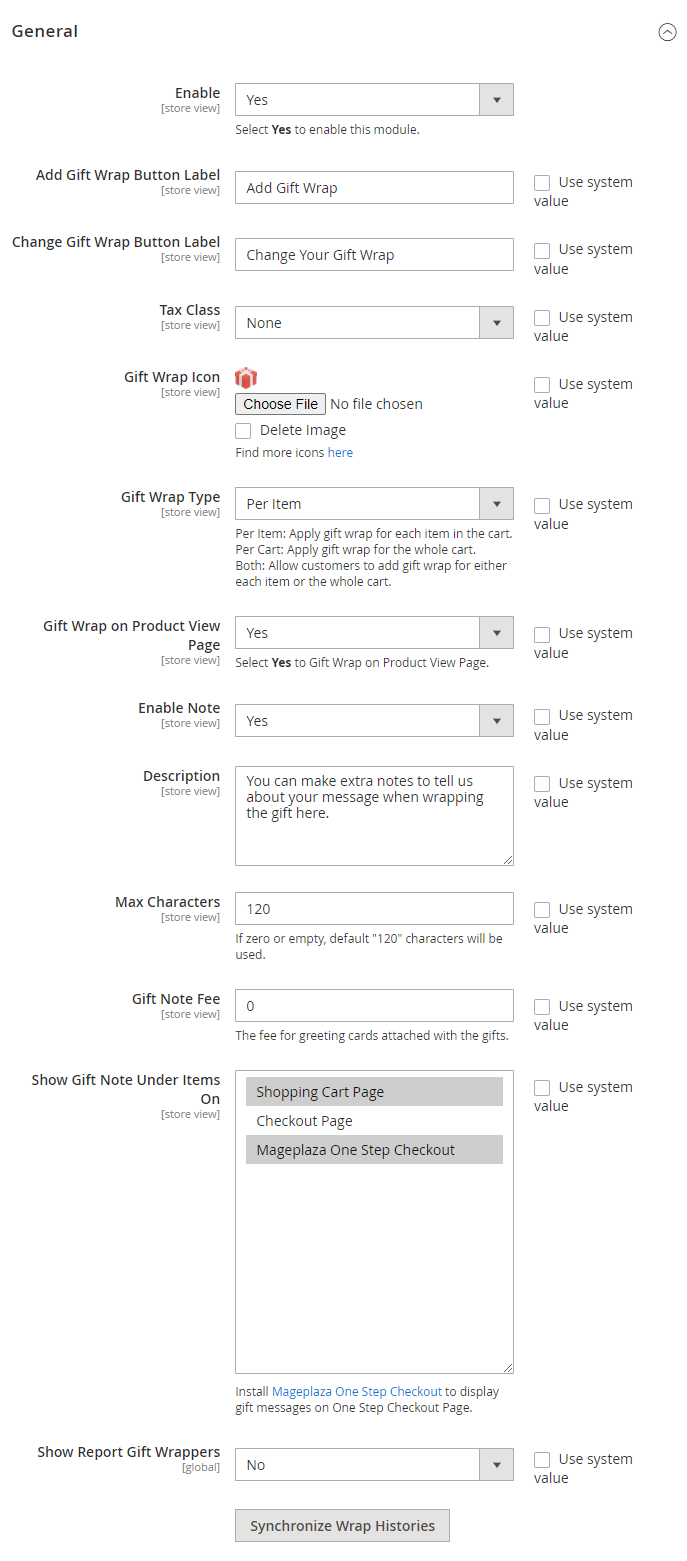
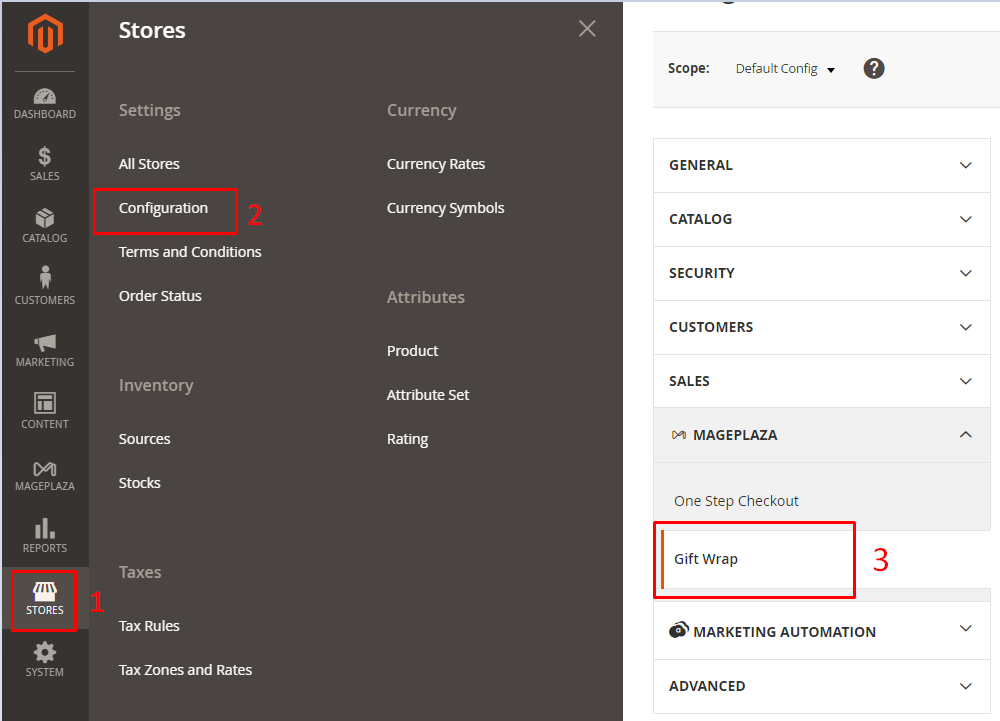
Firstly, please access to the backend admin, then navigate to Store > Settings > Configuration > Mageplaza > Gift Wrap > Configuration
-
Enable: Set to Yes to activate the module
-
Button Labels: Customize the Add/Change Gift Wrap button text and upload an icon to make it more visible on the frontend
-
Tax Class: Select the applicable tax class for the wrapping fee
Here’s how it looks on the frontend:
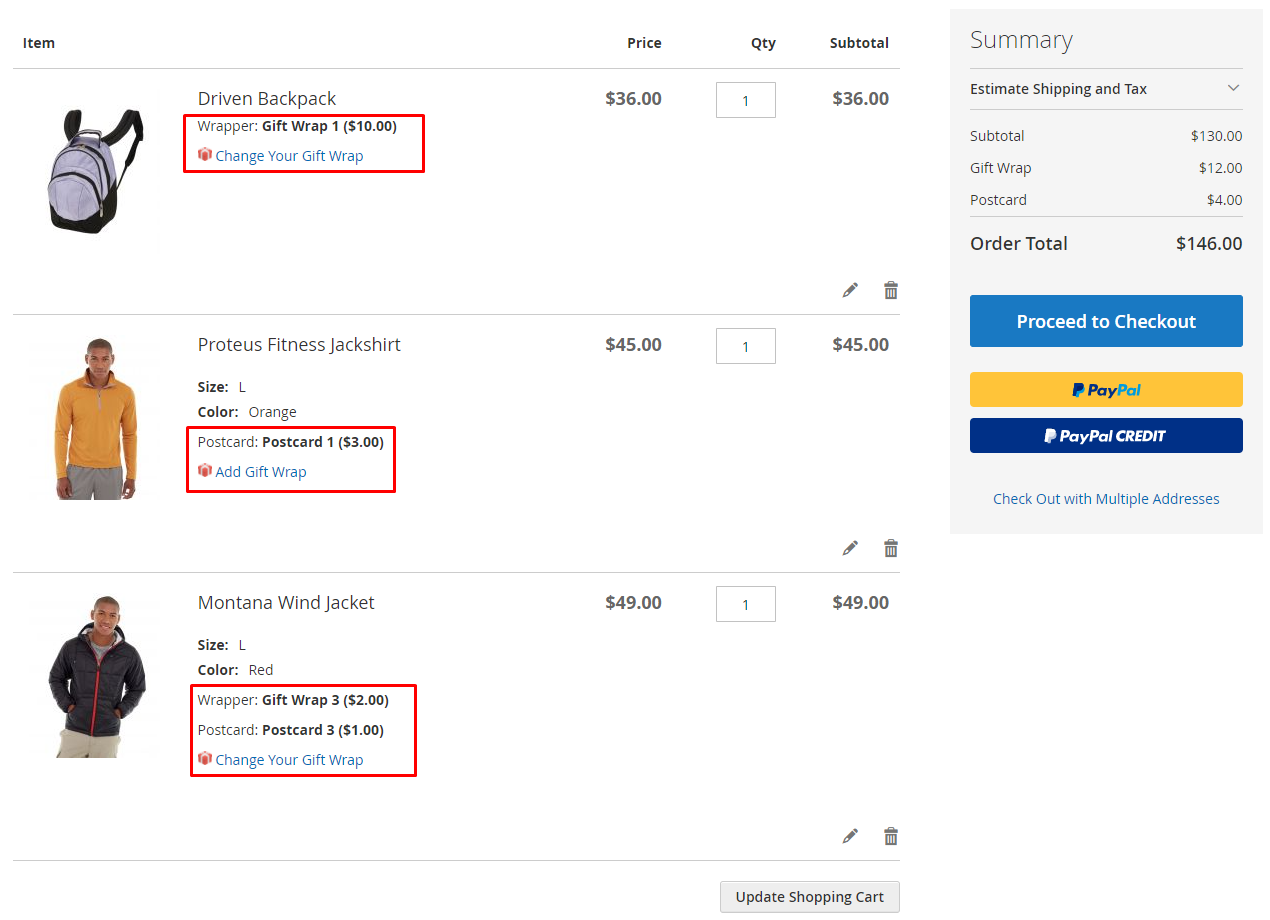
- Gift Wrap Type: This is the most important setting here
- Per Item — customers pick a different wrap for each product
- Per Cart — one wrap applies to the entire order
- Both — customers can do either
-
Enable Gift Note: Turn on to let customers include a personal message. You can set a character limit, add a fee, and write a short description that appears below the note field on the frontend
- Show Gift Note On: Choose which pages display the note — Shopping Cart, Checkout, or One Step Checkout.
Here’s how it looks on the frontend:
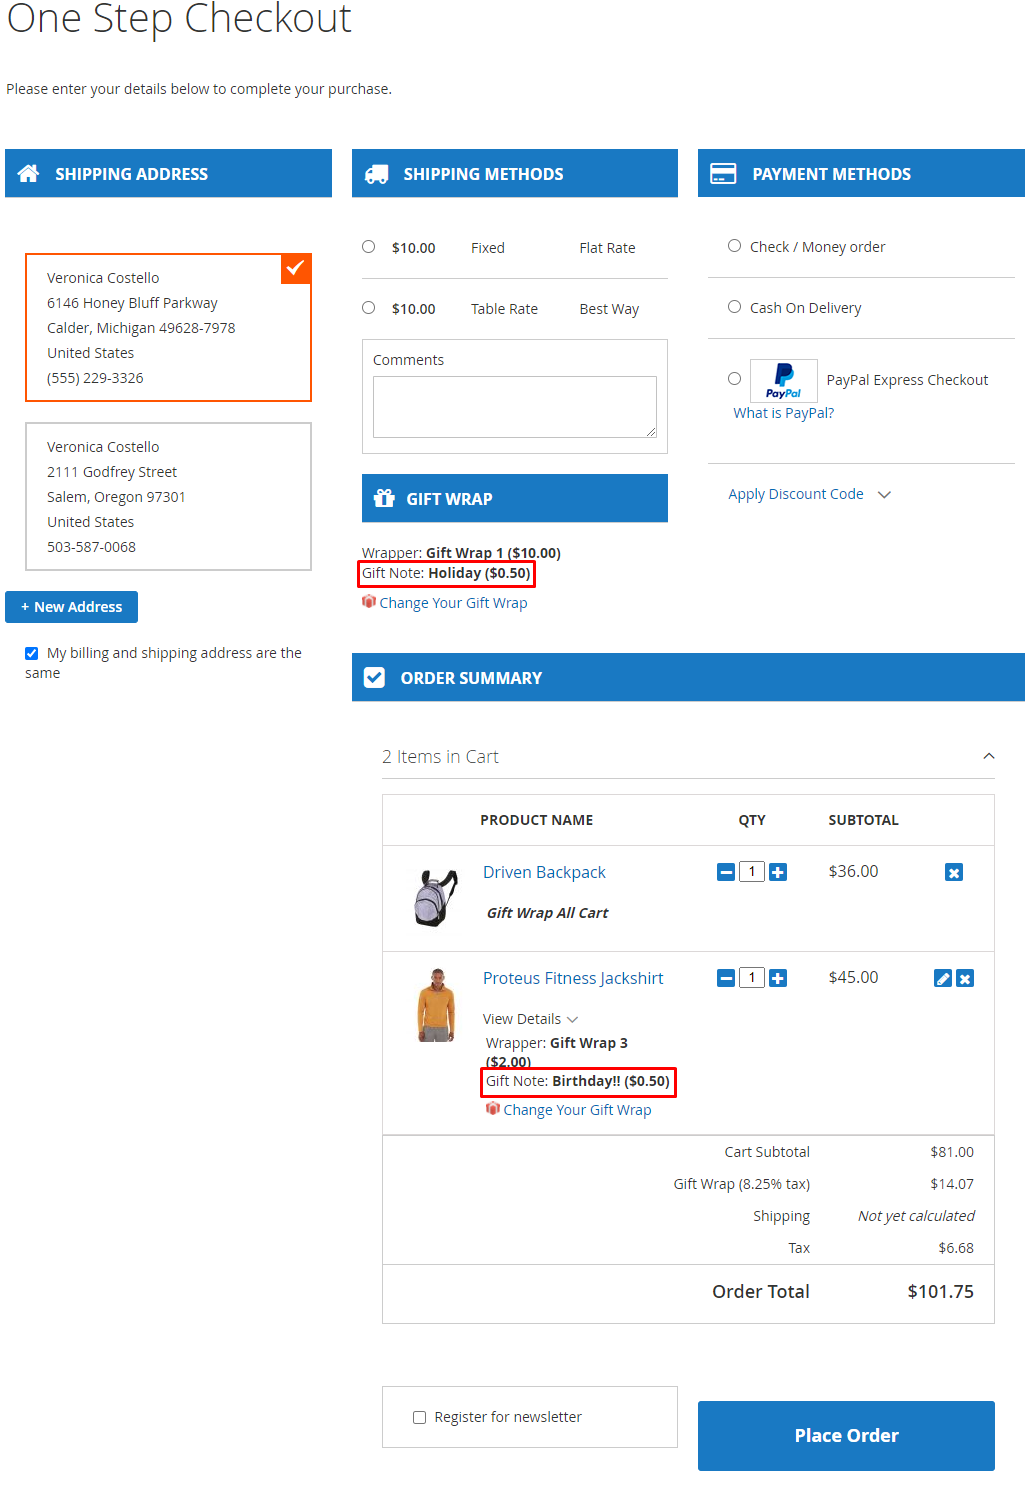
💡 Tip: Enable Gift Note on both pages (Cart & Checkout). Customers often decide to add gift wrapping and notes impulsively — the more touchpoints, the better for conversion rate.
2. Manage Wrap Categories
Firstly open the Admin Panel, then go to Mageplaza > Gift Wrap > Manage Wrap Categories
2.1. Manage Category Grid
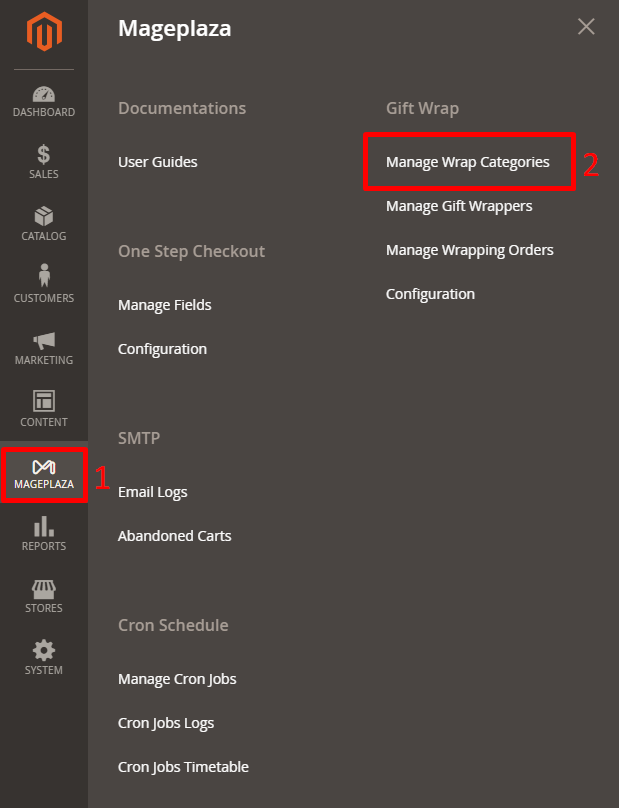
-
Displays all wrap categories with key info: Name, Status, Sort Order, Action
-
Action: Edit, Delete, or Change Status for any category
-
Admin can also Filter, Change Store View, or Hide/Display Columns
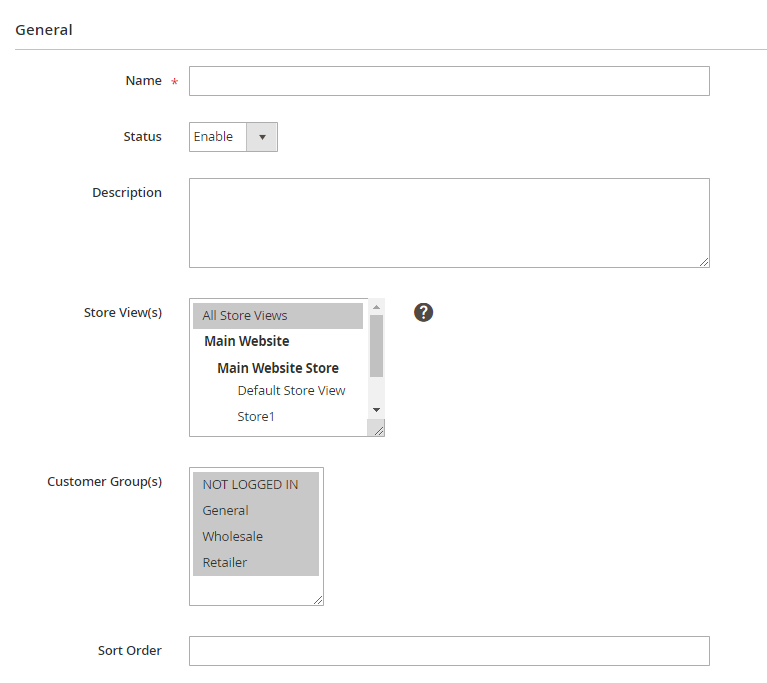
2.2. Create/Edit Category
-
Name & Status: Give it a clear name and set to Enabled to show it on the frontend
-
Description: Optional, but useful if you want to add context to the category
-
Store View(s) & Customer Group(s): Scope the category to specific stores or customer segments if needed
-
Sort Order: Lower number shows first
💡 Tip: No need to create new categories every season. Simply adjust the Sort Order to bring your holiday collections to the top.
3. Manage Gift Wrappers & Postcards
Go to the Admin Panel, then follow these steps Mageplaza > Gift Wrap > Manage Gift Wrappers
3.1. Manage Gift Wrappers Grid
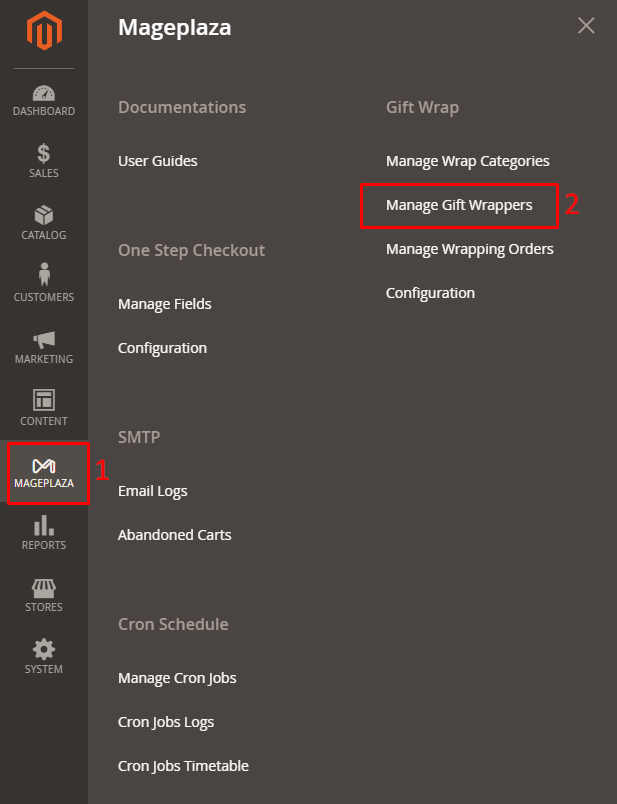
This is where all your gift wraps are listed.
The grid displays key information such as:
ID, Name, Price Type, Category, Amount, Image, Status, Sort Order, and Actions.
Actions:
- Delete: Remove selected gift wraps.
- Change Status: Enable or disable selected items.
- Edit: Modify an existing gift wrap.
You can also filterresults, show/hide columns, and switch Store Views.
3.2. Create / Edit Gift Wrap
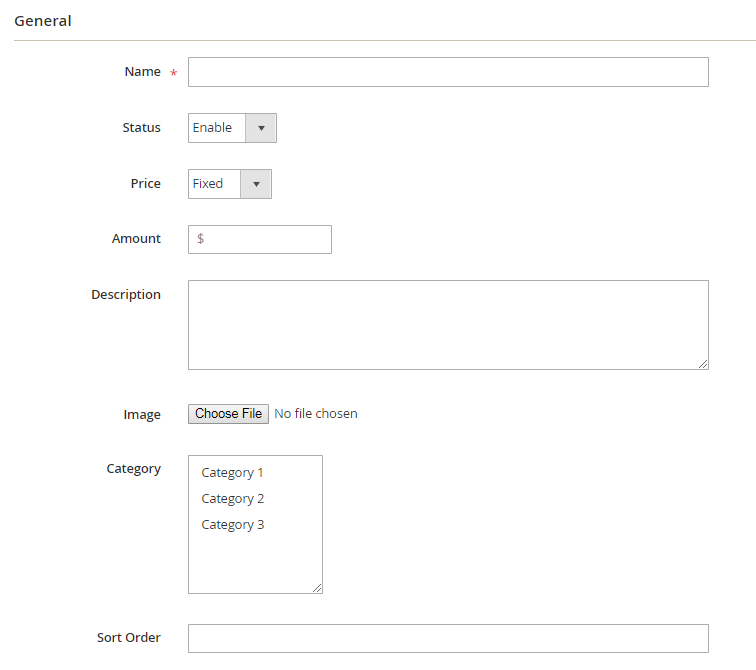
Click Create New Gift Wrap to add a new option.
-
Name & Status: Give it a clear name and set to Enabled to show it on the frontend
-
Price: Choose Fixed (flat fee per order) or By Qty (multiplied by number of items)
-
Amount: Enter the wrapping fee
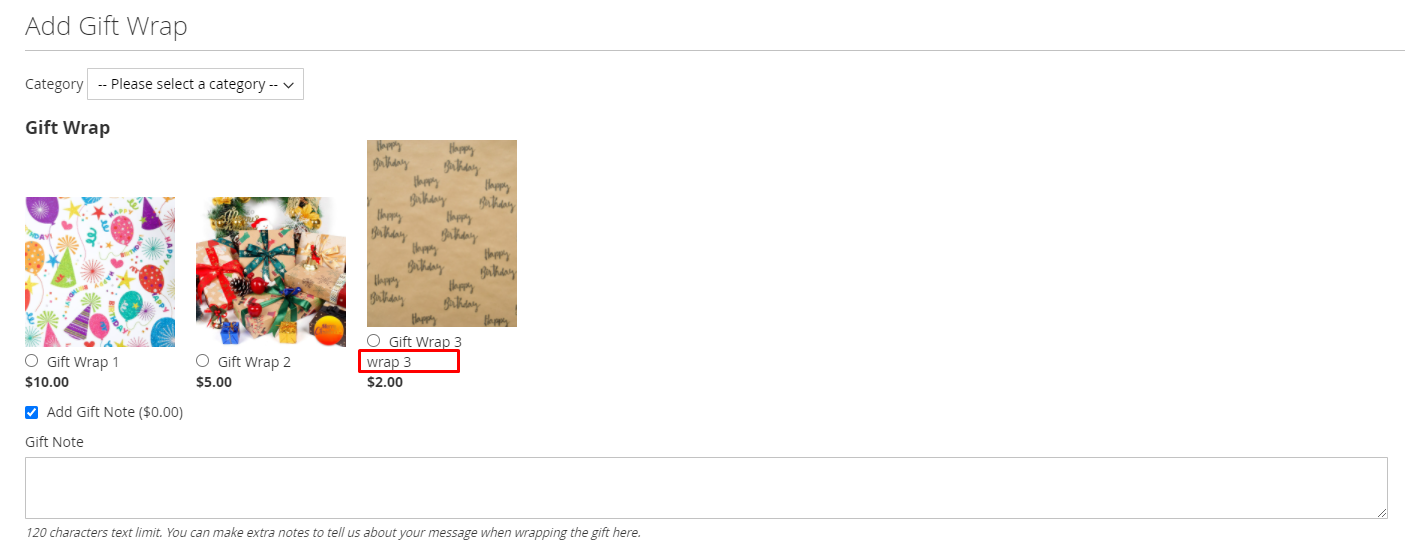
Here’s how it looks on the frontend:
4. Manage Wrapping Orders
Open Admin panel, then go to Mageplaza > Gift Wrap > Manage Wrapping Orders
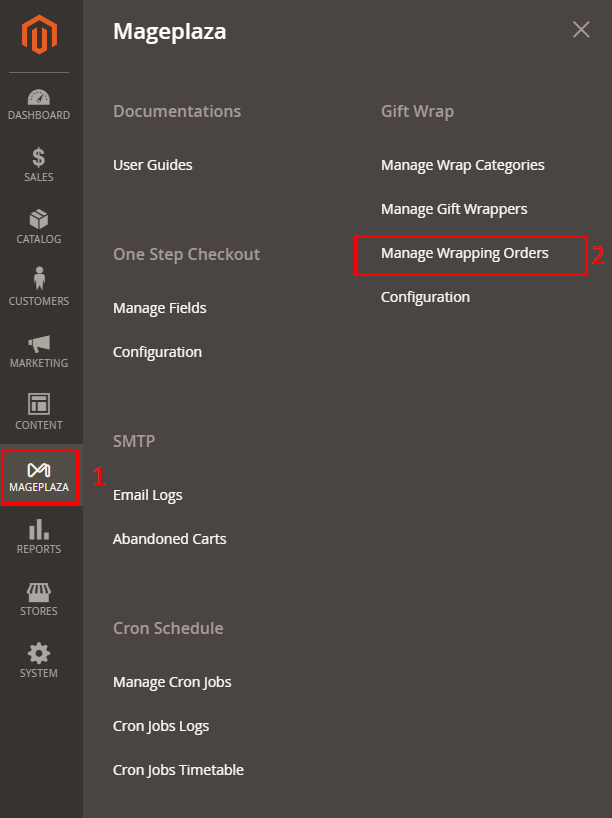
Here you can view all orders that used Gift Wrap, including:
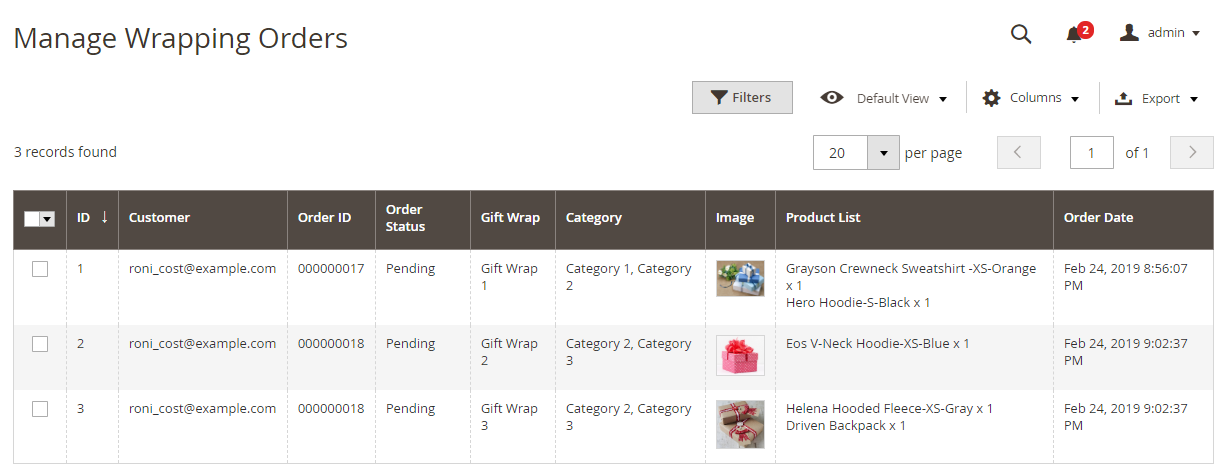
- Selected wrap type
- Postcard (if any)
- Customer’s gift message
- Order status
- Export data to CSV or XML.
- If Show Report Gift Wrappers is enabled in Configuration, Gift Wrap revenue will appear directly in the grid.
- For older orders: Click Synchronize Wrap Histories to update the data.
- Gift Wrap information is automatically displayed in the PDF Invoice with no extra setup required.
Final words
Missing out on Gift Wrap is a missed opportunity both for your customers’ experience and your store’s revenue. When shoppers know they can order a beautifully wrapped gift straight from your store, you become their go-to destination for every special occasion. And with the option to charge a small extra fee for the service, it’s a simple way to boost your average order value without much effort.
Together, these two features turn a standard Magento 2 store into a place people genuinely enjoy shopping at — and keep coming back to.
Table of content

Jacker is the Chief Technology Officer (CTO) at Mageplaza, bringing over 10 years of experience in Magento, Shopify, and other eCommerce platforms. With deep technical expertise, he has led numerous successful projects, optimizing and scaling online stores for global brands. Beyond his work in eCommerce development, he is passionate about running and swimming.
Related Post

16 mins read
|
08-30-2026
5 mins read
|
07-30-2026
7 mins read
|
06-30-2026

How to Enable DebugView in GA4 for your Magento 2 store - Mageplaza
Step-by-step guide to enabling GA4 DebugView for Magento 2 merchants — verify your GA4 events are firing correctly before trusting your data.
8 mins read
|
06-09-2026
Table Rate Shipping in eCommerce: A Practical Guide
Master Magento 2 Table Rate Shipping. Learn how to configure an accurate, automated shipping matrix to optimize your checkout and boost sales.
10 mins read
|
06-02-2026
8 mins read
|
09-30-2026
16 mins read
|
08-30-2026
5 mins read
|
07-30-2026
7 mins read
|
06-30-2026
How to Enable DebugView in GA4 for your Magento 2 store - Mageplaza
Step-by-step guide to enabling GA4 DebugView for Magento 2 merchants — verify your GA4 events are firing correctly before trusting your data.
8 mins read
|
06-09-2026
Table Rate Shipping in eCommerce: A Practical Guide
Master Magento 2 Table Rate Shipping. Learn how to configure an accurate, automated shipping matrix to optimize your checkout and boost sales.
10 mins read
|
06-02-2026