


7 mins read
|
06-30-2026
How to Eliminate Render-Blocking WordPress: 5 Minutes Guide
Vinh Jacker | 07-27-2023
Are you tired of waiting for your website to load, only to be greeted by a frustratingly slow loading time?
Well, fear no more because we’ve got just the solution for you! In this article, we’ll explore eliminating render-blocking resources in WordPress to improve site speed and enhance the visitor experience, eliminating elements preventing quick rendering.
So, grab a cup of coffee, sit back, and get ready to optimize your WordPress site like a pro. Let’s jump right in!
What are render-blocking resources?

Render-blocking resources are external files for web pages to render content but delay the process. These resources, like CSS and JavaScript, require fetching, parsing, and execution before the browser can continue rendering.
When a browser encounters a render-blocking resource, it halts the rendering process, fetches the resource from the server, and then processes it. This can introduce delays in rendering the visible content of the page, leading to slower page load times and a poorer user experience.
Common examples of render-blocking resources are:
-
External CSS files. CSS files define web page elements’ appearance and layout, but render-blocking causes browsers to wait for fetched and parsed files before correct rendering.
-
JavaScript files. JavaScript, a dynamic programming language, can cause delays in web page rendering if render-blocking files are executed by the browser.
Importance of eliminating render‑blocking resources in WordPress

It is essential to get rid of render-blocking resources in WordPress if you want to improve your website’s functionality and user interface. Here are the key reasons why it’s important:
-
Faster page load times. Render-blocking resources slow down rendering, causing delays in content display. So, eliminating or minimizing their impact improves web page load times, leading to better user satisfaction, engagement, and lower bounce rates.
-
Improved user experience. Eliminating render-blocking resources on WordPress sites ensures quick loading and a smooth user browsing experience. This prevents partially loaded pages and delays critical content display.
-
Search Engine Optimization (SEO) benefits. Optimizing WordPress site performance and eliminating render-blocking resources boosts search engine rankings, organic traffic, and visibility by improving user experience and optimizing performance.
-
Mobile optimization. Optimizing WordPress sites for mobile devices is crucial due to high latency and limited bandwidth, which reduces bounce rates and improves conversions.
-
Increased conversion rates. A faster, responsive website boosts conversion rates by enabling users to access content, navigate, and complete actions. So, eliminating render-blocking resources and optimizing performance improves business outcomes.
Therefore, to deal with how to eliminate render-blocking resources WordPress, we can employ various techniques like minifying, asynchronous loading, caching, and performance optimization plugins and themes for improved performance.
How to find render-blocking resources in WordPress?
Regardless of the status of your website, the initial step is to locate any render-blocking resources and determine the appropriate course of action. Thankfully, there are several methods at your disposal for accomplishing this.
Here are the two most popular methods you can use to identify render-blocking resources in Wordpress:
Using web performance optimization tools
Free and paid tools offer detailed insights into website performance, including the ability to identify render-blocking resources. Common options include:
- Google PageSpeed Insights: This free tool by Google analyzes your website and offers suggestions for improvement, including highlighting render-blocking resources in the “Opportunities” section.
- GTmetrix: This free tool also analyzes website performance and provides a “Lighthouse” audit that specifically identifies render-blocking resources.
- WebPageTest: This free tool offers a waterfall chart that visually depicts how resources are loaded on your website. This can help you identify render-blocking resources by looking for loaded resources before the initial page render.
Analyzing network requests in developer tools
Most modern browsers have built-in developer tools that allow you to analyze network requests made by your website. Here’s how to find render-blocking resources using developer tools:
- Open your website in your preferred browser.
- Right-click anywhere on the page and select “Inspect” or “Inspect Element” (depending on the browser).
- Move to the “Network” tab in the developer tools.
- Look for resources with the “Blocking” type in the “Type” column. These are the render-blocking resources on your website.
How to eliminate render‑blocking resources WordPress manually?
To manually eliminate render-blocking resources WordPress, you’ll need to modify your theme’s files or use plugins specifically designed for this purpose. Here’s a step-by-step guide:

Step 1: Locate the render-blocking resources
You need to identify the CSS and JavaScript files mentioned in the analysis report. Typically, these files are enqueued in your theme’s functions.php file or within individual template files.
Step 2: Move CSS files to the header
To countinue the process of eliminating render-blocking resources WordPress, you need to open your theme’s header.php file and locate the <head> section. Find the enqueued CSS files and move them from the footer (where they are usually located) to the header. Use the wp_enqueue_style function or the wp_head action hook to enqueue the CSS files.
Step 4: Defer JavaScript loading
Open your theme’s functions.php file and find the section where JavaScript files are enqueued. Replace the wp_enqueue_script function with the wp_enqueue_script('handle', 'source', array(), false, true); format. This loads the script in the footer and defers its execution.
Step 5: Minify and combine files
You can minify and combine CSS and JavaScript files to further optimize your website. There are plugins available, such as Autoptimize and W3 Total Cache, that can handle this automatically. However, manual minification and combination should be done cautiously, as it may require more advanced knowledge.
Step 6: Test and validate
After making these changes, test your website thoroughly to ensure everything functions as expected. Check that the render-blocking resources have been successfully eliminated by re-running the analysis using the tools mentioned in Step 1.
Remember to take a backup of your theme files before making any modifications. If you’re not comfortable editing code manually, you can also consider using caching and optimization plugins that offer options to eliminate render-blocking resources automatically.
How to eliminate render‑blocking resources WordPress with plugins?
W3 Total Cache

To eliminate render-blocking resources WordPress with the W3 Total Cache plugin, you can follow these strategies:
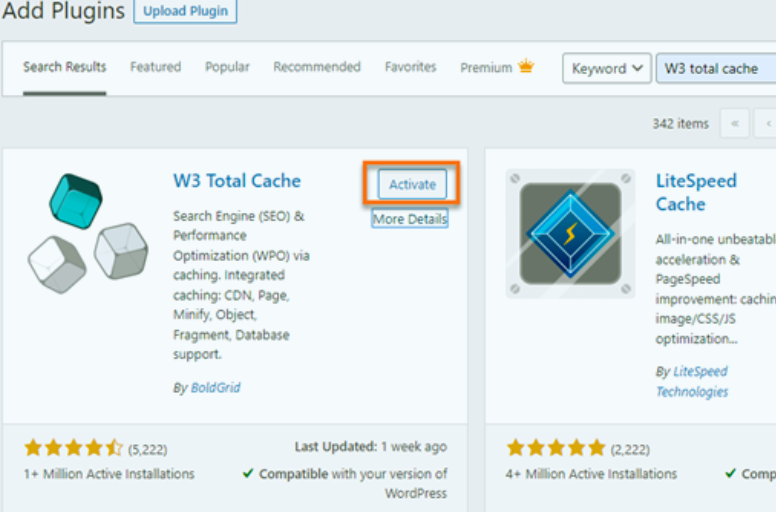
Step 1: Install and activate the W3 Total Cache plugin
Login to your WordPress dashboard, hit Plugins -> Add New, search for W3 Total Cache, and click Install and then Activate.
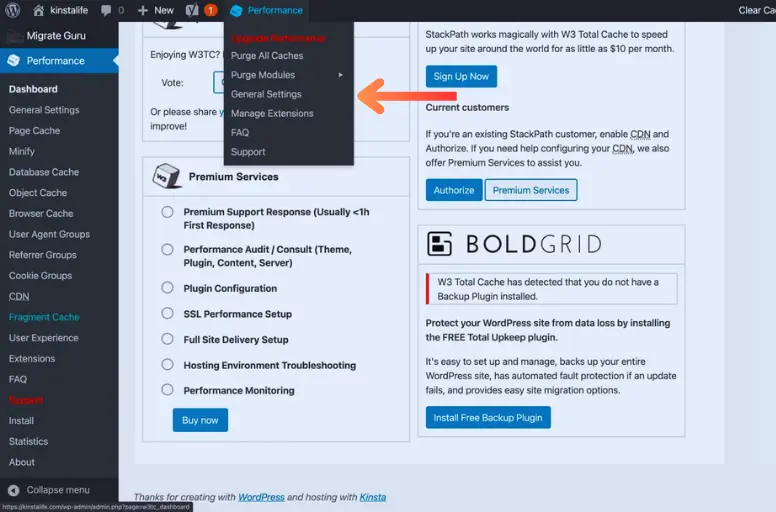
Step 2: Enable the necessary features
After activating the plugin, go to Performance in your WordPress dashboard sidebar and click on General Settings. Ensure that the Enable box is checked to activate the plugin.
Step 3: Configure Minify settings
In the W3 Total Cache settings, click on Minify in the sidebar. Check the Enable box to activate the feature. Under HTML & XML, select Manual from the dropdown menu. Under JS and CSS, choose Auto. Save the settings.
Step 4: Configure JavaScript and CSS settings
In the W3 Total Cache settings, click on General Settings in the sidebar. Scroll down to the Minify section and find the Minify mode option. Choose Manual from the dropdown menu. Save the settings.
Step 5: Specify render-blocking JavaScript and CSS files
In the W3 Total Cache settings, click on Minify in the sidebar. Scroll down to the Minify HTML section. Here you can enter the specific JavaScript and CSS files that you want to exclude from minification to avoid any potential issues. Save the settings.
Step 6: Clear the cache
After configuring the settings, it’s important to clear the cache. In the W3 Total Cache settings, go to the Performance section in the sidebar and click on Empty All Caches.
Step 7: Test your website
Visit your website and use tools like Google PageSpeed Insights or GTmetrix to check if the render-blocking resources have been eliminated. The tools will provide suggestions and recommendations for further optimization if needed.
By following these steps, you should be able to reduce or eliminate render-blocking resources WordPress using the W3 Total Cache plugin. Remember to regularly monitor your website’s performance and make adjustments as necessary.
WP Rocket
Here are some recommendations to eliminate render-blocking resources WordPress using the WP Rocket plugin:
Step 1: Install and activate the WP Rocket plugin
Go to your WordPress dashboard, hit Plugins, click on Add New, search for WP Rocket, click Install Now, and then Activate.
Step 2: Access the WP Rocket settings
Once the plugin is activated, you’ll find a new option called WP Rocket in your WordPress dashboard. Click on it to access the plugin’s settings.
Step 3: Enable the File Optimization feature
In the WP Rocket settings, click on the File Optimization tab. Make sure the feature is enabled by checking the box next to Enable File Optimization.
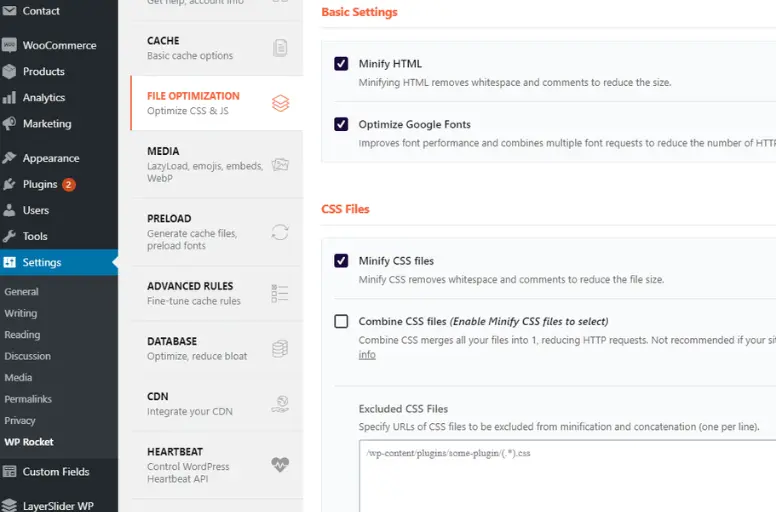
Step 4: Configure the CSS settings
-
Scroll down to the CSS Files section. Here, you have a few options to optimize the CSS delivery:
-
Enable Optimize CSS Delivery: Check the box to enable this feature. WP Rocket will load the critical CSS inline and defer the rest, preventing render-blocking.
-
Combine CSS Files: Enable this option to combine multiple CSS files into a single file, reducing the number of requests.
-
Minify CSS Files: Check the box to minify CSS files, removing unnecessary characters and reducing file size.
Step 5: Configure the JavaScript settings
Scroll down to the JavaScript Files section. Here, you can optimize the delivery of JavaScript resources.
-
Enable Load JavaScript Deferred: Check this option to defer the loading of JavaScript files, allowing the rest of the page to load first.
-
Combine JavaScript Files: Enable this option to combine multiple JavaScript files into a single file, reducing requests.
-
Minify JavaScript Files: Check the box to minify JavaScript files, reducing their size.
Step 6: Save settings and clear cache
Once you have configured the desired options, choose Save Changes at the end of the settings page. After that, clear any existing cache by clicking the Clear Cache button.
Step 7: Test your website
Visit your website and verify if the render-blocking resources have been eliminated. You can use browser developer tools or online tools like Google PageSpeed Insights or GTmetrix to analyze your site’s performance.
By following these steps, you should be able to optimize and eliminate render-blocking resources using the WP Rocket plugin in WordPress. Remember to always test your site after making changes to ensure everything works as expected.
Autoptimize

To eliminate render-blocking resources WordPress using the Autoptimize plugin, you can follow these steps:
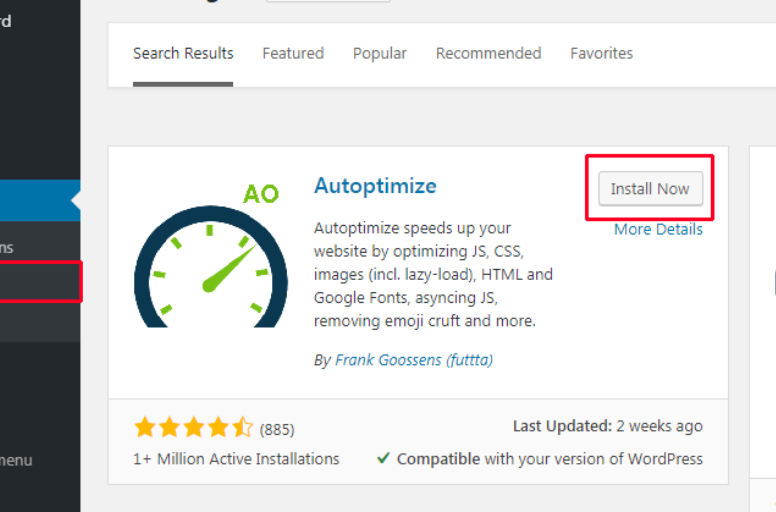
Step 1: Install and activate the Autoptimize plugin
-
Log in to your WordPress admin dashboard.
-
Go to Plugins and hit Add New.
-
Search for Autoptimize.
-
Click Install Now and then Activate to activate the plugin.
Step 2: Configure Autoptimize settings
After activating the plugin, go to Settings in the WordPress dashboard. Click on Autoptimize to access the plugin’s settings page.
Here, you’ll find various options to configure. The key settings related to render-blocking resources are:
-
JavaScript options
-
Check the box for Optimize JavaScript Code.
-
Optionally, enable the Also aggregate inline JS? option if necessary.
-
-
CSS Options:
-
Check the box for Optimize CSS Code.
-
Optionally, enable the Also aggregate inline CSS? option if necessary.
-
-
Advanced Options:
-
Enable the Force JavaScript in head? option if your theme or plugins require it.
-
Be cautious with this option, as it may cause issues with certain plugins.
-
Step 3: Save and test the settings
-
Once you have configured the desired options, click on Save Changes and Empty Cache at the bottom of the settings page.
-
Clear any server-side or caching plugin cache if applicable.
-
Test your website thoroughly to ensure there are no conflicts or issues caused by the optimization.
By following these steps, Autoptimize will optimize JavaScript, CSS, and HTML files, reducing render-blocking resources and improving WordPress site loading speed. Don’t forget to regularly test your website after implementing optimization plugins to ensure functionality.
Final thoughts
In conclusion, eliminating render-blocking resources WordPress is essential for optimizing website performance and user experience. By identifying and addressing resource bottlenecks, you can improve page load times, reduce frustration, and enhance engagement.
To eliminate render-blocking resources WordPress, you should use techniques like minification, concatenation, asynchronous loading, and caching. Also, remember to utilize plugins and themes for optimized performance and accessibility.
Table of content

Jacker is the Chief Technology Officer (CTO) at Mageplaza, bringing over 10 years of experience in Magento, Shopify, and other eCommerce platforms. With deep technical expertise, he has led numerous successful projects, optimizing and scaling online stores for global brands. Beyond his work in eCommerce development, he is passionate about running and swimming.
Related Post


How to Enable DebugView in GA4 for your Magento 2 store - Mageplaza
Step-by-step guide to enabling GA4 DebugView for Magento 2 merchants — verify your GA4 events are firing correctly before trusting your data.
8 mins read
|
06-09-2026

Table Rate Shipping in eCommerce: A Practical Guide
Master Magento 2 Table Rate Shipping. Learn how to configure an accurate, automated shipping matrix to optimize your checkout and boost sales.
10 mins read
|
06-02-2026
3 mins read
|
05-30-2026

Google Analytics Ecommerce Reports for Magento Merchants: What to track & Tips
A practical guide to GA4 ecommerce reports for Magento merchants, covering what to track, how to read each report, and specific tips to turn data into revenue decisions.
18 mins read
|
05-20-2026

5 Ways to Hide Products on Shopify (2026 Guide)
Explore the best 5 ways to hide products on Shopify. Learn how to manage visibility, protect pricing, and create a tailored shopping experience for buyers.
18 mins read
|
05-16-2026
7 mins read
|
06-30-2026
How to Enable DebugView in GA4 for your Magento 2 store - Mageplaza
Step-by-step guide to enabling GA4 DebugView for Magento 2 merchants — verify your GA4 events are firing correctly before trusting your data.
8 mins read
|
06-09-2026
Table Rate Shipping in eCommerce: A Practical Guide
Master Magento 2 Table Rate Shipping. Learn how to configure an accurate, automated shipping matrix to optimize your checkout and boost sales.
10 mins read
|
06-02-2026
3 mins read
|
05-30-2026
Google Analytics Ecommerce Reports for Magento Merchants: What to track & Tips
A practical guide to GA4 ecommerce reports for Magento merchants, covering what to track, how to read each report, and specific tips to turn data into revenue decisions.
18 mins read
|
05-20-2026
5 Ways to Hide Products on Shopify (2026 Guide)
Explore the best 5 ways to hide products on Shopify. Learn how to manage visibility, protect pricing, and create a tailored shopping experience for buyers.
18 mins read
|
05-16-2026