Guide to Setting up a Blog in Magento 2

In the era of explosive growth in social media, blogs have become indispensable tools. They are not just platforms for sharing information and opinions but also play a crucial role in building and enhancing a business’s brand. With platforms like Tumblr, WordPress, Drupal, and Joomla leading the charge, the question arises: how can businesses harness this medium effectively?
In this article, we’ll explore the untapped potential of business blogging, guided by the capabilities of Magento 2. Join us as we uncover strategies and insights to build an interesting business blog and enhance your online presence.
Exploring the Impact of Business Blogging with Magento 2: Tips and Tricks Find out how to use Magento 2 for business blogging effectively. Learn useful strategies to boost your online presence and strengthen your brand. Let’s dive into the world of blogging and see how it can help businesses grow.
What Makes Magento 2 Stand Out?
By default, Magento doesn’t include a built-in blog feature. However, you can install the Magento 2 Blog extension to create and manage your blog directly within Magento.
Why choose the Magento 2 Blog extension?
- Seamlessly integrate a fully functional blog into your Magento store.
- Effortlessly manage blog posts, categories, tags, and authors within Magento’s familiar interface.
- Customize your blog’s design to match your store’s branding and style.
- Boost SEO and drive more traffic to your store with valuable, relevant content.
Don’t miss out on unlocking the full potential of your Magento store!
Advantages of Magento Blog Extension
Any owner of an online store who wants to create and manage blogs directly within the Magento store without having to rely on other platforms has to have the Magento 2 Blog extension. With posts that appear highly on Google’s search results page, it improves your store’s SEO performance. Additionally, this extension enables commenting, liking, and sharing of posts by visitors. To increase sales, you can also feature related products within articles. Particularly, setting up and updating the Mageplaza Blog extension is very easy for users.
- Works with API/GraphQL
- Works with Hyva Theme
- Allows creating blogs without needing additional third-party tools
- Supports Disqus, Facebook, and default commenting systems
- Includes social sharing buttons
- Includes related posts or product sections
- Shows view counts, estimated reading time, and tags
- Offers comprehensive blog management features
- Uses SEO-friendly links
- Integrates seamlessly with Magento’s default XML sitemap
- Includes metadata options
- Supports RSS integration
- Allows creation of blog widgets and root categories
- Comes with a responsive design
Step-to-steps to create a new blog post in Magento 2
Today, we will concentrate on blog posts and discuss how to make one in Magento 2 Blog by following 14 steps.
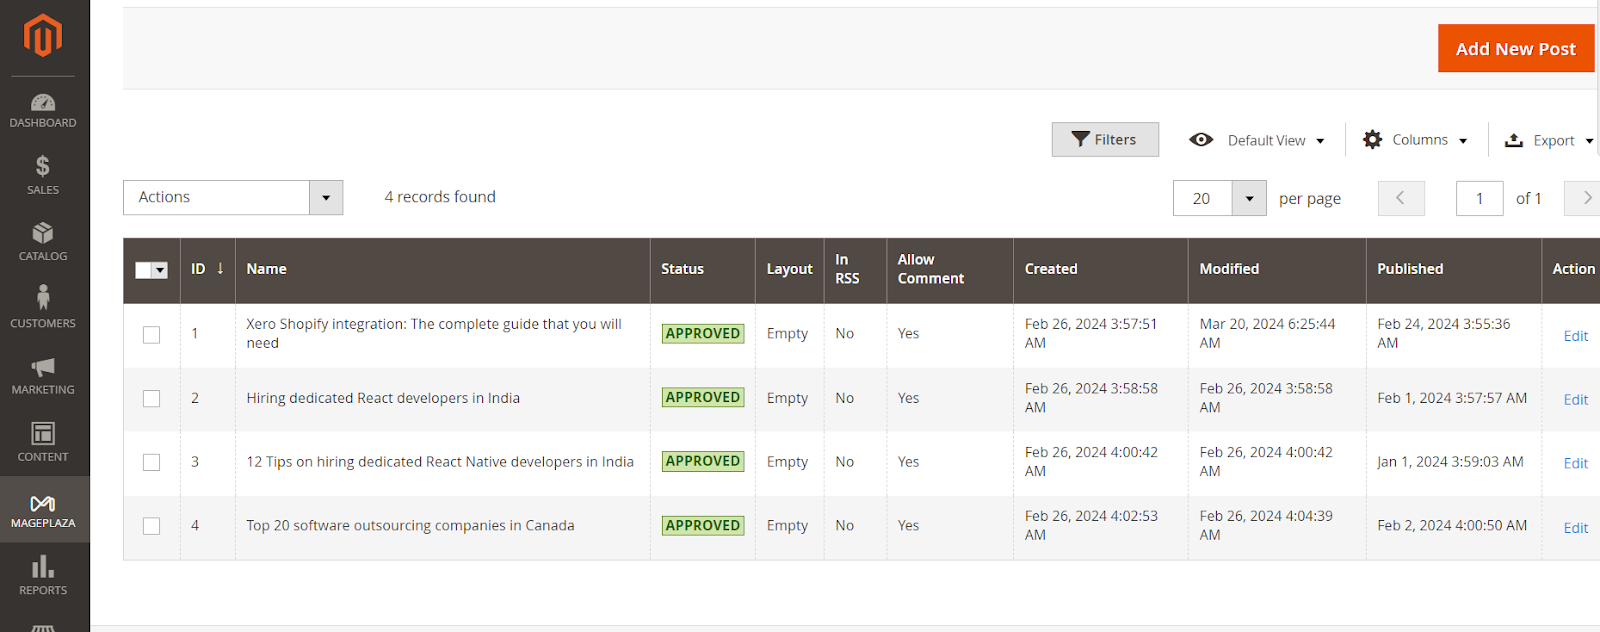
- Log in and visit Mageplaza > Manage Posts Then, click on the Add New Post button.
-
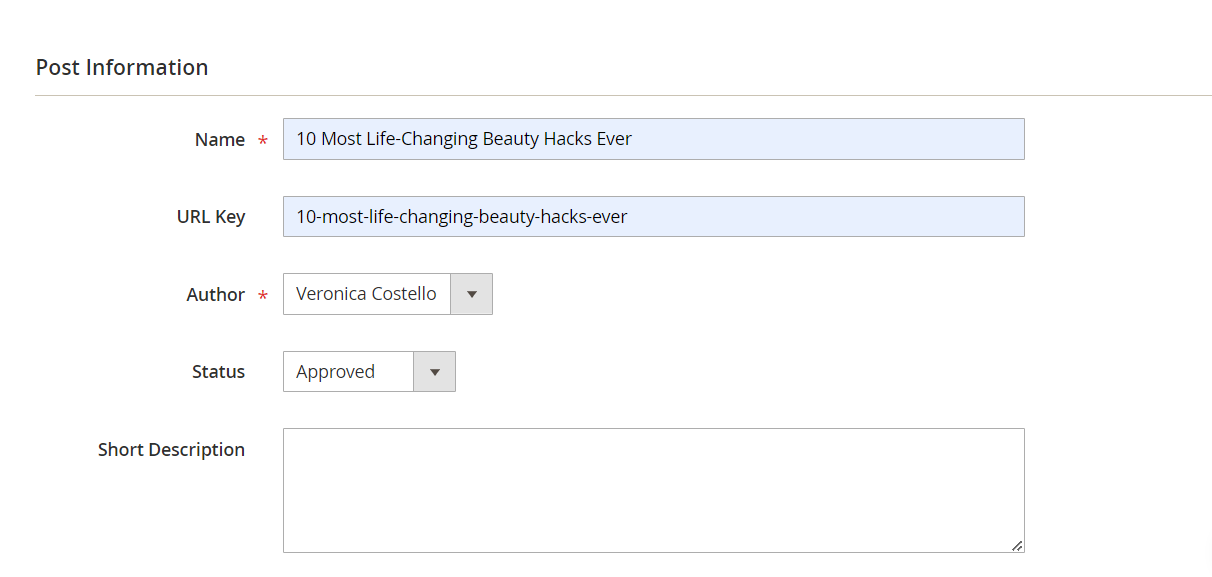
In Post Information, please create your post Name and URL Key first.
-
Set the Author and Status.
-
Don’t forget to include any further descriptions you may have in the Short Description field.
- Create your post with Content In this feature, we provide various assisting options that are very helpful for writing a blog post.

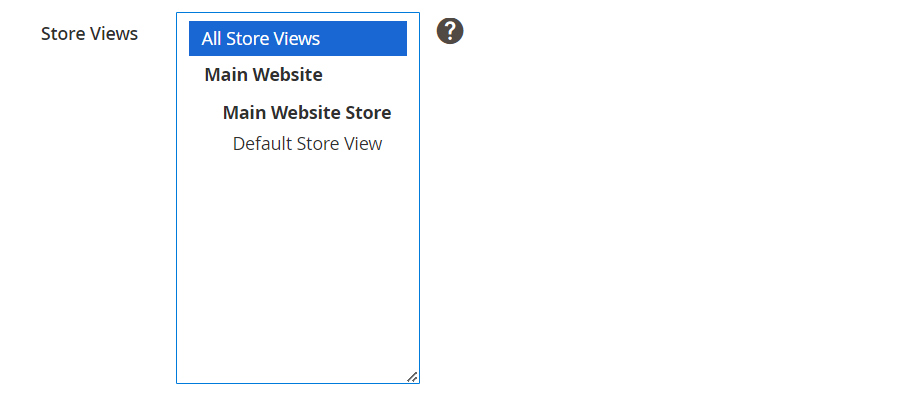
- Choose one or many Store Views to post your blog on
-
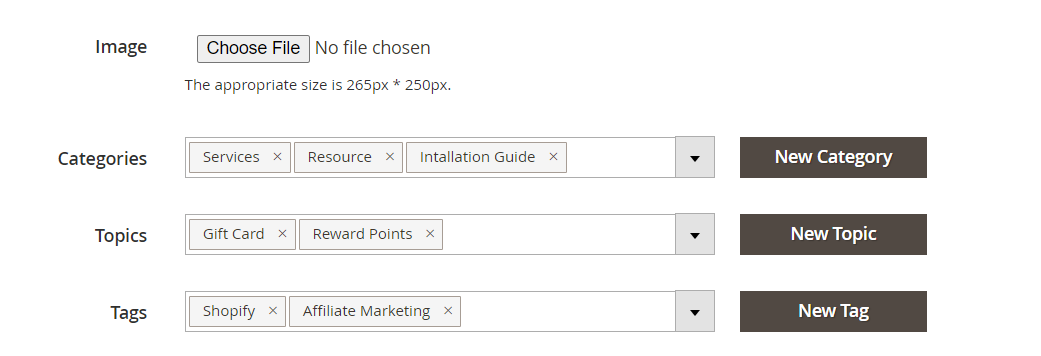
Insert an Image as a thumbnail of your blog.
-
Choose the Categories that the blog post should be placed in. Or you can choose New Category to create a new category.
-
Include the Topics or create new ones to generate keywords that will help people find your content easily.
-
Add Tags to connect your Magento 2 blog posts. You can create blog tags and assign them to specific store views.
-
Click Yes or No in RSS (Really simple syndication) whether you want to link your blog on another website.
-
To allow users to leave comments on your post, select the suitable options in Allow Comment
-
In the Publish Date option, choose the time the post is to be up. If you do not set a date, it will default to today. If you set a date in the future, the post will be scheduled as a blog post publication.
-
Give readers a time limit to read by using the Read Time

- Customize the Design by choosing a suitable layout

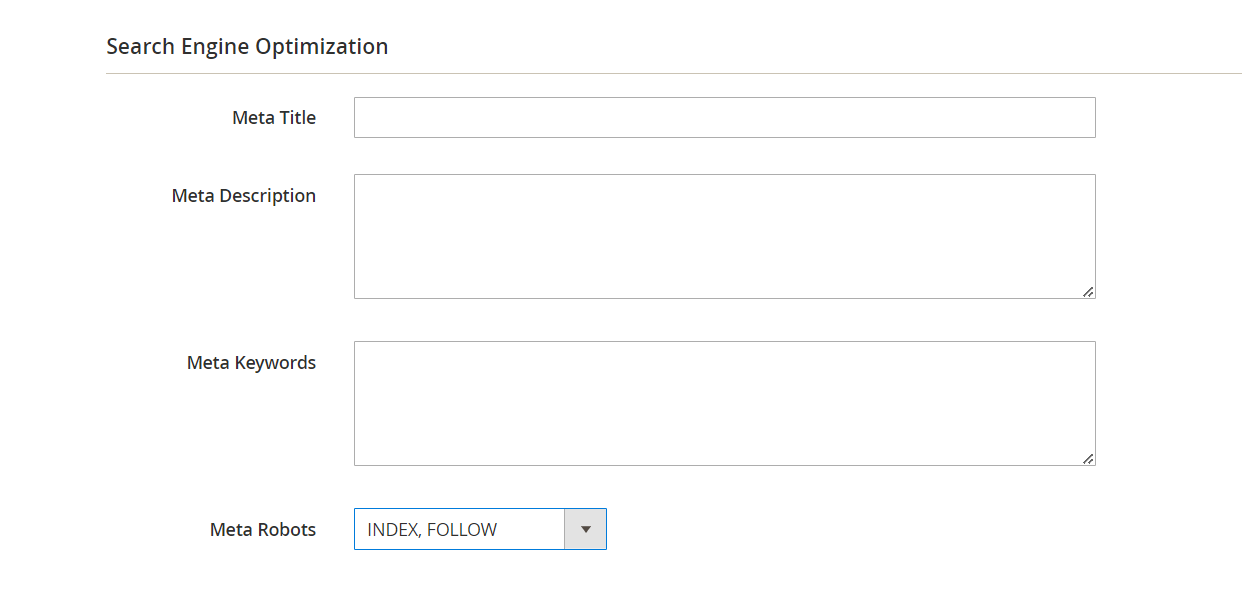
- Edit the Search Engine Optimization When you create a blog post on your Storefront-powered website, you can customize the following details for better search engine optimization (SEO):
- Meta Title: Keep this title not too long (50-60 characters) and relevant to your content. If you don’t specify one, the Post Title will be used.
- Meta Description: Limit this description to 160 characters. If left empty, the Short Description will be used.
- Meta Keywords: Add if necessary, although it’s not recommended based on current SEO practice.
- Meta Robots: Choose the right option because it provides instructions to search engines about how to index and display your post in browser results. It is INDEX, FOLLOW as usual.
After you’re done creating a blog, remember to click “Save.”
Next, navigate to the Mageplaza > Configuration to customize the appearance and add extra elements to your blog post pages.
Final Thought
This guide has shown how Magento 2’s Blog Extension enables businesses to create engaging blogs within their online stores. With features like SEO optimization and social media integration, Magento 2 empowers users to drive traffic and enhance customer engagement through compelling content. You now have the tools to create and manage your own blog.


