If the value that you want to display in the column is a product attribute, it’s not too difficult to add a column to the products grid. This is because these columns are already present in the products grid toolbar which is under Columns control. To display or remove the columns from the grid, you just need to check or uncheck them.
But when it comes to displaying values that are not the product attributes such as quantity or website, it’s not that easy. Therefore, in today’s post, I will guide you on how to add those values to the products grid by adding custom columns.
How to add custom columns in 3 steps
Step 1: Create Magento 2 module
A new column which is added to the products grid will display if you turn on or off stock management as it can be enabled/ disabled per product.
To make all of the code examples easier to follow, we can create a Magento 2 module and name it Mageplaza_Custom.
In case you haven’t know the way to create a module on Magento 2, you can refer to this article: How to Create Module in Magento 2
After creating a module, you can add Magento’s Magento_Catalog module under sequence tag in the module.xml file because it needs to be loaded before your module.
app/code/Mageplaza/Custom/etc/module.xml
<?xml version="1.0" encoding="utf-8" ?>
<config xmlns:xsi="http://www.w3.org/2001/XMLSchema-instance" xsi:noNamespaceSchemaLocation="urn:magento:framework:Module/etc/module.xsd">
    <module name="Mageplaza_Custom" setup_version="1.0.0">
        <sequence>
            <module name="Magento_Catalog"/>
        </sequence>
    </module>
</config>
Once the module.xml has been edited, the app/etc/config.php file needs to be updated using the following console command:
php bin/magento setup:upgrade
Step 2: Add custom columns to products grid
To add custom columns to Magento 2, you can use Listing UI component instance named Product_listing and XML configuration file Magento_Catalog/view/adminhtml/ui_component/product_listing.xml.
To customize it, you need to create a file in the module which has the same path and name.
app/code/Mageplaza/Custom/view/adminhtml/ui_component/product_listing.xml
<?xml version="1.0" encoding="utf-8"?>
<listing xmlns:xsi="http://www.w3.org/2001/XMLSchema-instance" xsi:noNamespaceSchemaLocation="urn:magento:module:Magento_Ui:etc/ui_configuration.xsd">
    <columns name="product_columns">
        <column name="manage_stock" component="Magento_Ui/js/grid/columns/select" sortOrder="76">
            <settings>
                <addField>true</addField>
                <options class="Magento\Config\Model\Config\Source\Yesno"/>
                <filter>select</filter>
                <dataType>select</dataType>
                <sortable>false</sortable>
                <label translate="true">Manage Stock</label>
            </settings>
        </column>
    </columns>
</listing>
Before you can add new columns, the columns UI component named product_columns need to be referenced from the original config file. Then, name your column manage_stock with label Manage Stock.
To clean cache, run the following console command:
php bin/magento cache:clean config
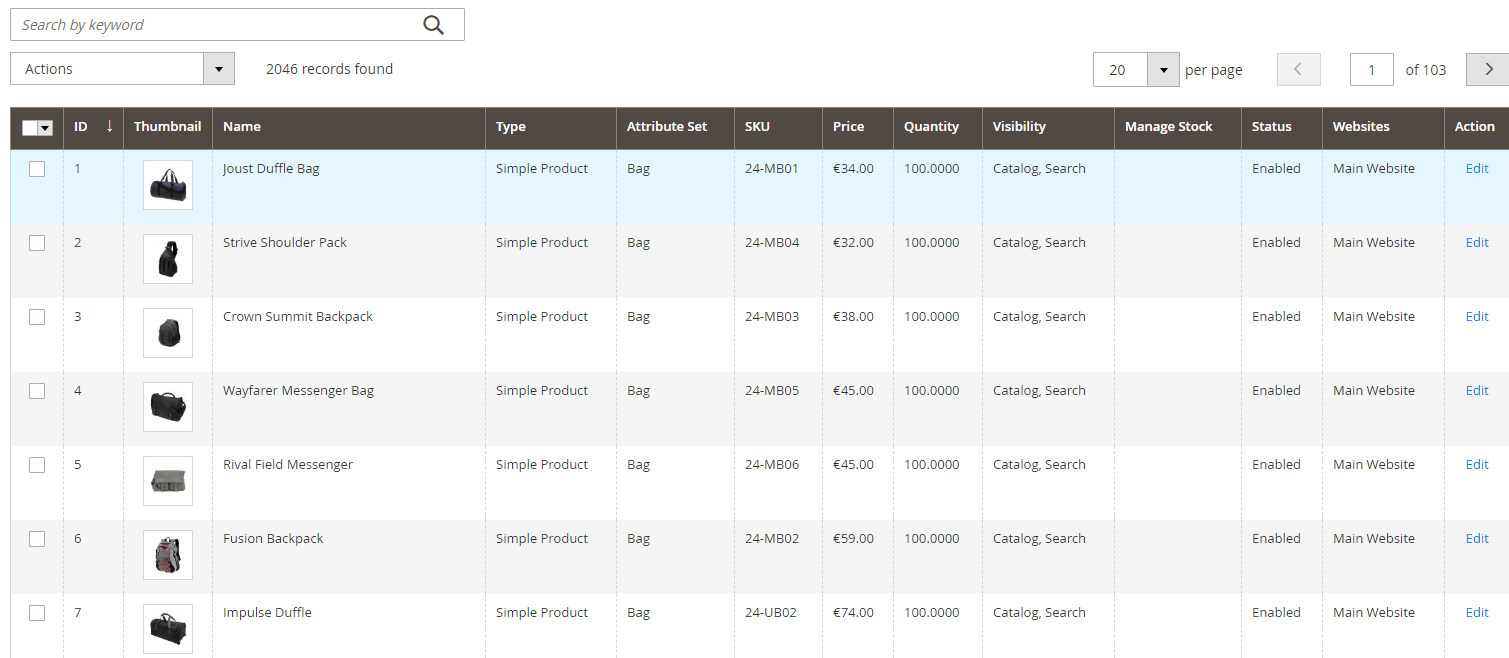
After clearing the cache, you will see the new column in the products grid. However, the data of that column is missing as you did not add stock management date to products collection.
Step 3: Add stock management data to products collection
Data provider class which is used by product_listing UI component instance is the best place to add stock managementdata to products collection.
Magento_Catalog/view/adminhtml/ui_component/product_listing.xml
<dataSource name="product_listing_data_source" component="Magento_Ui/js/grid/provider">
    <settings>
        <storageConfig>
            <param name="dataScope" xsi:type="string">filters.store_id</param>
        </storageConfig>
        <updateUrl path="mui/index/render"/>
    </settings>
    <aclResource>Magento_Catalog::products</aclResource>
    <dataProvider class="Magento\Catalog\Ui\DataProvider\Product\ProductDataProvider" name="product_listing_data_source">
        <settings>
            <requestFieldName>id</requestFieldName>
            <primaryFieldName>entity_id</primaryFieldName>
        </settings>
    </dataProvider>
</dataSource>
You will see the dataProvider class is Magento\Catalog\Ui\DataProvider\Product\ProductDataProvider if you look at the dataSource UI component.
There are two properties in this data provider class which are addFieldStrategies and addFilterStrategies. These properties are arrays with extra strategies which are called addField and addFilter methods respectively. Bellow, you are going to be guided on how to create your own strategies for your stock management column.
Manage stock field strategy
Creating a field strategy which will allow you to add stock management status to the products collection is the first thing that you will need to do.
Mageplaza\HelloWorld\Ui\DataProvider\Product\AddManageStockFieldToCollection
<?php
namespace Magplaza\HelloWorld\Ui\DataProvider\Product;
class AddManageStockFieldToCollection implements \Magento\Ui\DataProvider\AddFieldToCollectionInterface
{
    public function addField(\Magento\Framework\Data\Collection $collection, $field, $alias = null)
    {
        $collection->joinField('manage_stock', 'cataloginventory_stock_item', 'manage_stock', 'product_id=entity_id', null, 'left');
    }
}
The addField method from Magento\Ui\DataProvider\AddFieldToCollectionInterface interface will be implemented in AddManageStockFieldToCollection field strategy. To add Stock management status to product collection, you will use the stock management status which comes from the manage_stock column in cataloginventory_stock_item DB table and Magento\Eav\Model\Entity\Collection\AbstractCollection::joinField method.
Manage stock filter strategy
Sometimes, someone would want to filter grid data by stock management status. In those cases, you need to create the below filtering strategy.
Mageplaza\HelloWorld\Ui\DataProvider\Product\AddManageStockFilterToCollection
<?php
namespace Mageplaza\HelloWorld\Ui\DataProvider\Product;
class AddManageStockFilterToCollection implements \Magento\Ui\DataProvider\AddFilterToCollectionInterface
{
    public function addFilter(\Magento\Framework\Data\Collection $collection, $field, $condition = null)
    {
        if (isset($condition['eq'])) {
            $collection->addFieldToFilter($field, $condition);
        }
    }
}
The addFilter method from Magento\Ui\DataProvider\AddFilterToCollectionInterface interface will be implemented in AddManageStockFilterToCollection field strategy. The filter condition will be forward to Magento\Eav\Model\Entity\Collection\AbstractCollection::addFieldToFilter method if grid is filtered by stock management status.
Add strategies to the product listing data provider
After you have created strategies, you need to add these strategies to the product_listing data provider in order to use them. This can be done in the di.xml file.
app/code/Mageplaza/Custom/etc/adminhtml/di.xml
<?xml version="1.0" encoding="utf-8" ?>
<config xmlns:xsi="http://www.w3.org/2001/XMLSchema-instance" xsi:noNamespaceSchemaLocation="urn:magento:framework:ObjectManager/etc/config.xsd">
    <type name="Magento\Catalog\Ui\DataProvider\Product\ProductDataProvider">
        <arguments>
            <argument name="addFieldStrategies" xsi:type="array">
                <item name="manage_stock" xsi:type="object">Mageplaza\HelloWorld\Ui\DataProvider\Product\AddManageStockFieldToCollection</item>
            </argument>
            <argument name="addFilterStrategies" xsi:type="array">
                <item name="manage_stock" xsi:type="object">Mageplaza\HelloWorld\Ui\DataProvider\Product\AddManageStockFilterToCollection</item>
            </argument>
        </arguments>
    </type>
</config>
To finish, you need to run this console command to clean cache:
php bin/magento cache:clean config
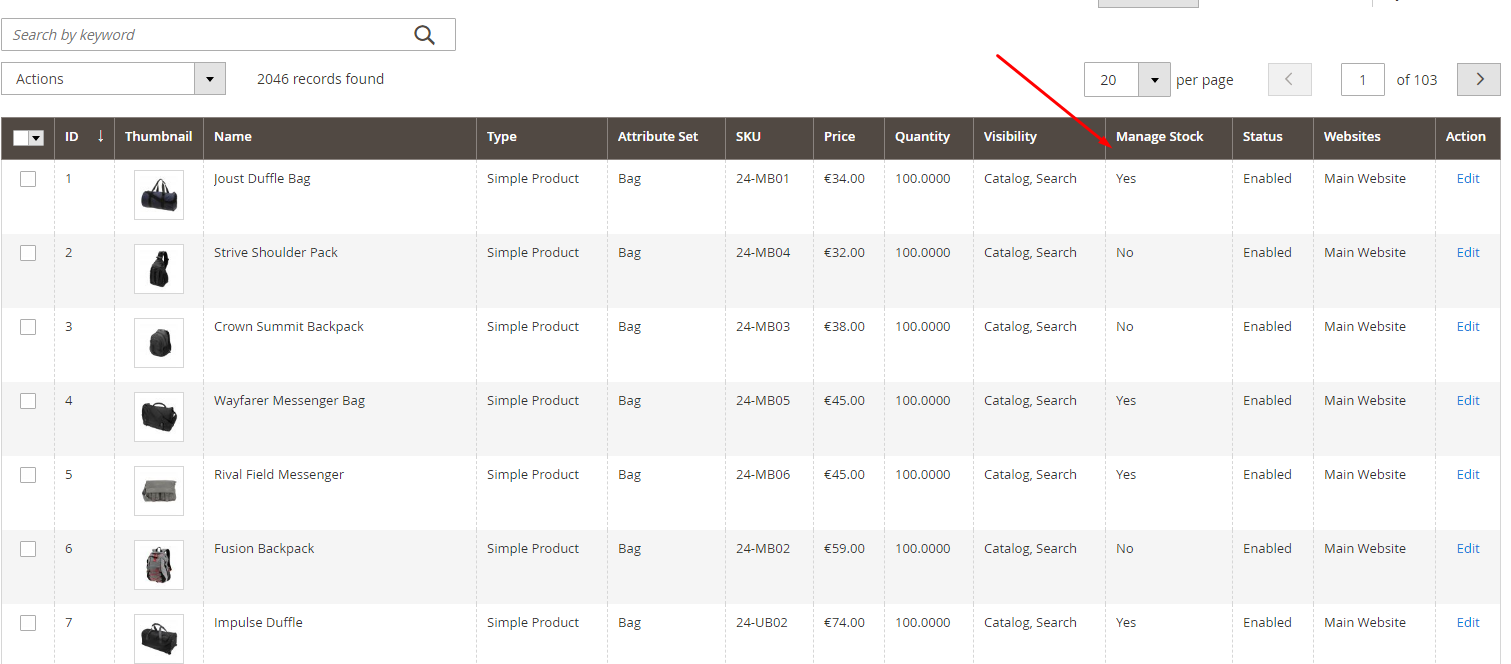
Once you have cleaned cache, you will see your new column with data in the products grid.
Conclusion
In conclusion, when displaying values in the product grid’s columns, besides the columns which are already are product attributes, you may need to display values that aren’t product attributes. I hope after reading this post, you will be able to add these values to the products grid easily.