How to Add Social Media to Your Shopify Store – Complete 2025 Guide

Integrating social media into your Shopify store can significantly boost customer reach, brand awareness, and sales. Research shows that 87% of online shoppers rely on social media to make purchasing decisions, highlighting its importance in the e-commerce landscape.
So, how exactly can you connect your social media accounts to your Shopify store?
This article aims to provide a detailed guide on incorporating social media into Shopify. You will discover how to showcase social media icons on your store and link them directly to your social media profiles, enhancing your online presence and customer engagement. So what are you waiting for, let’s get started!
Why Should We Add Social Media to Shopify?

Adding social media to your Shopify store brings numerous advantages. By integrating platforms like Instagram, Facebook, and TikTok, you open doors to various benefits:
-
Boost Brand Awareness: Incorporating social media icons enables visitors to easily follow your accounts, extending your brand’s reach beyond your website.
-
Enhance Customer Interaction: Social media fosters live feedback and discussions, allowing you to build stronger relationships with your customers and gain valuable insights.
-
Establish Trust and Credibility: Maintaining an active social media presence demonstrates reliability and credibility, enhancing trust among your audience.
-
Improve Customer Support: Social media provides a convenient channel for customers to ask questions or provide feedback, offering a seamless and efficient support experience directly from your Shopify store.
How to Add Social Media to the Shopify Store?
Adding Social Media to the Shopify Store can be a challenge for beginners, but with our experience in the e-commerce industry, it’s a piece of cake!
Here is a simple guide that will show you how to add social media to your Shopify store. It includes methods like how to connect your store to social media sites, add a social sharing image, and add a social media feed.
1. Connect your Shopify business to social media platforms
Integrating your Shopify store with social media platforms is a strategic move to boost your online presence and reach a wider audience. By seamlessly connecting platforms like Instagram, Facebook, Twitter, and more, you can streamline your marketing efforts, increase brand visibility, and drive traffic to your Shopify store. Below are easy steps you can do yourself:
Step 1: Enter the Shopify dashboard and go to Online Store > Themes > Customize.
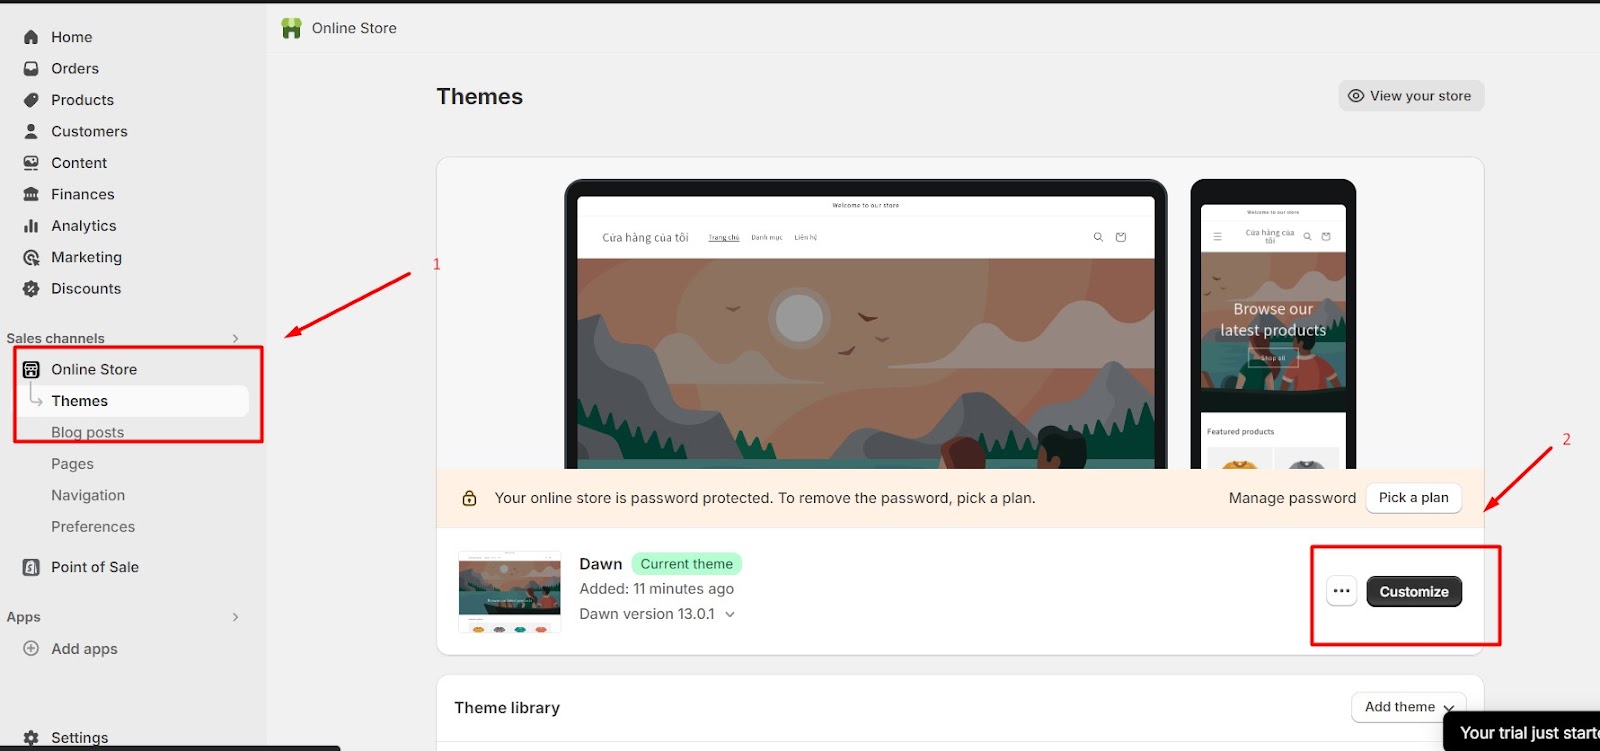
Step 2: Locate the button that says “Theme settings.” Find the Social Media choice on the left and click on it.
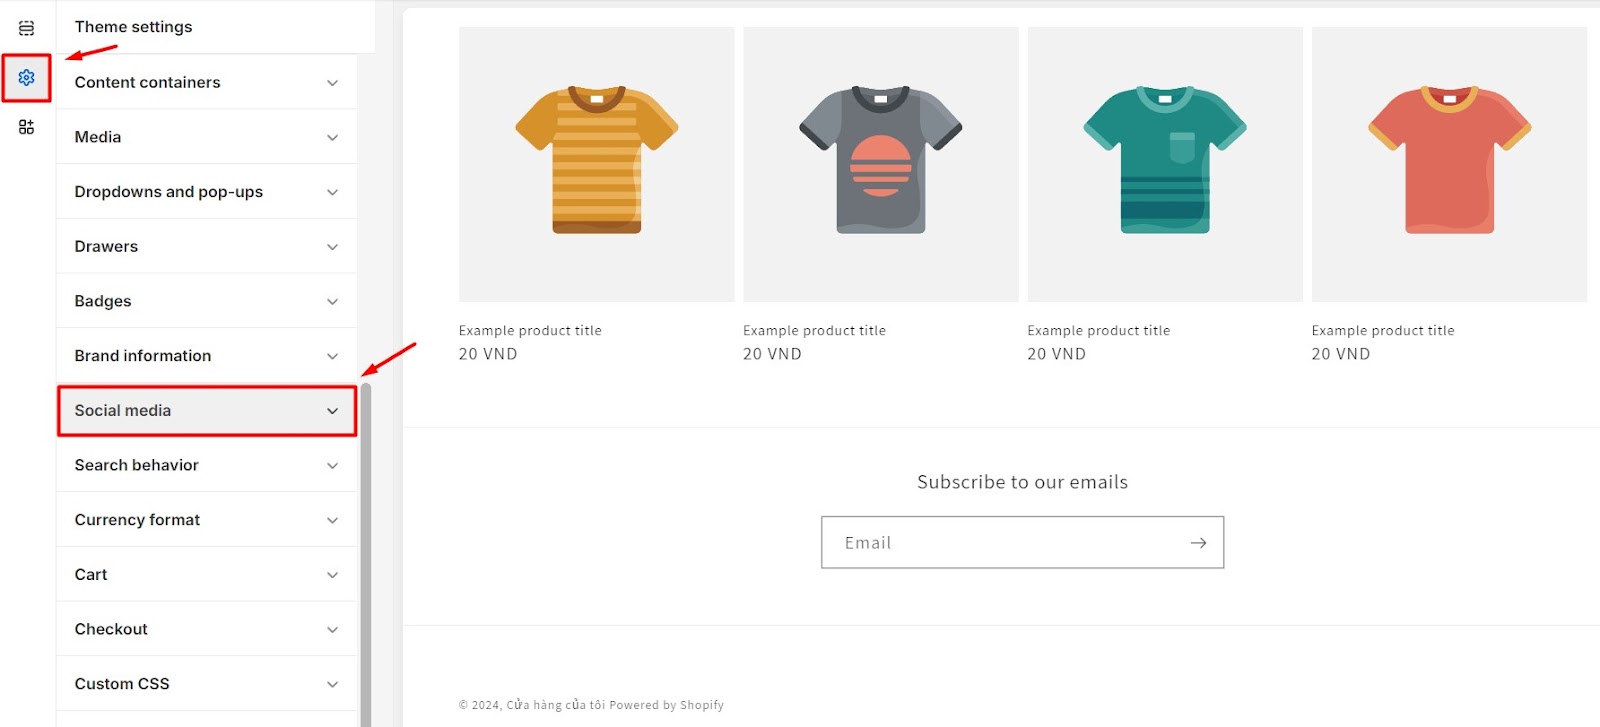
Step 3: You should copy all of your social media page URLs and then put them all into the right field. This shows you how to add links to social media to Shopify.
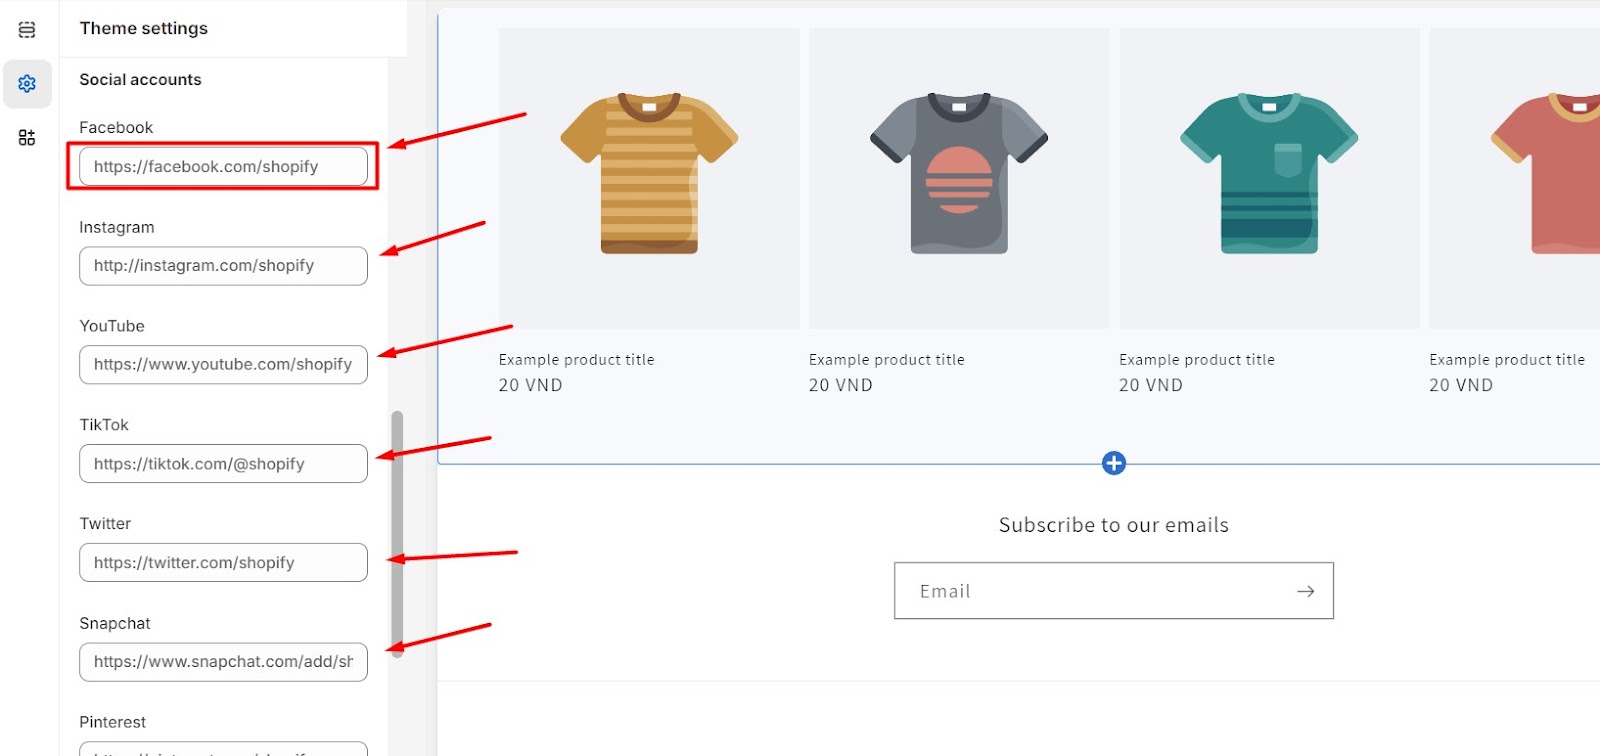
Step 4: Look at the social icons to make sure they show up right for the accounts you added. By default, they are right above the bottom. Then, click Save to finish the process.
2. Add a picture for social sharing
To add a social sharing image, you can follow these simple steps:
Step 1: Start by logging into your Shopify account and clicking on “Online Store” in the admin menu. From there, select “Preferences.”
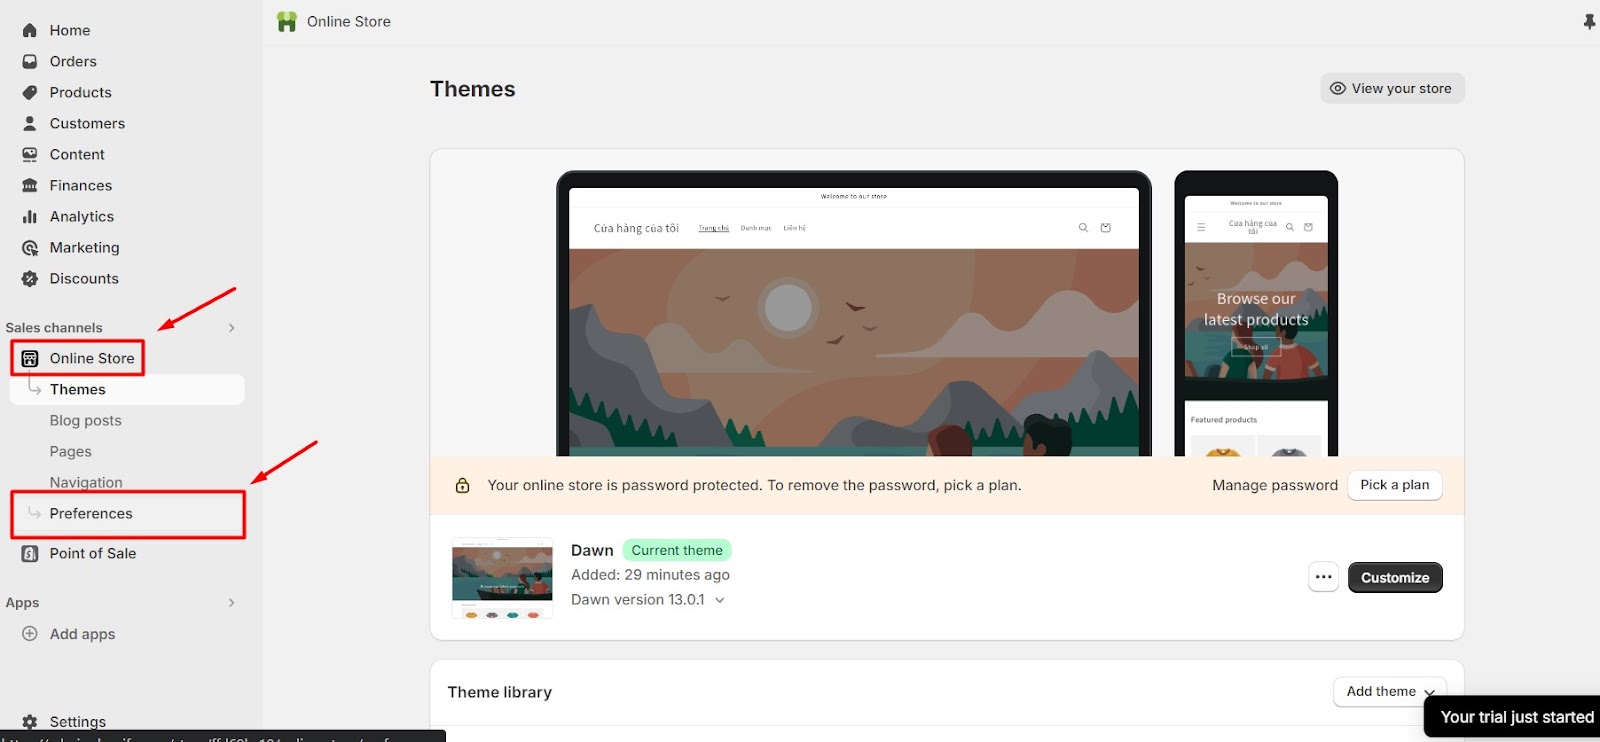
Step 2: Once you’re in the Preferences section, scroll down until you find the “Social sharing image” option.
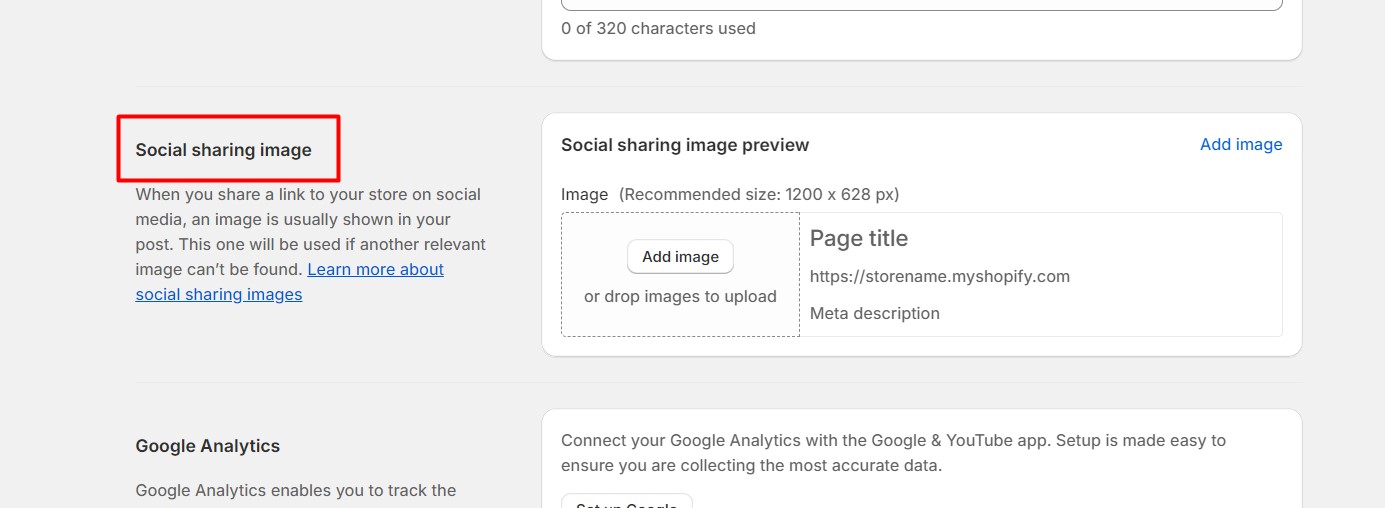
Step 3: Click on the “Add image” button next to the Social sharing image option. This action will prompt you to upload an image from your computer.
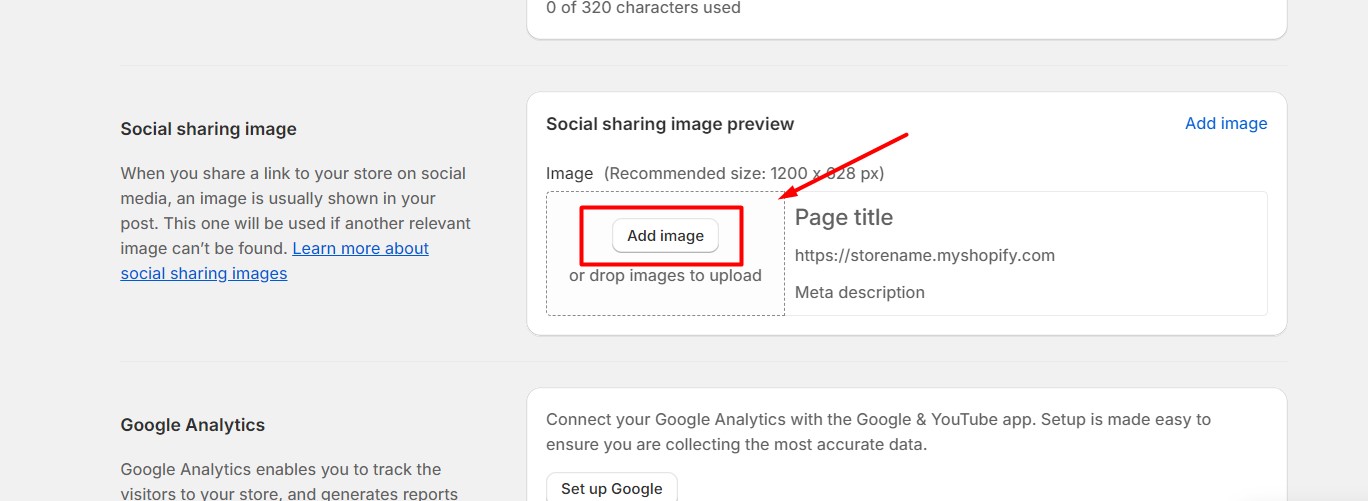
Step 4: Choose the image you want to use as your social sharing image and upload it. After uploading, you’ll see a preview of how the image will appear when your store link is shared on social media platforms.
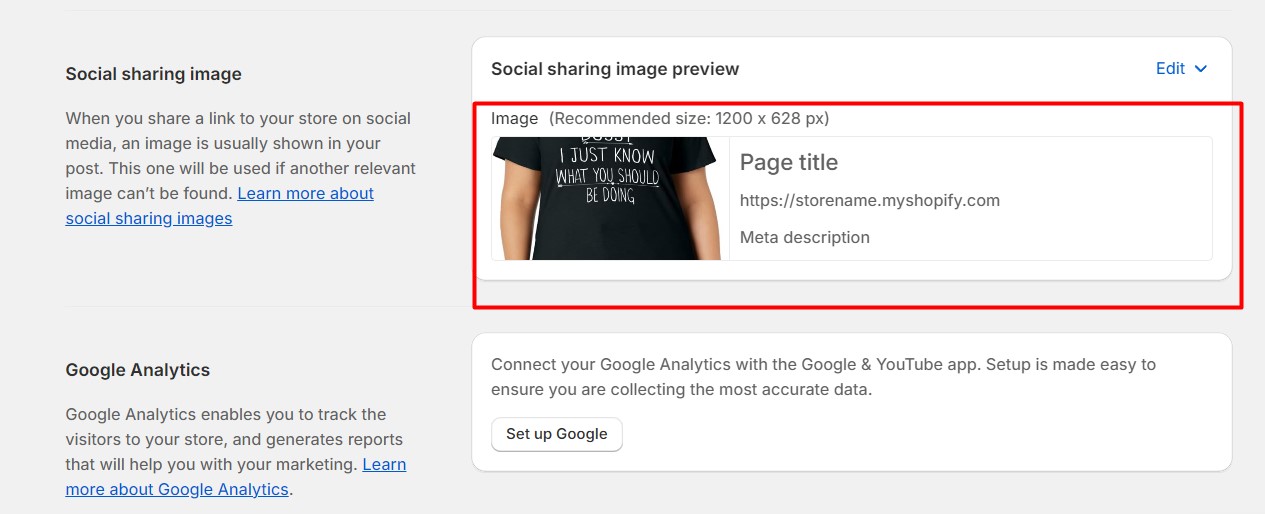
Step 5: If you’re satisfied with the preview, save the changes to ensure that your selected image will be used as the social sharing image when you share your store link on social media.
3. Add a feed from social media
Adding a social media feed to your Shopify store can help showcase your social media content directly on your website, engaging visitors and encouraging them to explore your social profiles. Here are the steps to add a social media feed to Shopify:
Install Mageplaza Instagram Feed on your Shopify
Step 1: Go to the Shopify App Store and search for Mageplaza. Choose the Mageplaza Instagram Feed. Then, click the Log in to install button.

Step 2: Press on the Google icon.
![]()
Step 3: Click on your Google account > Continue > Create a Shopify account
Step 4: Press Sign up
Step 5: Choose one of the two options that are suitable for your situation, including:
-
I’m just starting.
-
I’m already selling online or in person.
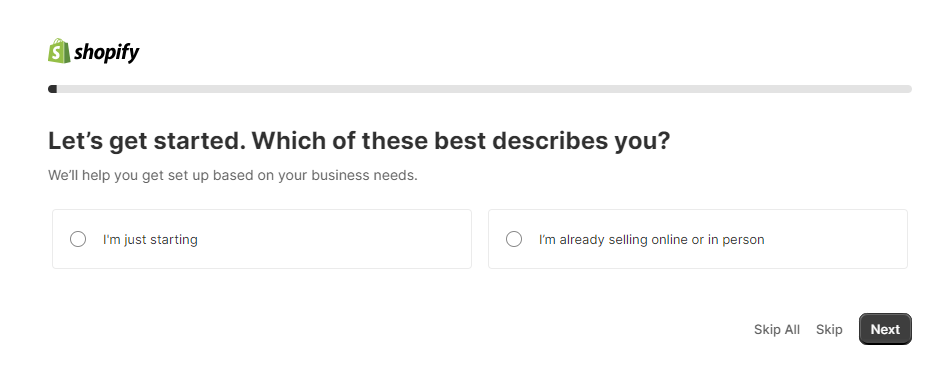
Step 6: Click on Next
Step 7: Choose where you want to sell.
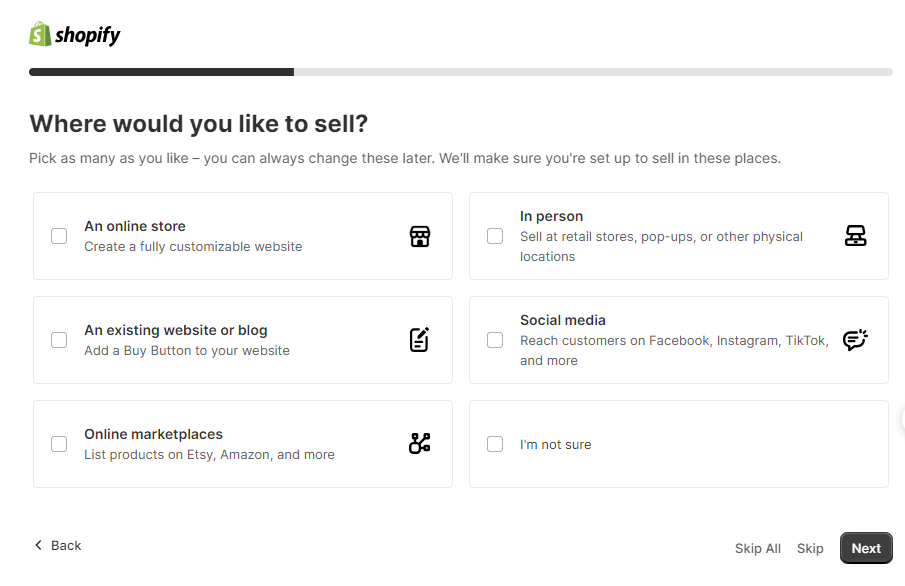
Step 8: Pick products that you want to start with.
Step 9: Select your business to be located.

Step 10: Sign up with Google to create a Shopify account.
Step 11: Click add apps button to insert the “Mageplaza Instagram Feed”
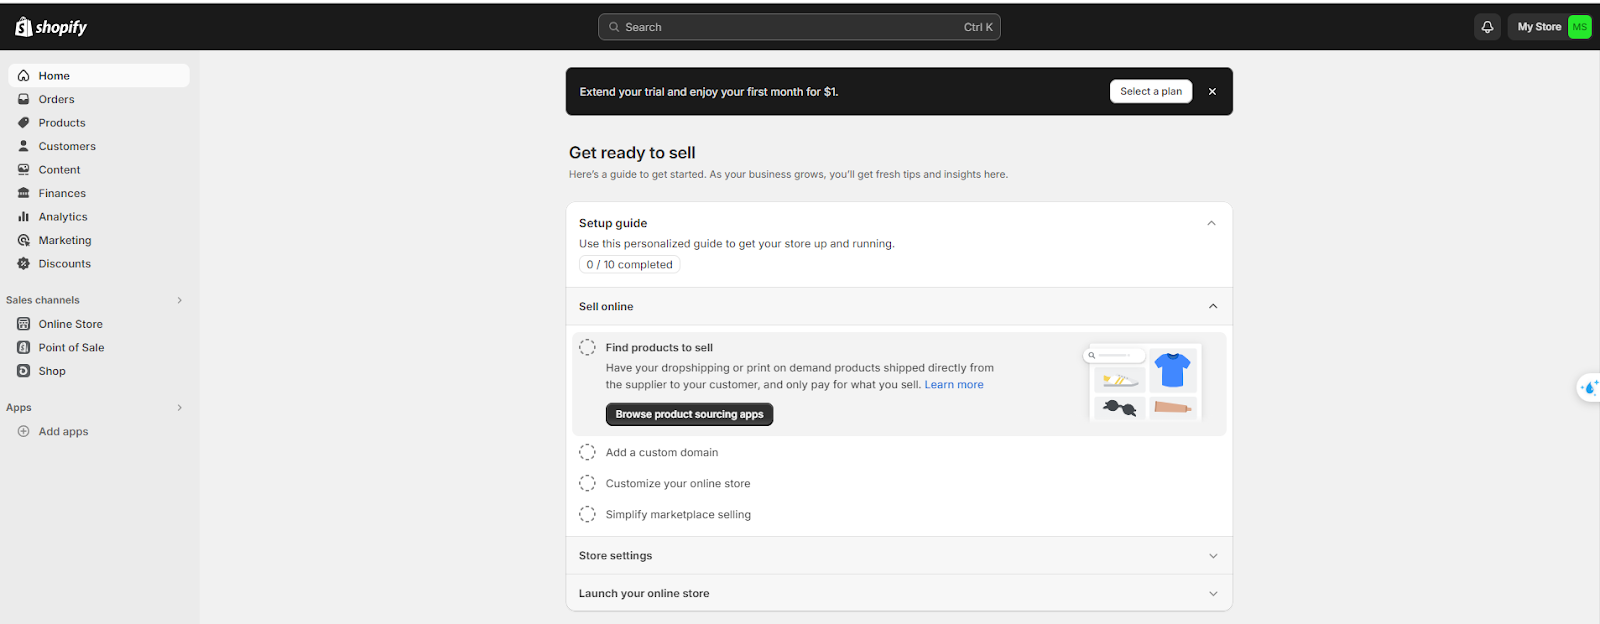
Step 11: Install “Mageplaza Instagram Feed” into your Shopify.
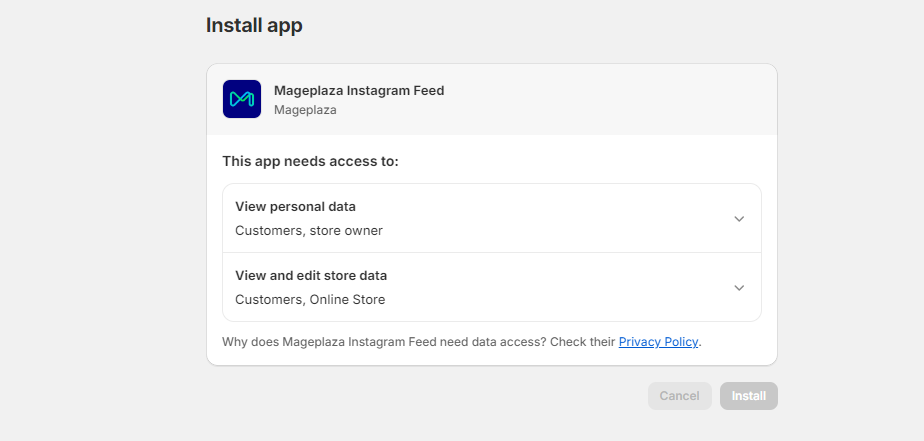
Then, install, and your store will have the Mageplaza Instagram Feed appear in the Apps section.
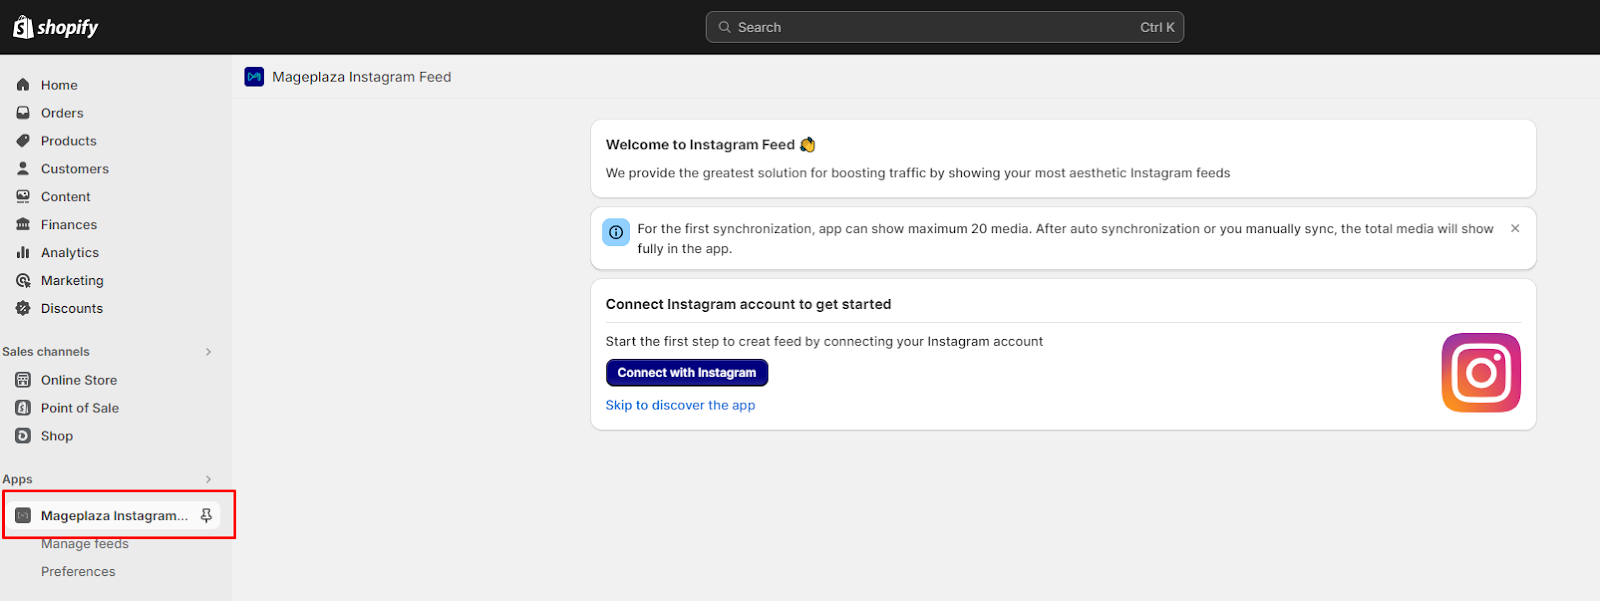
Connect your Instagram account to the Mageplaza Instagram Feed
After you install Mageplaza Instagram Feed on your Shopify, you need to connect your Instagram account to Mageplaza Instagram Feed.
Step 1: Start by clicking on the Connect Instagram account button.

Step 2: Log in to your Instagram account.
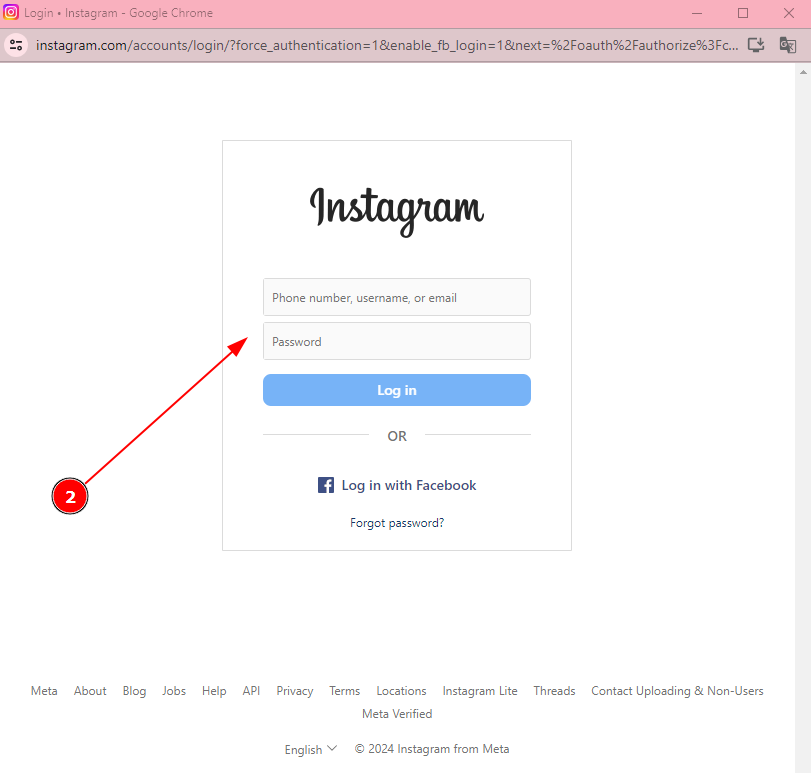
Step 3: Once you log in, a confirmation window will pop up requesting permission to share your account information. Simply click Allow to continue.

Step 4: Allow Instagram to use cookies and similar technologies, which is essential for the integration.
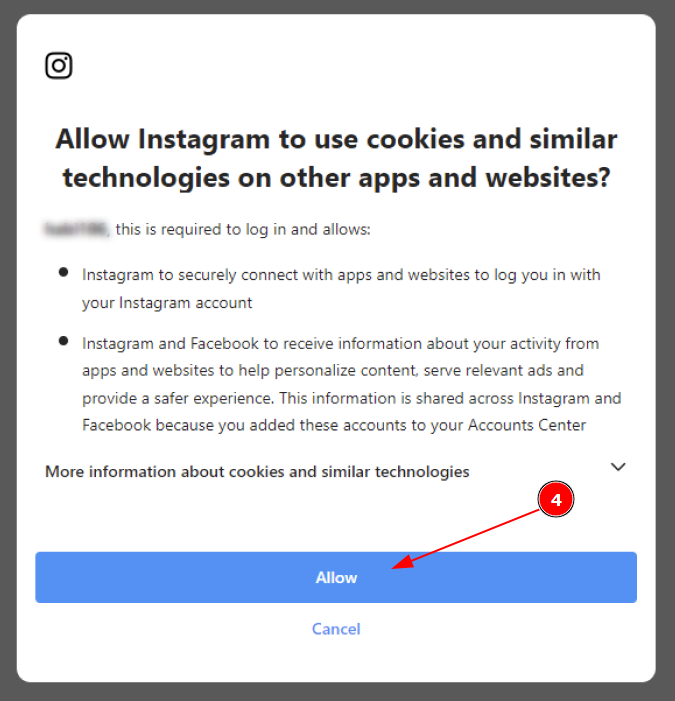
Step 5: After that, give Mageplaza Instagram Feed permission to receive information about your profile and content.

Upon completing these steps, you will be redirected to the Create Feed page, where you can start designing your new feed.
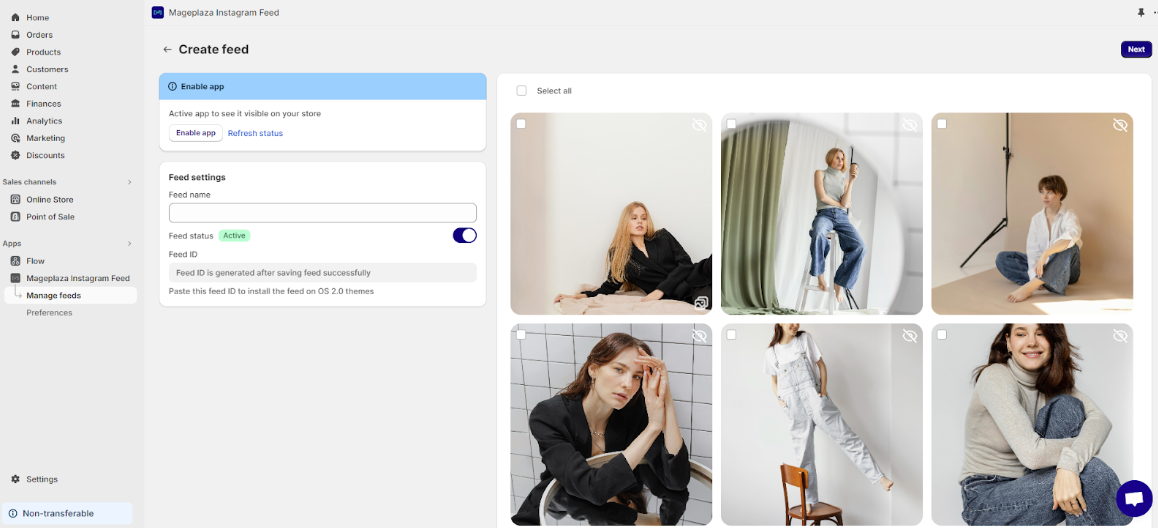
If you decide not to connect your Instagram account initially, you can click on Skip to discover the app.

Then, the Create Feed page will appear, allowing you to customize feeds. Here, you can connect your account by clicking Connect with Instagram.

Follow all the detailed steps above and you can add a social media feed to Shopify successfully.
4 Best Social Media Share Button Apps
You’ll be surprised at how useful these popular social share button apps are in the Shopify App Store. For quick selection, we’ve also marked them to help you add social networks to Shopify, change the look of the social network icons, and make sharing possible.
1. Elfsight Social Share Buttons
Elfsight Social Share Buttons are a powerful tool for enhancing website engagement and social media visibility. By enabling seamless one-click sharing, they encourage visitors to spread content easily across various platforms, leading to increased traffic and improved SEO rankings.

These buttons facilitate content promotion and audience interaction, helping businesses create a vibrant online presence and connect with their target audience effectively. With Elfsight Social Share Buttons, businesses can amplify their reach and engagement, driving meaningful results for their online presence.
Outstanding Features:
- Easy social sharing integration for multiple platforms (Facebook, Twitter, Pinterest, WhatsApp, etc.)
- Customizable button design & layout to match your website’s aesthetic
- Strategic placement options (inline, floating, or at the bottom of posts)
- Mobile-friendly design ensures seamless sharing across devices
Pricing:
- Free Plan: $0/month
- Basic Plan: $5/month
- Pro Plan: $10/month
- Premium Plan: $20/month
2. ShareThis Share Buttons
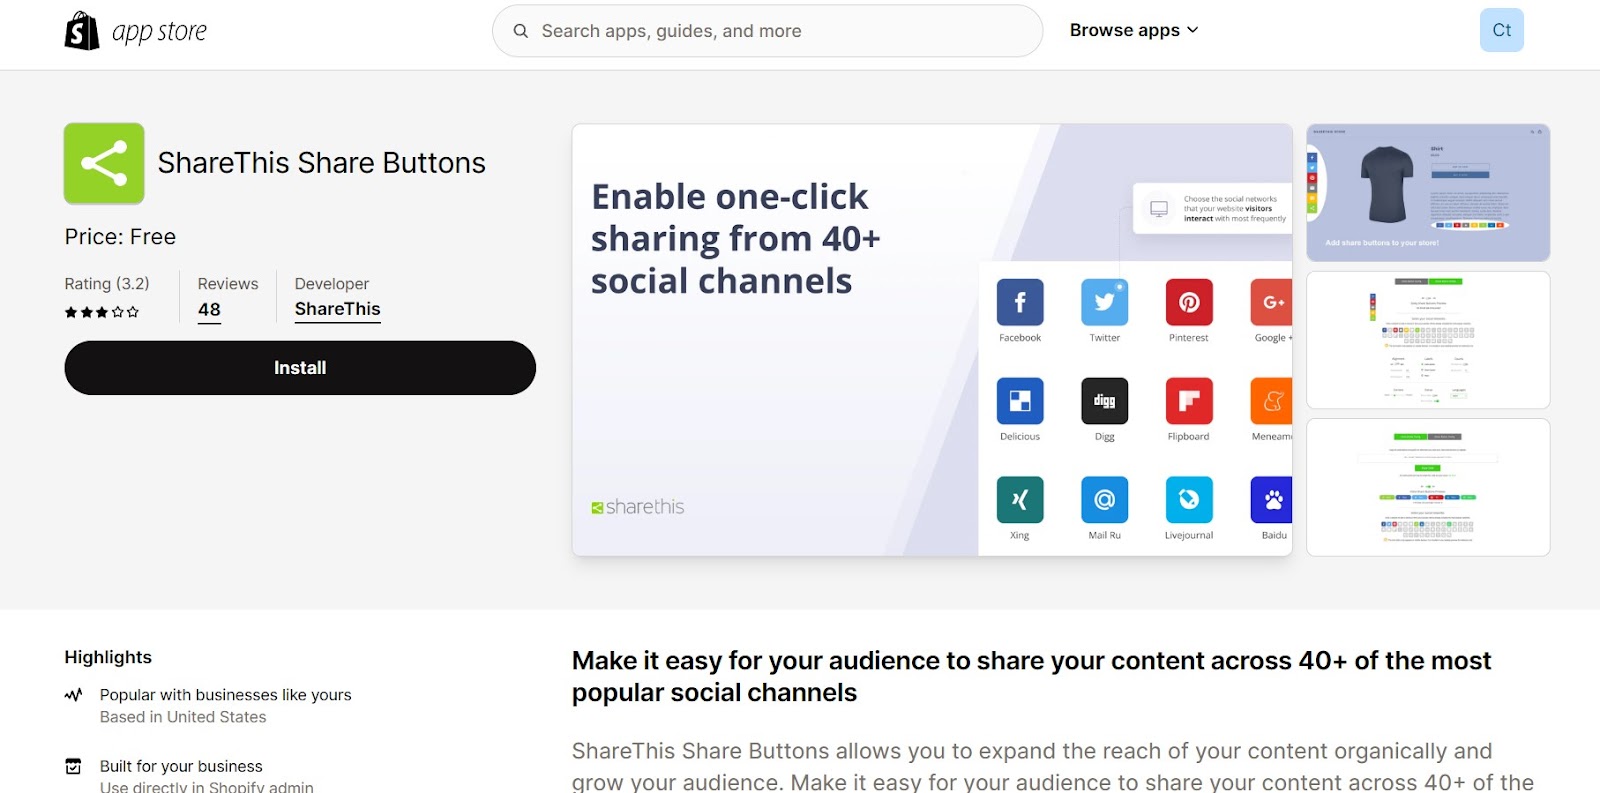
ShareThis Share Buttons lets website owners get their original content seen on more social media sites, like Facebook, WhatsApp, Twitter, and Pinterest. With these simple buttons, sharing is made easy, so people can easily share material they find useful.
By adding ShareThis Share Buttons, websites can get users more involved, get more attention on social media, and get more free traffic by making it easy for people to share on social media.
Outstanding Features:
- Make buttons stay in place on the sidebar even when people scroll.
- Can change the share buttons’ size, color, orientation, and style to make them fit your brand.
- It should be easy to add share buttons to blog posts and pages with products.
Pricing: Free Plan: $0/month
3. Keep & Share Your Cart
Keep & Share Your Cart is a convenient app that empowers customers to effortlessly share their cart contents on popular social media platforms such as WhatsApp, Twitter, and Facebook. With customizable social sharing buttons, users can select their preferred sharing options directly from the cart page.
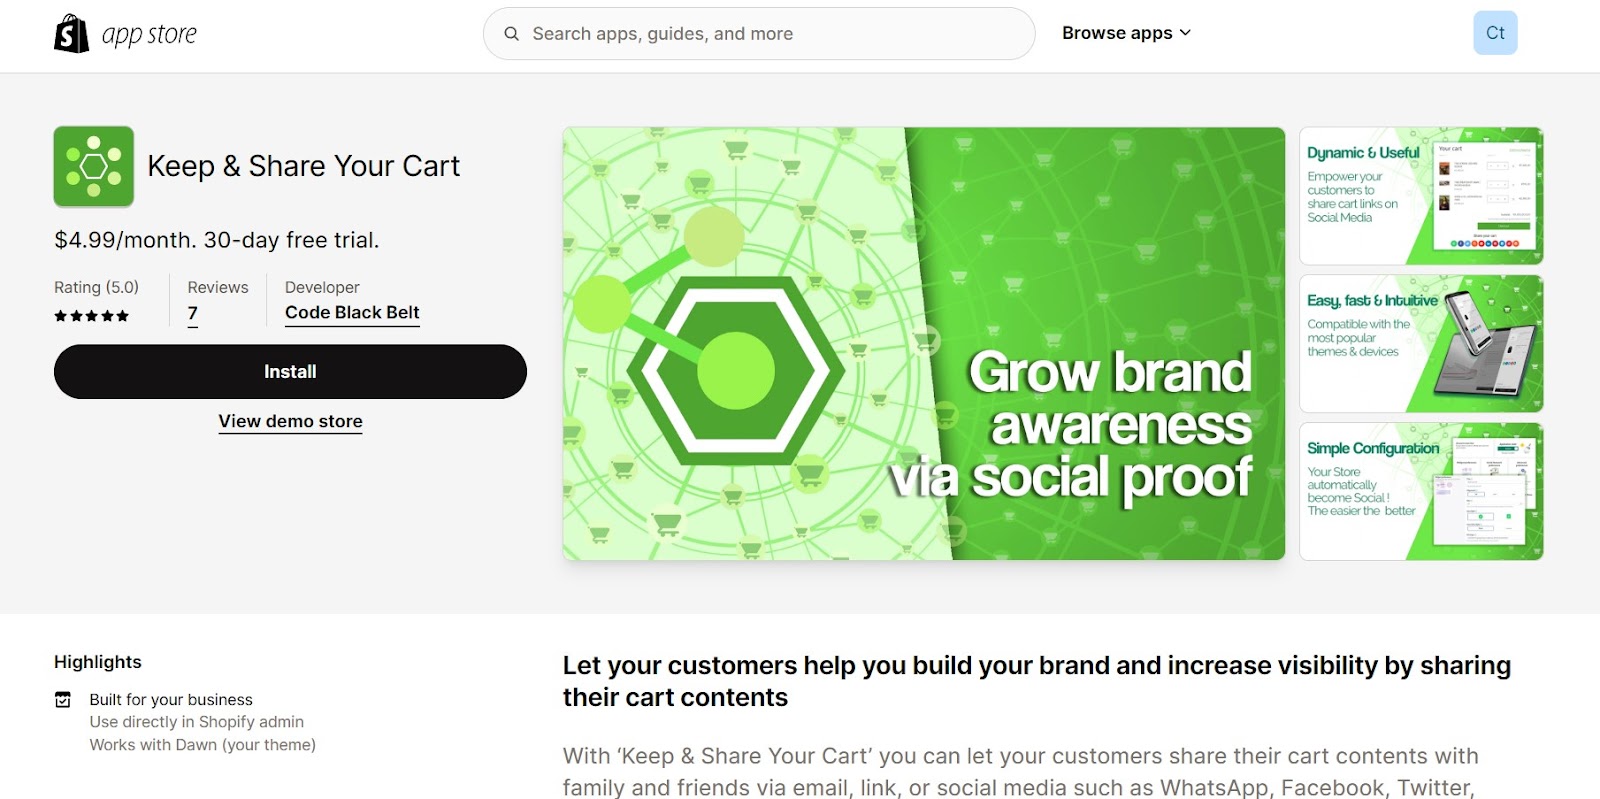
The app allows easy configuration of the widget’s position, ensuring seamless integration with any theme without requiring template modifications or coding knowledge. This user-friendly approach enhances the shopping experience and promotes social sharing, driving increased engagement and potential sales.
Outstanding Features:
- Save shopping carts for later retrieval
- Share cart contents with friends & family via email, link, or social media
- Resume shopping later from any device
- Potentially reduces cart abandonment & encourages social sharing
Pricing:
$4.99/month with 30-day free trial.
4. Floatify ‑ CTA, Social Buttons
Floatify is a powerful app designed to enhance the appearance and user experience of your online store. It offers customizable Call-to-Action (CTA) and social buttons that seamlessly integrate with your website, improving navigation and encouraging interaction.
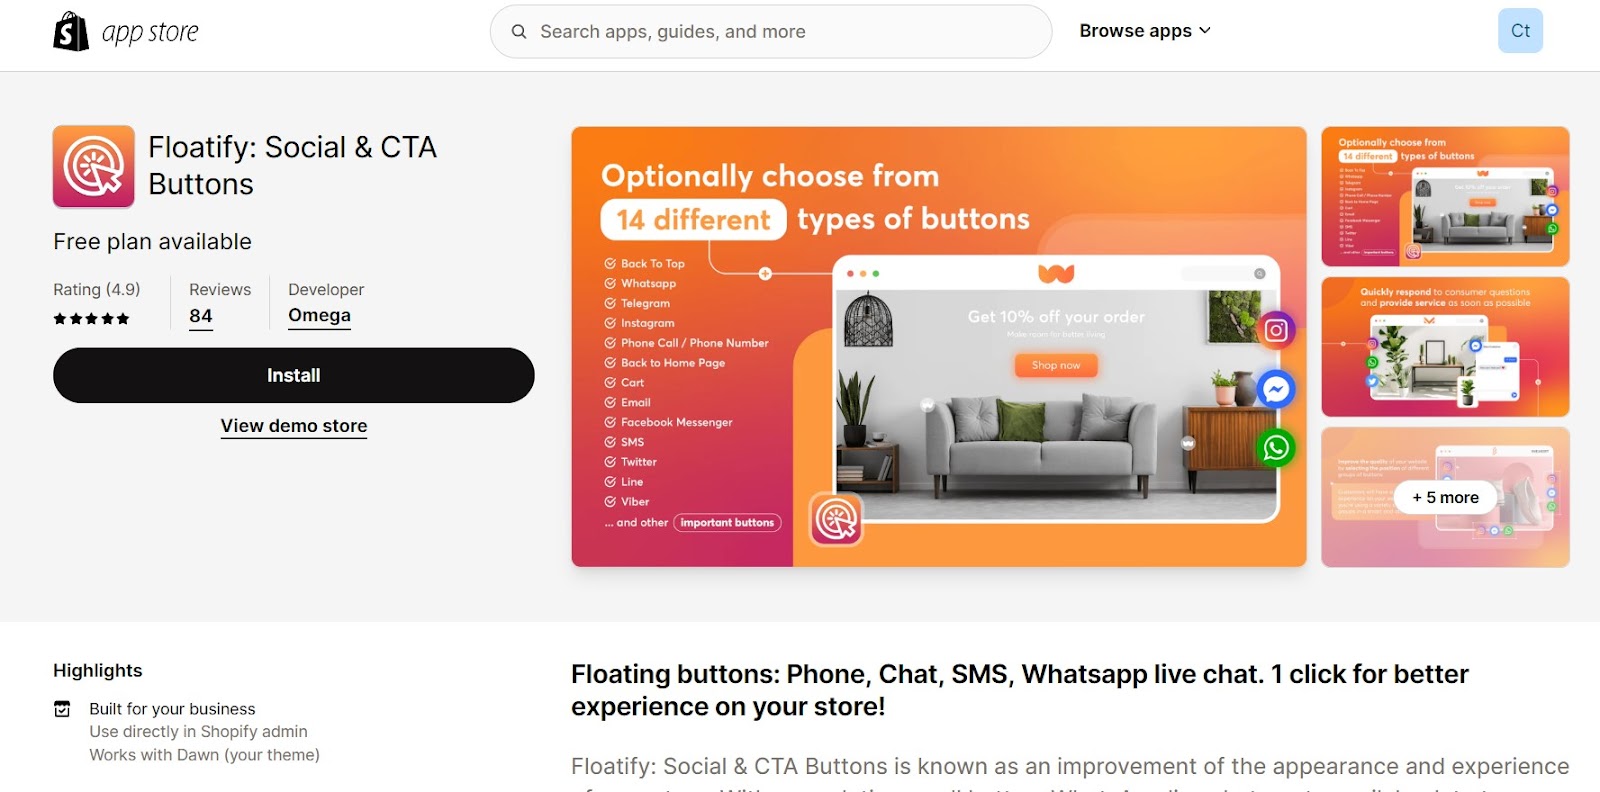
With Floatify, you can boost product sales by creating visually appealing and easy-to-use buttons that guide customers through your store. Its high-quality features ensure a professional and engaging browsing experience for visitors, leading to increased conversions and customer satisfaction.
Outstanding Features:
- Give a variety of button styles.
- Put buttons in the right places to help buyers and sellers connect faster.
- Give out buttons with nice patterns.
Pricing:
- Free plan available
- $4.99/month
FAQs
1. What’s the best way to add my Social Media link to Shopify?
To add social media links to Shopify, you should navigate to the theme setting > social media, then, insert your Instagram, Facebook, or TikTok account’s URL to link it to your Shopify store. Finally, just save your settings and it’s done.
2. How do I get social media icons to show up in the header of Shopify?
There are a lot of ways to get social networking icons to show up in the Storeify header. To do this, most people use a Shopify tool or app, like Social Bar: Social Media Icons, ShareThis Share Buttons, Floatify - Social Buttons, and so on.
3. What are the steps to add social media buttons to the Shopify footer?
- Step 1: Open the Theme Editor in your Shopify dashboard.
- Step 2: In the Theme Editor, navigate to the “Sections” tab.
- Step 3: Look for and select the “Footer” section from the list of available sections.
- Step 4: Within the Footer section settings, locate the option related to displaying social media icons. This option may be labeled as “Show Social Media Icons” or something similar.
- Step 5: Check the box next to the option to enable the display of social media icons in your footer.
- Step 6: Save your changes by clicking on the “Save” or “Publish” button in the Theme Editor.
4. How do I add social media to the Shopify bar for announcements?
- Step 1: Go to your Shopify admin panel and click on “Online Store,” then select “Themes”.
- Step 2: In the Themes section, find and select the “Debutify” Shopify theme. Click on the “Customize” button next to it.
- Step 3: Once you are in the customization panel for the Debutify theme, look for options to add a new section. You can either choose the “Announcement” section if it’s available, or you may need to click on “Add section” to find and add the Announcement section to your storefront.
- Step 4: Within the Announcement section settings or options, there should be a checkbox labeled “Show social media” or something similar. Tick or check this option to enable the display of social media icons.
- Step 5: After making sure the “Show social media” option is selected, click on the “Save changes” button to apply the changes to your theme.
Final Words
As an online store owner, you want to make the most of the sales that come through your doors. One of the most important things to do is learn how to add social media to Shopify.
Your customers will know there are more ways to stay in touch, get news, give feedback, and help take your brand to a whole new level if you put social icons right at the top of the website’s bottom. Enjoyed our guide? Follow Mageplaza to get more Shopify business tips and tricks!


