How to Set Up Klaviyo in Shopify: A Complete Guide in 2025

A Shopify store without integrations for e-commerce apps is like an athlete without their training gear. Using apps for Shopify email marketing strategies, in particular, are vital for effectively managing an online store.
In this discussion, we’ll explore Klaviyo, one of the most popular and feature-rich options available. We’ll focus on how to integrate it seamlessly with your Shopify store.
Now, let’s quickly delve into the reasons and the process.
Key Features of Klaviyo
Klaviyo functions as a unified customer data platform for marketing channels, allowing you to control customer data and interactions to drive business growth on your terms.
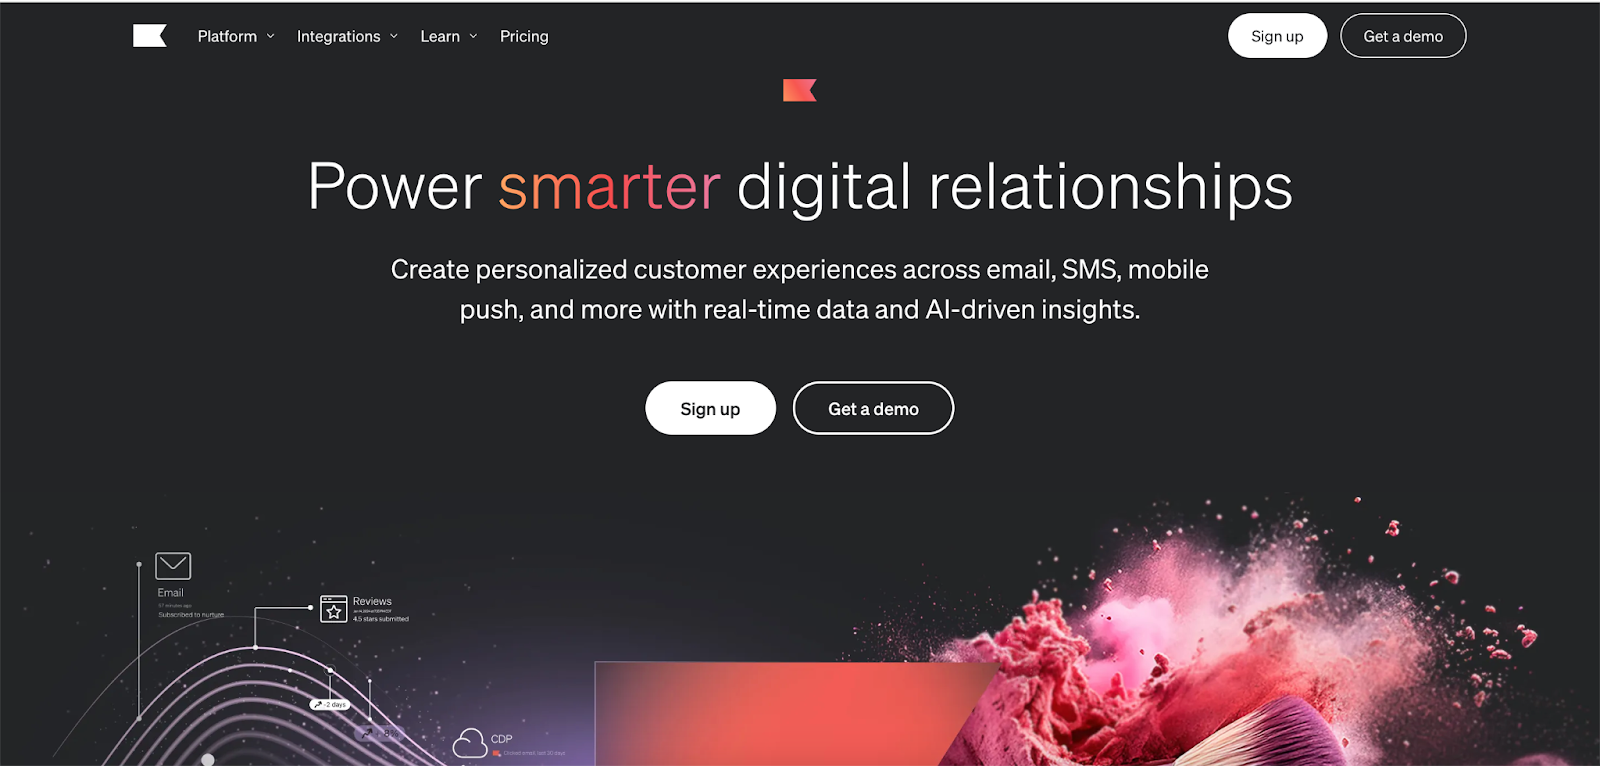
Here are the key features that make it a powerful automation tool:
- Seamless Integration
Klaviyo lets you organize crucial information in one place with just a click, eliminating the need for development work.
- ROI Reporting
It provides precise insights into the revenue you can generate by analyzing real-time transactions.
- Advanced Segmentation and Personalization
You can target individuals based on their activity, browsing habits, property values, and other relevant factors, allowing you to create customized Klaviyo email templates that yield better results.
- Pre-Programmed Autoresponders
Activate pre-built responses to customers to increase your business’s profitability.
- Dynamic Data Blocks
Personalize your email content using information about products and orders to enhance engagement.
That’s a brief summary of Klaviyo. Now, let’s get an overview of Klaviyo and Shopify integration.
Benefits of Integrating Klaviyo with Shopify Accounts
Harmonize Your Online Store’s Data Flow with First-Party Insights
You’ve probably heard about “privacy-first tracking” and the “end of third-party cookies.” While these shifts are crucial, Klaviyo’s first-party data collection ensures your customer acquisition and retention strategies remain robust. Integrating Klaviyo with Shopify allows you to sync Klaviyo’s processes, including lead data, with Shopify’s server-side data, unlocking numerous promotional opportunities. For example, exporting high-value customers to an advertising platform can improve the platform’s algorithm to identify high-intent customers—a win-win scenario.
Send Targeted Blasts or Design Customer Journeys
Planning a flash sale? No worries. Send a targeted blast to your list and watch the sales surge. This is perfect for holidays, special events, milestones, or new product launches. Klaviyo makes customer retention easy with a few clicks. You can also engage “colder” audiences or re-engage past customers with well-designed workflows that include your brand’s story. Segment your audience to target cart abandoners or send special emails to frequent shoppers. The possibilities are limitless!
Implement Pre-Built Consent and Lead Generation Forms
With Klaviyo and Shopify in sync, lead generation is effortless. Use pre-built Klaviyo email sign-up form templates on your Shopify store, avoiding the need to build from scratch.
Leverage Data Science and Customer Analytics
To monitor your key performance indicators, Klaviyo offers a variety of customisable reports. Your email marketing campaigns’ success may be precisely measured by merging Klaviyo analytics with Shopify.
For instance, you may track the precise number of customers who converted after receiving your email during a BFCM campaign. This synced data provides unambiguous insights into the effectiveness of your campaign.
Tailored Product Recommendations

Use algorithms to recommend products to your customers based on Shopify’s product catalog and customer behavior. Add these personalized recommendations as blocks in your emails, providing tailored suggestions for each recipient.
Additional Benefits
The partnership between Shopify and Klaviyo includes many smaller, often overlooked advantages. Customer support teams on both platforms are familiar with each other’s tools, ensuring quick and effective assistance. Moreover, syncing the platforms allows seamless use of features from both, such as incorporating Shopify-generated discounts into your email campaigns.
When Should You Consider Connecting Klaviyo to Shopify?
If you’re a Shopify store owner who hasn’t yet set up email automation—what are you waiting for? And for those who have, connecting your automation tool with Shopify is a straightforward decision
The primary advantage of Klaviyo is that it’s not only one of the most advanced and cost-effective email automation tools on the market but also incredibly easy to integrate with Shopify.
You may then centralize all of your data and easily switch between the two programs according to your needs. If your goals are to: You should also think about integrating Klaviyo.
- Set up Automated Campaigns: Utilize server-side data from Shopify and first-party data from Klaviyo to automate campaigns such as abandoned carts, welcome series, and order confirmations.
- Use Advanced Segmentation and Personalization: To deliver communications that are relevant to your clients, divide up your audience based on demographics, browsing habits, and past purchases.
- Customize Your Emails: Klaviyo provides a variety of email templates and a drag-and-drop editor, simplifying the creation of professional and attractive emails.
- Track Detailed Analytics and Reporting: Monitor key performance indicators like email open rates, click-through rates, and revenue generated from email campaigns. This data empowers you to optimize your strategies and make informed decisions.
In short, integrating Klaviyo with Shopify can significantly enhance your ecommerce email marketing strategy by unlocking its full potential.
How to Integrate Klaviyo With Shopify?
Incorporating Klaviyo into your Shopify account is designed to be exceptionally straightforward. In fact, there are two methods available to synchronize these two platforms:
1. Using the Klaviyo Setup Wizard
2. Using the Integrations Tab in Klaviyo
Let’s explore both methods to ensure you can seamlessly integrate Klaviyo with your Shopify store.
How to Add Klaviyo to Shopify Using Setup Wizard
There are actually two methods to accomplish this:
1. Signing up directly with Klaviyo: You can register with Klaviyo and specify your website by entering your sender details.
2. Using Shopify’s app store: If you install Klaviyo through Shopify’s app store, it will automatically synchronize all data when you input your details. However, if your Shopify account isn’t set up yet, you’ll be redirected to Shopify and the synchronization won’t occur.
Once these steps are completed, you can relax and Klaviyo will gather your branding elements such as logos, colors, fonts, social links, and other rebranding components.
How to Connect Klaviyo to Shopify Using Integrations Tab
Syncing Shopify and Klaviyo via the integrations tab may seem complex, but it’s the preferred method for many users. According to Shopify’s guidelines, here’s the detailed process:
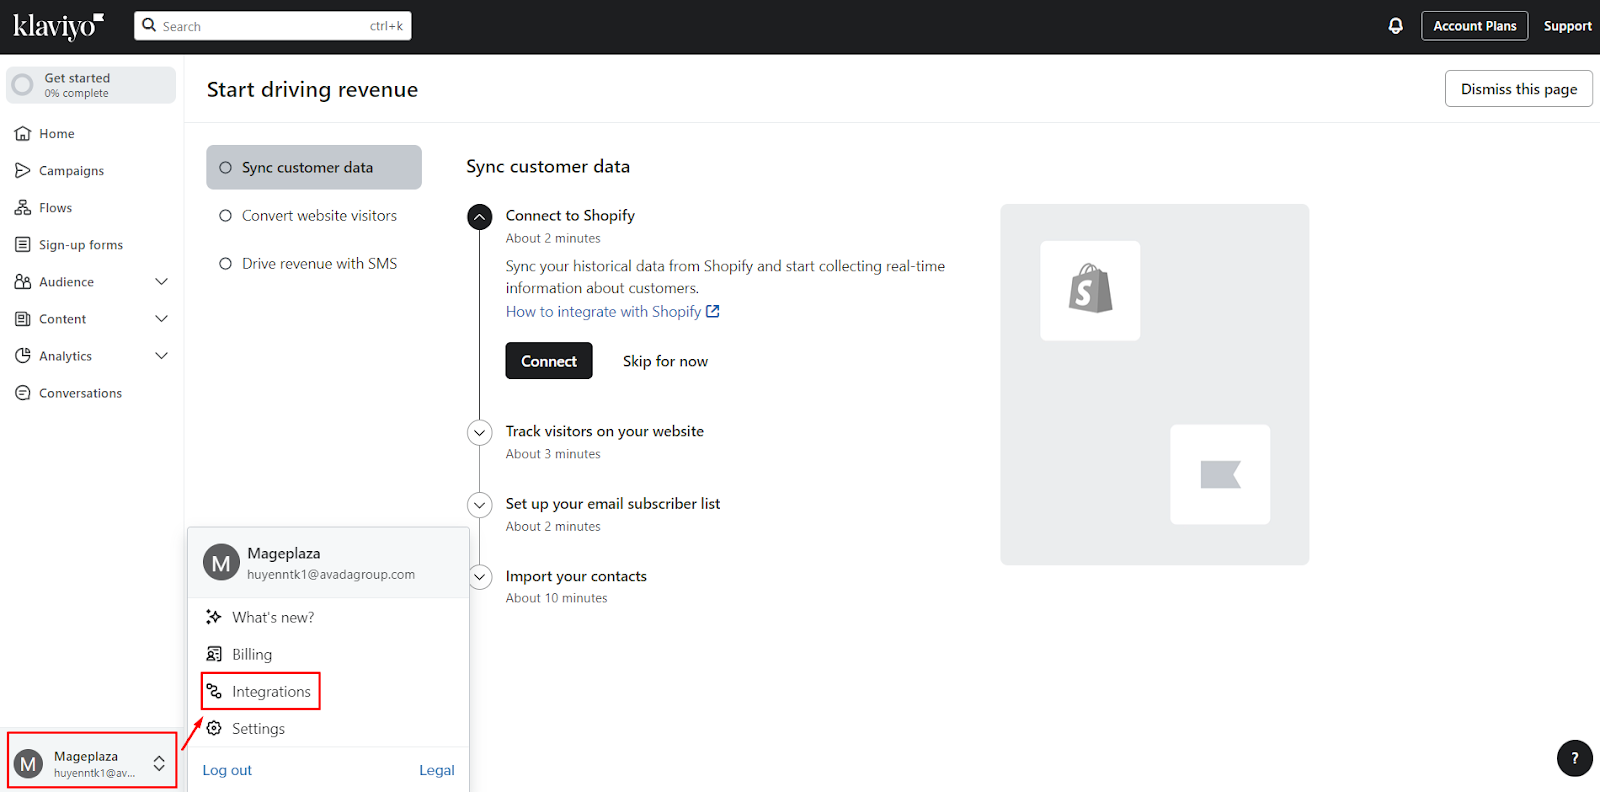
Step 1: Go to your Klaviyo account and locate your account name in the lower left corner. Navigate to the Integrations section.
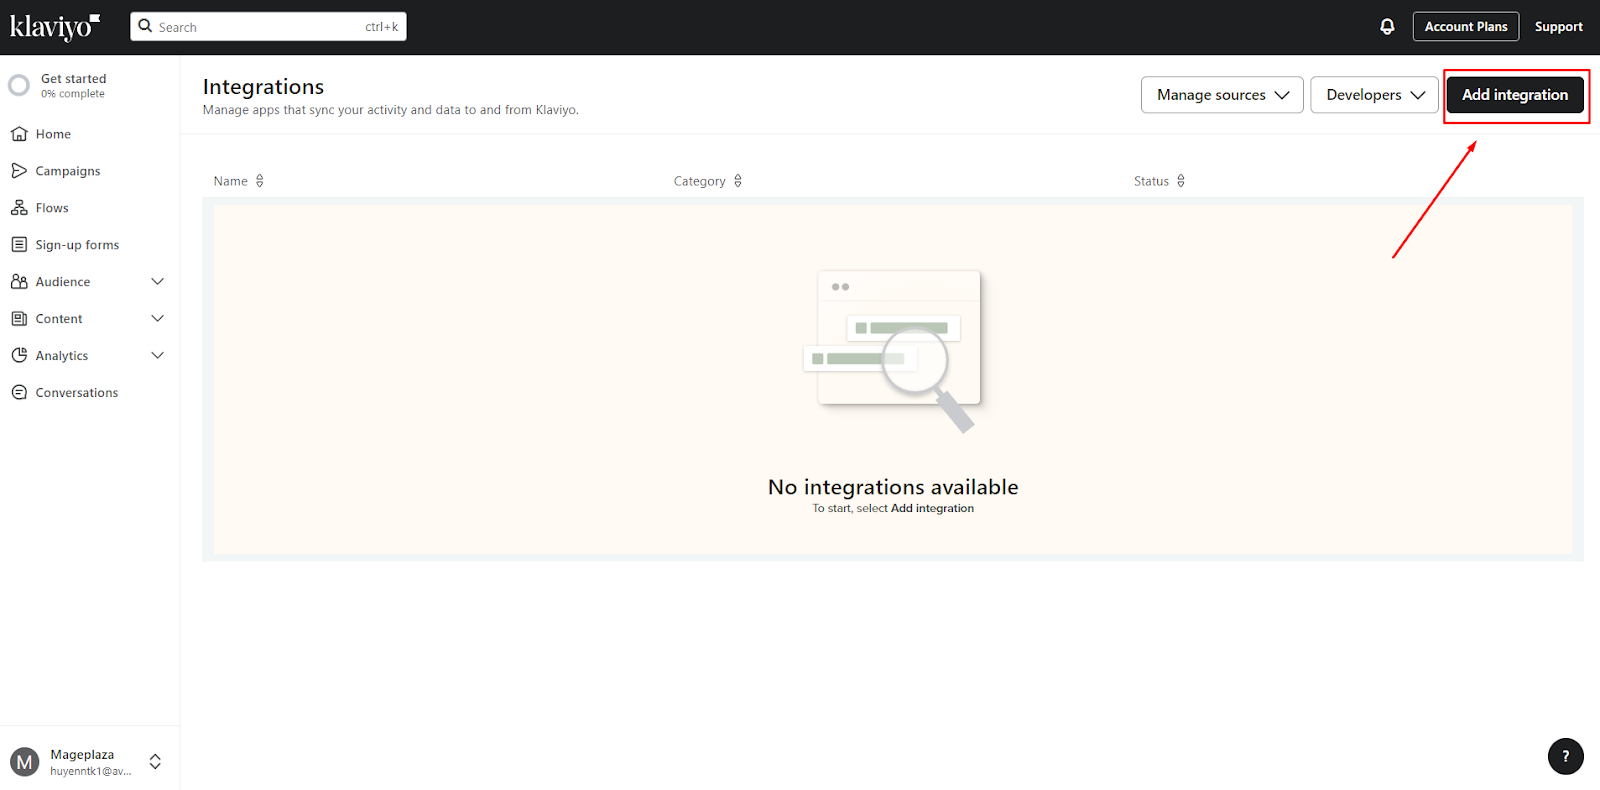
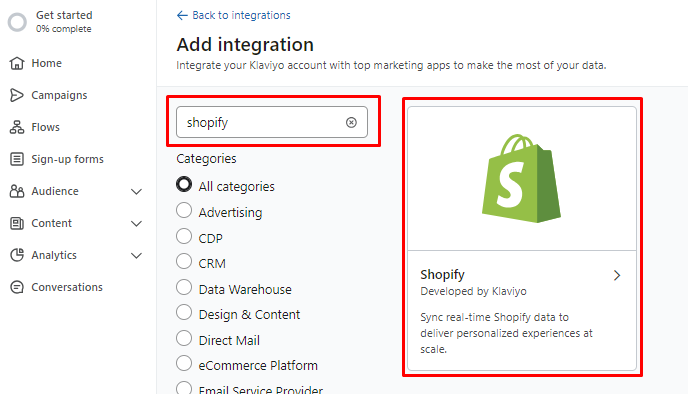
Step 2: Find the Shopify integration and choose to Add Integration. This action will direct you to the integration settings page.
Step 3: Search for Shopify and enter your Shopify store URL in the format of mystore.myshopify.com into the specified field.

Step 4: Once connected to Shopify, proceed to configure the onsite tracking feature.
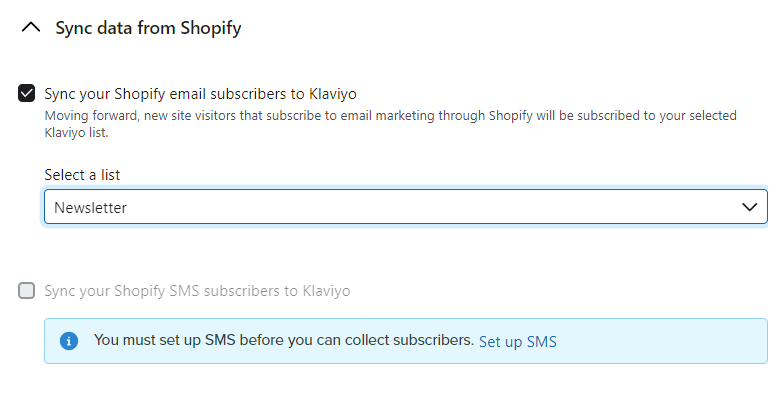
Step 5: Enable the option to Sync your Shopify email subscribers to Klaviyo. This ensures that customers who provide email marketing consent during checkout, submit their information, or sign up via Shopify’s form are automatically added to Klaviyo. You can select the desired list for their inclusion.
Step 6: Similarly, activate the Sync your Shopify SMS subscribers to Klaviyo checkbox for SMS marketing.
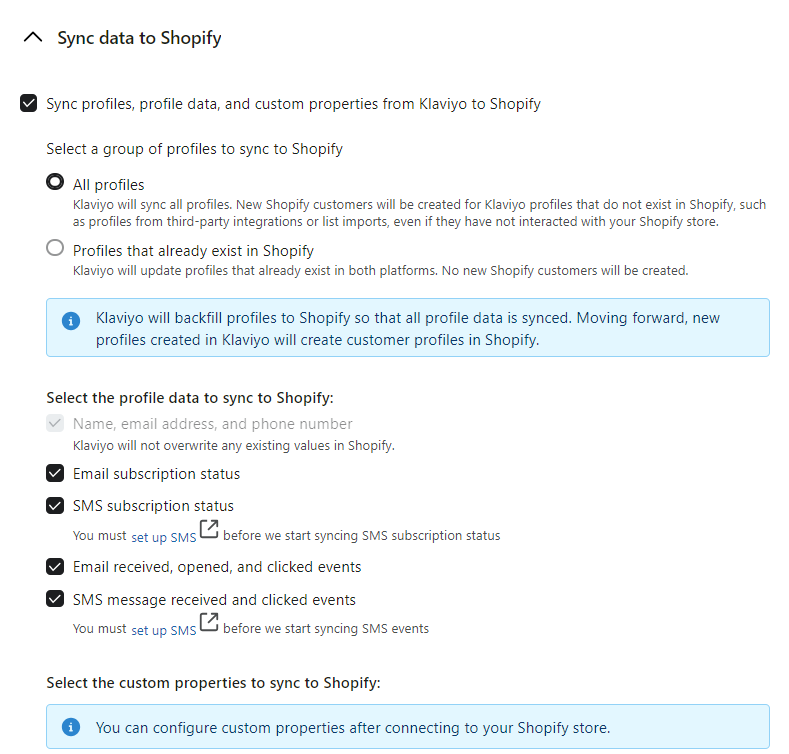
Step 7: To synchronize data between platforms, select the option to Sync profiles and profile data from Klaviyo to Shopify, which is highly recommended.
Step 8: After configuring these settings, click Connect to Shopify at the right bottom corner. This will either redirect you to your Shopify account or prompt you to log in.
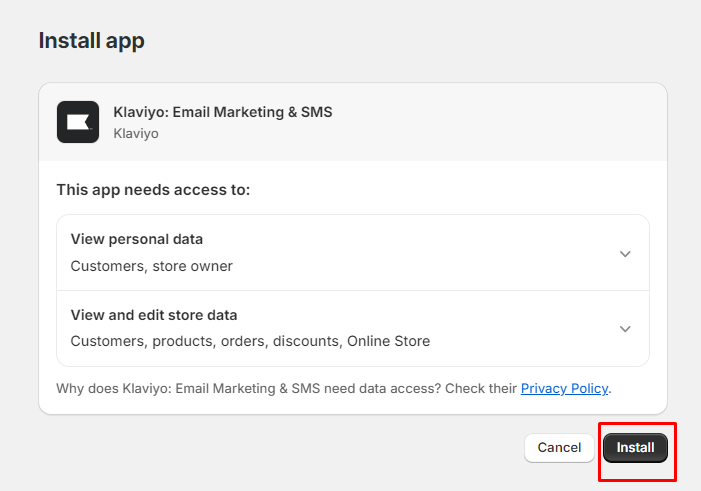
Step 9: Examine the settings and permissions in detail. After verification, click Install app to go back to your Klaviyo account and start the synchronization of all Shopify data with Klaviyo.
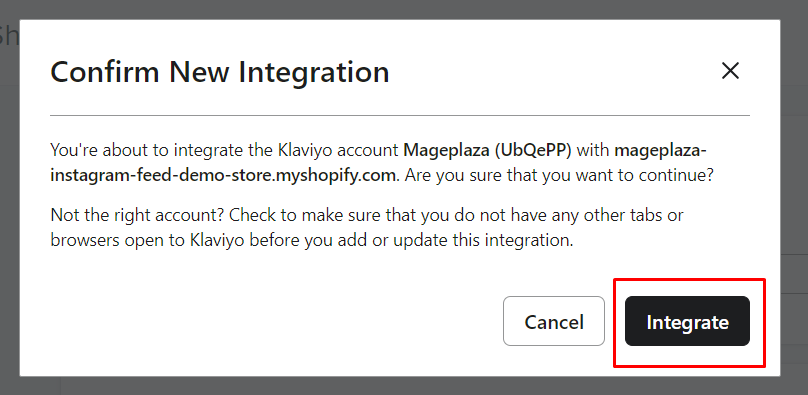
Step 10: Click Integrate to confirm the new integration. Upon successful data sync with Klaviyo, you should see a green notification confirming the setup was successful.

Step 11: Click the View your Shopify add Embed setting link to adjust the configuration. In order to enable onsite tracking, activate the Klaviyo app embed in Shopify as the last step. Navigate to the integration settings page and find the Onsite Tracking option.
You will receive an instruction to enable the Klaviyo app embed. To change the configuration, click the View your Shopify add Embed setting link.
![]()
Step 12: By default, the Add Viewed Product tracking to my site setting is already chosen. The app embed will immediately begin tracking Viewed Products as soon as it is activated.
Step 13: Ensure that the app embed is activated in your theme settings and save any changes made.
Step 14: Go back to Klaviyo’s Shopify integration settings page and check for the blue callout to make sure the app embed is active again.
By finishing these steps, you can ensure that the Klaviyo and Shopify integration is successfully implemented with fully functional onsite tracking.
How to Test Your Onsite Tracking
It’s crucial to confirm whether the integration was effective after bringing the two platforms into sync.
Two components of Klaviyo’s onsite monitoring are Viewed Product tracking and Active on Site tracking.
To verify that they are operating as intended, take the following actions:
-
Go to your Shopify website.
-
Add this to your homepage URL:[email protected]. Replace [email protected] with your email address.
-
Go back and view the page.
-
Open your website and navigate to a product page.
-
Use Klaviyo to look for your email address.
If your Klaviyo profile didn’t already exist, you ought to see one made for you. Your activity feed should also display the stats for Active on Site and Viewed Product.
Steps to Monitor Your Data Sync
Klaviyo lets you create workflows for your most recent customers by first syncing the latest ninety days of your Shopify data when you link the two platforms.
Following this first sync, Klaviyo will start gathering all of the previous information. Depending on the amount of data, this process may take a few minutes to many days.
Take the following actions to make sure the sync is finished:
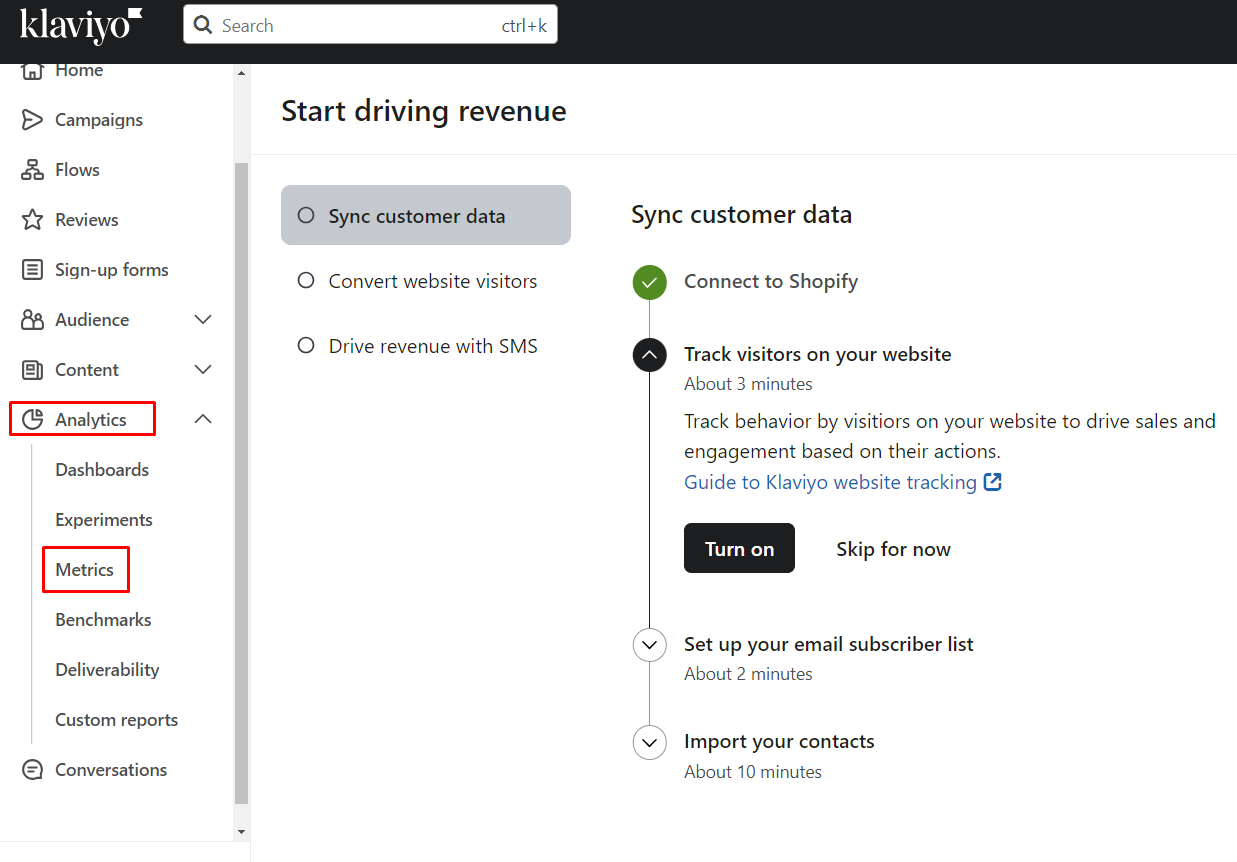
- Select Metrics from the drop-down menu under Analytics.
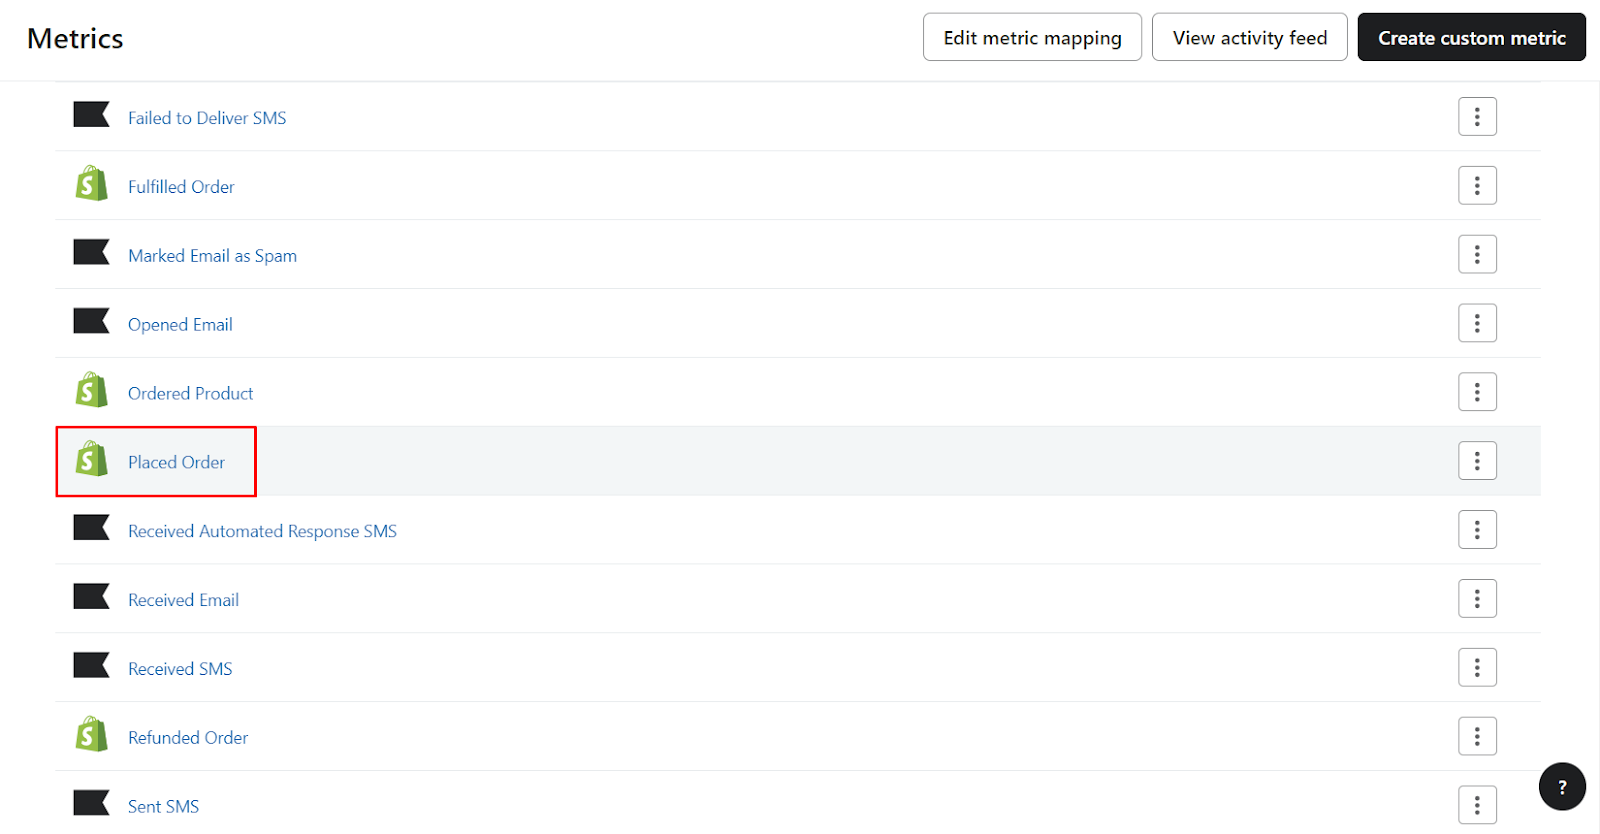
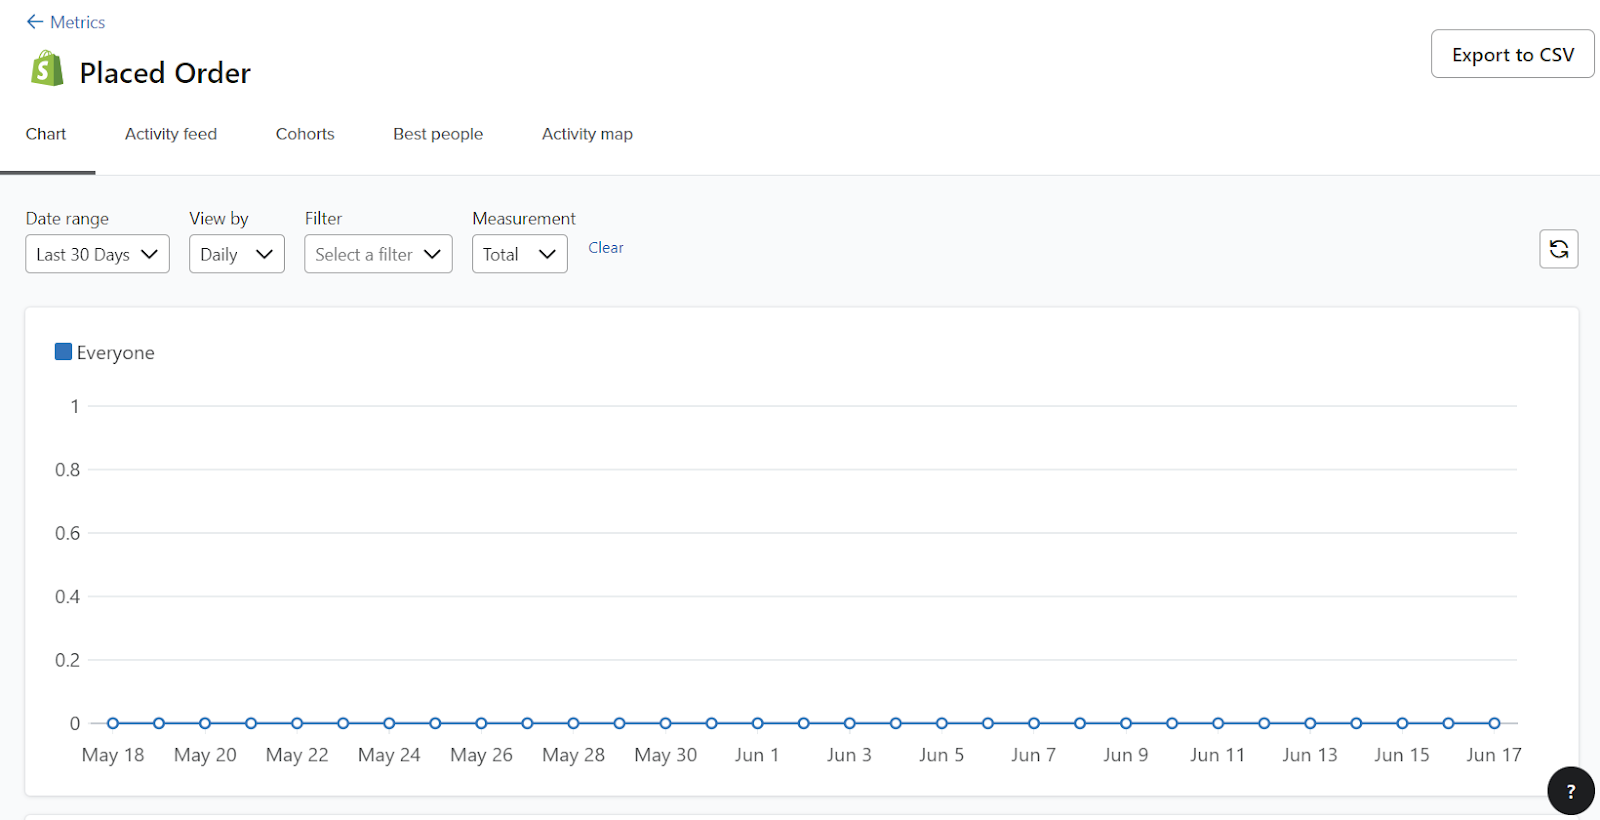
- To view which days have been synced, locate the Placed Order statistic and modify the date range on the graph.
-
When the Shopify Integration is marked as complete, Shopify will let you know that the sync is finished.
-
To ensure that all the data has synchronized, double-check the total amount of orders over the course of a few days or a week.
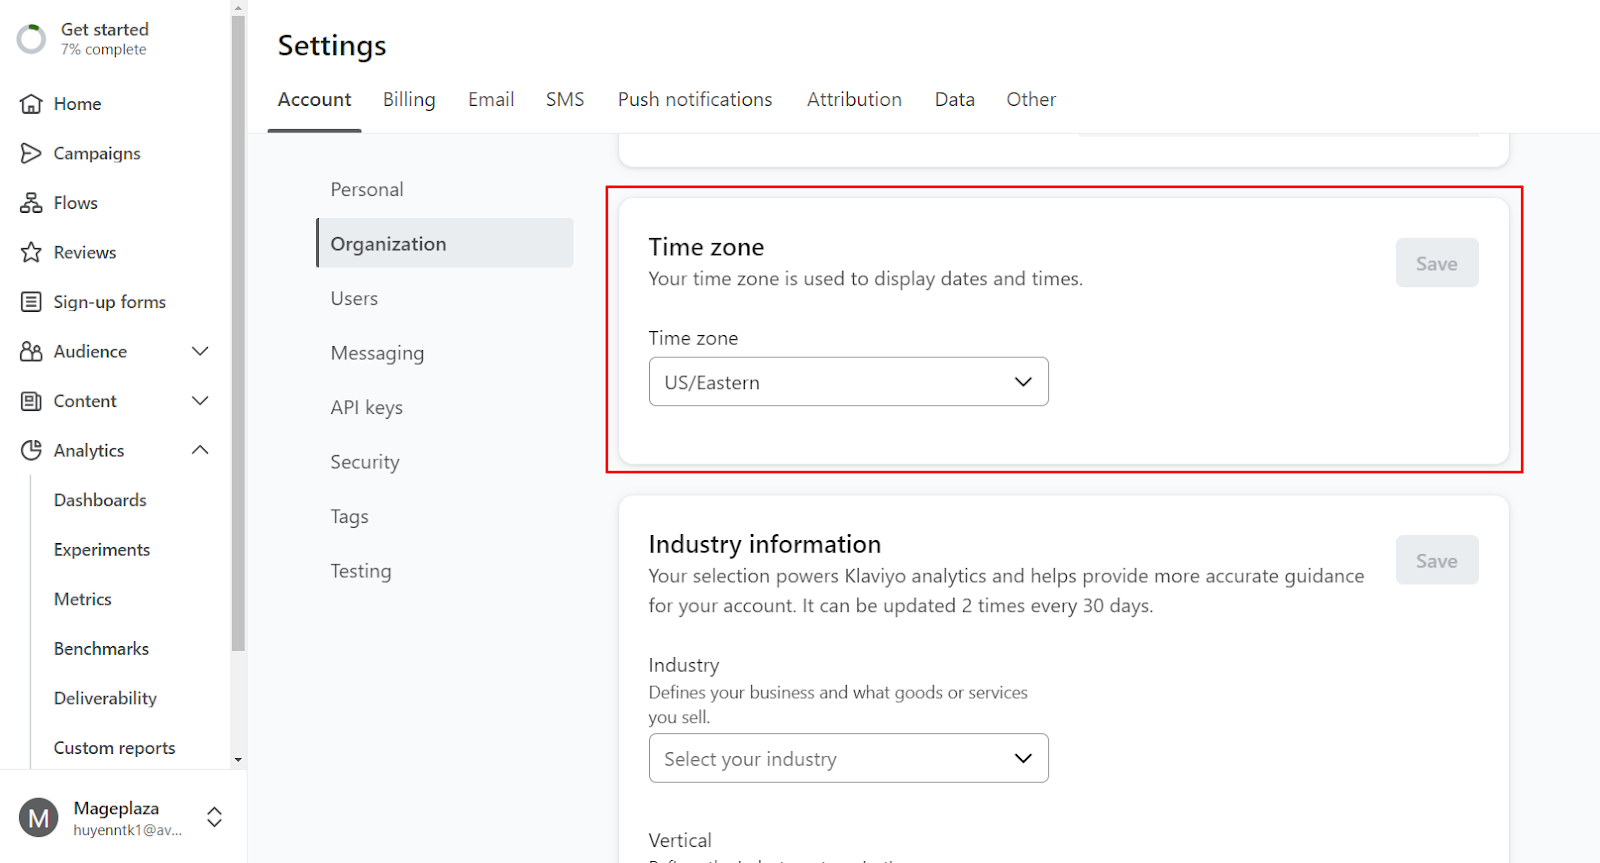
- Verify that the time zones on your Klaviyo account and Shopify correspond. To find out your time zone, click on the name of your account in the lower-left corner, select Settings > Organization, and then search for the time zone at the bottom.
Types of Sign-Up Forms Can be Used With Shopify
You have three options for syncing your sign-up forms to Klaviyo when you sync the two platforms:
-
Sync your default Shopify sign-up forms to a Klaviyo list: When configuring the integration, choose the “Sync your Shopify email subscribers to Klaviyo” option.
-
Incorporate a Klaviyo opt-in form into your Shopify store.
-
Make use of a third-party provider of sign-up forms that are linked to your Klaviyo account.
Conclusion
Congratulations, you’ve made it. With your Klaviyo workflow now seamlessly integrated with your Shopify store, you’re ready to start sending out some amazing email campaigns to your audience.
Before you dive in, ensure everything is set up correctly. Don’t forget to test your onsite tracking to make sure you’re capturing all essential data and optimizing your potential revenue.
Do not hesitate to get in touch with us if you require any assistance configuring your e-commerce tools!


