


5 mins read
|
07-30-2026
An instruction to utilize Knockout JS in Magento 2
Vinh Jacker
|
03-17-2025

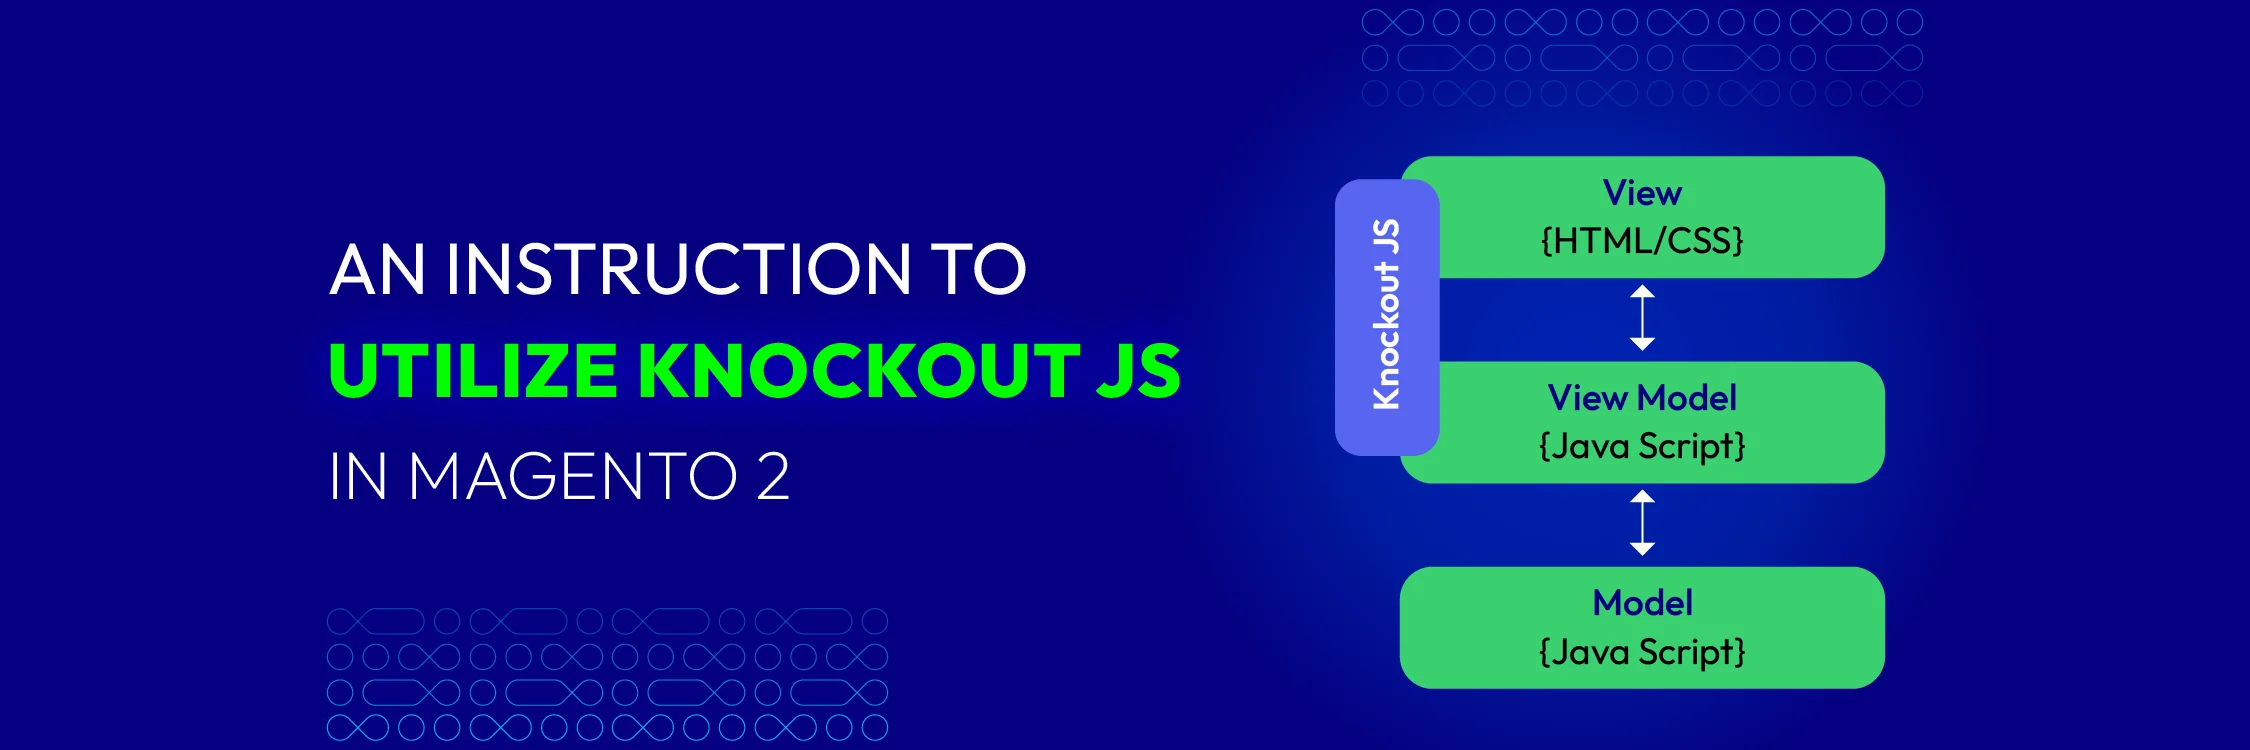
Knockout is a widely used JavaScript library in the user interface of Magento 2. It employs the MVVM (Model-View-View-Model) design pattern and is present on various pages of Magento 2, but primarily on the checkout page. However, integrating Knockout JS into Magento 2 can be somewhat complex.
This article explains the basic principles of Knockout JS in Magento 2, focusing on concepts applicable to Magento 2 and presenting how to implement simple logic.
Introduction about Knockout JS
The JavaScript library known as Knockout JS is used to build specific elements of the Magento 2 user interface in a flexible way. The Model-View-View-Model (MVVM) pattern is used, which in Magento 2 can be somewhat confusing and challenging to apply in practice. However, it significantly improves the smooth operation of an online store built on Magento 2.
Furthermore, Knockout JS’s development process is incredibly powerful and engaging. In short, Magento primarily relies on Knockout JS’s data binding concept, which is used in many crucial components, including the checkout and mini cart. If you want to go deeper into extending checkout functionality, check out our tutorial on create checkout fields via code in Magento 2, which complements Knockout-based customization.
Why should we use Data Binding in the first place?
“Can we use basic libraries like JQuery to manually parse the DOM?” - Absolutely!
JQuery isn’t really necessary for this purpose. All DOM operations can be performed using simple JavaScript. But in Magento 2, Knockout JS offers benefits such as standardized, clean, and maintainable code. It also improves the speed and security of Magento 2. Therefore, we will guide you on using Knockout JS and building it into a custom module in detail after this article.
Magento 2 Knockout JS Integration
This section covers how KnockoutJS bindings are used in Magento 2.
Initialization Magento 2 KnockoutJS
The KO library is defined by RequireJS in this file
module-ui/view/base/web/js/lib/knockout/bootstrap.js
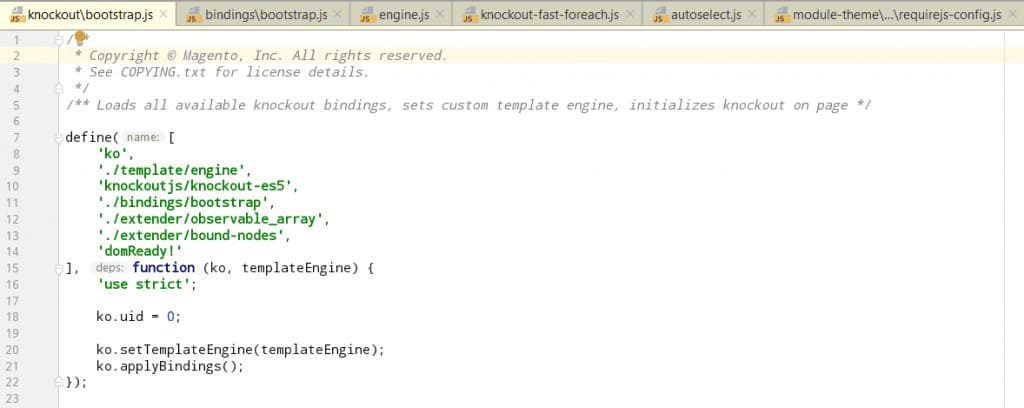
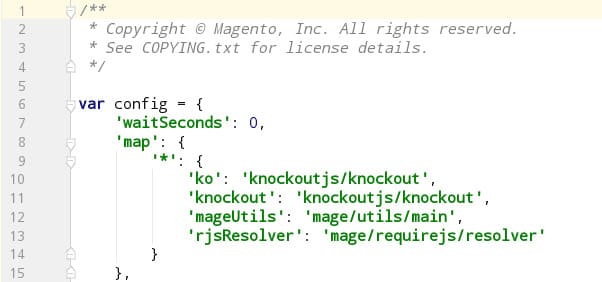
kois an alias for Magento 2’s Knockout JS library, defined in themodule-theme/view/base/requirejs-config.jsfile.
-
template/engine: This library overrides Knockout’s default template binding.
-
bindings/bootstrap: These are custom bindings defined in Magento’s file
module-ui/view/base/web/js/lib/knockout/bindings/bootstrap.js.
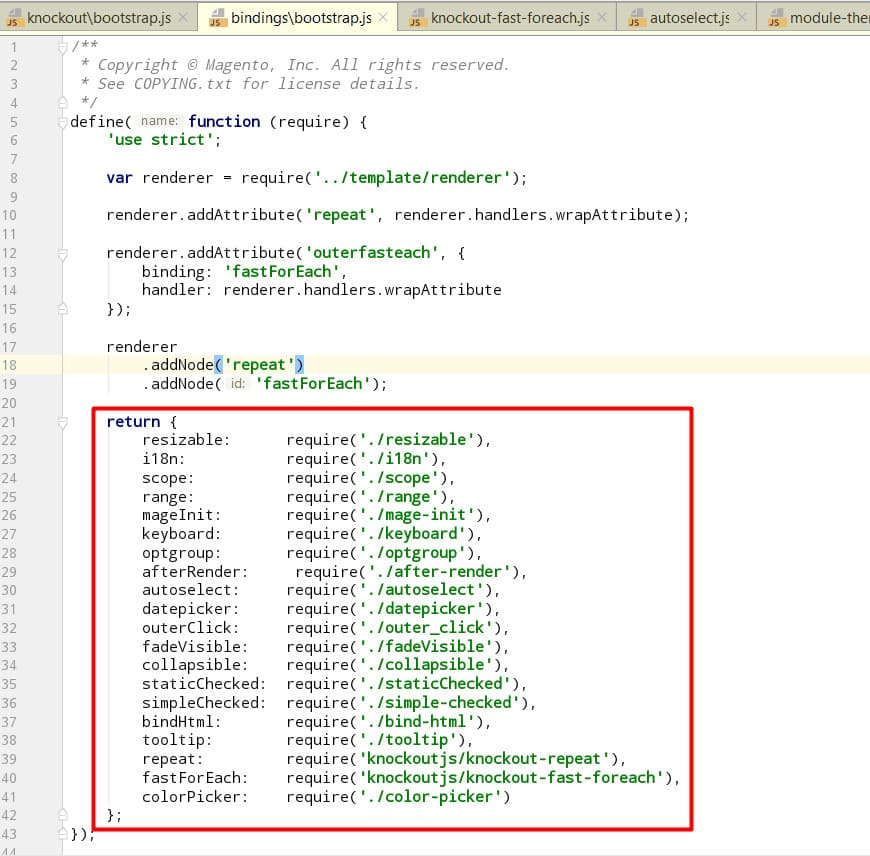
In addition to Magento’s custom bindings, the repeat and fast-foreach libraries are community-developed.
extender/observable_array: This library extends Observable arrays with extra functions like each, map, filter, and more.
Template Engine
When working with KnockoutJS templates, you typically define an HTML snippet on the client side using a <script type="text/html" id="my_template"> tag.
In Magento, however, template rendering is handled on the server side, depending on how the page is processed. Knockout components in Magento allow templates to be loaded from a server-side URL.
To enable this, each template must be associated with a corresponding ViewModel, ensuring a flexible connection between the ViewModel and its template. As a result, Magento customizes Knockout’s template behavior to support downloading and caching templates from the server.
The template engine is managed in the file: module-ui/view/base/web/js/lib/knockout/template/engine.js.
To demonstrate how a template can be rendered from a URL, consider the following example:
-
First, create a controller and add a block to its layout, assigning the template file as
Bss_KOExample::template_engine.phtml. -
Then, create the file at
app/code/Bss/KOExample/view/frontend/templates/template_engine.phtmlwith the following content:
<div data-bind="template: {name: 'Bss_KOExample/template_engine', data: {}}"></div>
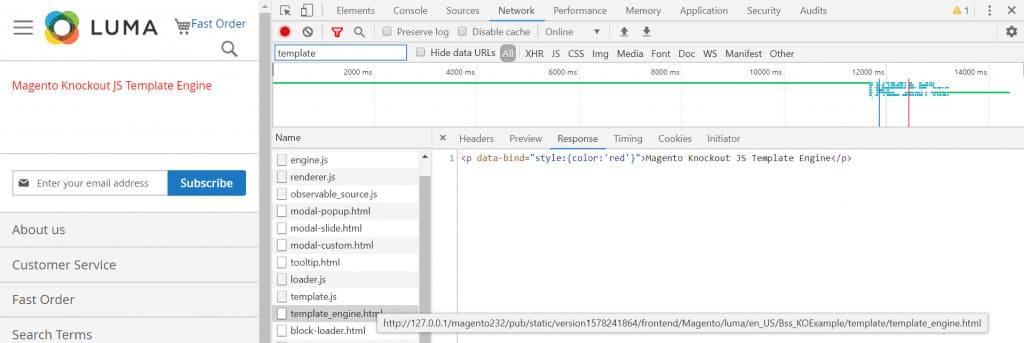
Magento creates a URL for the above template and links to this file: view\frontend\web\template\template_engine.html
- Create a file: app\code\Bss\KOExample\view\frontend\web\template\template_engine.html with the content:
<p data-bind="style:{color:'red'}">Magento Knockout JS Template Engine</p>.
Visit the route to confirm that the Magento 2 Knockout template has been successfully loaded from the server:
Components
As you may know, Knockout’s Component Binding includes both a ViewModel and a Template.
Magento builds upon this concept to create its own uiComponent, which consists of a Component (serving as the ViewModel) and a Template. This approach allows Magento to efficiently manage multiple components on a single page, including nested or child components.
There are two methods available for declaring a Component:
- Declare Component from Layout (XML file): Create a node inside the Block tag, following this structure:
<arguments>
    <argument name="jsLayout" xsi:type="array">
        <item name="components" xsi:type="array">
            <item name="component-alias" xsi:type="array">
            </item>
        </item>
    </argument>
</arguments>
*Note: <item name=”component-alias” xsi:type=”array”> ⇒ Declaring the identifier of a component
⇒ Let’s take a look at an example:
<block class="Bss\CatalogSearch\Block\ListProduct" name="catalogsearch.product_list"
   template="Bss_CatalogSearch::catalog/products.phtml">
 <arguments>
   <argument name="jsLayout" xsi:type="array">
      <item name="components" xsi:type="array">
        <item name="productList" xsi:type="array">
         <item name="component" xsi:type="string">Bss_CatalogSearch/js/catalog/products</item>
         <item name="config" xsi:type="array">
            <item name="template" xsi:type="string">Bss_CatalogSearch/catalog/product-list</item>
         </item>
       </item>
      </item>
    </argument>
  </arguments>
</block>
- Directly declare by Script tag (PHTML file)
For instance:
<script type="text/x-magento-init">
     {
        "*": { "Magento_Ui/js/core/app": {
            "components": {
                "productList": { // => component identifier
                        "component": "Bss_CatalogSearch/js/catalog/products",
                        "config": {
                            "template": "Bss_CatalogSearch/catalog/product-list"
                        }
                    }
                }
            }
        }
     }
</script>
(The keyword “component” is considered as ViewModel in Ko Component).
The “product list” Node is declared in the “components” node with Components as “Bss_CatalogSearch/js/catalog/products”, and Template file as “Bss_CatalogSearch/catalog/product-list.”
If you’re declaring a Component through the Layout, you’ll need to initialize it as shown below.
<script type="text/x-magento-init">
    {
        "#products-wrapper": {
            "Magento_Ui/js/core/app": <?php /* @escapeNotVerified */ echo $block->getJsLayout(); ?>
        }
    }
</script>
getJsLayout() parses content from the jsLayout node from the layout and converts it into JSON.
Magento_Ui/js/core/app
It processes the components defined in the JsLayout, then uses the layout.js file (vendor/magento/module-ui/view/base/web/js/core/renderer/layout.js) to initialize a UiComponent instance for each one, storing them in the uiRegistry.
uiRegistry
Source code: vendor/magento/module-ui/view/base/web/js/lib/registry/registry.js.
uiComponent
uiComponent (or uiCollection) serves as the foundational component in Magento 2’s Knockout JS framework. This means all declared components must extend it. The uiComponent is responsible for initializing and rendering its child components. You can find its source code in the file: vendor/magento/module-ui/view/base/web/js/lib/core/collection.js.
Scope binding
Magento uses the scope binding to apply Components within the View layer (phtml files). This binding identifies the associated Component in the JSON configuration, enabling the loading of the relevant JavaScript logic to render the Magento 2 Knockout template.
For example, you declare “product list” component in the layout:
<item name="components" xsi:type="array">
    <item name="productList" xsi:type="array">
        <item name="component" xsi:type="string">Bss_CatalogSearch/js/catalog/products</item>
        <item name="config" xsi:type="array">
            <item name="template" xsi:type="string">Bss_CatalogSearch/catalog/product-list</item>
        </item>
    </item>
</item>
To map this content to View, you use:
<div id="products-wrapper" data-bind="scope: 'productList'" class="container-default">
...
</div>
Note: The scope binding is applied only to the main component, not its child components.
getTemplate
To load a Magento 2 Knockout template from a Component, use the following syntax:
<!-- ko template: getTemplate() --><!-- /ko →
This function is declared in the file: module-ui/view/base/web/js/lib/core/element/element.js
/**
* Returns path to elements' template.
*
* @returns {String}
*/
getTemplate: function () {
   return this.template;
},
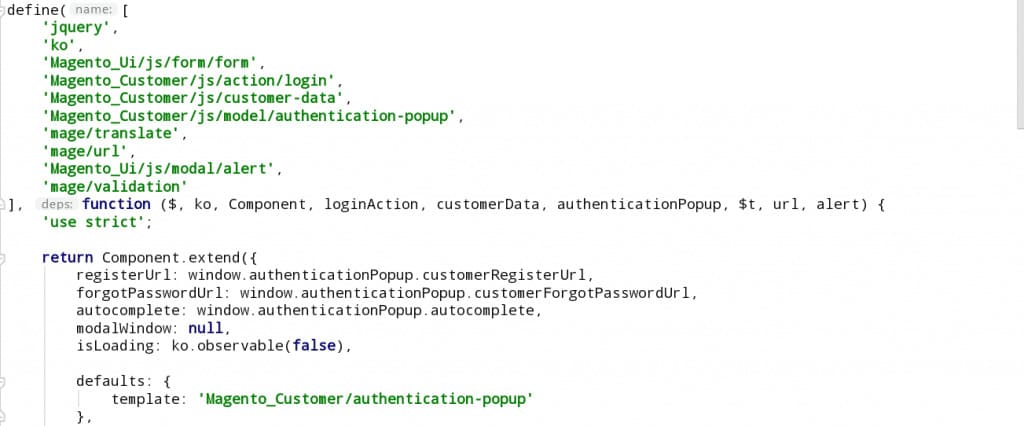
*Note: To define a template from a Component (JS file), include the following configuration in the ViewModel.
defaults: {
   template: 'template_path'
}
For example, the file: module-customer/view/frontend/web/js/view/authentication-popup.js.
How to use Knockout JS in Magento 2
To get started, create a Magento 2 module named Mageplaza_Mymodule. The path MAGENTO2_ROOT > app > code > Mageplaza > Mymodule is where you can find our module. Now, create the register.php file by navigating to app > code > Mageplaza > Mymodule.
<?php
\Magento\Framework\Component\ComponentRegistrar::register(
   \Magento\Framework\Component\ComponentRegistrar::MODULE,
   'Mageplaza_Mymodule',
   __DIR__
);
and in module.xml in app > code > Mageplaza > Mymodule > etc
<?xml version="1.0"?>
 <config xmlns:xsi="http://www.w3.org/2001/XMLSchema-instance" xsi:noNamespaceSchemaLocation="urn:magento:framework:Module/etc/module.xsd">
 <module name="Mageplaza_Mymodule" setup_version="1.0.0"></module>
</config>
We need to identify where Magento 2 displays the default quantity field on the product page because, as you know, we will be changing the behavior of the quantity. We have the following template that might be helpful after some research.
Magento > Catalog > view > frontend > templates > catalog > product > view > addtocart.phtml
<?php
/**
* Copyright © 2016 Magento. All rights reserved.
* See COPYING.txt for license details.
*/


// @codingStandardsIgnoreFile


/** @var $block \Magento\Catalog\Block\Product\View */
?>
<?php $_product = $block->getProduct(); ?>
<?php $buttonTitle = __('Add to Cart'); ?>
<?php if ($_product->isSaleable()): ?>
<div class="box-tocart">
   <div class="fieldset">
       <?php if ($block->shouldRenderQuantity()): ?>
       <div class="field qty">
           <label class="label" for="qty"><span><?php /* @escapeNotVerified */ echo __('Qty') ?></span></label>
           <div class="control">
               <input type="number"
                      name="qty"
                      id="qty"
                      maxlength="12"
                      value="<?php /* @escapeNotVerified */ echo $block->getProductDefaultQty() * 1 ?>"
                      title="<?php /* @escapeNotVerified */ echo __('Qty') ?>" class="input-text qty"
                      data-validate="<?php echo $block->escapeHtml(json_encode($block->getQuantityValidators())) ?>"
                      />
           </div>
       </div>
       <?php endif; ?>
       <div class="actions">
           <button type="submit"
                   title="<?php /* @escapeNotVerified */ echo $buttonTitle ?>"
                   class="action primary tocart"
                   id="product-addtocart-button">
               <span><?php /* @escapeNotVerified */ echo $buttonTitle ?></span>
           </button>
           <?php echo $block->getChildHtml('', true) ?>
       </div>
   </div>
</div>
<?php endif; ?>
<?php if ($block->isRedirectToCartEnabled()) : ?>
<script type="text/x-magento-init">
   {
       "#product_addtocart_form": {
           "Magento_Catalog/product/view/validation": {
               "radioCheckboxClosest": ".nested"
           }
       }
   }
</script>
<?php else : ?>
<script>
   require([
       'jquery',
       'mage/mage',
       'Magento_Catalog/product/view/validation',
       'Magento_Catalog/js/catalog-add-to-cart'
   ], function ($) {
       'use strict';


       $('#product_addtocart_form').mage('validation', {
           radioCheckboxClosest: '.nested',
           submitHandler: function (form) {
               var widget = $(form).catalogAddToCart({
                   bindSubmit: false
               });


               widget.catalogAddToCart('submitForm', $(form));


               return false;
           }
       });
   });
</script>
<?php endif; ?>
Copy the file addtocart.phtml into the module you created:
app > code > Mageplaza > Mymodule > view > frontend > templates > catalog > product > view > addtocart.phtml
The UI component, which inherits additional classes and methods from the UI component, is a dependency of Magento 2 Knockout JS. We will build and initialize the UI component in our addtocart.phtml file. We will instruct Magento 2 to create a component in:
app > code > Mageplaza > Mymodule > view > frontend > web > js > catalog > product > view > qty_change.js
Insert the following code above the quantity input field:
<script type="text/x-magento-init">
{
   "*": {
           "Magento_Ui/js/core/app": {
               "components": {
                   "qty_change": {
                       "component": "Mageplaza_Mymodule/js/view/product/view/qty_change",
                       "defaultQty": <?php echo $block->getProductDefaultQty() * 1 ?>
                   }
               }
           }
   }
}
</script>
Now that our qty_change component has been built, we need to link or connect it with the frontend HTML as follows:
<div class="control" data-bind="scope: 'qty_change'">
   <button data-bind="click: decreaseQty">-</button>
   <input  data-bind="value: qty()"
   type="number"
   name="qty"
   id="qty"
   maxlength="12"
   title="<?php echo __('Qty') ?>"
   class="input-text qty"
   data-validate="<?php echo $block->escapeHtml(json_encode($block->getQuantityValidators())) ?>"
   />
   <button data-bind="click: increaseQty">+</button>
</div>
The above code uses the data-bind attribute in both the div and input fields. This attribute acts as a bridge between the HTML and the JavaScript functionality of our qty_change component. Essentially, in the Knockout framework, any function call referenced here will be looked for in our qty_change component.
This helps you realize that the value entered into the input field is related to the result of using the qty() function of the component. Additionally, there are two buttons linked to the component using JavaScript click events. They will help us change the quantity value. Therefore, the final view of addtocart.phtml will be:
<?php
/**
* Copyright © 2016 Magento. All rights reserved.
* See COPYING.txt for license details.
*/


// @codingStandardsIgnoreFile


/** @var $block \Magento\Catalog\Block\Product\View */
?>
<?php $_product = $block->getProduct(); ?>
<?php $buttonTitle = __('Add to Cart'); ?>
<?php if ($_product->isSaleable()): ?>
<div class="box-tocart">
   <div class="fieldset">
       <?php if ($block->shouldRenderQuantity()): ?>
       <div class="field qty">
           <label class="label" for="qty"><span><?php /* @escapeNotVerified */ echo __('Qty') ?></span></label>
           <script type="text/x-magento-init">
           {
               "*": {
                       "Magento_Ui/js/core/app": {
                           "components": {
                               "qty_change": {
                                   "component": "Mageplaza_Mymodule/js/view/product/view/qty_change",
                                   "defaultQty": <?php echo $block->getProductDefaultQty() * 1 ?>
                               }
                           }
                       }
               }
           }
           </script>
           <div class="control" data-bind="scope: 'qty_change'">
               <button data-bind="click: decreaseQty">-</button>
               <input  data-bind="value: qty()"
                   type="number"
                   name="qty"
                   id="qty"
                   maxlength="12"
                   title="<?php /* @escapeNotVerified */ echo __('Qty') ?>" class="input-text qty"
                   data-validate="<?php echo $block->escapeHtml(json_encode($block->getQuantityValidators())) ?>"
               />
               <button data-bind="click: increaseQty">+</button>
           </div>
       </div>
       <div>
           <input
               type="text"
               name="remarks"
               id="remarks"
               maxlength="255"
               placeholder="Remarks"
           />
       </div>
       <br>
       <?php endif; ?>
       <div class="actions">
           <button type="submit"
                   title="<?php /* @escapeNotVerified */ echo $buttonTitle ?>"
                   class="action primary tocart"
                   id="product-addtocart-button">
               <span><?php /* @escapeNotVerified */ echo $buttonTitle ?></span>
           </button>
           <?php echo $block->getChildHtml('', true) ?>
       </div>
   </div>
</div>
<?php endif; ?>
<?php if ($block->isRedirectToCartEnabled()) : ?>
<script type="text/x-magento-init">
   {
       "#product_addtocart_form": {
           "Magento_Catalog/product/view/validation": {
               "radioCheckboxClosest": ".nested"
           }
       }
   }
</script>
<?php else : ?>
<script>
   require([
       'jquery',
       'mage/mage',
       'Magento_Catalog/product/view/validation',
       'Magento_Catalog/js/catalog-add-to-cart'
   ], function ($) {
       'use strict';


       $('#product_addtocart_form').mage('validation', {
           radioCheckboxClosest: '.nested',
           submitHandler: function (form) {
               var widget = $(form).catalogAddToCart({
                   bindSubmit: false
               });


               widget.catalogAddToCart('submitForm', $(form));


               return false;
           }
       });
   });
</script>
<?php endif; ?>
Now let’s discuss the final step, the qty_change component.
Create a new file named qty_change.js in app > code > Mageplaza > Mymodule > view > frontend > web > js > view > product > view and fill it with the following content.
define([
   'ko',
   'uiComponent'
], function (ko, Component) {
   'use strict';


   return Component.extend({
       initialize: function () {
          //initialize parent Component
           this._super();
           this.qty = ko.observable(this.defaultQty);
       },


       decreaseQty: function() {
           var newQty = this.qty() - 1;
           if (newQty < 1) {
               newQty = 1;
           }
           this.qty(newQty);
       },


       increaseQty: function() {
           var newQty = this.qty() + 1;
           this.qty(newQty);
       }


   });
});
Now everything is quite clear in the above code. Check the initializer function: (). We have set up an observable quantity, which is a Magento 2 Knockout JS object. When called with the data-bind attribute from HTML, it will return its value. The two other functions are decreaseQty and increaseQty. When the HTML button is clicked, they will help change the value.
That’s the end. To override the default addtocart.phtml template, we need to inform Magento 2 about our custom template file. We will achieve this by modifying the layout using XML.
Let’s create a new file named catalog_product_view.xml in the app > code > Mageplaza > Mymodule > view > frontend > layout directory and add the following code:
<?xml version="1.0"?>
<page layout="1column" xmlns:xsi="http://www.w3.org/2001/XMLSchema-instance" xsi:noNamespaceSchemaLocation="urn:magento:framework:View/Layout/etc/page_configuration.xsd">
   <body>
       <referenceBlock name="product.info.addtocart">
           <action method="setTemplate">
               <argument name="template" xsi:type="string">Mageplaza_Mymodule::catalog/product/view/addtocart.phtml</argument>
           </action>
       </referenceBlock>
       <referenceBlock name="product.info.addtocart.additional">
           <action method="setTemplate">
               <argument name="template" xsi:type="string">Mageplaza_Mymodule::catalog/product/view/addtocart.phtml</argument>
           </action>
       </referenceBlock>
   </body>
</page>
Finally, we are ready with the Magento 2 module using Knockout JS. Please use the following Magento 2 CLI commands to enable and activate your module:
rm -rf var/di var/generation var/cache/* var/log/* var/page_cache/*
php bin/magento module:enable Mageplaza_Mymodule
php bin/magento setup:upgrade
php bin/magento setup:di:compile
php bin/magento indexer:reindex
php bin/magento cache:clean
php bin/magento cache:flush
Conclusion
We can also regularly use our module once it is prepared for use. Part of the Magento 2 interface is built flexibly with the help of Magento 2 Knockout JS. I hope this simple Magento 2 Knockout JS example has been understood and will be helpful for your future Magento 2 development.
Please feel free to contact us anytime if you have any questions or need assistance from our experts with your Magento development agency.
Table of content

Jacker is the Chief Technology Officer (CTO) at Mageplaza, bringing over 10 years of experience in Magento, Shopify, and other eCommerce platforms. With deep technical expertise, he has led numerous successful projects, optimizing and scaling online stores for global brands. Beyond his work in eCommerce development, he is passionate about running and swimming.
Related Post

7 mins read
|
06-30-2026

How to Enable DebugView in GA4 for your Magento 2 store - Mageplaza
Step-by-step guide to enabling GA4 DebugView for Magento 2 merchants — verify your GA4 events are firing correctly before trusting your data.
8 mins read
|
06-09-2026

Table Rate Shipping in eCommerce: A Practical Guide
Master Magento 2 Table Rate Shipping. Learn how to configure an accurate, automated shipping matrix to optimize your checkout and boost sales.
10 mins read
|
06-02-2026
3 mins read
|
05-30-2026

Google Analytics Ecommerce Reports for Magento Merchants: What to track & Tips
A practical guide to GA4 ecommerce reports for Magento merchants, covering what to track, how to read each report, and specific tips to turn data into revenue decisions.
18 mins read
|
05-20-2026
5 mins read
|
07-30-2026
7 mins read
|
06-30-2026
How to Enable DebugView in GA4 for your Magento 2 store - Mageplaza
Step-by-step guide to enabling GA4 DebugView for Magento 2 merchants — verify your GA4 events are firing correctly before trusting your data.
8 mins read
|
06-09-2026
Table Rate Shipping in eCommerce: A Practical Guide
Master Magento 2 Table Rate Shipping. Learn how to configure an accurate, automated shipping matrix to optimize your checkout and boost sales.
10 mins read
|
06-02-2026
3 mins read
|
05-30-2026
Google Analytics Ecommerce Reports for Magento Merchants: What to track & Tips
A practical guide to GA4 ecommerce reports for Magento merchants, covering what to track, how to read each report, and specific tips to turn data into revenue decisions.
18 mins read
|
05-20-2026