[2025] How to Add The Instagram Sale Channel to Shopify?
![[2025] How to Add The Instagram Sale Channel to Shopify? - Mageplaza](https://cdn2.mageplaza.com/media/blog/how-to-add-the-instagram-sale-channel-to-shopify/instagram-sale-channel-cover.png)
According to data-driven statistics, around 80% of shoppers can decide to purchase or not based on Instagram. With a huge amount of Instagram users, a majority falling within the 18-34 age bracket, products appealing to this demographic can significantly boost Shopify sales through Instagram. Intriguing, isn’t it?
As we look closely at how to add Instagram Sale Channel to Shopify in 2025, we’ll explore the latest updates, step-by-step procedures, and invaluable tips to help merchants seamlessly connect their Shopify stores with Instagram, unlocking new avenues for growth and revenue generation.
Benefits of adding an Instagram sale channel
-
Access to a Vast Audience: Instagram boasts one of the largest user bases among social platforms, providing an unparalleled opportunity to showcase your products to millions of users effortlessly.
-
Positive Social Impact: By leveraging Instagram as a sales channel, you can create a positive social impact for your business and customers, while also contributing to Instagram’s recognition and growth.
-
Discoverability: Statistics show that a significant portion of users actively seek out new products on Instagram, making it a prime platform for discovery and engagement.
-
Seamless Shopping Experience: Instagram’s shoppable posts feature enables shoppers to buy directly from your posts without leaving the app, streamlining the buying process and enhancing user experience.
-
Native Integration: The integration of Shopify and Instagram through shoppable posts provides a seamless and native shopping experience for users, facilitating convenient product discovery and purchase.
-
Global Reach: With shoppable posts available in over 40 countries worldwide, you can tap into a global audience and expand your reach beyond borders.
-
Exponential Growth Potential: Businesses like Natori have experienced significant increases in traffic and sales after implementing shoppable Instagram posts, showcasing the immense growth potential of this feature.
Consider these compelling points that might shift your perspective:
Instagram has 800M active users and 500M daily active users 90% of Instagram users follow at least one brand, positioning Instagram as an ideal platform for e-commerce. Instagram ad is expected to reach nearly $60 billion in 2024
Read more:
Shopify Multi Channel Selling: Tips to Start in 2025
Omnichannel vs Multichannel Ecommerce: Which is Better?

Things to prepare before integrating Instagram sales channel to your store
1. Ensuring your business eligibility
-
Have an active online store
-
Follow the Basic Shopify plan or a higher tier
-
Remove your store password
-
Have a Facebook Shop that is approved and has no age or country restrictions
-
Connect your Instagram business profile with Facebook catalog
-
Comply with Facebook commerce policies and the merchant agreement is mandatory
-
Sell physical and tangible items only
-
Ensure you have installed the most recent version of the Instagram app
2. Establishing a Facebook shop
To integrate your Instagram sales channel, ensure to establish a Facebook Shop page and populate it with your products within the Facebook catalog. If you haven’t created one yet, swiftly set up your Facebook shop and add products to generate a Facebook product catalog. If your products are already available on Facebook Shop, you’ve fulfilled this criterion.
3. Switching your Instagram profile into a business profile
Step 1: Access your account settings
Log in to your Instagram account, access your settings

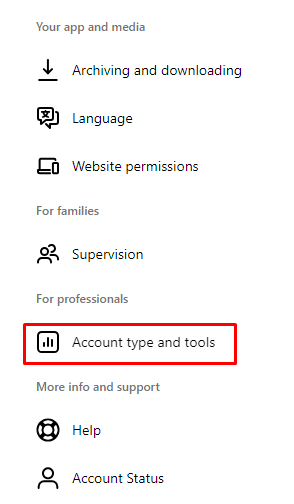
Scroll down to find the For professionals section and click on Account types and tools
Step 2: Convert to business profile
Click on Switch to professional account

Step 3: Select business
Afterward, select the option that most accurately describes you, which, in this instance, is “Business.”

Link Instagram account to Facebook business page by following the instructions provided by Instagram. Ensure that the Facebook page corresponds to the one you added to Shopify.
Adding Instagram sale channel to Shopify
1. Desktop version
Step 1: Navigate to your Shopify admin and click on Sales channels

Search for Facebook & Instagram

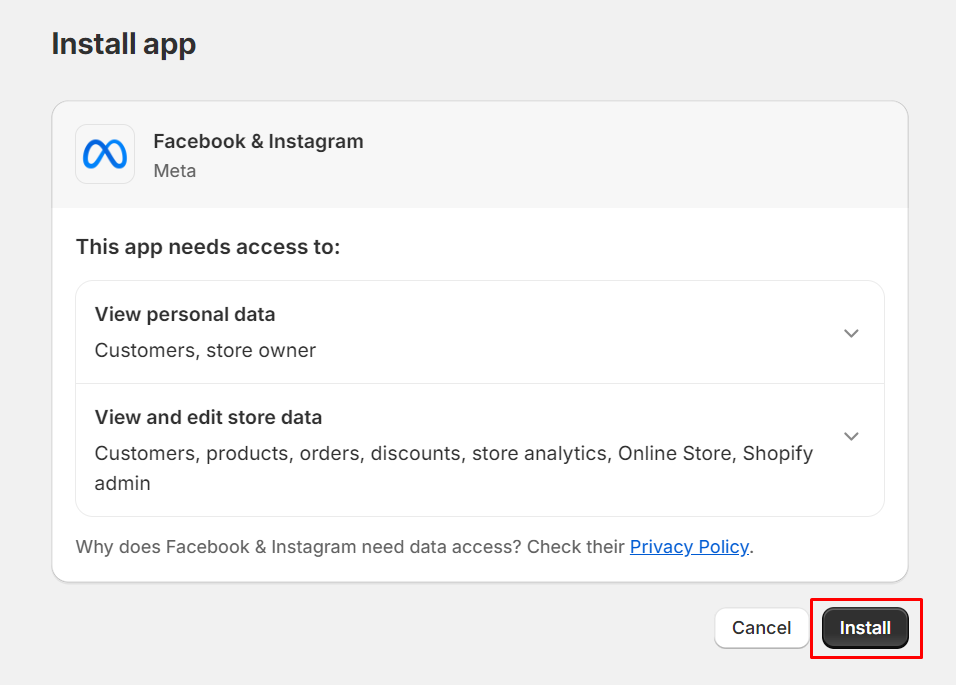
Step 2: Install Facebook & Instagram in Shopify app store
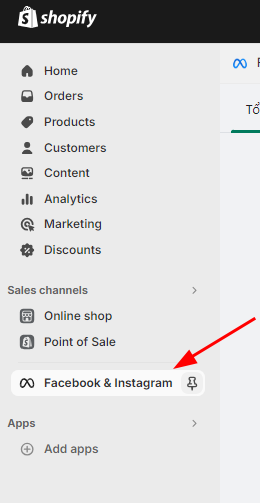
Step 3: The Facebook sales channel currently is on your Shopify dashboard which includes Instagram.
Step 4: Proceed to your Facebook account page and authenticate the Instagram account within the sales channel.
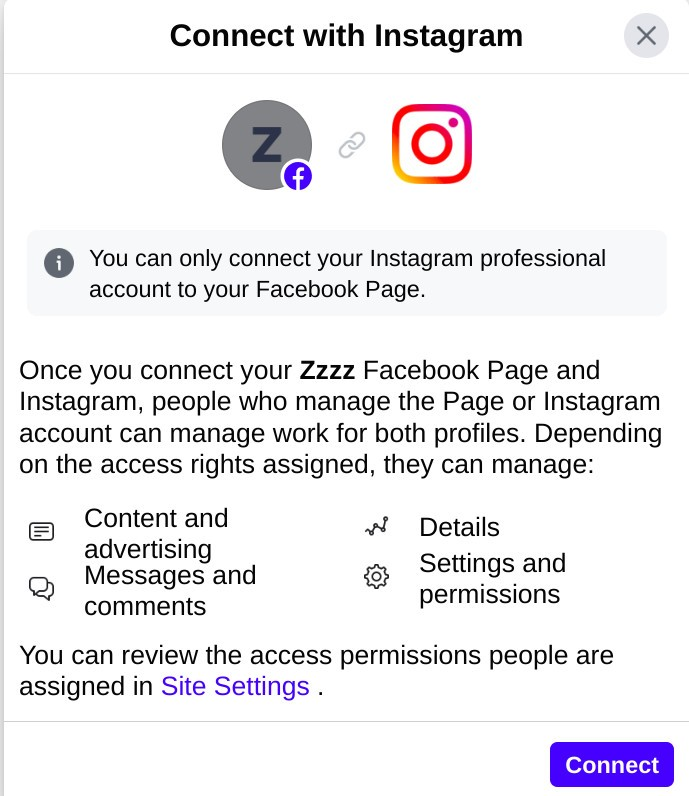
2. iOS version
Step 1: Access your Shopify app and select Store.
Step 2: Locate Add channel adjacent to Sale channels.
Step 3: While on the Add sales channel screen, search for Instagram.
Step 4: Opt for Add Instagram.
Step 5: Navigate to your Facebook account page and authenticate the Instagram account within the sales channel.
3. Android version
Step 1: Access your Shopify app and select Store.
Step 2: Locate the + button adjacent to Sale channels.
Step 3: While on the Add sales channel screen, search for Instagram.
Step 4: Opt for ADD INSTAGRAM.
Step 5: Navigate to your Facebook account page and authenticate the Instagram account within the sales channel.
Tagging products in Instagram posts
Tagging products in your Instagram posts and stories is now feasible with Instagram’s latest feature. This functionality allows your customers to conveniently browse and purchase your products directly from your online store within the Instagram app.
It’s important to note that product tagging is only available for Instagram posts or stories if the products are listed in the Facebook catalog as well as Shopify online store, and your Instagram business profile is approved.
To tag products in your posts, please follow these five steps:
Step 1: Choose a photo or video and customize it with effects and filters
Step 2: Choose the products to tag in the photo. For videos, a tray will appear for selecting the products to tag. You can tag up to five products in videos
Step 3: Enter the product name to tag and select it from the search results
Step 4: Click Done
Step 5: Click Share
You can preview your posts or save them as drafts for better quality. Simply click Preview Tagged Products or Save Draft. Instagram also allows you to tag products in previous posts on your professional account. With the ability to tag five products per single-image post and video, and up to 20 products per multi-image post, you can effectively promote your products and your store on Instagram.
How to display your Instagram Gallery on your website
Displaying your Instagram Gallery on your website offers numerous advantages. It demonstrates the vitality of your brand and showcases how you engage with newcomers. Additionally, visitors can easily navigate to your Instagram profile to view more stunning product images.
To integrate your Instagram Gallery into your website, you’ll need a plugin like Mageplaza Instagram Feed. This user-friendly tool allows:
Manage many feeds (create, edit, delete feeds, and update status)
-
Show/hide Instagram posts
-
Customize feed interface
-
Synchronize data automatically
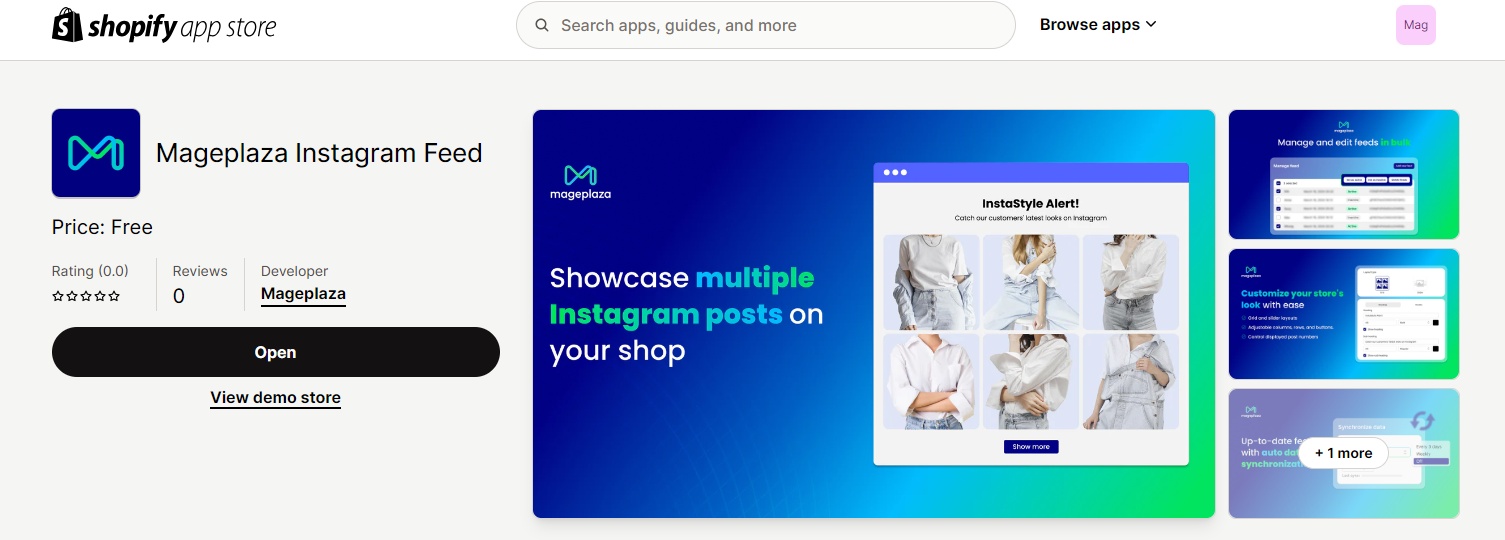
Once you’ve selected the Mageplaza Instagram Feed and initiated installation, you’ll receive a confirmation message. Subsequently, you’ll be prompted to personalize your feed and synchronize it with your Instagram profile. Finally, you’ll receive an embed code, enabling you to position your feed precisely where you desire on your website.
How to put Instagram profile buttons on your site
This step is crucial for seamless Instagram and Shopify integration. By adding small Instagram profile buttons, you signal your active presence on Instagram, making it easier for customers to find and follow your updates.
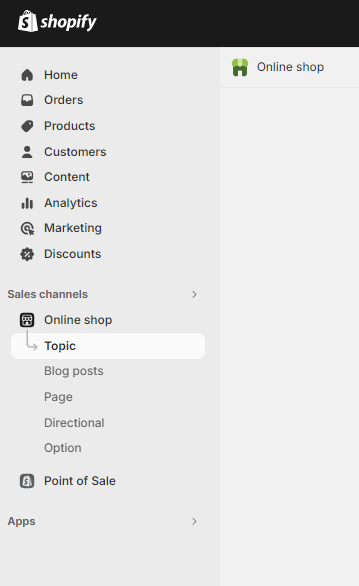
To accomplish this, First, when you log in to your Shopify account, you click on Online Store in the admin dashboard and then choose Topic
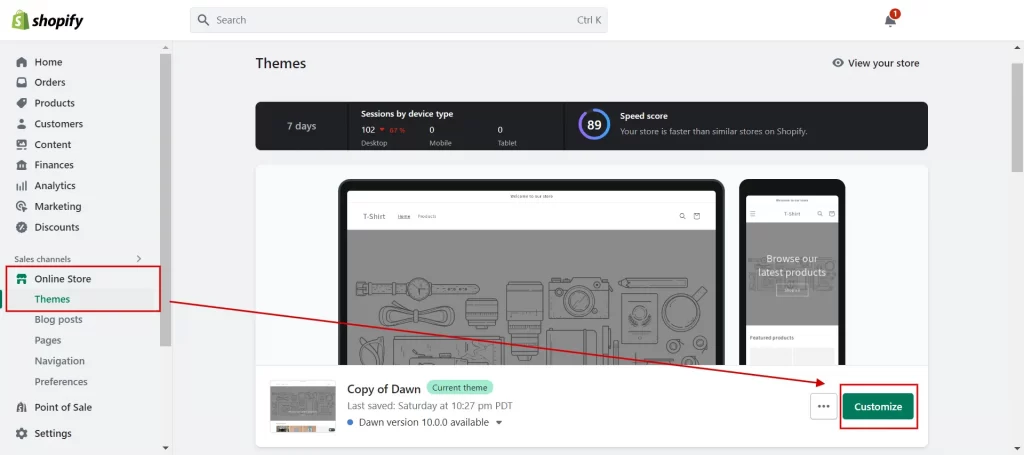
Next, you click the Customize button next to the current theme where you want to add social media accounts.
In the Theme Editor, choose the Theme Settings icon on the left-hand screen, then click the Social media tab.
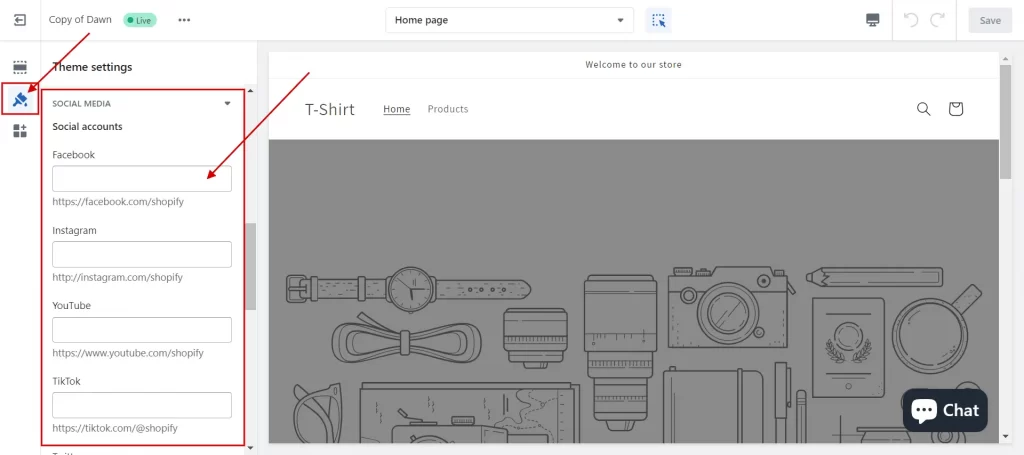
Upon installation completion, an editor will appear where you can input URLs to your social profiles.
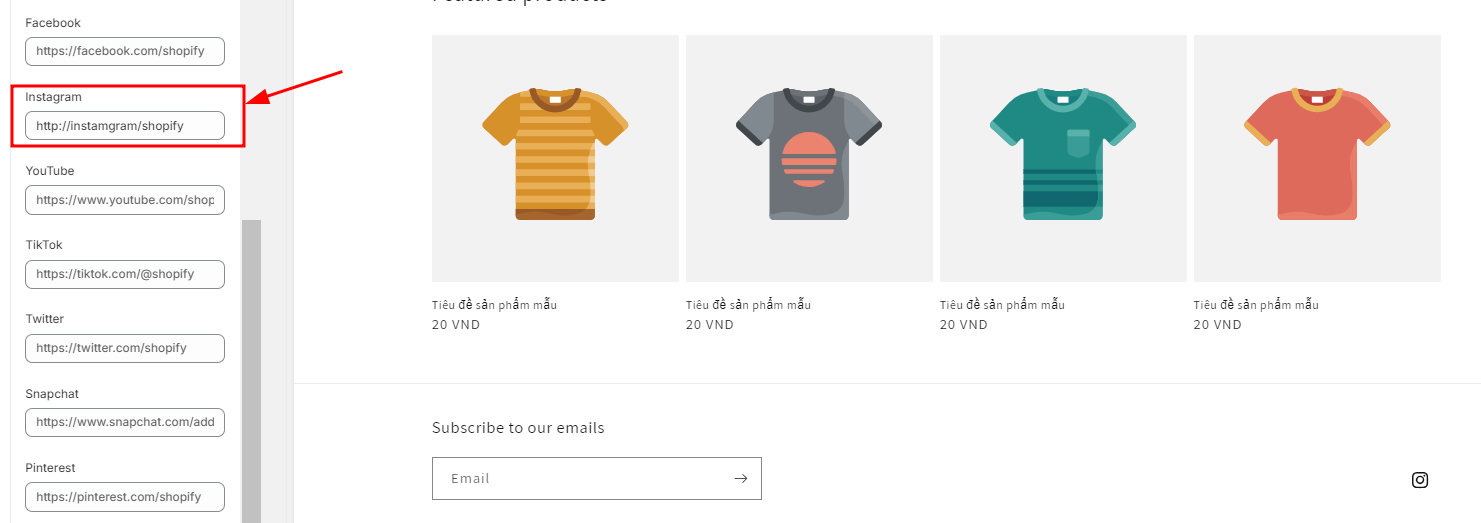
Add your URLs, and the app will handle the rest, seamlessly integrating Instagram profile buttons onto your Shopify store.
Installing the tracking pixel for campaigns
To begin, the initial action is to establish your Pixel on Facebook. While we provide a comprehensive tutorial on configuring your Pixel, you’ll need to:
- Access your Facebook Events Manager.

- Navigate to “Connect to the data source” on the left-hand menu.
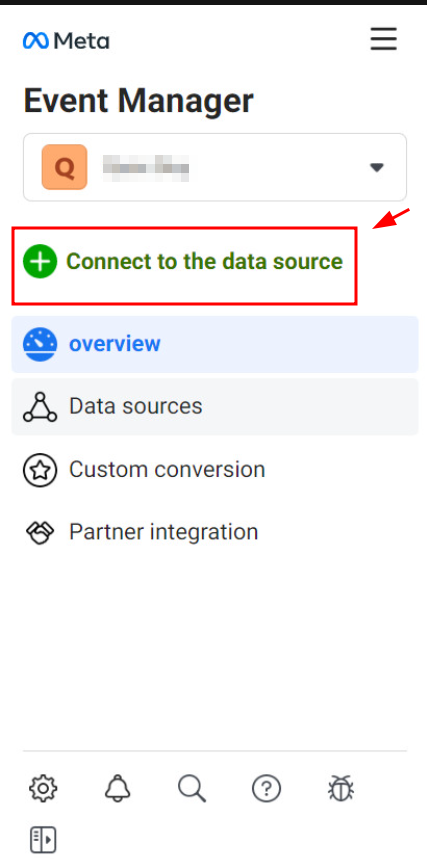
- Choose “Web” and click “Connect.”
![]()
- Provide your Pixel with a descriptive name. Opt for a more imaginative choice rather than simply using “My Pixel”. Then, click Create
![]()
- Input your website URL to explore simplified setup alternatives.

- Click Next
Conclusion
As we conclude our exploration of adding the Instagram Sale Channel to Shopify in 2025, it’s evident that this integration holds immense potential for merchants seeking to expand their online presence and boost sales. By harnessing the power of Instagram’s extensive user base and innovative shopping features, Shopify merchants can elevate their eCommerce strategy to new heights.


