How to Create a Sale on Shopify? [Quick & Easy]
![How to Create a Sale on Shopify? [Quick & Easy] - Mageplaza](https://cdn2.mageplaza.com/media/blog/create-a-sale-on-shopify/cover.png)
In this article, we will guide you on how to set up a sale on Shopify. Offering discounts and promotional gifts is a common practice among businesses to attract customers and increase revenue.
It is important to be cautious when implementing discounts. Improper sales planning and management may lead to lower profits or even harm your business. Therefore, you must understand the best practices for creating sales on Shopify.
Why should you create a sale on Shopify?
- Boosted Traffic: Eye-catching ads, such as 50% off or buy-one-get-one-free offers, naturally draw customers into your online store. This surge in visitors increases the likelihood of people exploring your products.
- Higher Sales Volume: More visitors typically lead to more sales. Customers might not need a product right away, but enticing discounts prompt them to consider future use and make purchases. Those with immediate needs are likely to buy on the spot, especially since such promotions are time-limited. Customers often buy in larger quantities than necessary to take advantage of these deals, boosting overall sales.
- Achievement of Sales Goals: Many store owners set sales objectives on a weekly, monthly, or yearly basis. Promotions can be a strategic tool to meet these targets, ensuring your business performs as planned.
- Enhanced Customer Relationships: Promotions not only engage customers but also build loyalty. For new customers, a sale might be their first interaction with your products, allowing them to try your offerings at a favorable price and potentially leading them to return for future purchases. Moreover, discounts can also reinforce customer loyalty as shoppers appreciate the value they get from such deals.
- Inventory Management: For businesses, particularly in fashion, managing inventory can be challenging due to seasonal changes and shifting trends. Promotions help clear out-of-season or outdated stock, sometimes just breaking even or making a small profit, but crucially freeing up resources for new inventory.
How can you set up a sale on Shopify?
Display discounted prices to customers
The product listings on your online store will be updated to highlight items on sale once you set up price comparisons. How the discounted price is shown varies based on the theme your store uses. Additionally, the presentation of the sale price may differ depending on whether the product has multiple variants with varying prices or if it’s a single variant product or its variants share the same price.
- Sale products with different variant prices:
For products that have variants with different prices, the lowest sale price will be shown. Take a look at Adidas, they show the least expensive variant but when you click into that product, you’ll find out there are other variants with higher price.
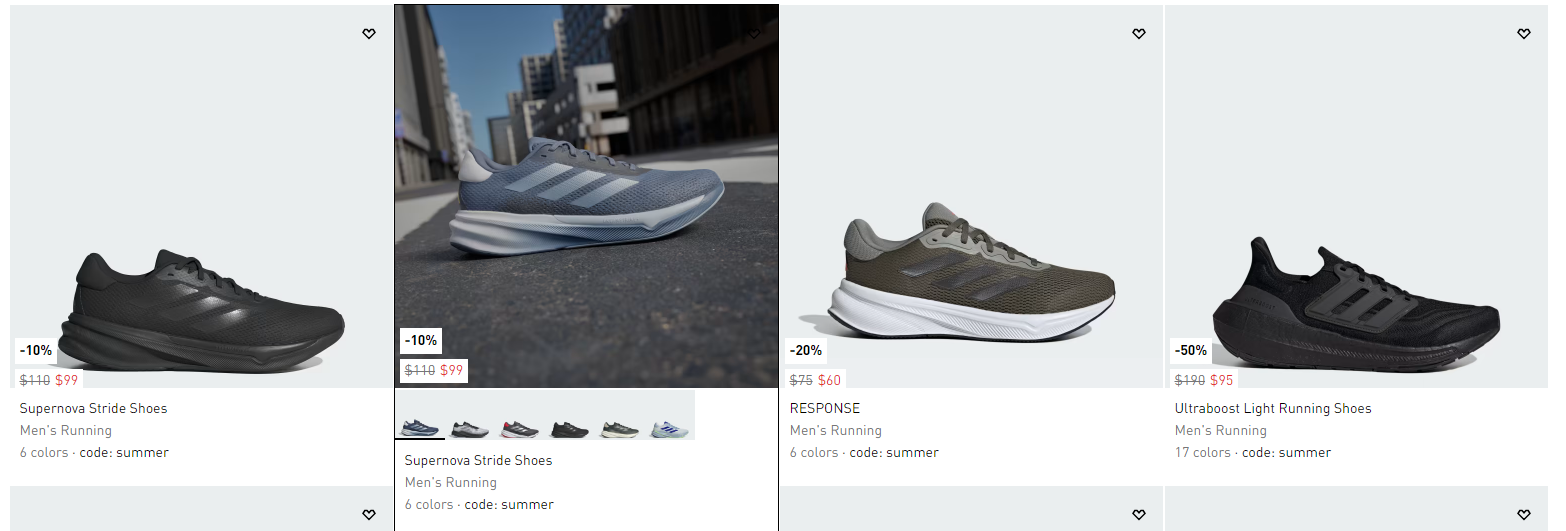
- Sale price for products with one or multiple variants at the same price:
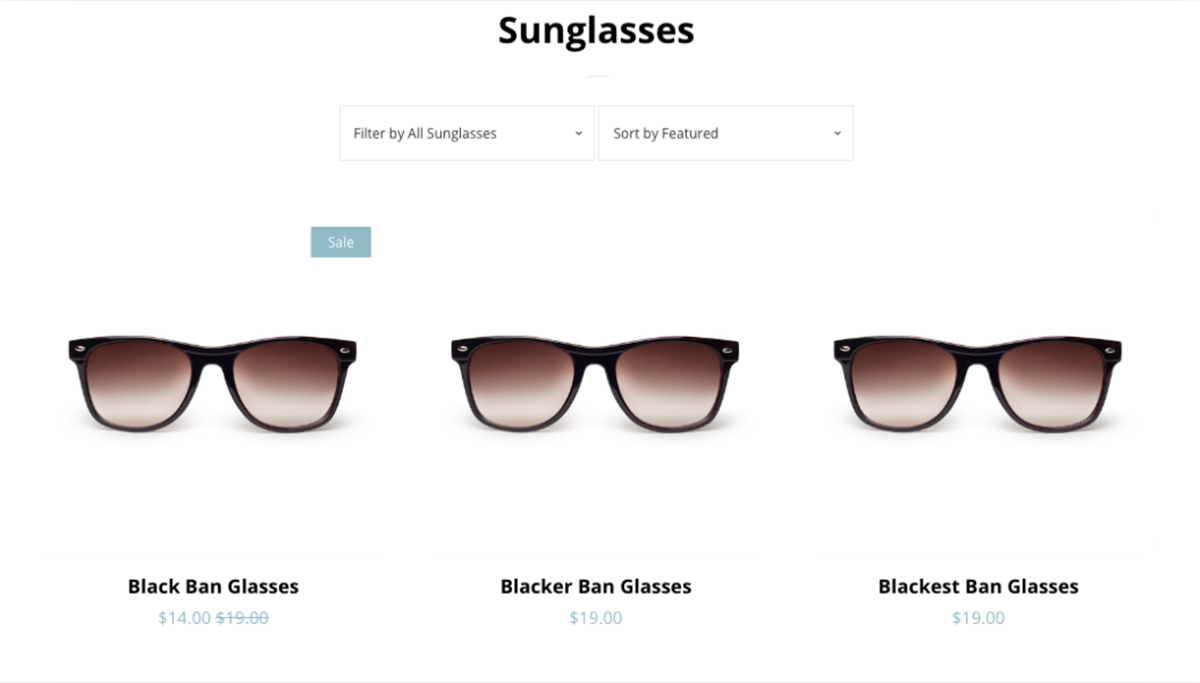
Here, both the original price and the discounted price are displayed together for comparison. This allows customers to see the savings they can achieve by purchasing the product at a discounted rate, which can enhance their desire to buy.
Compare price of a product
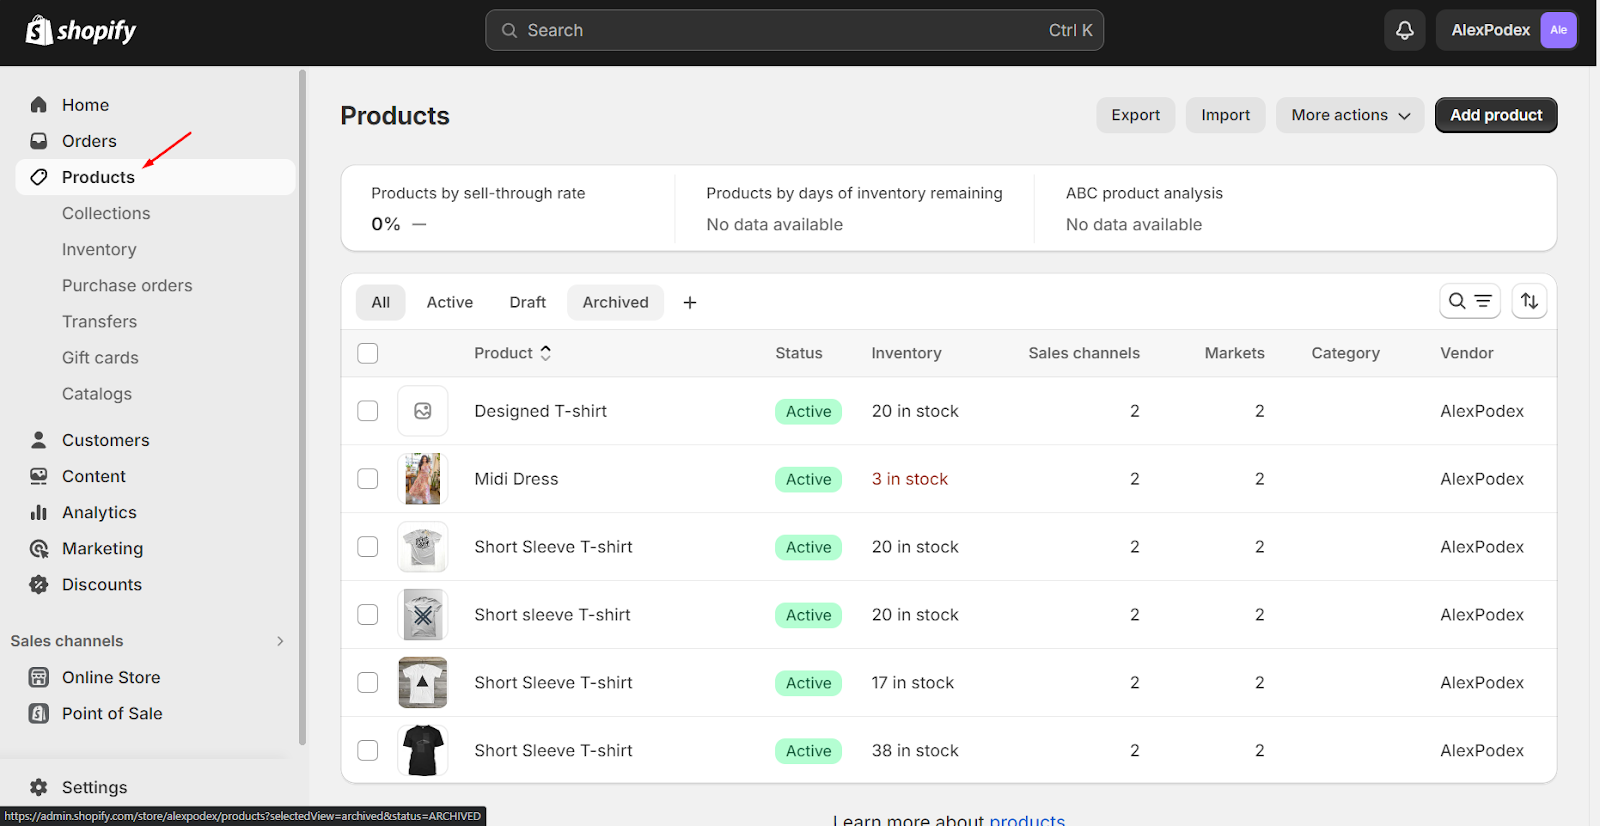
Step 1: Go to Products
In the Shopify admin panel, click on the Products button in the left-hand menu then all of your products will be displayed
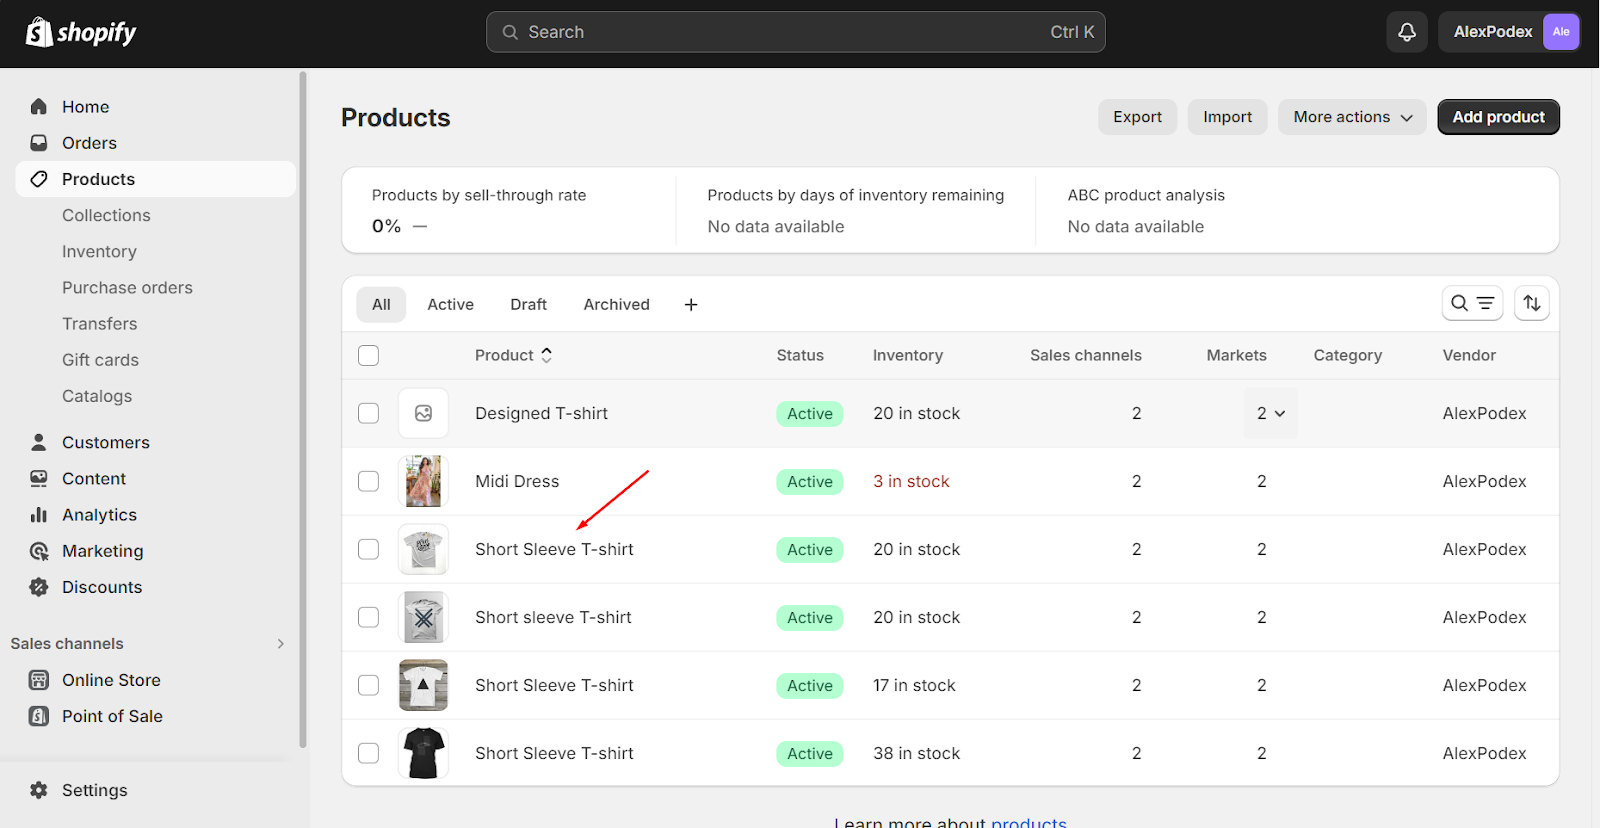
Step 2: Click on the product name
In this step, locate the product for which you want to set a comparison price and click on its name:
Step 3: Set the original price
Navigate to the Price section and enter the product’s original price into the “Compare at price” field.
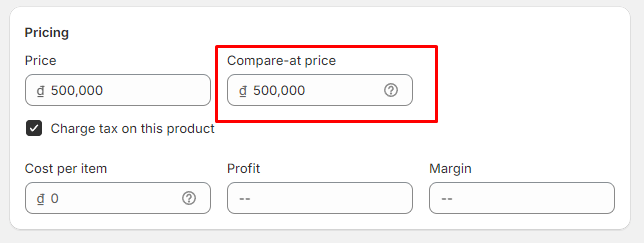
Step 4: Enter the sale price
After deciding on a suitable sale price for the product, enter this amount in the “Price” textbox. Ensure that the value entered here is lower than the value in the “Compare at price” to effectively display the product as being on sale.
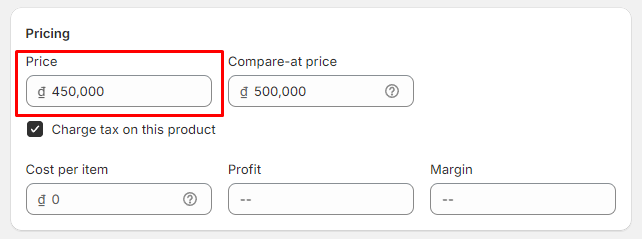
Step 5: Click Save
To finalize the comparison price for your product, click the “Save” button.

Compare at price for a product variant
Step 1: Select a Product
On the Products page, select the product for which you want to set a comparison price for a variant.
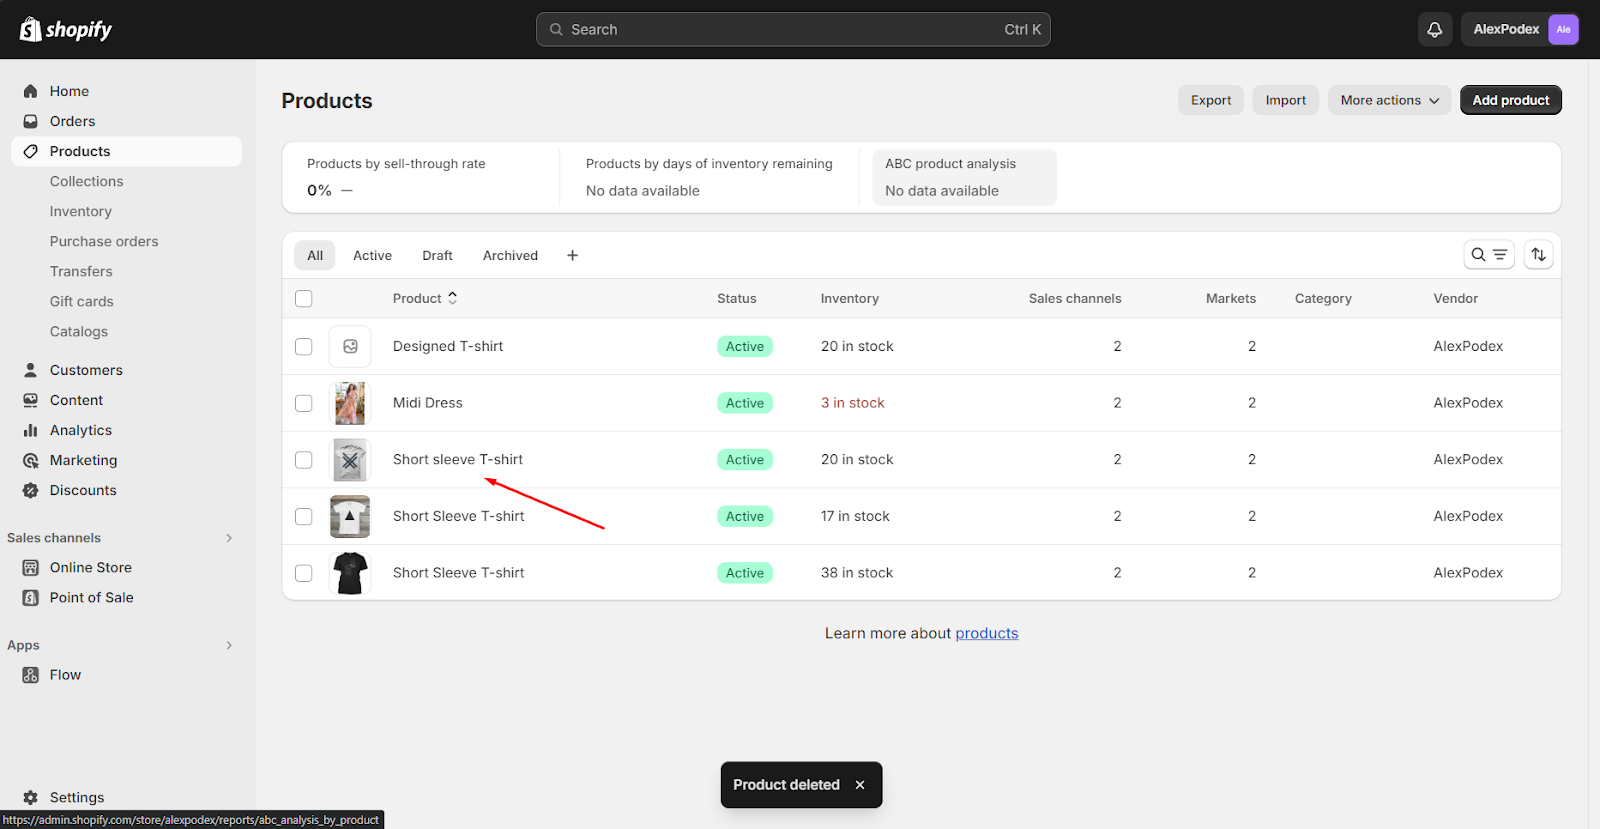
Step 2: Navigate to the Variants Section
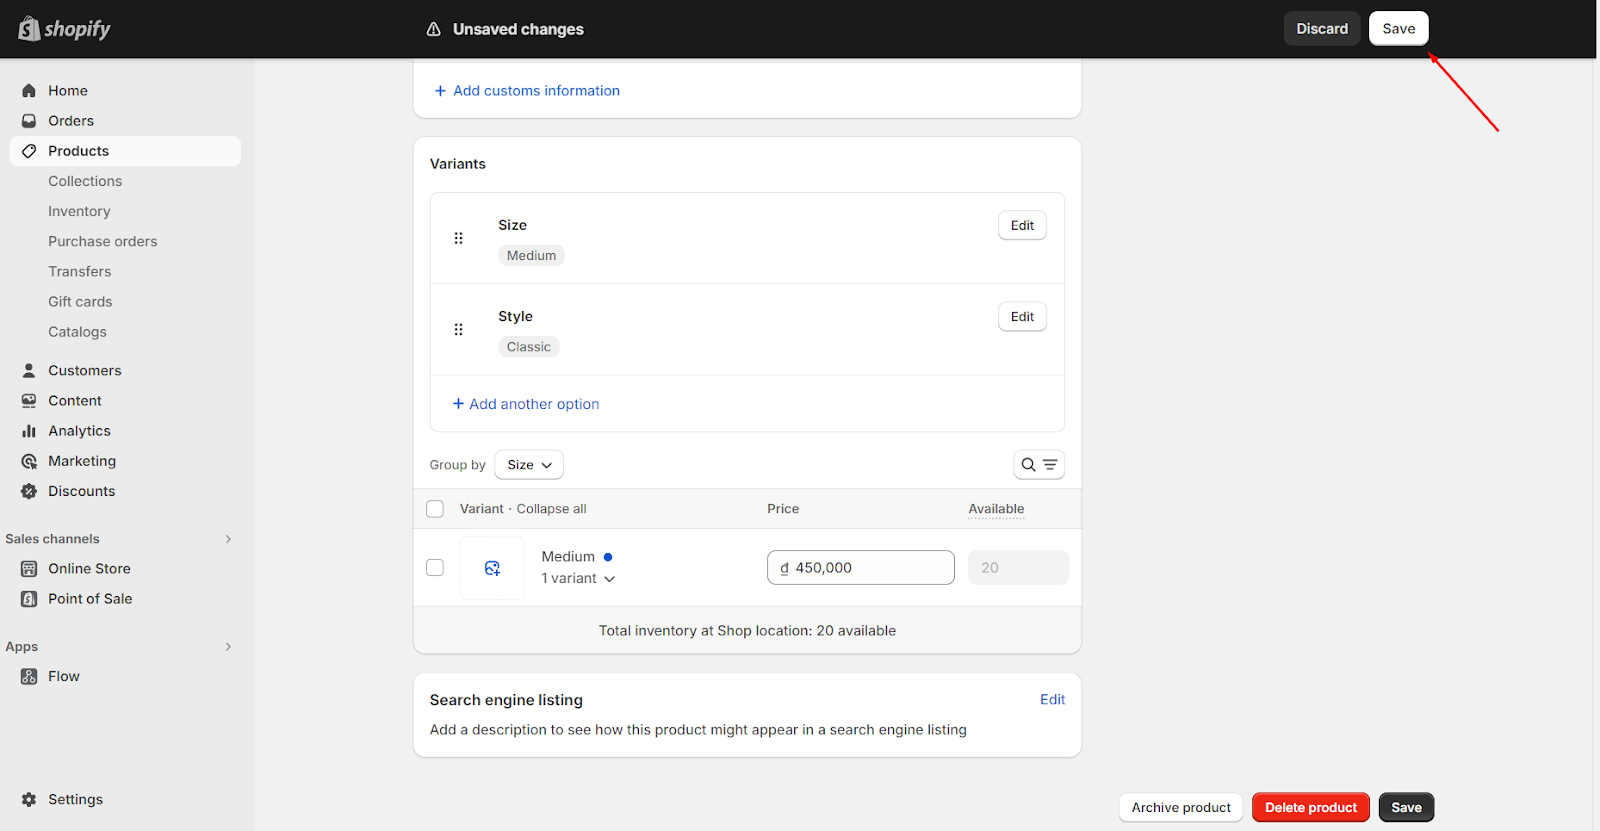
Scroll down to find the Variants section. In the Price section, enter the reasonable sale price you’ve determined for this product into the “Price” textbox.
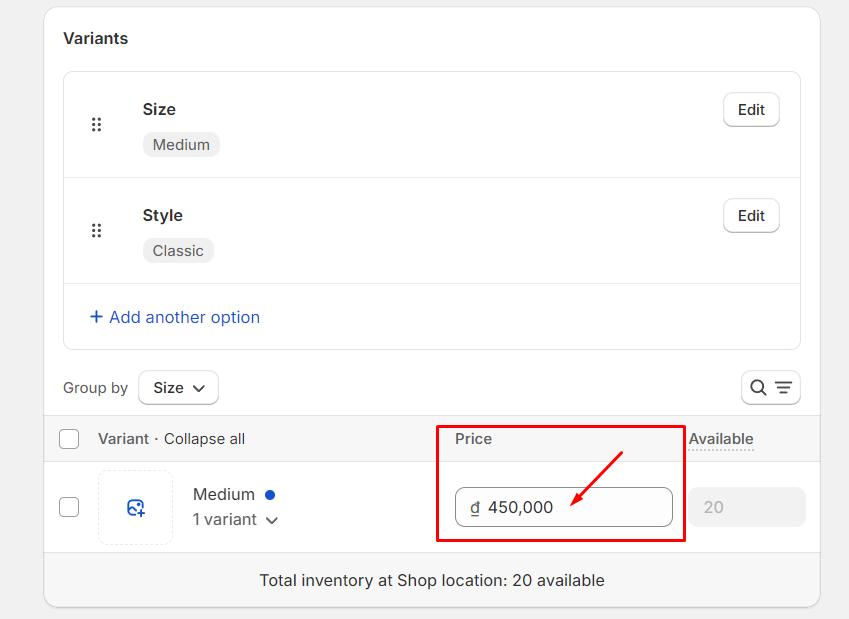
Step 3: Click Save
To finish setting the comparison price for your product, click on the “Save” button.
How to set up a discount collection on Shopify
Shopify offers a helpful feature that can enhance customer satisfaction in your store. It allows you to curate a selection of products currently discounted, making it easier for customers to discover sale items and guaranteeing they don’t overlook any amazing deals. Below are simple guidelines to assist you in setting up a sales collection on Shopify.
Step 1: Create a new Collection
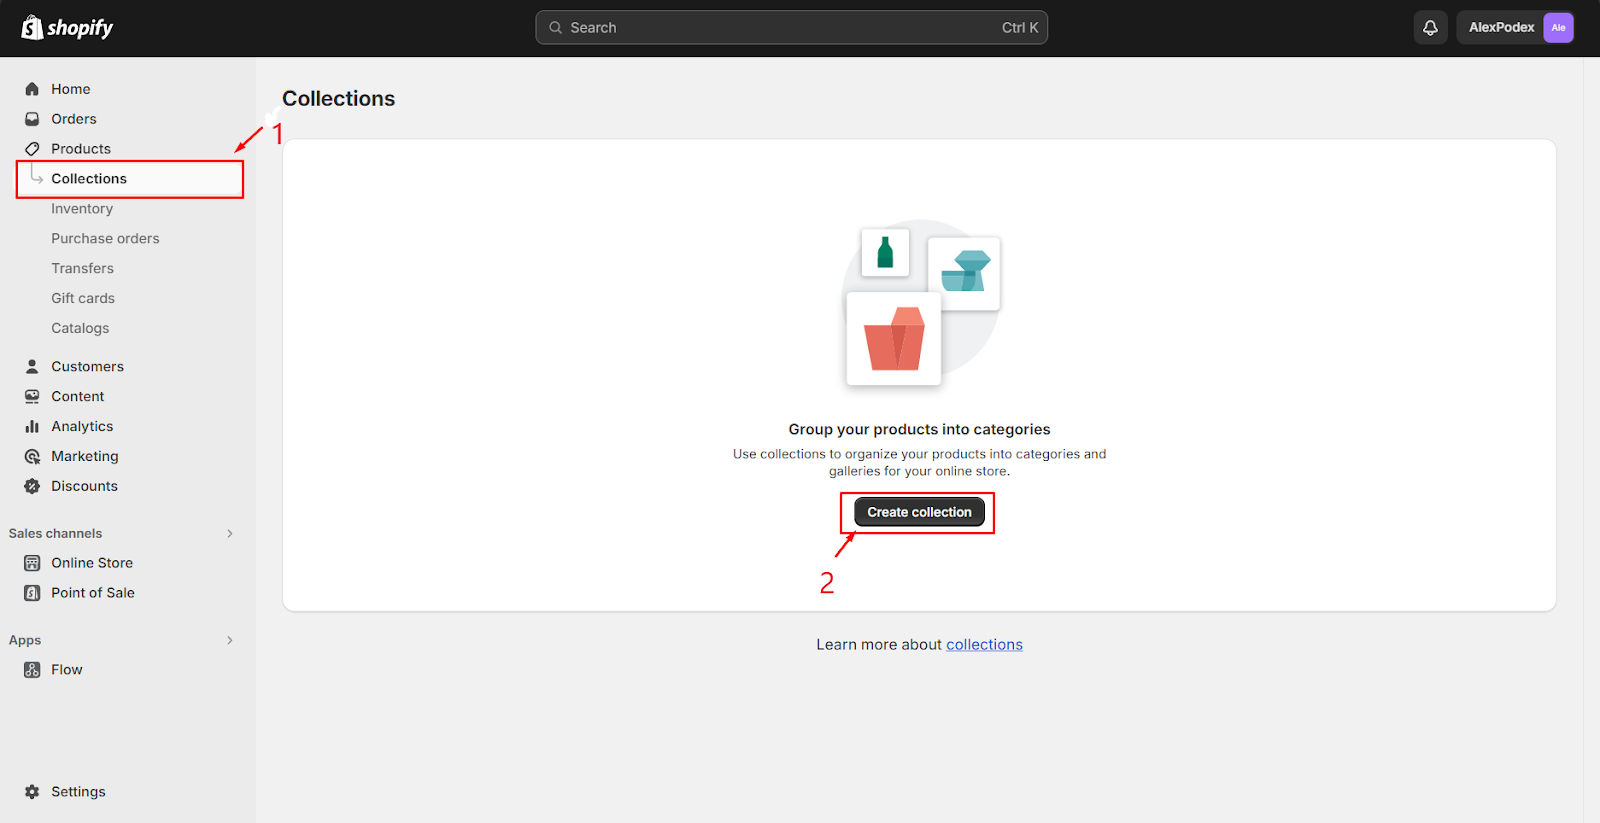
From your admin dashboard, click on the Products button in the menu. Then, navigate to Collections to see your existing collections. Click on Create collection to start a new collection specifically for your sale products.
Step 2: Enter Product Information
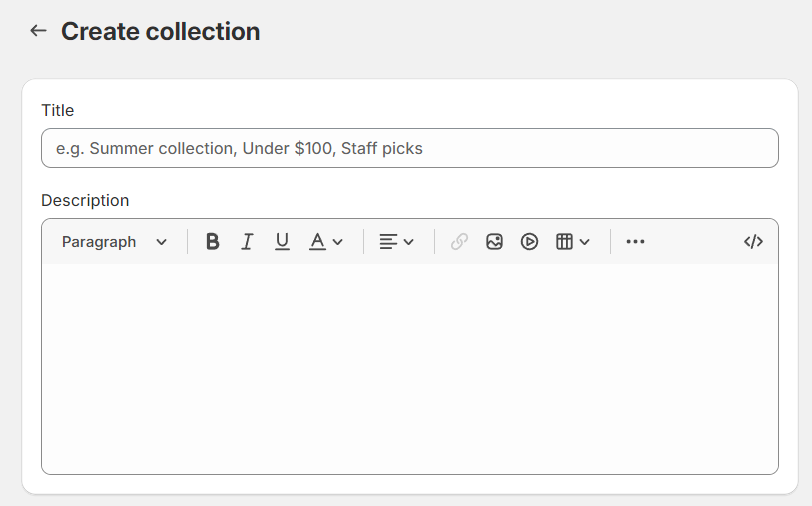
In this step, fill in the product details, including the title and description. Craft a distinctive title and an engaging description to capture the interest of your customers and provide them with essential information about the product.
Step 3: Select Collection Type
Take a look at the Collection type field where you will find two options: Manual and Automated. It is advisable to choose the Automated option, as it allows you to add products to the collection automatically, rather than manually inputting each sale item one at a time. This approach is more efficient and will save you considerable time

Step 4: Choose All Conditions
In the Conditions section, you’ll find two options at the top. Ensure you select All Conditions to apply all specified criteria to the collection.

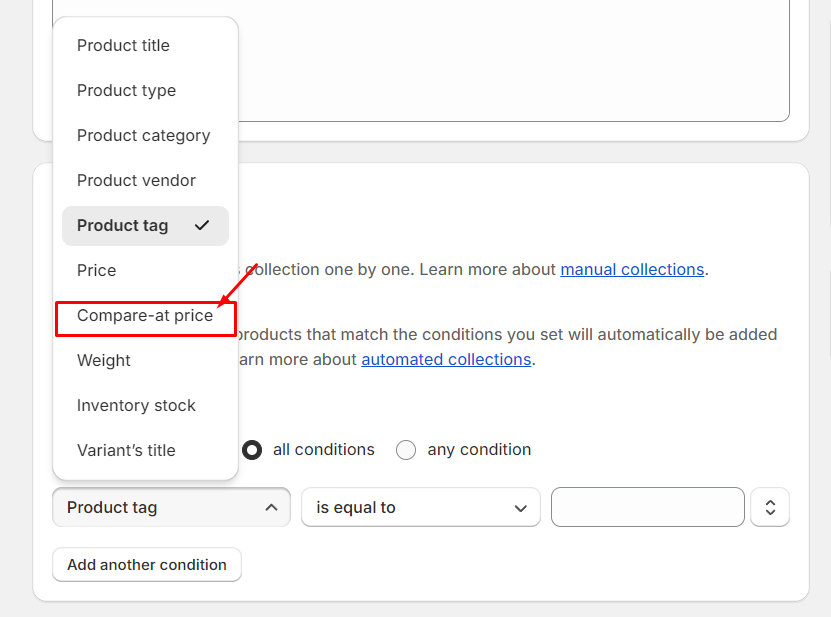
Step 5: Select Compare at Price
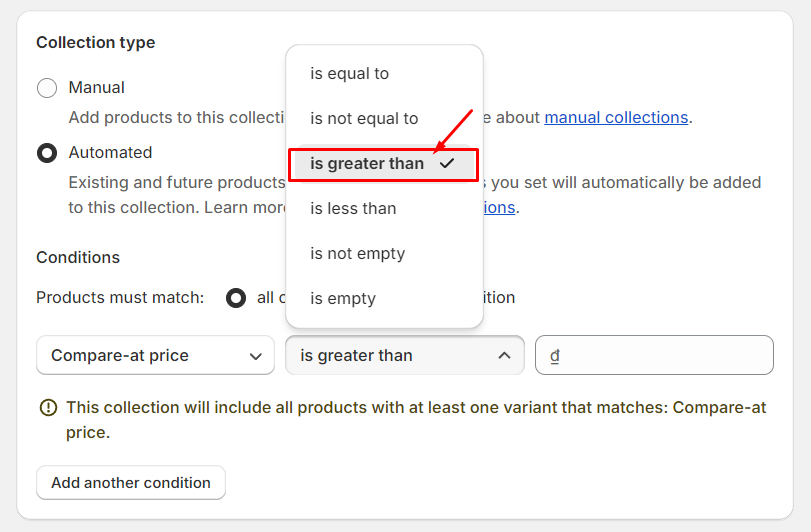
Next, navigate to the Conditions section. From the dropdown menu highlighted in the image provided, choose Compare at Price.
Step 6: Choose Is Greater Than
In this step, select Is Greater Than from the second dropdown list.
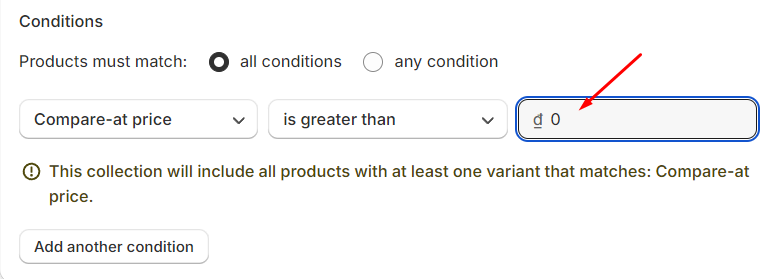
Step 7: Enter ‘0’ in the Third Textbox
Now, input the number ‘0’ into the third textbox, which is located adjacent to the second dropdown list from the previous step.
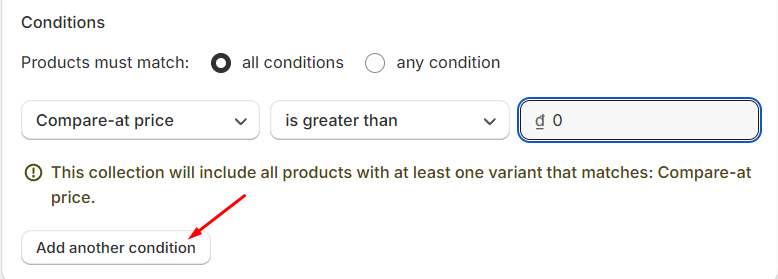
Step 8: Include Another Condition
After setting the initial condition in steps 5 through 7, consider adding an extra condition. This allows you to further refine which sale products are automatically included in the collection, tailoring it more precisely to your needs.
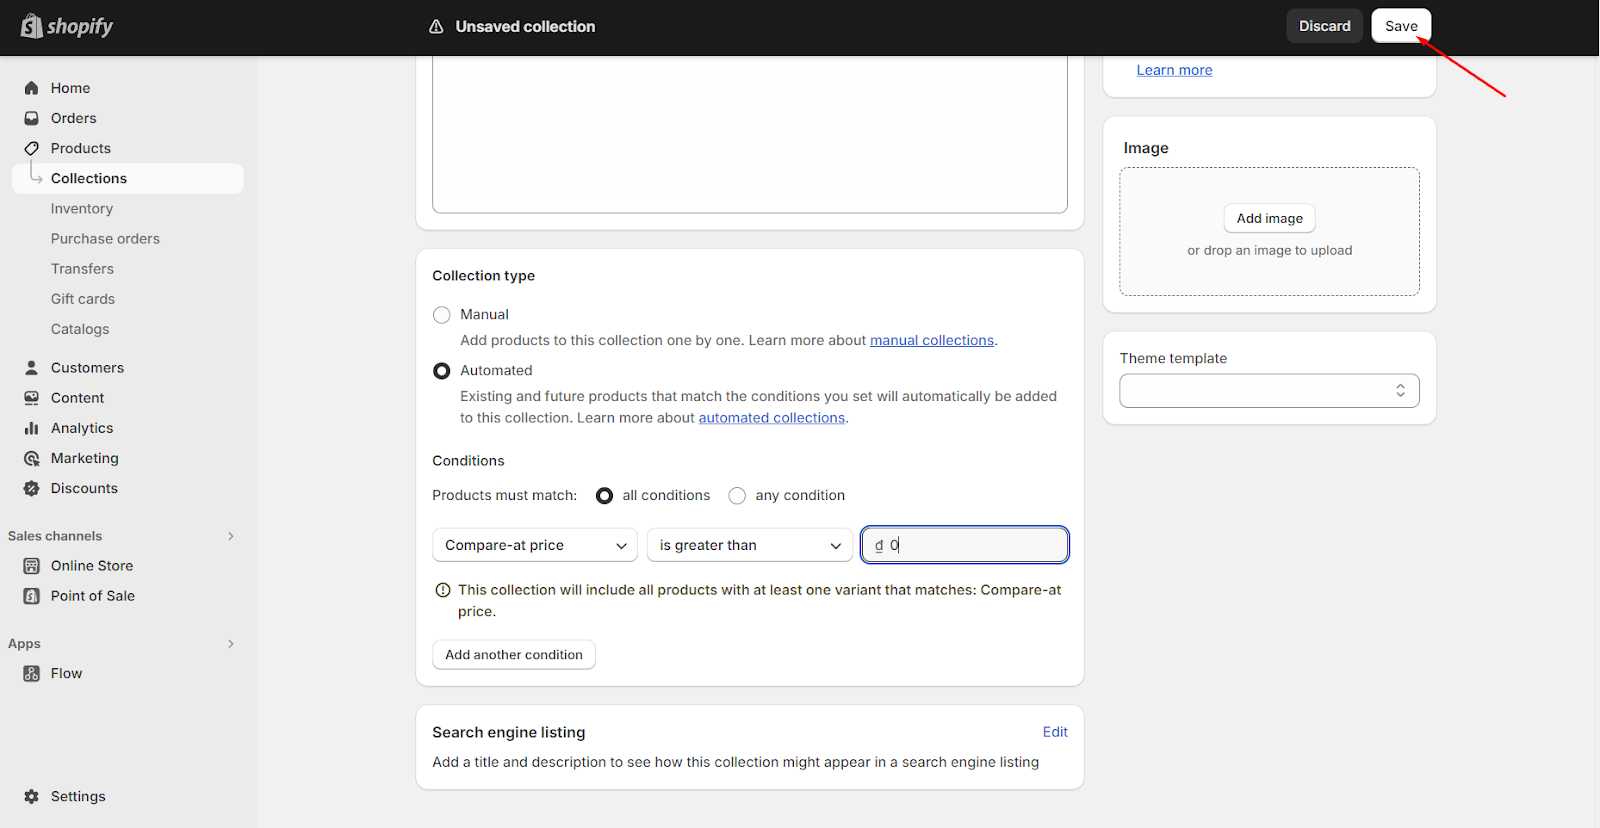
Step 9: Hit Save
To finish setting up your sale collection, make sure to click the Save button.
Top Sales & Discount Apps for Your Shopify Store
As a busy shop owner, you have numerous tasks to manage, which is where helpful apps come into play, especially for creating sales. These apps eliminate the need for hiring additional staff by providing cost-effective solutions to run promotions like buy-one-get-one-free deals, aiding in business growth, and more. Here are 11 user-recommended apps that I suggest for your Shopify store.
Bold Discounts ‑ The Sale App
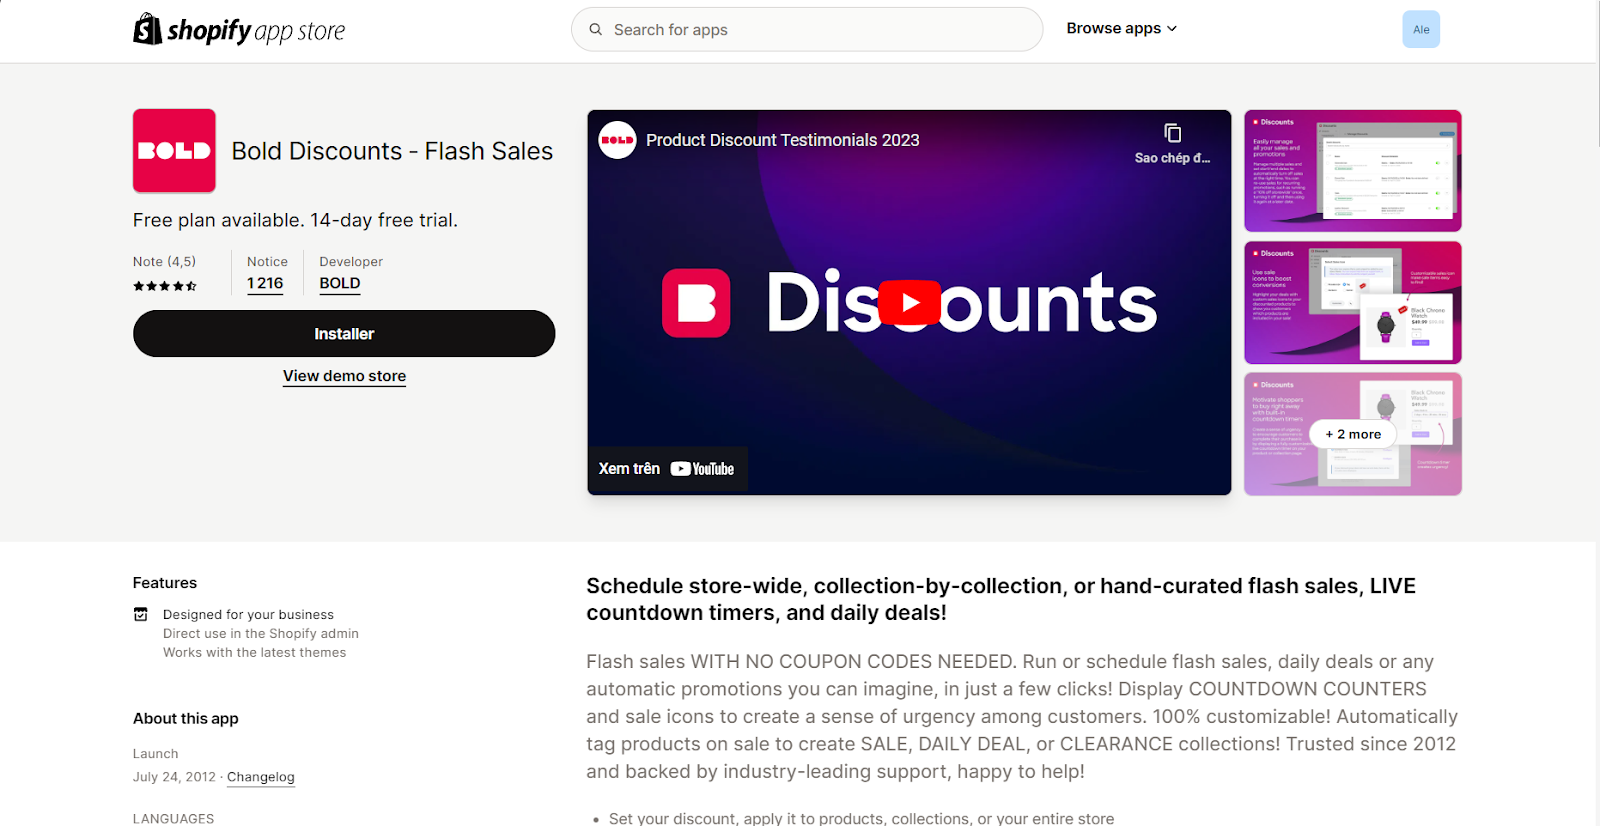
Bold Discounts - The Sale App by Bold is highly regarded for its capability to set discounts for products, collections, or the entire store. Real-time countdowns promote your sales effectively. You can launch unlimited promotions without cumulative discounts and plan them in advance, making it perfect for events like Black Friday. Automatically include products with sale tags in collections for streamlined management.
Price: $19.99 (you can help 14-day free trial to experience)
Upsell on Exit & Visit
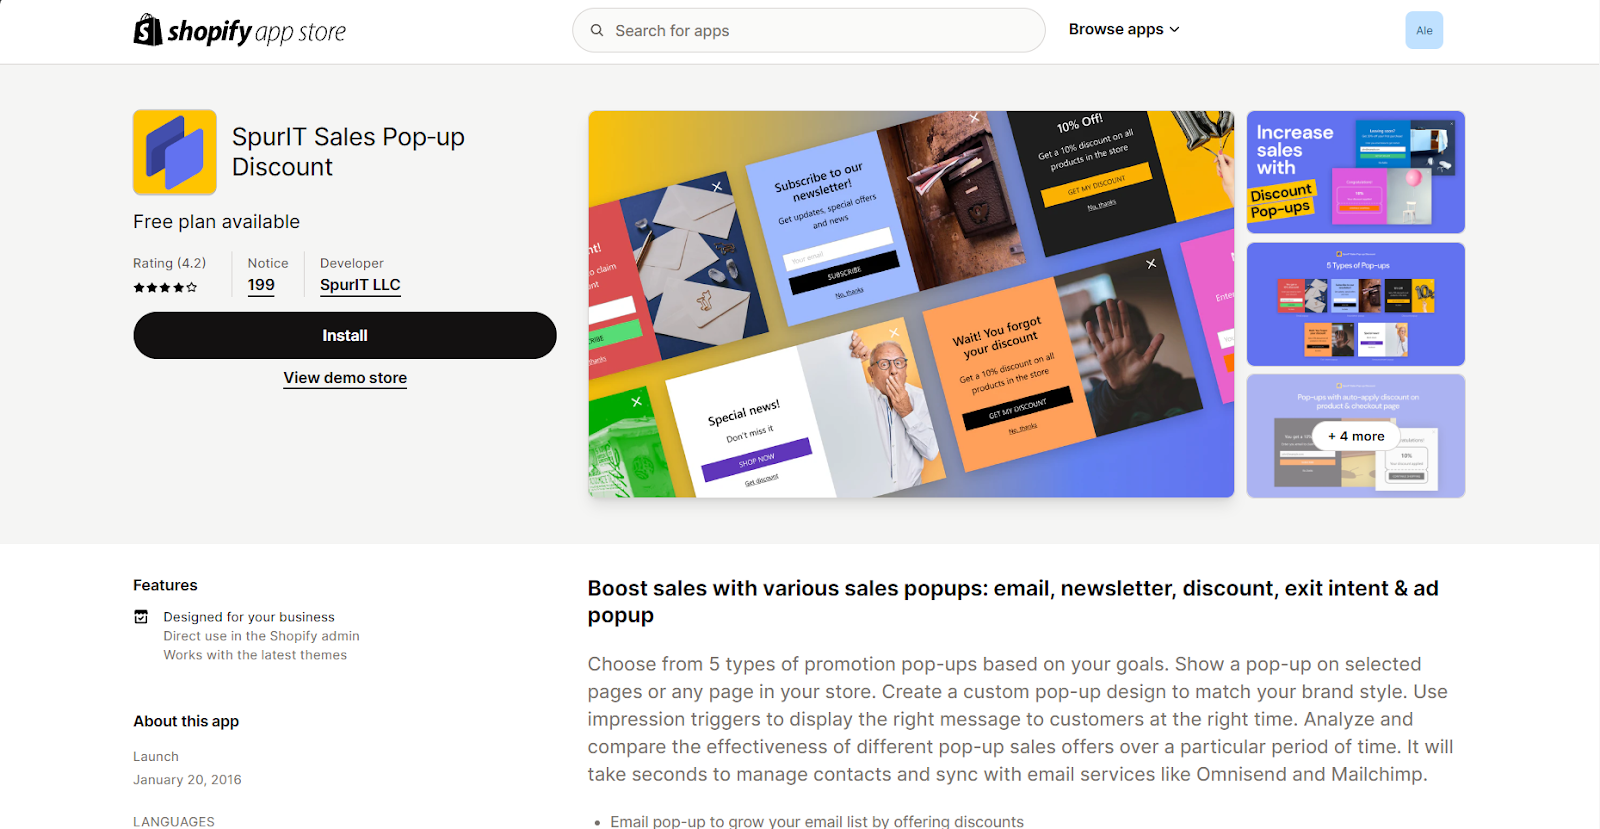
This unique application has a clever strategy to keep customers engaged by presenting appealing discount pop-ups when they are about to leave. It specifically targets new customers, utilizing the Upsell on Exit & Visit feature to transform them into loyal patrons. Additionally, this app ensures that your customers frequently receive enticing offers like coupons, gifts, free shipping, or personalized messages. The basic version of this application is free, but for a more enhanced experience, you can opt for the Unlimited at $7.95 per month, and Unlimited Priority at $16.95 per month.
Wheelio
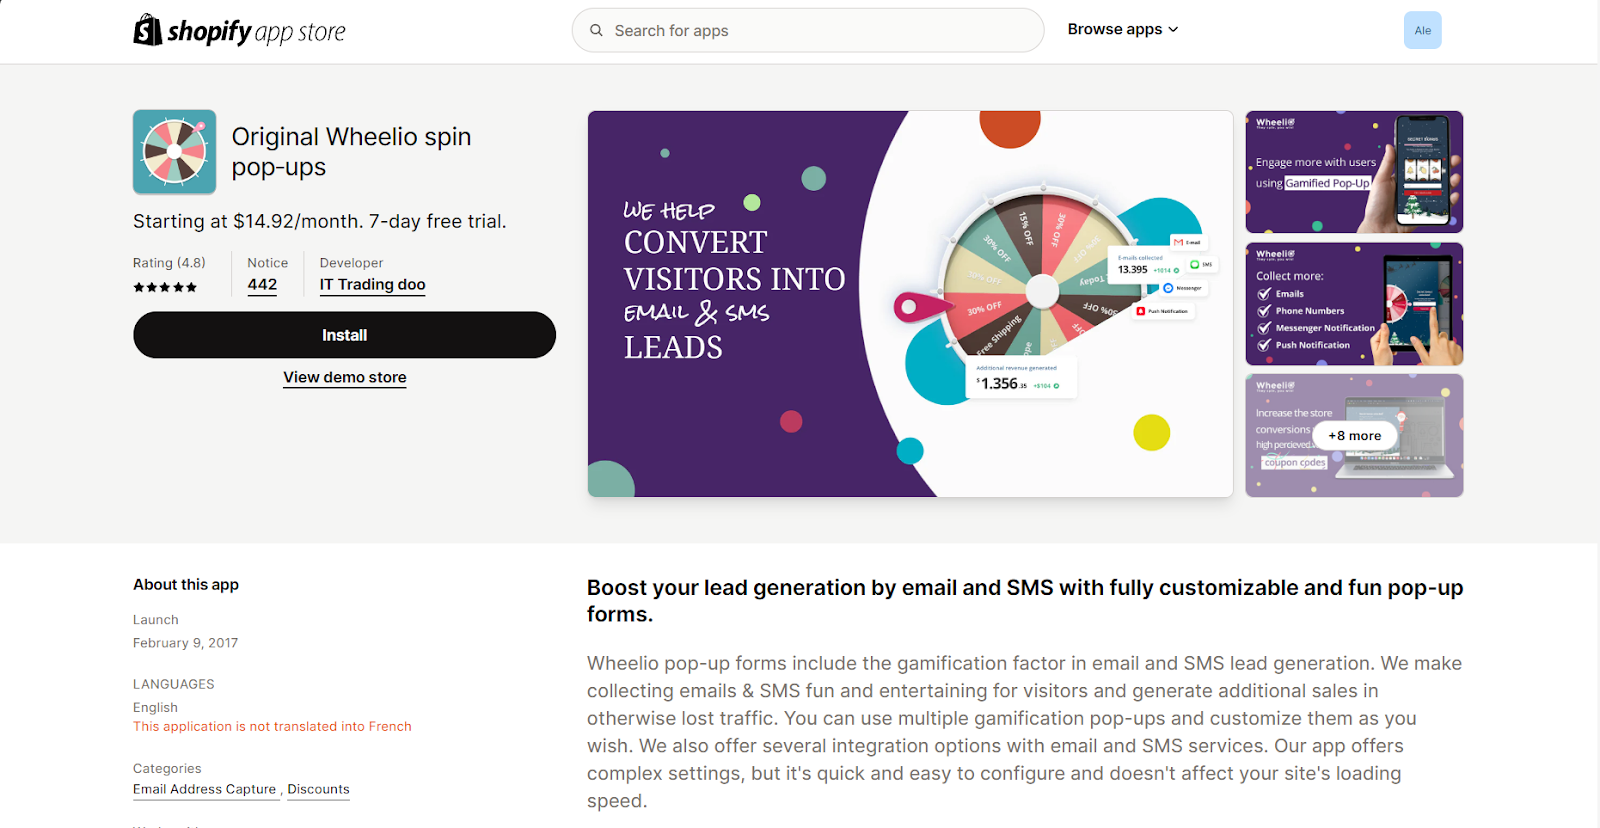
Wheelio is a user-friendly application that helps you keep your customers from leaving your online store. When a customer is about to leave, attractive discount pop-ups will appear to grab their attention. You can easily customize when and how these pop-ups appear, making them more effective in engaging your customers. With Wheelio, you can create special offers that motivate your customers to interact and stay on your site.
The pricing for Wheelio includes four tiers: Base plan at $14.92 per month, Level 2 at $29.92 per month, Level 3 at $54.92 per month, and Level 4 at $109.92 per month, each providing access to all its features and benefits.
Birthday Reminder
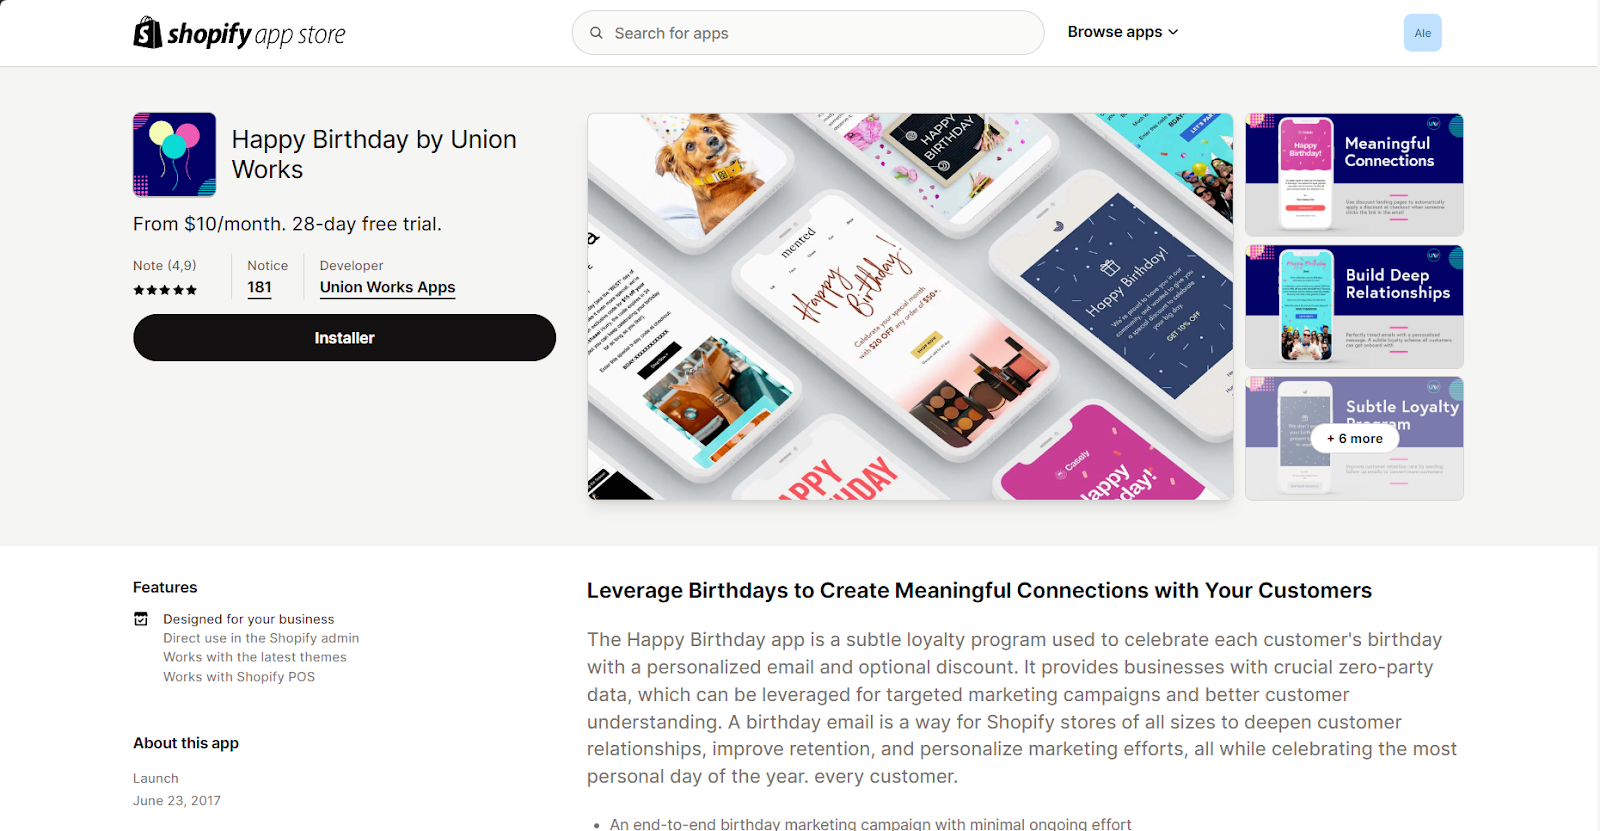
One useful application in the Shopify store is the Birthday Reminder app. This innovative tool assists you in automatically sending heartfelt and warm birthday wishes to your customers. With this app, you have the flexibility to customize greetings, adding a personal touch to your messages that will delight and surprise your customers. Additionally, you can leverage the app’s feature to send emails with special gifts or discounts, encouraging them to become loyal patrons.
We offer three pricing plans for our app:
- Base: $10 per month
- Growth: $20 per month
- Unlimited: $40 per month
Bulk Discounts
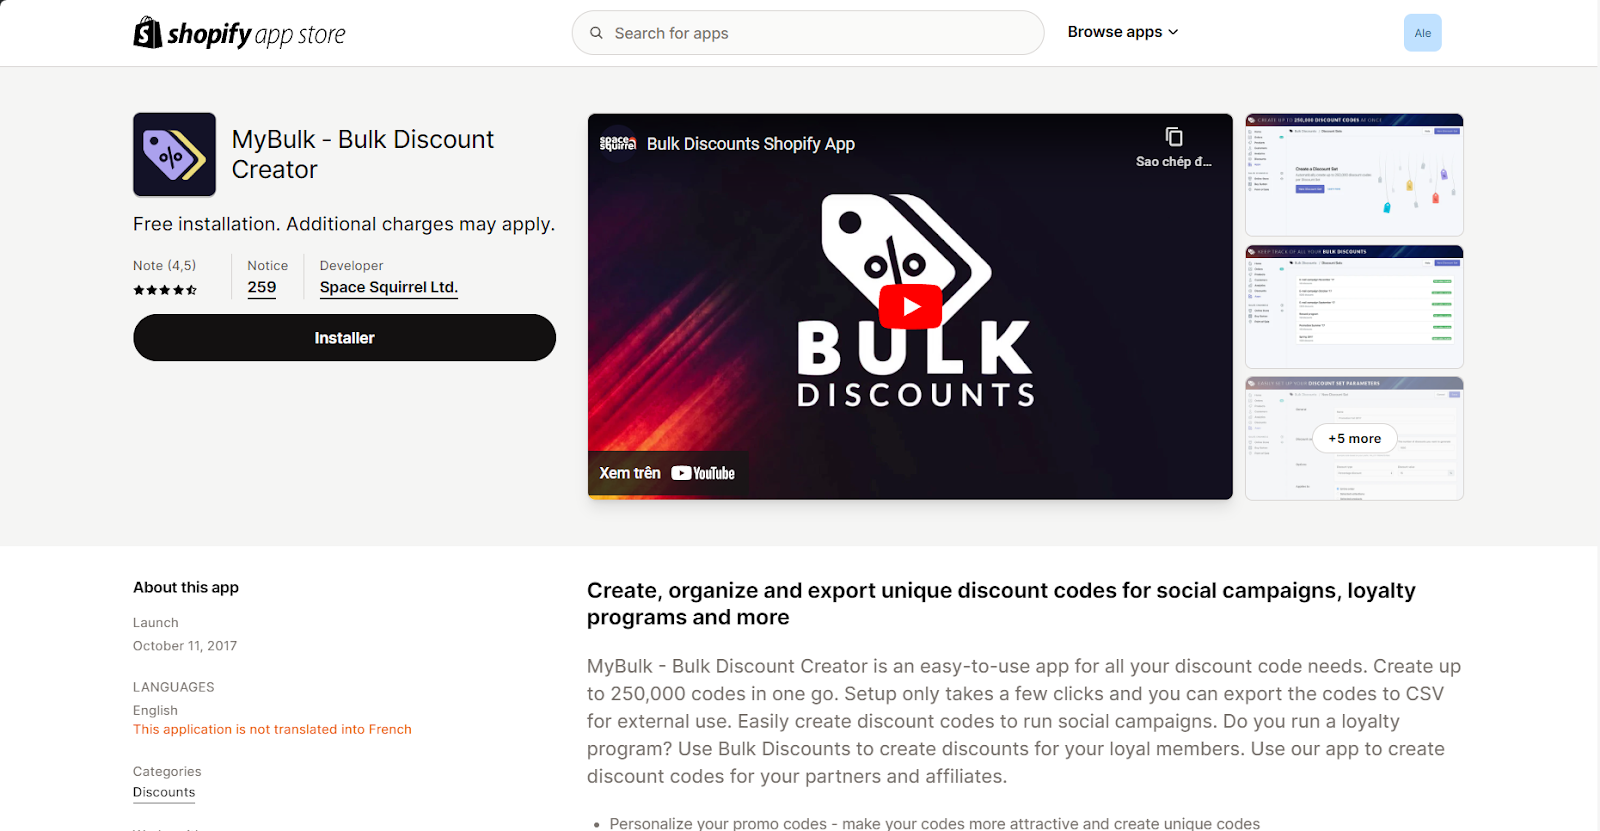
If you need an app to make lots of discount codes, try Bulk Discounts. It’s free and lets you make thousands of one-time or reusable codes quickly. It works with Groupon and LivingSocial too, so you can easily import and export your codes.
Cost: Free
Final Thought
The post gives you easy steps to set up a sale on Shopify and shows how to create a sale collection for customers to browse sale items easily. It also lists 8 top sales & discount apps for your Shopify store. I hope you find it useful.


