
With a big catalog of 224+ extensions for your online store
How to Insert New Products List in Widget in Magento 2
New product list is necessary to inform customers with the latest products which are marked as “New” and selected from the catalog. The homepage is one of the first places that customers may go to search before buying, hence it is considered a great place to promote new items. Now it is possible for you to create such a list in Magento 2 by adding a widget. The list can be set to display in the default which automatically contains recent added items or demonstrates only new items specified by a Date Range.
This tutorial will help you produce your own New Products List to catch your customers’ attention and boost sales accordingly.
5 Steps to Insert New Products List in Widget in Magento 2:
- Step 1: Configure the Date Range
- Step 2: Generate the Widget
- Step 3: Display on frontend
- Step 4: Set the List
- Step 5: Preview
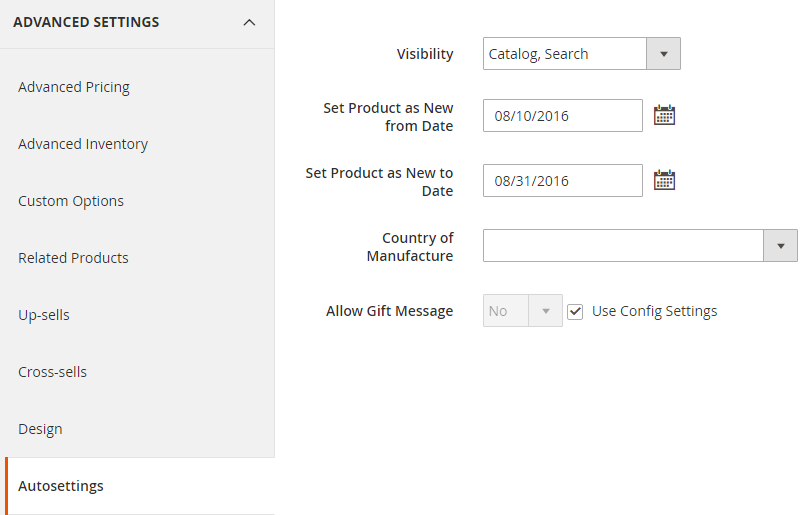
Step 1: Configure the Date Range
The Date Range will decide the period of time that a product is considered as New. To assign values for Date Range, follow the instruction below.
- On the Admin sidebar, click
Products > Inventory > Catalog. - In the grid, choose the product you want to settle the Date Range and click on
editmode in theActioncolumn.-
Click
ADVANCED SETTINGS > autosettings. -
Enter a valid first date to assign for the item in the
Set Product as New From Datefield or click on calendar button and choose the date.
 -
Enter a valid last date to assign for the item in the
Set Product as New To Datefield or click on calendar button and choose the date.
-
- Click the
Savebutton in the upper-right corner when you are done.
Step 2: Generate the Widget
Now you will determine how the New Products List display on your storefront.
-
On the Admin sidebar, tap
Content > Elements > Widgets. - In the upper-right corner, click the
Add New Widgetbutton. - In the
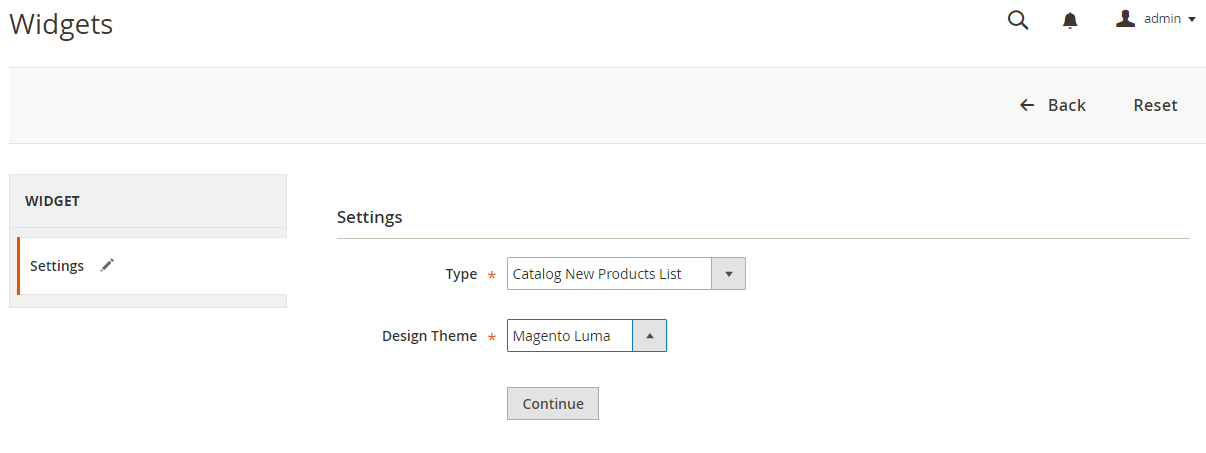
settingsection:- Set
TypetoCatalog New Products List. - Set
Design Themeto the current used theme of your store.
- Set
- Click
Continue.
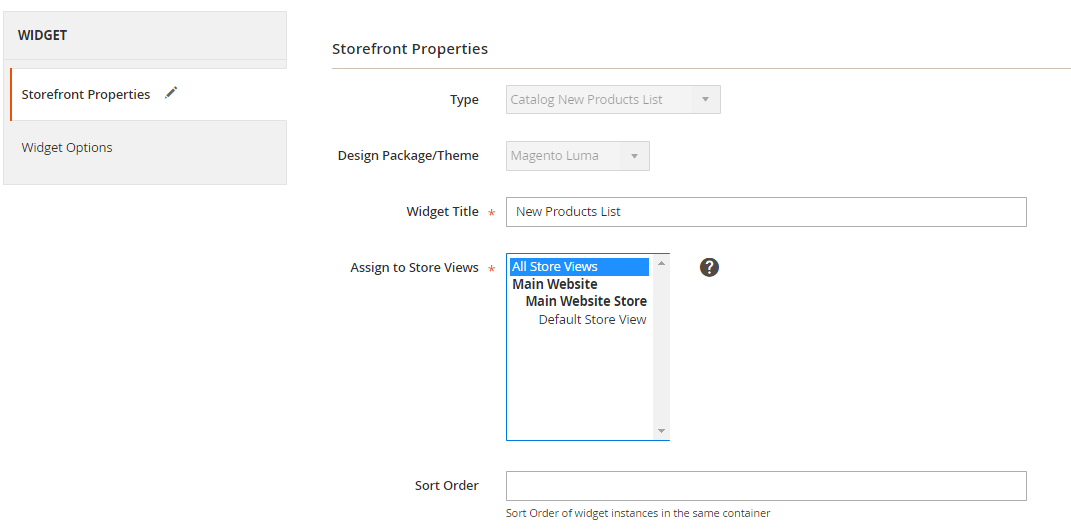
- In the
Storefront Propertiessection, complete the following fields:Widget Title: Type a specific title for the widget in the field. This title is visible only from the Admin.Assign to Store Views: Choose the store views that the widget is visible.Sort Order: This field is optional, you should enter a number to set the order this item appears with others in the same part of the page, starting from 0.
Step 3: Display on frontend
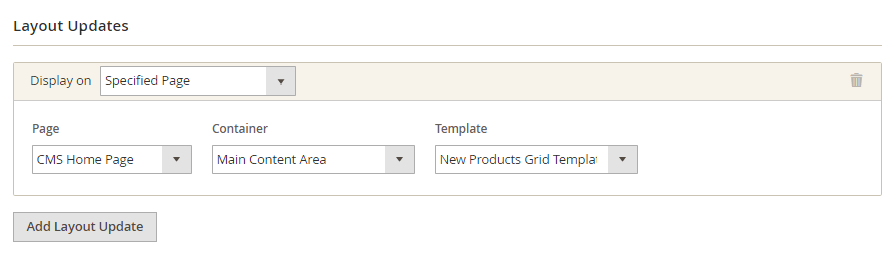
The appearance of New products List can be modified in the Layout Updates section.
- click
Add Layout Update.- In the
Display onfield, setSpecified Page.” - In the
Pagefield, setCMS Home Page. - In the
Block Referencefield, setMain Content Area. - Set Template to the one you prefer the New Products List to display.
- In the
- Click
Save and Continue Edit. - If you are notified to refresh the page cache, click the links in the notification, and follow the instructions.
Step 4: Set the List
The content of the New Products List is managed in this part of the guidance.
- In the panel on the left, click on
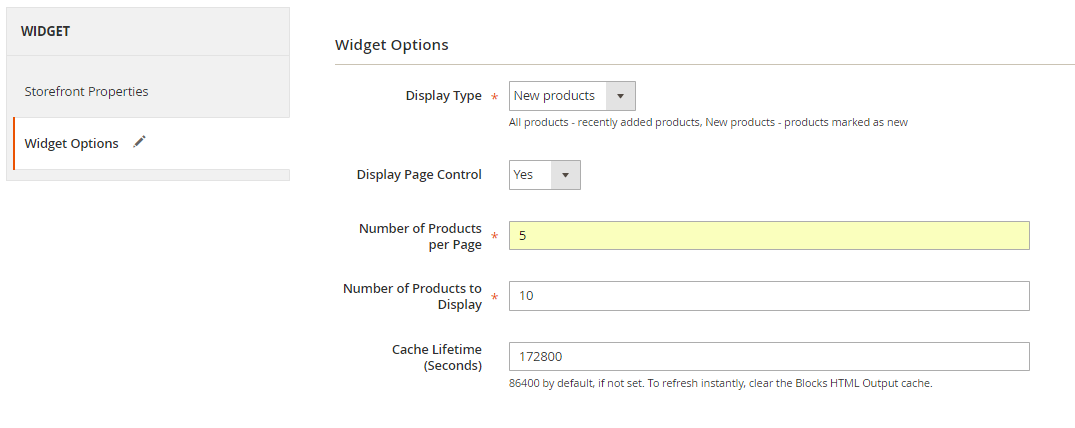
Widget Options.- In the
Display Typefield, chooseAll productsto display all recently added products orNew productsto show the items specified with a Date Range and the list will be blank if the Date Range expires. - In the
Display Page Controlfield, chooseYesto control the number of products shown on one page or turn it toNoto display all items.- If the field
Display Page ControlisYes, the boxNumber of Products per Pagewill appear. Enter the number of products you want to perform on each page.
- If the field
- In the
Number of Products to Displayfield, enter the number of new products you want to include in the list or leave it for the default number which is 10. - In the
Lifetime (Seconds)field, custom the number to set the time interval between each refresh circle of the new products list. If the field is left blank, the cache is set to 86400 seconds by default.
- In the
- Click
savewhen you are finished. - If you are notified to refresh the page cache, click the links in the notification, and follow the instructions.
Step 5: Preview {preview}
- On the Admin sidebar, click
Content > Elements > Pages. - Find the page that you assign the New Products List to be visible on and in the Action column tab
Select > Preview.
Final words
Inserting New Products List in Widget in Magento 2 can bring an engaging frontend, helping online merchants to promote their recently released items effectively. If you find yourself troubled to follow the guideline, please contact us for more support. Share it with your friends or business partners to help them as well. See you in our next posts!
Related topics

Looking for
Customization & Development Services?
8+ years of experiences in e-commerce & Magento has prepared us for any challenges, so that we can lead you to your success.
Get free consultant
Recent Tutorials

Change Store Email Addresses

Fix Magento 2 'Invalid Form Key. Please refresh the page'

Magento 2 Search Settings: Default Magento vs Mageplaza AJAX Search
Explore Our Products:
People also searched for
- magento 2 new products widget
- magento 2 product list widget
- magento 2 custom widget product list
- magento 2 product widget
- magento 2 new products
- display new products on homepage magento 2
- create custom product list page in magento 2
- magento 2 product list widget sort order
- magento 2 custom product list page
- magento 2 custom product list
- magento 2 product list
- magento new products
- set product as new from date magento 2
- insert a widget magento 2
- magento 2 add widget to cms page
- magento 2 widget sort order
- 2.3.x, 2.4.x
Stay in the know
Get special offers on the latest news from Mageplaza.
Earn $10 in reward now!


