
With a big catalog of 224+ extensions for your online store
How to Create/Configure Newsletter Templates in Magento 2
To make your newsletters in the best practice, Magento 2 allows store admins to configure the newsletter settings and create a newsletter template. In the last topic, you have learnt about How to confifure Newsletter in Magento 2, and today, I will show you the steps to create the great newsletter template.
In the backend, you are free to create unlimited newsletter templates depending on what your purpose is. For example, you can send the newsletter to inform a product update, a new product or a monthly promotion, and obviously, each template is designed for each type of the newsletter.
To create the newsletter template, follow the guides:
Configuring Newsletter Subscription Options in Magento 2
Before starting to create newsletters, set up how people can subscribe in your Magento 2 store.
Enable Guest Subscriptions & Implementing Double Opt-In Confirmation
Magento 2 usually only lets people who have accounts sign up for your newsletter. But you can change it to let anyone sign up, even if they don’t have an account.
- Log in to your Magento 2 admin panel and choose
Stores > Configuration > Newsletter
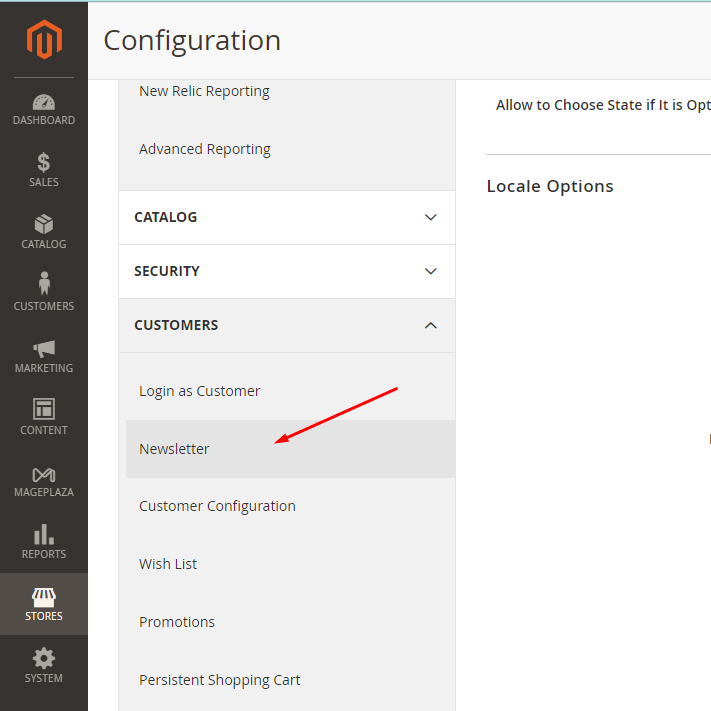
- To let anyone sign up for your newsletter, find the
Allow Guest Subscriptionbox and check it. - Click
Save Configto save your changes.

- In the
Subscription Optionssection, click onNeed to Confirmfield. - Choose
Yesto require double opt-in confirmation for all new subscriptions. - Click
Save Configto save your changes.
Customize Confirmation and Success Emails
In the Subscription Options section, find the Confirmation Email Sender field then select the sender of the email.
Choose the email template for the confirmation email.
Creating Newsletter Templates in Magento 2
- On the Admin Panel,
Marketing > Communications > Newsletter Template. - Click on the
Add New Template, go to the workplace. - Set
Template Namefor the new newsletter template - Enter
Template Subjectto define what the newsletter is for. - Insert the
Sender Namewho sends the newsletter to the suscribers. - Insert the
Sender Emailthat is the email address the newsletter is sent from. - Cick on the
Show/Hide Editorbutton at the top ofTemplate Contentfield to enable the WYSIWYG editor. It is flexible to edit and update the content as needed.
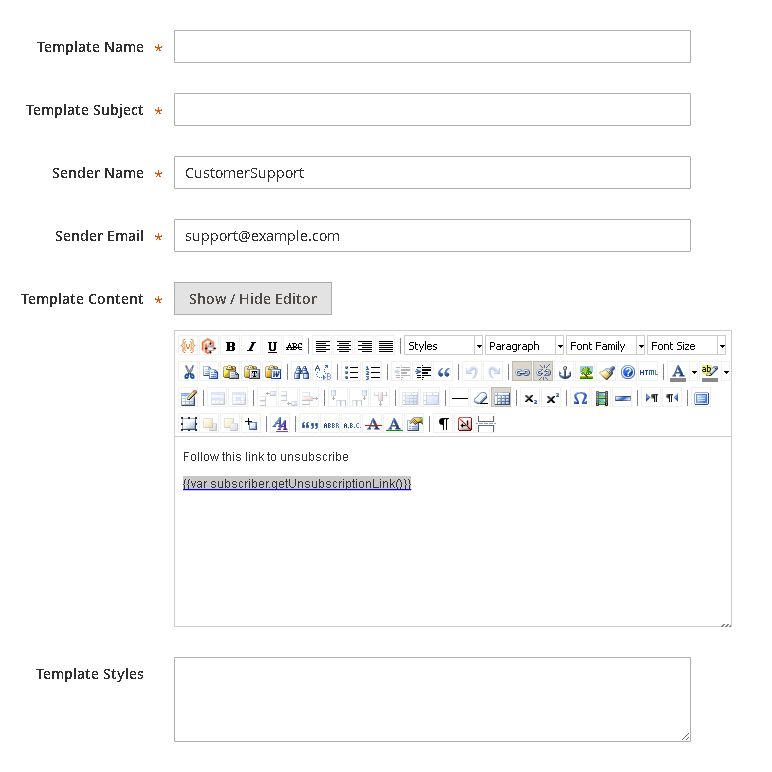
The Template Content has included unsusbcribe link before, that is required by law. Please do not delete it —
- Insert any CSS declarations to format the content in the
Template Stylesfield. - Make sure that all configuration is all correct, click on
Preview Templatelink. Save Configto complete
Noticeably, in the next time to edit, use Save As button to save any variation of the template without overriding the original.
Sending Newsletters in Magento 2
- This part is all about getting it to your eager subscribers’ inboxes at the perfect time. Think of it like setting the launch date and time for your email rocket.
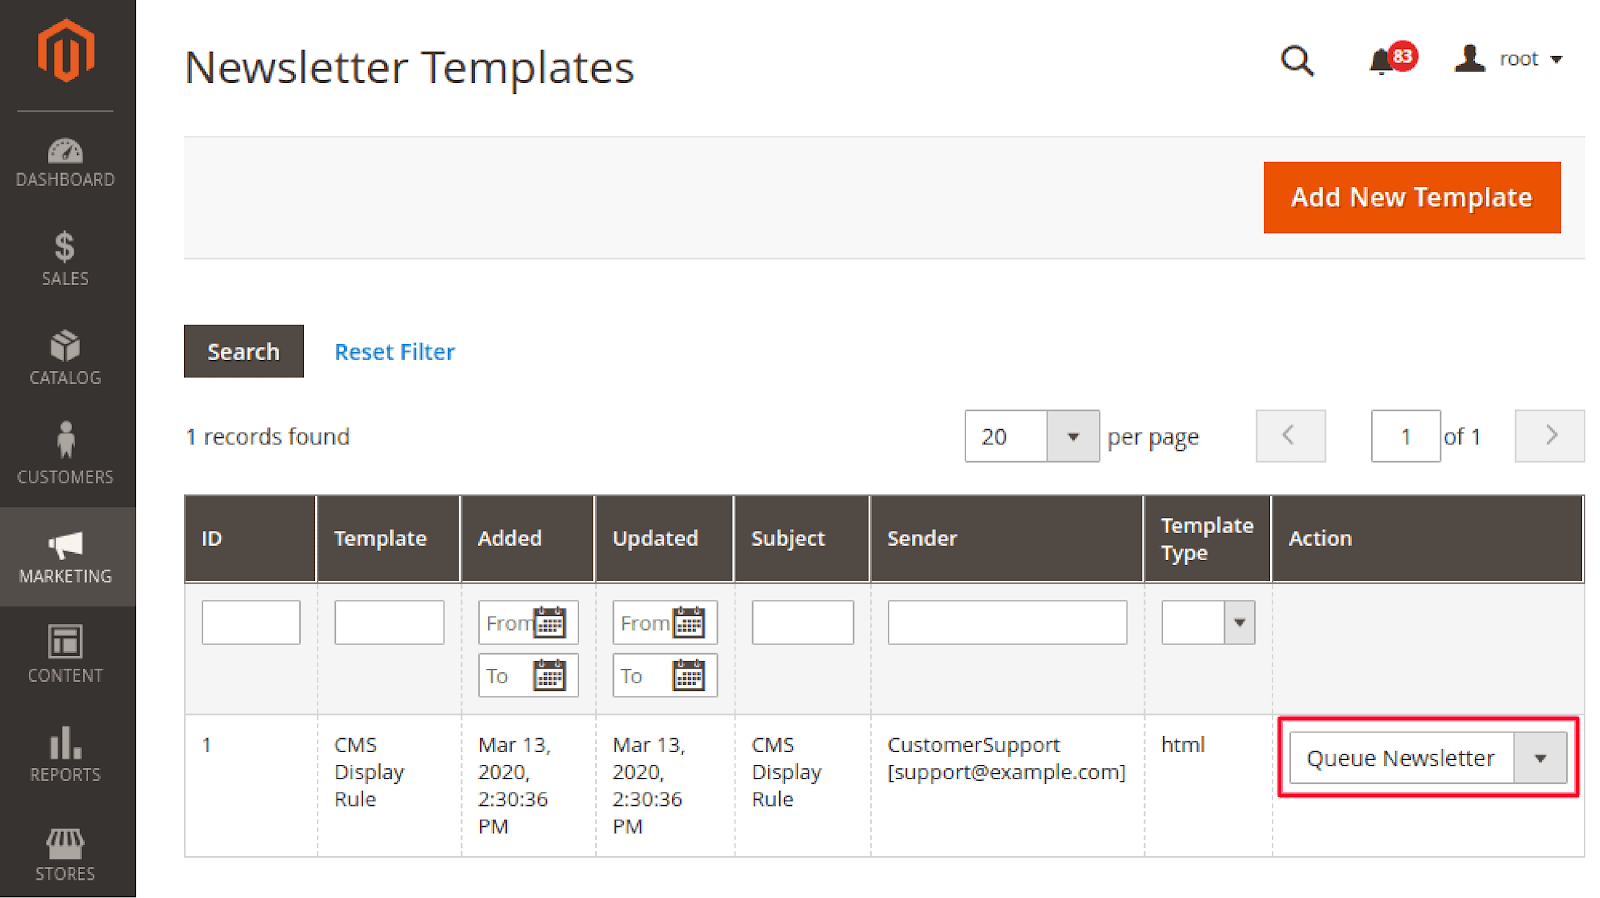
- Log in to your Magento 2 admin panel and navigate to
Marketing > Communications > Newsletter Queue. - Click the
Queue Newsletteraction link. It corresponds to the template you want to send.
You’ll be redirected to the Queue Information page. Preview the newsletter content and set the queue date and start time.
Click on the calendar icon to select a date for your newsletter campaign.
Set the start time by clicking the clock icon next to the date field. You can use the up and down arrows to adjust the hours and minutes.
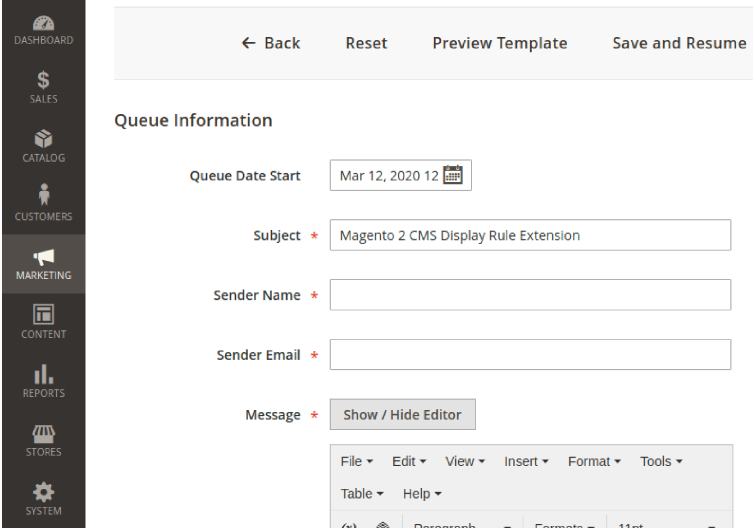
After setting the queue date and start time, click the Save Newsletter button.
Managing Newsletter Subscribers in Magento 2
This section will guide you through viewing and editing subscriber information. You can see how to subscribe and unsubscribe customers in Magento 2.
View and Edit Subscriber Information
- Log in to your Magento 2 then choose
Marketing > Communications > Newsletter Subscribers. - In the
Newsletter Subscribersgrid, you can view the list of all subscribers. - To edit subscriber information, click the
Editaction link.
- You can update the customer’s information including email addresses, store views, and subscription status.
- On the “Edit Subscriber” page. Click the “Save” button to save your updates.
Subscribe and Unsubscribe Customers
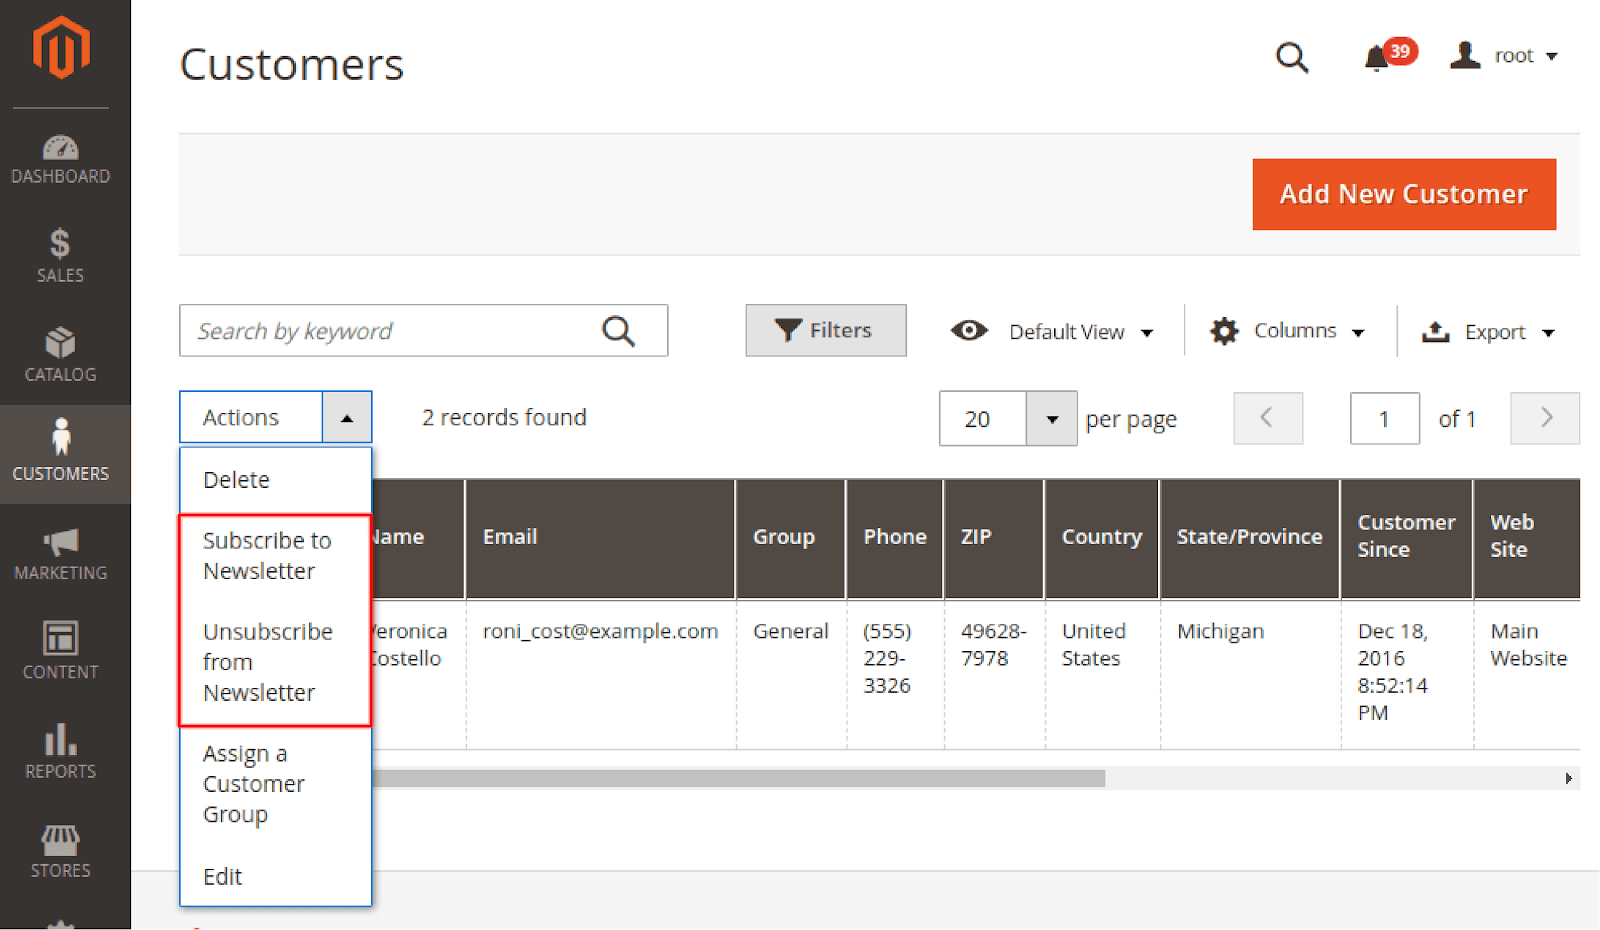
- To manually subscribe a customer to the newsletter, navigate to
Customers > All Customersin the admin panel. - Click on the “Edit” action link for the customer you want to subscribe to or unsubscribe.
- In the “Customer Information” section, click the “Newsletter” tab on the left sidebar.
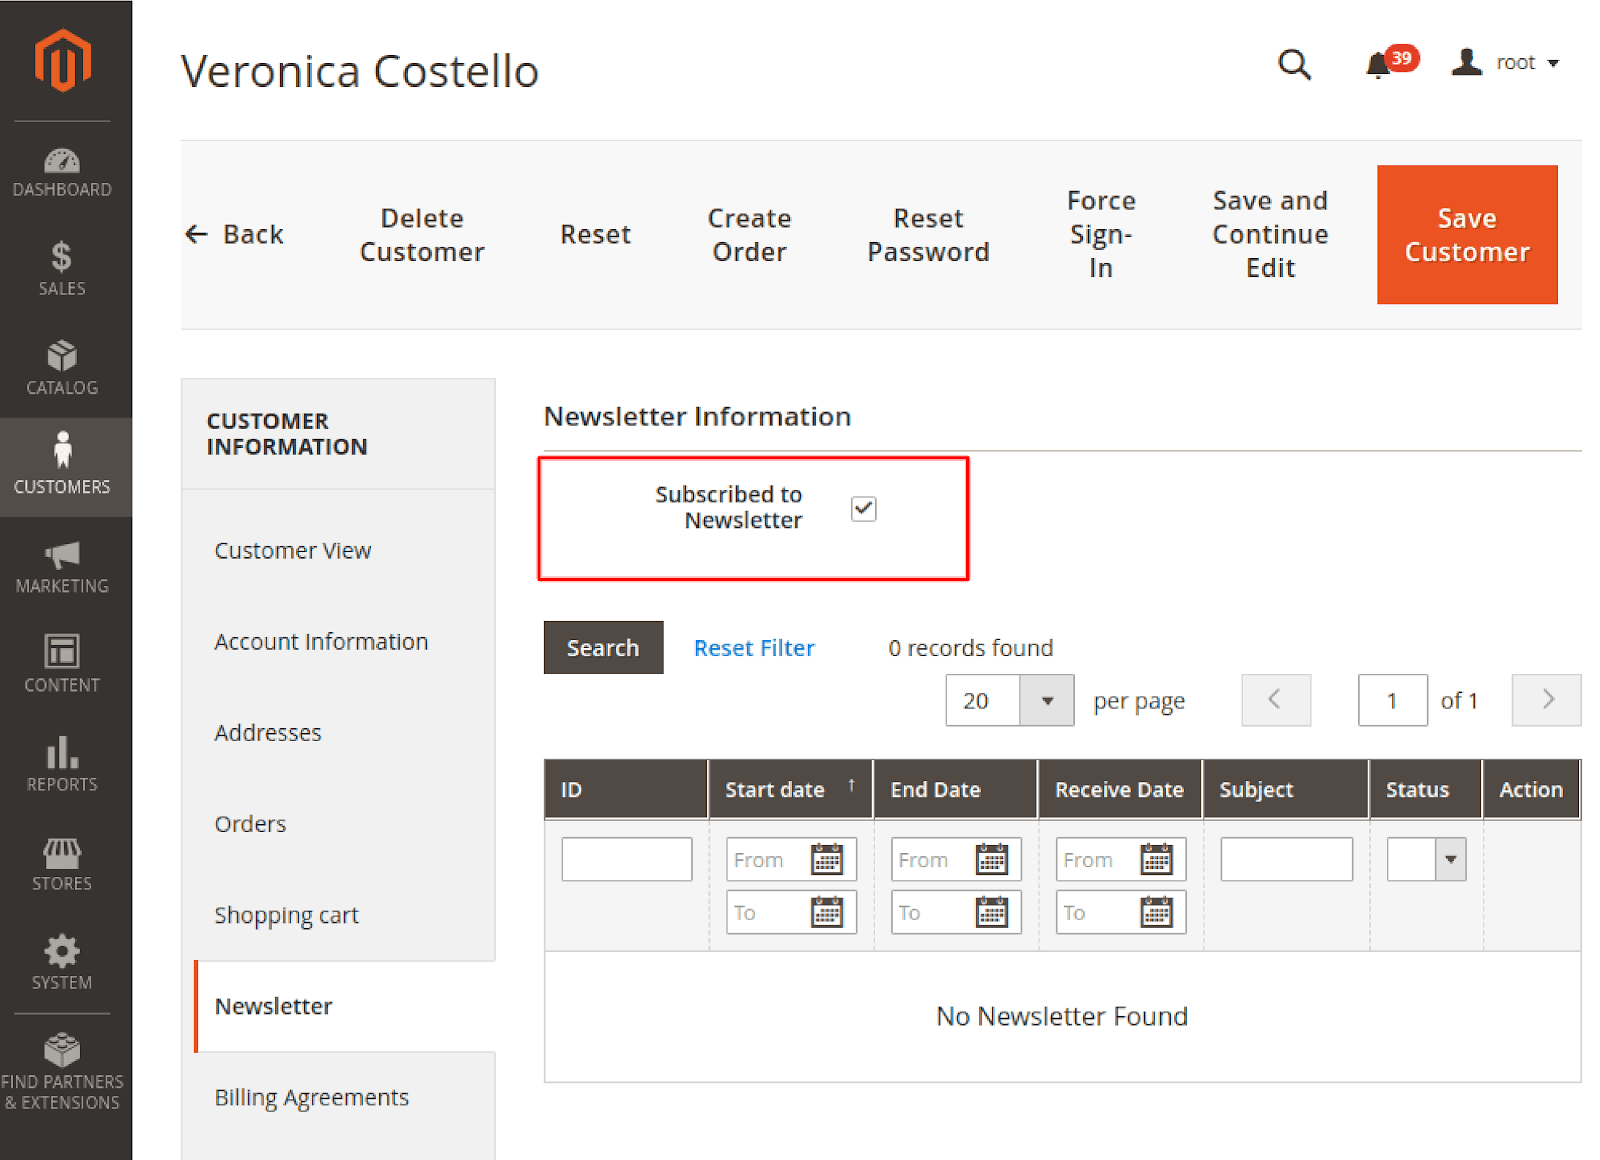
To subscribe to the customer, check the Subscribed to Newsletter box. To unsubscribe, uncheck the box.
Click the Save Customer button to save your changes.
Related Post

Looking for
Customization & Development Services?
8+ years of experiences in e-commerce & Magento has prepared us for any challenges, so that we can lead you to your success.
Get free consultant
Recent Tutorials

Change Store Email Addresses

Fix Magento 2 'Invalid Form Key. Please refresh the page'

Magento 2 Search Settings: Default Magento vs Mageplaza AJAX Search
Explore Our Products:
People also searched for
- magento 2 newsletter template
- magento newsletter template
- newsletter templates
- magento newsletter templates
- magento newsletter template styles
- how to create a newsletter
- magento newsletter
- create newsletter template
- how to create a newsletter template
- magento newsletter templates free
- create a newsletter template
- magento create template
- pdf newsletter templates
- magento 2 create template
- create newsletter free
- newsletter vorlage magento
- newsletter magento
- free pdf newsletter templates
- creating a newsletter template
- how to make a newsletter template
- 2.3.x, 2.4.x
Stay in the know
Get special offers on the latest news from Mageplaza.
Earn $10 in reward now!


