
With a big catalog of 224+ extensions for your online store
How to Configure Shipping Labels in Magento 2
I will introduce how to configure shipping label in Magento 2 in this topic. Let update country of manufacture and complete the store information to configure shipping label. If you have multiple stores and the contact information differs from the default, complete the configuration in your store for each carrier that you plan to use.
In following topic, I will introduce How to Create Shipping Labels in Magento 2 for you. Let try if you prefer.
Configure Shipping Labels in Magento 2
Step 1: Update the Country of Manufacture
- On the Admin panel, click
Products. In the Inventory section, selectCatalog
Method 1: Update a Single Record
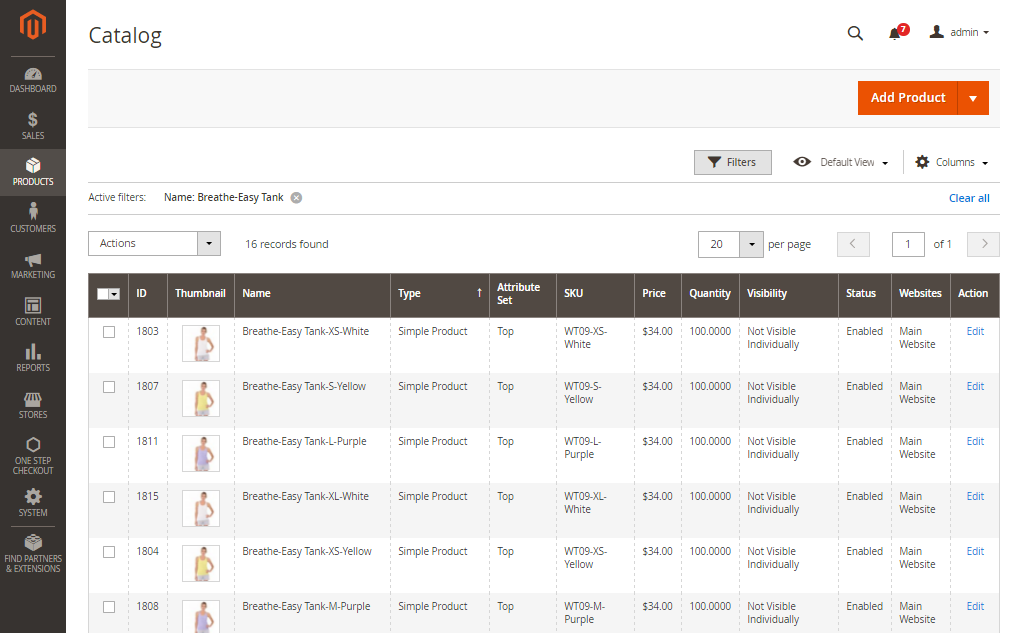
- In the grid, find the product to be updated, and open in edit mode.
- Select
Autosettingsin theAdvanced Settingssection in the panel on the left
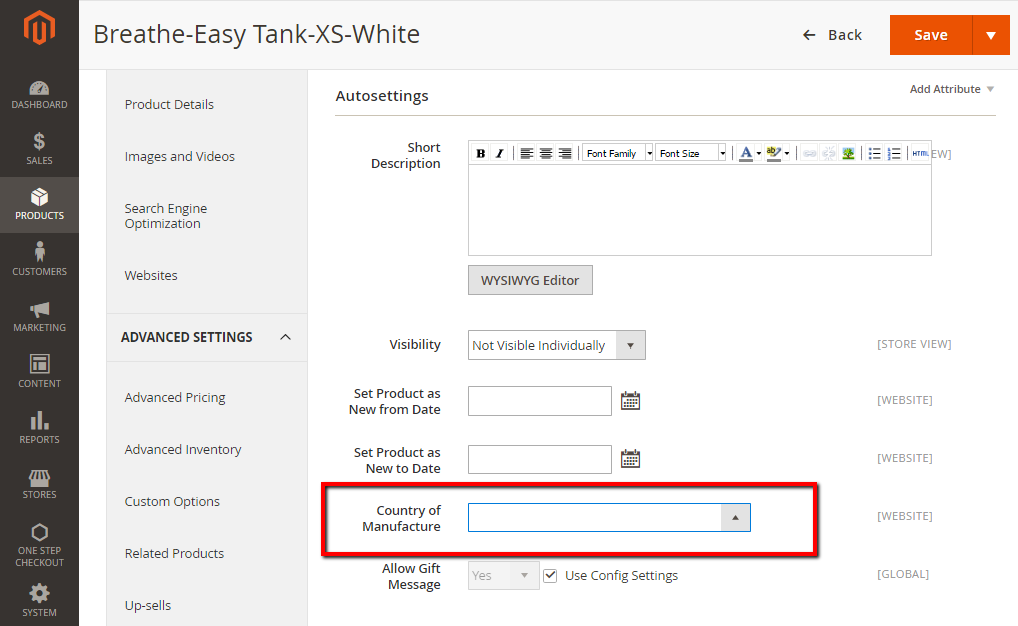
- In the
Country of Manufacturefield select the updated country -
When complete, click
Save. - Method 2: Update Multiple Records
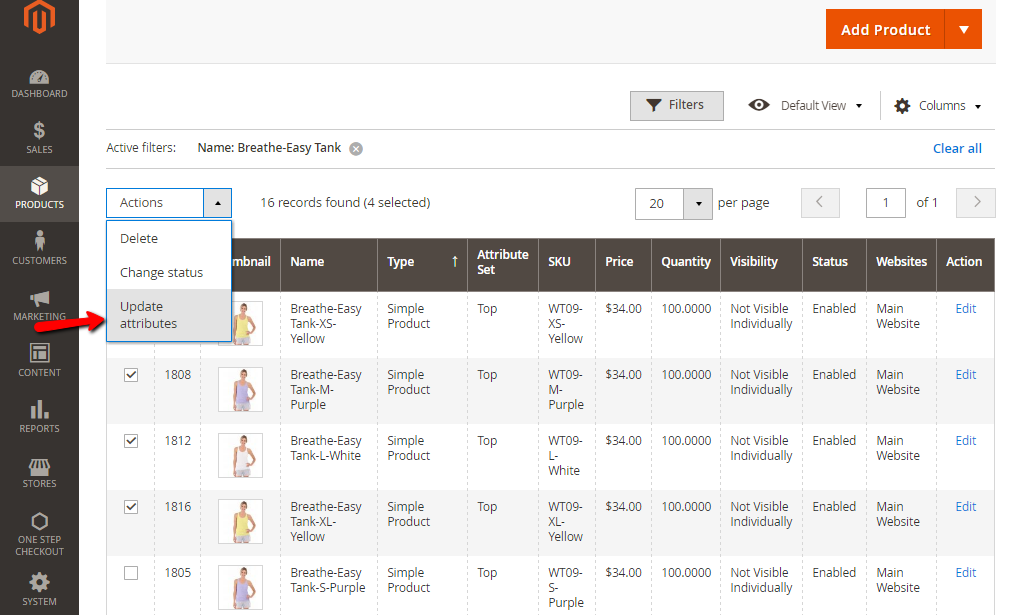
- In the grid, mark the checkbox of each product to be updated.
- In the
Actionscontrol, click onUpdate Attributes - In the Update Attributes form, find the
Country of Manufacturefield and mark theChangecheckbox. Then, choose the country. - When complete, click
Save.
Step 2: Complete the Store Information
- On the Admin panel, click
Stores. In theSettingssection, selectConfiguration. -
Select
Shipping SettingsunderSalesin the panel on the left- Open the
Originsection, and continue with following:
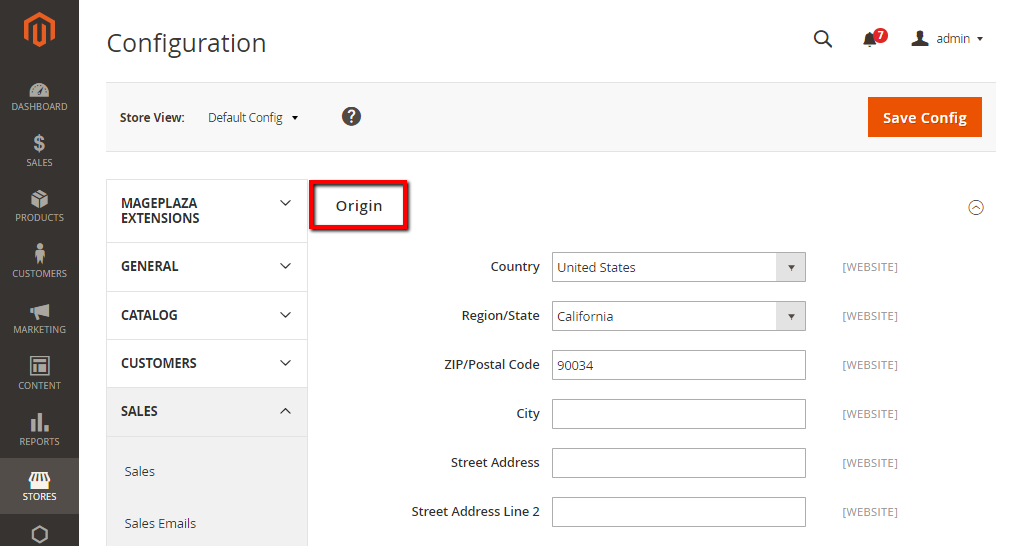
- In the
Street Addressfield, enter the street address of the place from which shipments are sent. For example, the location of your company or warehouse. - In the
Street Address Line 2field: Any additional address information that make obviously the shipping address, such as the floor, entrance and so on.
- Open the
-
Select Shipping Methods under
Salesin the panel on the left-
Open the
USPSsection, and continue with following- In the
Secure Gateway URLfield, Magento automatically enters the gateway URL - In the
Passwordfield, enter the password is provided by USPS, and gives you access to their system through Web Services. - In the
Sizefield, selectLargeto custom Length, Width, Height, Girth of the package
- In the
-
Open the
FedExsection, and complete all following information: - Meter Number
- Key
- Password
-
This information is provided by the carrier, and is required to gain access to their system through Web Services.
- Select
GeneralunderGeneralin the panel on the left. Expand theStore Informationsection, and complete following information.
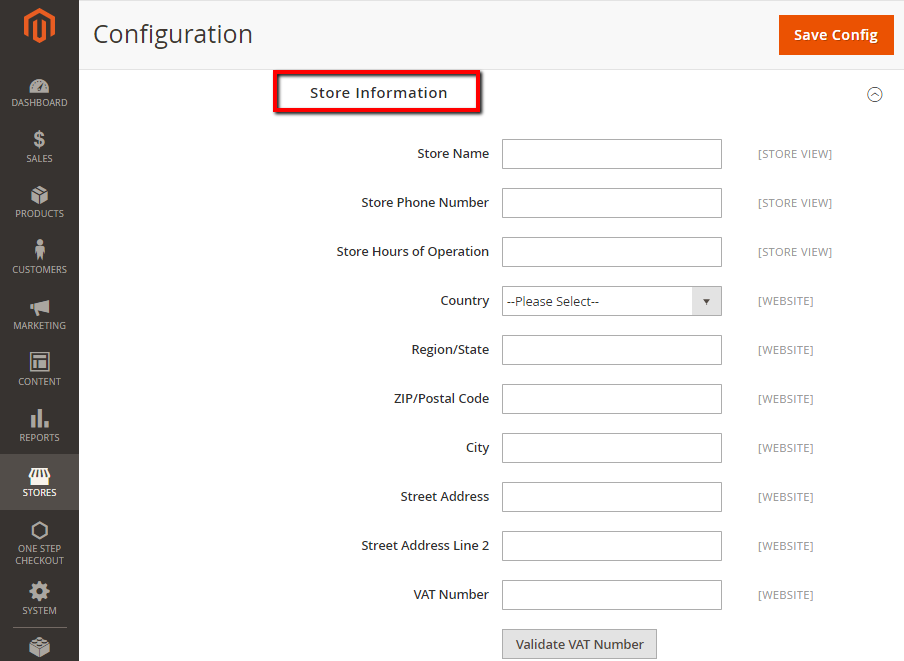
- Store Name
- Store Phone Number
- Country
- Street Address
- VAT number
Note: If you have multiple stores, and the contact information differs from the default, set Store View for each.
- When complete, click
Save Config
Related topics
Looking for
Customization & Development Services?
8+ years of experiences in e-commerce & Magento has prepared us for any challenges, so that we can lead you to your success.
Get free consultant
Recent Tutorials

Change Store Email Addresses

Fix Magento 2 'Invalid Form Key. Please refresh the page'

Magento 2 Search Settings: Default Magento vs Mageplaza AJAX Search
Explore Our Products:
People also searched for
- magento 2 shipping labels
- magento 2 shipping label extension
- magento 2 change checkout field label
- magento shipping labels
- magento shipping label
- magento usps labels
- custom shipping tags
- magento 2 update multiple records
- magento 2 create shipping label programmatically
- 2.3.x, 2.4.x
Stay in the know
Get special offers on the latest news from Mageplaza.
Earn $10 in reward now!


