
With a big catalog of 224+ extensions for your online store
How to Setup Cron Job Magento 2 - Schedule Tasks
Configure Cronjob in Magento 2 (Schedule Tasks) allows some operations run automatically on your Magento 2 site via a script you have written in the configuration. The operations you can control their scheduling from Magento Scheduler include:
The cron job is the awesome periodical method to make any of your important programs active automatically and properly instead of doing them manually. However, it is sure that the base URLs for the store are set correctly, so the URLs that are generated and used during cron operations are correct as well as the cron can be run perfectly.
Explore: Magento 2 Cron Schedule module
Thus, this tutorial will help know what you need to do to configure the cron. We are going to discuss two ways to set up a cron job: via Magento Admin, and using Command Line.
Table of Contents
- To setup Cron Job in Magento 2 admin
- Setup Magento 2 Cron job by command line:.
- Create Custom Cron Jobs in Magento 2
- Run Cron Jobs on the Command Line
- Run Cron In The Background
- Disable Magento 2 Cron Jobs
- The bottom line
To setup Cron Job in Magento 2 admin
In this way, you can configure cron jobs in the backend by logging into your admin account:
- On the Magento Admin, click
Stores. In theSettingssection, selectConfiguration. - Select
SystemunderAdvancedin the panel on the left - Open the
Cronsection, and continue with following:
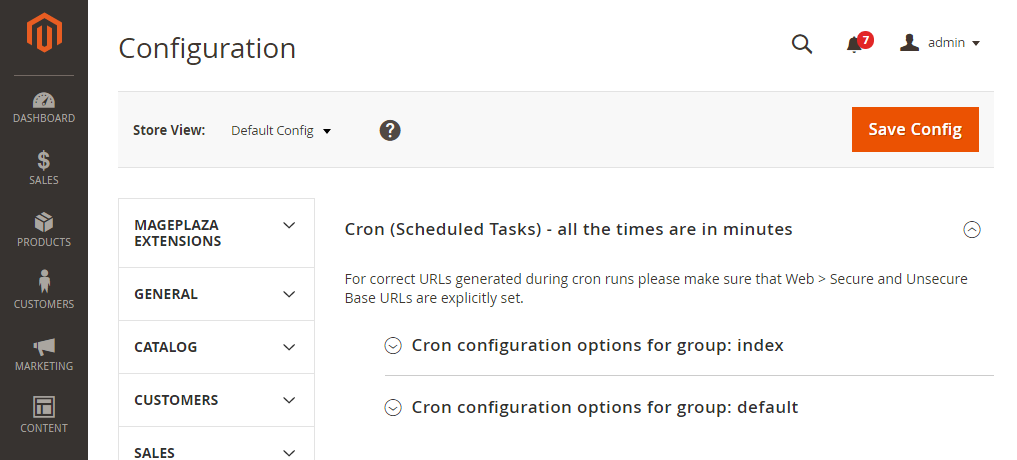
- Open
Cron configuration options for group: IndexandCron configuration options for group: Defaultsection and complete all following information
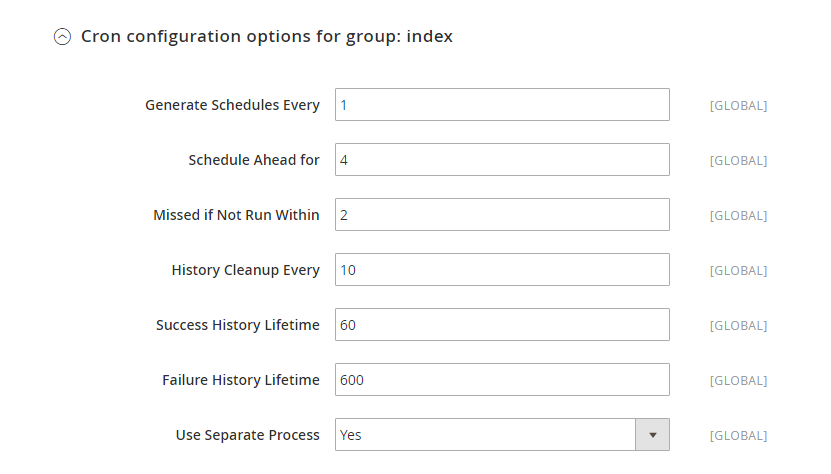
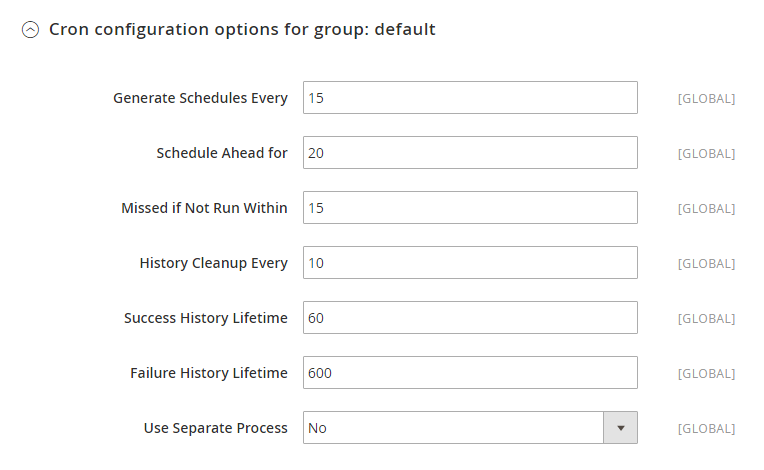
- Generate Schedules Every
- Schedule Ahead for
- Missed if not Run Within
- History Cleanup Every
- Success History Lifetime
- Failure History Lifetime
-
Use Separate Process
- When cron job setup complete, click
Save Config
Setup Magento 2 Cron job by command line
Before coming to configuring the Magento 2 cron, specific steps need to be taken to ensure a seamless setup and execution of cron jobs.
Access the Magento 2 server by logging in as a master user with write permissions to the Magento 2 file system. If utilizing the Bash shell, you can employ the following command to switch to the Magento file system owner:
su <Magento 2 file system owner> -s /bin/bash -c <command>
Then, log in as a user with root privileges and execute the following command:
crontab -u <Magento 2 file system owner username> -e
To setup cron job for Magento 2, you should run the following command line to update the cronjob table:
crontab -e
Add the following lines to your crontab file:
*/1 * * * * php -c {php.ini_path} {magento_path}/bin/magento cron:run
*/1 * * * * php -c {php.ini_path} {magento_path}/update/cron.php
*/1 * * * * php -c {php.ini_path} {magento_path}/bin/magento setup:cron:run
In this case, our enviroment is that: {php.ini_path} is /etc/php5/apache2/php.ini ; and {magento_path} is /var/www/m2, so the command cronjob is:
*/1 * * * * php -c /etc/php5/apache2/php.ini /var/www/m2/bin/magento cron:run
*/1 * * * * php -c /etc/php5/apache2/php.ini /var/www/m2/update/cron.php
*/1 * * * * php -c /etc/php5/apache2/php.ini /var/www/m2/bin/magento setup:cron:run
Save and close the crontab file.
Nano editor: PressCtrl + Oto save thenCtrl + Xto quit.Vim editor: PressEscape,:wqto save and quit.
Create Custom Cron Jobs in Magento 2
In this section, I’ll explain how to create a custom cron job program for your Magento 2 module, assuming the following prerequisites:
-
Magento application is installed in /var/www/html/magento2.
-
The Magento database username and password are both “magento.”
-
The user has the rights to perform all actions as the file system owner.
Step 1: Create a Sample Module
To create the custom cron job, start by creating a custom sample module. If you already have one, you can skip this step.
Step 2: Create a Class to Run a Cron Job
Follow these steps:
-
Create a “Cron” directory inside your module’s root directory (e.g., app/code/Mageplaza/SampleModule/Cron).
-
Within the “Cron” directory, create a sample class that will write a row to the cron_schedule table, confirming it’s been set up successfully.
-
Create a file and name it “SampleCron.php” (e.g., app/code/Mageplaza/SampleModule/Cron/SampleCron.php) with the provided code.
<?php
Namespace Mageplaza\SampleModule\Cron;
use Psr\Log\LoggerInterface;

class SampleCron {
    protected $logger;

    public function __construct(LoggerInterface $logger) {
        $this->logger = $logger;
    }

    /**
    * Write to system.log
    *
    * @return void
    */
    public function execute() {
        $this->logger->info('Cron Works');
    }
}
Step 3: Create crontab.xml File
Create “crontab.xml” in the “etc” directory (e.g., magento2/app/code/Mageplaza/SampleModule/etc) with the provided code.
<?xml version="1.0"?>
<config xmlns:xsi="http://www.w3.org/2001/XMLSchema-instance" xsi:noNamespaceSchemaLocation="urn:magento:module:Magento_Cron:etc/crontab.xsd">
    <group id="default">
        <job name="custom_cronjob" instance="Mageplaza\SampleModule\Cron\SampleCron" method="execute">
            <schedule>* * * * *</schedule>
        </job>
    </group>
</config>
- group_name: The cron group name (no need to be unique). Run cron for one group each time.
- job_name: Unique ID for the cron job.
- classpath: Class to be instantiated (classpath).
- method: Method in that classpath to call.
- time: Cron format schedule.
Step 4: Compile Code and Clean Cache
- Compile the code using:
bin/magento setup:di:compile
- Clean the cache with:
bin/magento cache:clean
Step 5: Verify the Cron Job
Verify the custom cron job using the following command:
bin/magento cron:run
Step 6: Set up Magento 2 Cron Group (Optional)
To set up a cron group for a custom module:
-
Open the “crontab.xml” file in a text editor.
-
Change <group id=”default”> to <group id=”custom_crongroup”>.
-
Edit text editor.
<config>
    <group id="custom_crongroup">
        <job name="<job_name>" instance="<classpath>" method="<method>">
            <schedule><time></schedule>
        </job>
    </group>
</config>
- Create “/var/www/html/magento2/app/code/Magento/SampleMinimal/etc/cron_groups.xml” with the following contents:
<?xml version="1.0"?>
<config xmlns:xsi="http://www.w3.org/2001/XMLSchema-instance" xsi:noNamespaceSchemaLocation="urn:magento:module:Magento_Cron:etc/cron_groups.xsd">
    <group id="custom_crongroup">
        <schedule_generate_every>1</schedule_generate_every>
        <schedule_ahead_for>4</schedule_ahead_for>
        <schedule_lifetime>2</schedule_lifetime>
        <history_cleanup_every>10</history_cleanup_every>
        <history_success_lifetime>60</history_success_lifetime>
        <history_failure_lifetime>600</history_failure_lifetime>
        <use_separate_process>1</use_separate_process>
    </group>
</config>
- Finally, run the following command to execute the cron job with the custom cron group:
bin/magento cron:run --group="custom_crongroup"
Run Cron Jobs on the Command Line
You can execute the Magento 2 cron on the command line using the following command:
magento cron:run [--group="<cron group name>"]
The optional –group switch allows you to specify the cron group to run. If you want to use the default group, you can omit this switch.
Please note that it’s important to run cron for one group at a time. The process involves running cron twice – first to discover the tasks to run and second to execute the tasks themselves.
Run Cron In The Background
Magento CE and EE editions recommend a specific process for executing Magento 2 cron jobs. Here are the requirements and steps:
- Cron Job Requirements
Magento cron jobs are executed with different configurations. The general cron job handling tasks such as reindexing, generating emails, and updating the sitemap typically runs as the PHP command-line user specified in php.ini. Other cron jobs are utilized by the component manager and system upgrade utilities, and these commands should be executed with the web server’s php.ini configuration.
If you are unfamiliar with running cron jobs, you can use all commands with the web server’s configuration.
-
Web Server Configuration To determine the web server configuration, execute the phpinfo.php file in a web browser and search for the “loaded configuration file” option.
-
PHP Command-line Configuration After configuring the web server, you need to configure the PHP command-line using the following command:
php -i | grep php.ini
This command provides information like:
Configuration File (php.ini) Path => /etc/php5/cli

Loaded Configuration File => /etc/php5/cli/php.ini
Disable Magento 2 Cron Jobs
Magento 2 does not provide a default feature to disable cron jobs like observers. However, you can disable a cron job by scheduling it at a time that includes a date that never happens. Here are the steps:
-
Open the crontab.xml file for the module.
-
Identify the job name you want to disable; for example, let’s consider the “custom_cronjob” created above:
<?xml version="1.0" ?>
<config xmlns:xsi="http://www.w3.org/2001/XMLSchema-instance" xsi:noNamespaceSchemaLocation="urn:magento:module:Magento_Cron:etc/crontab.xsd">
<group id="default">
    <job name="custom_cronjob" instance="Mageplaza\SampleModule\Cron\SampleCron" method="execute">
        <schedule>* * * * *</schedule>
    </job>
</group>
</config>
- To disable the cron job, change the schedule value to 0 0 30 2 *, i.e., 31st of February: ``` <?xml version=”1.0” ?>
``` Now, the “custom_cronjob” cron job has been set to run at 00:00 on the 30th of February, a date that will never occur. This effectively disables the cron job.
The bottom line
Setting up Cron Job for Magento 2 is vital to schedule repetitive activities on your website. A smooth cron job can ensure good site performance and improve customer experience. I hope you have gained understanding on how to set up a cron job for your Magento 2 store via Magento Admin or Command Line. If you need further support, contact us here.
A great tool to help store admins view, manage, and schedule cron tasks with ease from the store backend (Hyva ready)
Check it out!Related topics

Looking for
Customization & Development Services?
8+ years of experiences in e-commerce & Magento has prepared us for any challenges, so that we can lead you to your success.
Get free consultant
Recent Tutorials

Change Store Email Addresses

Fix Magento 2 'Invalid Form Key. Please refresh the page'

Magento 2 Search Settings: Default Magento vs Mageplaza AJAX Search
Explore Our Products:
People also searched for
- how to setup cron job in magento 2 admin
- magento 2 cron configuration admin
- how to setup cron job in magento 2
- magento 2 cron scheduler
- check cron scripts magento 2
- magento 2 cron configuration
- magento 2 enable cron jobs
- magento cron job setup
- magento 2 cron setup
- magento 2 disable cron job
- magento 2 cron job cpanel
- magento 2 configure cron
- magento 2 cron settings
- magento cron setup
- magento cron settings
- disable cron magento 2
- magento 2 cron job for indexing
- magento 2 cron job is missed
- how to setup cron job in magento admin
- magento cron jobs
- magento setup cron
- aoe_scheduler magento 2
- how to set cron job in magento 2
- magento cronjob
- magento cron job
- how to setup the magento cron
- magento 2 add cron job
- magento 2 stop all cron jobs
- how to set up cron job in magento
- how to setup magento cron
- magento disable cron
- 2.3.x, 2.4.x
Stay in the know
Get special offers on the latest news from Mageplaza.
Earn $10 in reward now!


