
With a big catalog of 224+ extensions for your online store
How to Add a New CMS Page in Magento 2
Adding a New CMS (Content Management System) Page is an easy action you can do with Magento 2 Configuration. All pages, from ‘About us’ page, ‘Contact us’ page, to other landing pages, are CMS pages. Thanks to these CMS Pages, owners can show dynamic content to shoppers and manage multiple contents at the same time. From the backend, the new page is created by text, images, blocks of content, variables, and frontend. All of them are designed friendly for both search engines that crawl the metadata of the page and people who access your page.
Using CMS Pages strategically can reduce the abandonment rate by 66% as well as increase the conversion rate by 30%. Ignore the back and forth that are the redundant motions when standing on your site. If you are facing the problem with filtering products in navigation, this will help. The below are six steps you need to walk through to add a new CMS page successfully. After that, you can find instructions on how to assign a Home Page in Magento 2.
Table of Contents
- 6 Steps to Add a New CMS Page in Magento 2
- Assign a Home Page in Magento 2
- Add CMS Page link to Navigation Menu
- Create custom cms page using Patch Data in Magento 2
- The bottom line
6 Steps to Add a New CMS Page in Magento 2
- Step 1: Add a New Page
- Step 2: Choose the Page Layout
- Step 3: Enter the Content
- Step 4: Enter the Meta Data
- Step 5: Preview the Page
- Step 6: Generate the Page
Step 1: Add a New Page
- On the Admin Panel,
Content > Elements > Pages. - Click on
Add New Page.
- Under the
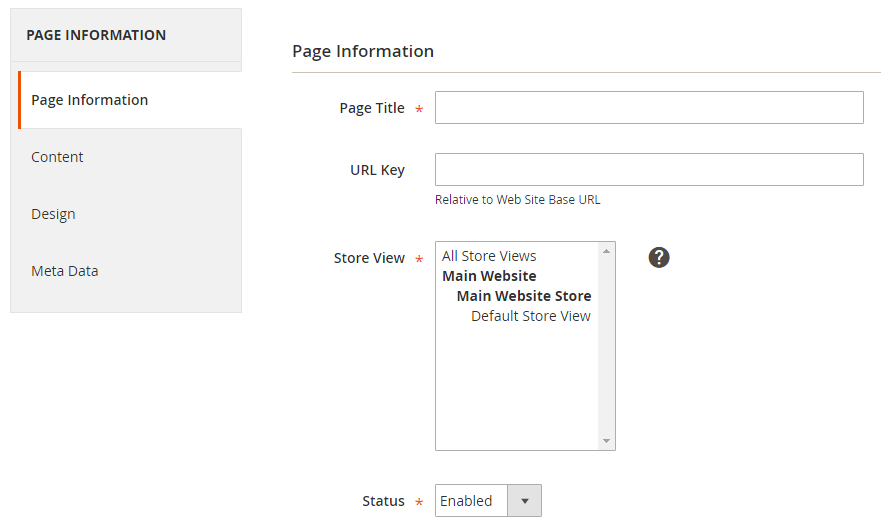
Page Informationsection:- Fill out the
Page Title, the meta data that shows in the title bar and tab of the browser. - Fill out a
URL Key for the page, added to the base URL for the new online address of the page.
Remember to insert lowercase characters and hyphens without spaces.
- In the
Store Viewlist, choose the store view which the page is displayed on. - Set
Disableif it is not ready to go live, but don’t forget to come back and enable the page status to make it available. - Click on
Save and Continue Edit.
- Fill out the
Step 2: Choose the Page Layout
- On the left panel, tap the
Designtab. - In the
Layoutfield, choose one of the options from the dropdown list of the page layout.- 1 column
- 2 columns with left bar
- 2 columns with right bar
- 3 columns
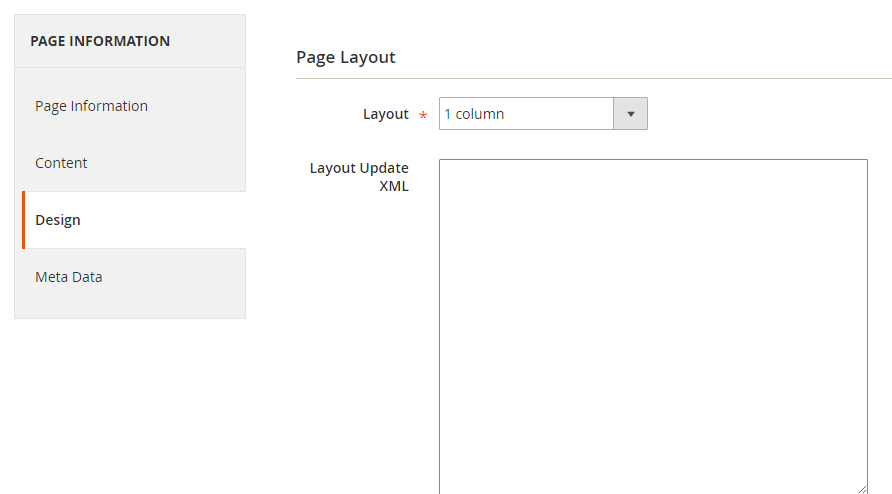
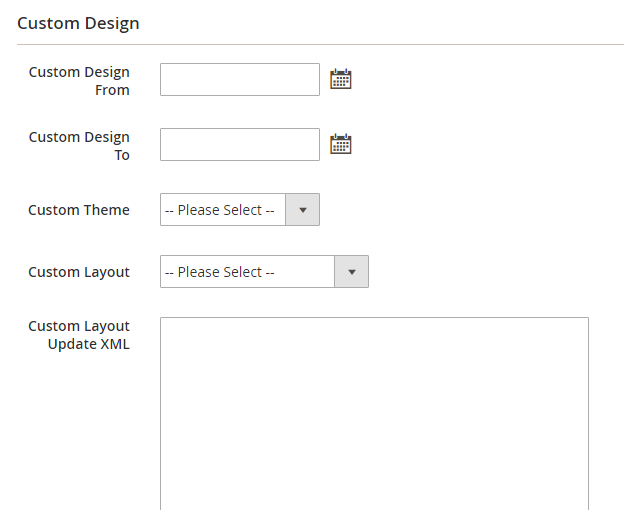
- Scroll down to customize the page design. On the
Custom Designsection, you can change theme, layout, and style within exact time period like holiday or sales.
Step 3: Enter the Content
- On the left panel, tap the
Content tab. - In the
Content Headingfield, enter the main heading at the top of the page. - Click on the
Show/Hide Editorbutton to edit the text with the WYSIWYG editor.
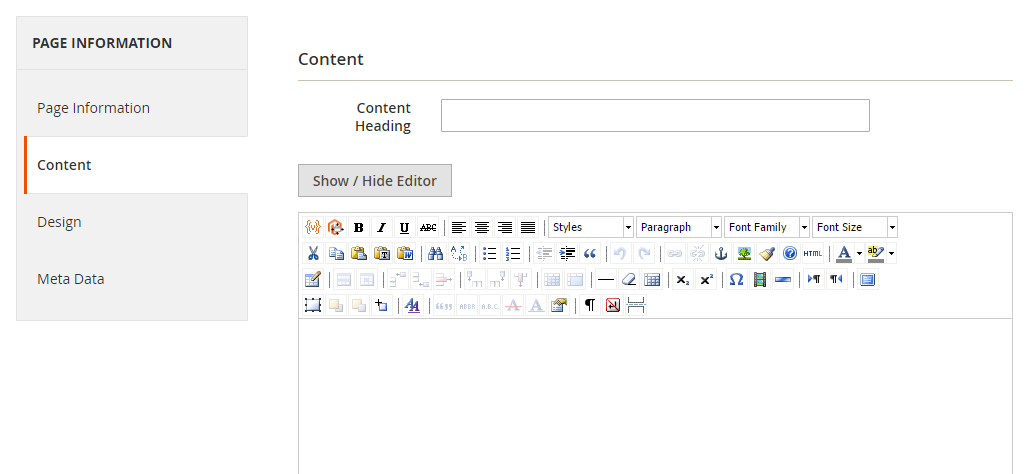
- Hit the
Save and Continue Edit
Step 4: Fill out the Meta Data
- On the left panel, tap the
Meta Datatab. - Enter the
KeywordsandDescriptionfor the CMS page, that is necessary for SEO. - Hit the
Save and Continue Edit.
Step 5: Preview the Page
To ensure that all settings are perfect as well as you want to check the formatting, on the upper-right corner, click on Preview link.
Step 6: Generate the Page
- Return to
Page Informationand setStatustoEnabled. - Hit the
Save page.
That is all for adding a new page, and now it is ready to be included in your store navigation, or link to other pages, even you can also apply it for your new home page. You can insert products into the homepage here.
Assign a Home Page in Magento 2
You can assign any page as a Home Page according to the following guide:
- Finish all steps to create a new page.
- On the Admin Panel,
Stores > Settings > Configuration. - On the left panel, under
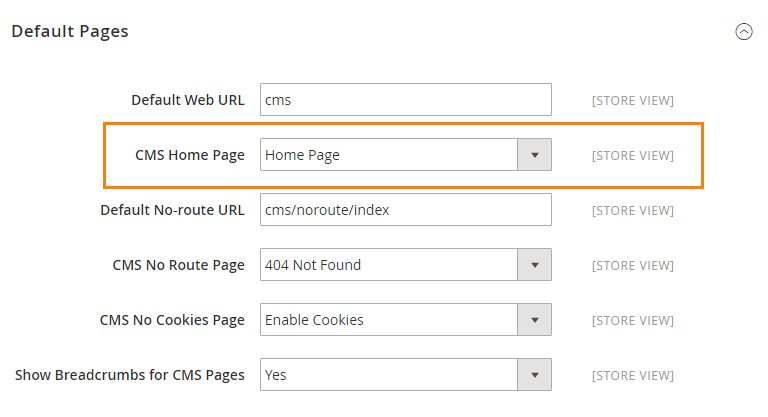
General, selectWeb. - Open the
Default Pagessection,- Set CMS Page as Home Page in the
CMS Pagefield. Save Configto activate the settings.
- Set CMS Page as Home Page in the
- Click on the
Cache Managementlink in the system message to flush your cache.
The bottom line
Magento 2 Add a new CMS Page is a wonderful feature for any online store, because you can save time by using an user-friendly interface, build your website friendly with SEO, as well as update and manage contents easily. We also have other posts related to CMS pages and blocks that you may want to check out below. Please write questions in the box below if any and we will reply to you soon.
Related Topics
- Add New CMS Blocks
- Create a CMS page programmatically
- Translate CMS Pages
- How to Insert Products on Homepage
- Show Breadcrumbs to CMS Pages
- Create CMS Page Rewrites
- Configure the Default Page
Add CMS Page link to Navigation Menu
The next step involves customizing your theme’s XML file to add your own code to specific sections of the template. You can achieve this by editing your theme’s layout XML file. However, it is recommended to create a small custom code with an extension to keep your theme files intact. This approach ensures compatibility with theme upgrades and support in the future.
To begin, define a Namespace as “Mage” and ModuleName as “NavigationLink” for your extension. Create a file named “default.xml” in the Magento 2 root at the following location:
Insert the following code into the created file:

```<?xml version="1.0"?>
<page xmlns:xsi="http://www.w3.org/2001/XMLSchema-instance" xsi:noNamespaceSchemaLocation="urn:magento:framework:View/Layout/etc/page_configuration.xsd">
<body>
<referenceContainer name="catalog.topnav">
<block class="Magento\Framework\View\Element\Html\Link\Current" name="navigationlink">
<block class="Mage\NavigationLink\Block\Links\Link" name="newpage" after='-' />
</referenceContainer>
</body>```

Next, create a file named "Link.php" at the following location from the Magento 2 root:

```app/Mage/NavigationLink/Block/Links/Link.php```

Insert the following code into the created file, replacing 'cms_page_url_key' with your page URL Key ('new-page') and the page link name ('Link_Name') with 'New Page':

```<?php
namespace Mage\NavigationLink\Block\Links;

class Link extends \Magento\Framework\View\Element\Html\Link {
  public function __construct(
    \Magento\Framework\View\Element\Template\Context $context,
    array $data = []
  ) {
    parent::__construct($context, $data);
  }

  public function getHref() {
    $page_url = 'cms_page_url_key';
    return $this->getUrl($page_url);
  }

  public function getLabel() {
    return 'Link_Name';
  }
}
?>```

Save both files, clear the cache, and activate the extension with the following commands in the command line with SSH access to your Magento 2 server in the Document Root directory:

```php bin/magento setup:upgrade
php bin/magento static:content:deploy```

After both commands have successfully completed, open your website homepage to verify that the link now appears in the Navigation Menu. If you require further customization for your Magento 2 web store, feel free to contact our Magento 2 developers.

## Create custom cms page using Patch Data in Magento 2 {#create-custom-cms}
Generate a Patch file within your module named **CustomCmsPage.php** at the specified path: **Vendor/Module/Setup/Patch/Data/CustomCmsPage.php**.

```<?php
namespace Vendor\Module\Setup\Patch\Data;

use Magento\Framework\Setup\Patch\DataPatchInterface;
use Magento\Framework\Setup\Patch\PatchVersionInterface;
use Magento\Framework\Setup\ModuleDataSetupInterface;
use Magento\Cms\Model\PageFactory;

class CustomCmsPage implements DataPatchInterface, PatchVersionInterface
{
    /**
     * @var ModuleDataSetupInterface
     */
    private $_moduleDataSetup;

    /**
     * @var PageFactory
     */
    private $_pageFactory;

    /**
     * @param ModuleDataSetupInterface $moduleDataSetup
     * @param PageFactory $pageFactory
     */
    public function __construct(
        ModuleDataSetupInterface $moduleDataSetup,
        PageFactory $pageFactory
    ) {
        $this->_moduleDataSetup = $moduleDataSetup;
        $this->_pageFactory = $pageFactory;
    }

    /**
     * {@inheritdoc}
     */
    public function apply()
    {
        $this->_moduleDataSetup->startSetup();

        /* Logic to Save CMS Page */
        $page = $this->_pageFactory->create();
        $page->setTitle('Create CMS page Using Patch')
            ->setIdentifier('custom-cms-page')
            ->setIsActive(true)
            ->setPageLayout('1column')
            ->setStores([0]) // Set store IDs where the page should be available
            ->setContent('Your custom page content goes here…')
            ->save();

        $this->_moduleDataSetup->endSetup();
    }

    /**
     * {@inheritdoc}
     */
    public static function getDependencies()
    {
        return [];
    }

    /**
     * {@inheritdoc}
     */
    public static function getVersion()
    {
        return '2.0.0';
    }

    /**
     * {@inheritdoc}
     */
    public function getAliases()
    {
        return [];
    }
}
?>
The script defines a Patch class named CustomCmsPage, implementing the DataPatchInterface and PatchVersionInterface. The apply method contains the logic to create a custom CMS page. Other methods specify patch dependencies, version, and aliases.
Replace ‘Your custom page content goes here…’ with the desired content for your custom CMS page. After running the necessary commands to apply the patch, you should be able to locate your custom CMS page in the storefront.
The bottom line
Magento 2 Add a new CMS Page is a wonderful feature for any online store, because you can save time by using an user-friendly interface, build your website friendly with SEO, as well as update and manage contents easily. We also have other posts related to CMS pages and blocks that you may want to check out below. Please write questions in the box below if any and we will reply to you soon.

Looking for
Customization & Development Services?
8+ years of experiences in e-commerce & Magento has prepared us for any challenges, so that we can lead you to your success.
Get free consultant
Recent Tutorials

Change Store Email Addresses

Fix Magento 2 'Invalid Form Key. Please refresh the page'

Magento 2 Search Settings: Default Magento vs Mageplaza AJAX Search
Explore Our Products:
People also searched for
- cms page magento 2
- how to create cms page in magento 2
- magento 2 add cms page to navigation
- magento 2 cms page
- cms pages in magento 2
- how to add cms page in menu magento 2
- magento 2 add page to menu
- magento 2 cms pages
- cms page magento
- magento 2 cms
- magento 2 add page to navigation
- how to create cms page in magento
- magento cms page
- how to create page in magento 2
- how to create new page in magento 2
- create custom page in magento 2
- magento 2 add css to cms page
- magento 2 create new page
- cms magento 2
- magento2 cms
- cms homepage content goes here.
- add cms page magento 2
- magento cms pages
- cms page in magento
- create new page magento 2
- 2.3.x, 2.4.x
Stay in the know
Get special offers on the latest news from Mageplaza.
Earn $10 in reward now!


