
With a big catalog of 224+ extensions for your online store
8 Tips Options of Magento 2 Customer Configurations
Customers benefit your business; therefore, Manage Customers plays an important role in success of your Stores. It will decide the loyalty as well as the level of consumer’s sasifaction or the visitors who are the potential customers for your stores in the future. However, there will be a problem when you have thousands of customers or even more. You cannot manage all of them.
By Magento 2, this problem can solve easily. Customer Configurations can store all the information, preference and the needs of customers. Whenever you need, you can use these data from your system. Futhermore, Magento 2 provides you different options to configure customers such as:
- Online Customers Options
- Account Sharing Options
- Create New Account Options
- Password Options
- Name and Address Options
- Login Options
- Address Templates
- CAPTCHA
How to Customer Configurations in Magento 2, follow 4 steps:
- Step 1: Access to Configuration
- Step 2: Access to Customer Configuration
- Step 3: Set options
- Step 4: Save Config
The process to configure customers, we follow all these steps
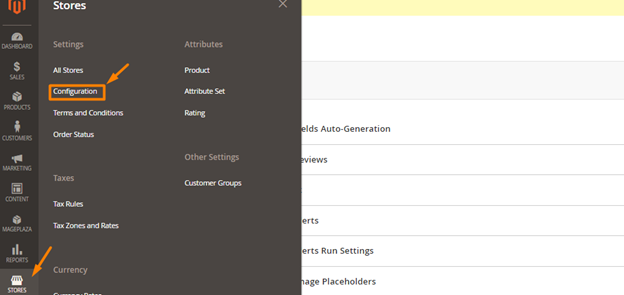
Step 1: Access to Configuration
- On the Admin Slidebar menu, select
Store - Select
Configuration
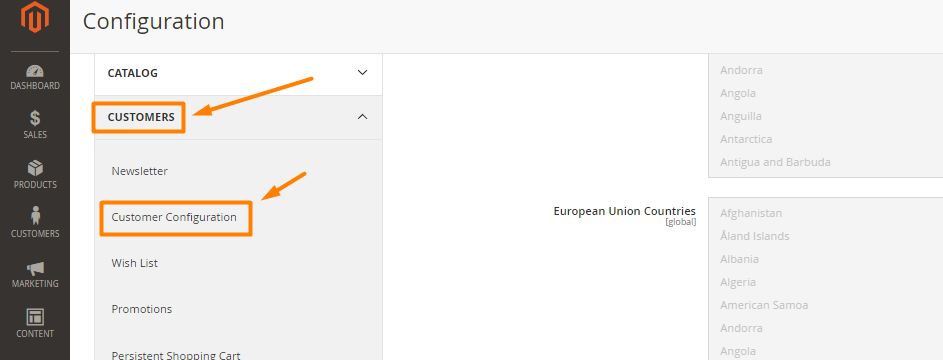
Step 2: Access to Customer Configuration
- On the Configuration menu, Down-list
Customer - Click
Customer Configuration
Step 3: Set options
-
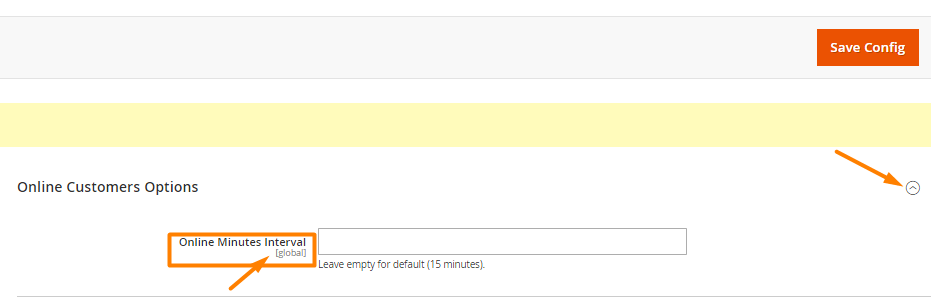
Option 1: Online Customers Options
- On the menu of Online Customers Options, Online Minutes Interval-the time that customer access the backend page of website
-
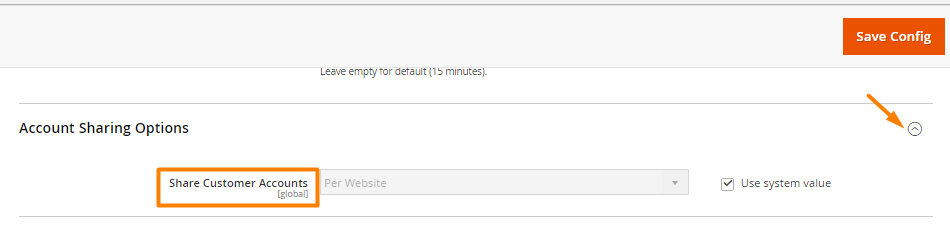
Option 2: Account Sharing Options
- You can set
Share Customer Accountinto Global public information of customers or Per Website the information is restricted to the website that account was created
- You can set
-
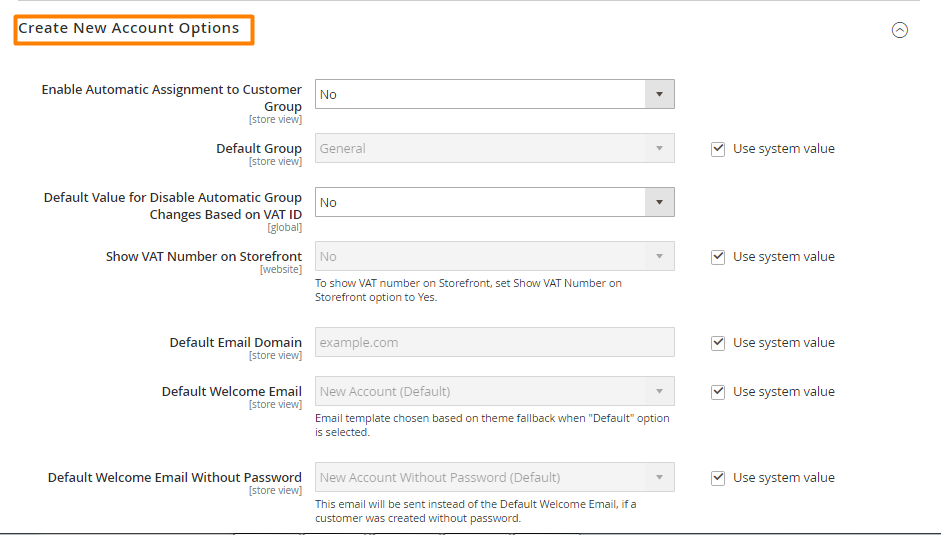
Option 3: Create New Account Options
-
Enable Automatic Assignment to
Customer Group: Select the group in Default Group then Yes to automatically assign customer to this group -
When you select Yes based on VAT ID, customers will be changed automatically to Default Value
-
Show VAT Number on Storefront: If Yes, customers can see the VAT number in the frontend -
Default Email Domain: Set default email domain -
Default Welcome Email: Set the template for email to welcome -
Default Welcome Email Without Password: Set welcome email template for new customer accounts which are created by admin and don’t have an assigned password yet. -
Email Sender: Set the store contact for sending welcome email -
Require Emails Confirmation: Choose Yes to require customer confirmation when creating an account
-
Confirmation Link Email: Set the email template for confirmation email
-
Welcome Email: After confirming the account, set the email template for the welcome email -
Generate Human-Friendly Customer ID: Select Yes to set human-friendly customer ID
-
-
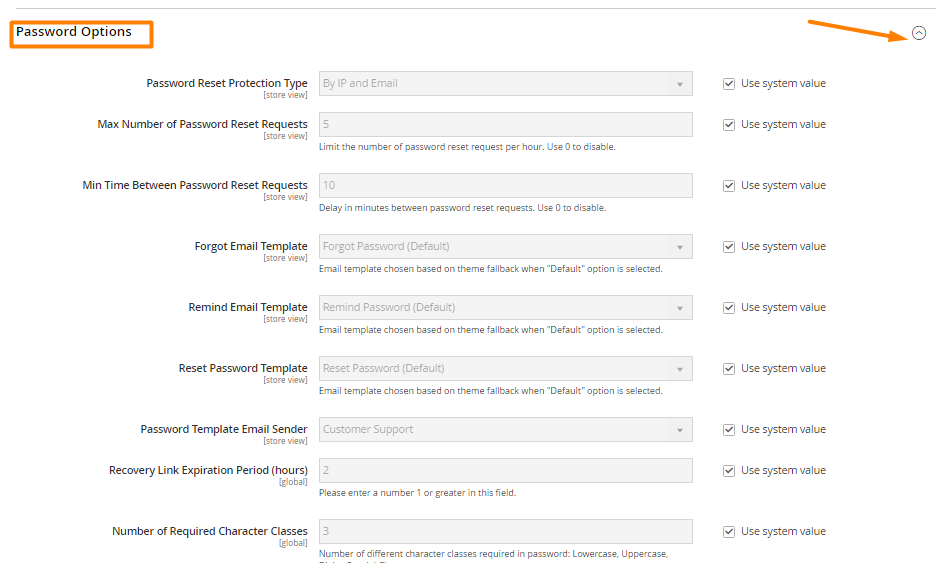
Option 4: Password Options
-
Password Reset Protection Type: Set the method to reset a customer password. If select None, only admin can reset the password -
Max Number of Password Reset Requests: Limits the number of password reset requests per hour. Entering 0 is unlimited requests -
Min Time Between Password Reset Requests: Limit time between password reset requests. Entering 0 is unlimited requests -
Forgot Email Template: When customer forgot password, set the password -
Remind Email Template: When customer receive password reminder/hintSpecify the email template -
Reset Password Template: when customer reset password, Specify the email template -
Password Template Email Sender: Select the store contact as sender for password-related emails -
Recovery Link Expiration Period(hours) -
Number of Required Character Classes -
Maximum Login Failures to Lockout Account -
Minimum Password Length -
Lockout Time(minutes)
-
-
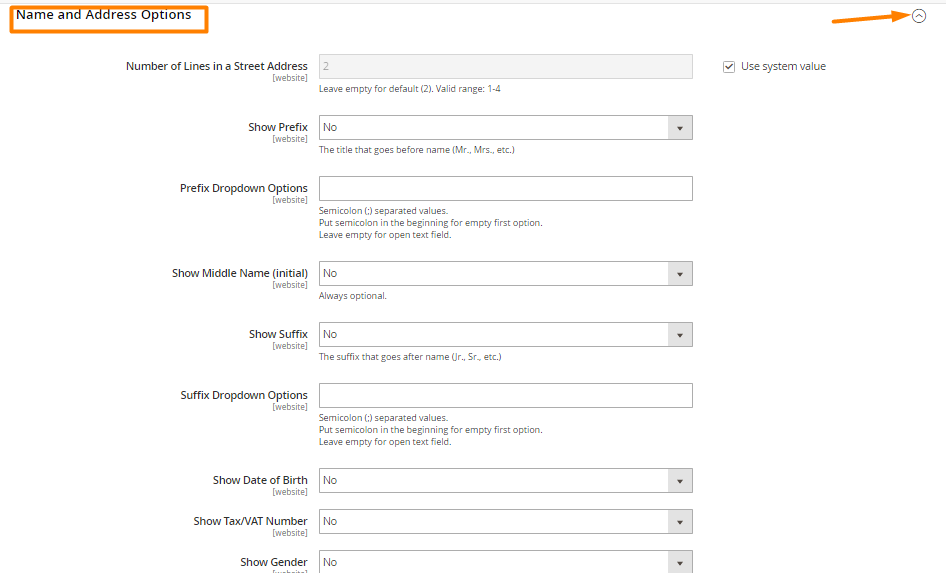
Option 5: Name and Address Options
Number of Lines in a Street Address: If the field is blank, the default street address of two lines is usedShow PrefixPrefix Dropdown OptionsShow Middle Name (initial)Show SuffixSuffix Dropdown OptionsShow Date of BirthShow Tax/VAT Number- Show Gender
-
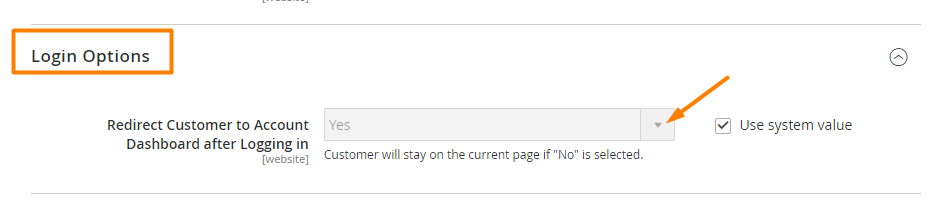
Option 6: Login Options
- Set Yes in
Redirect Customer to Account Dashboardafter Logging in
- Set Yes in
-
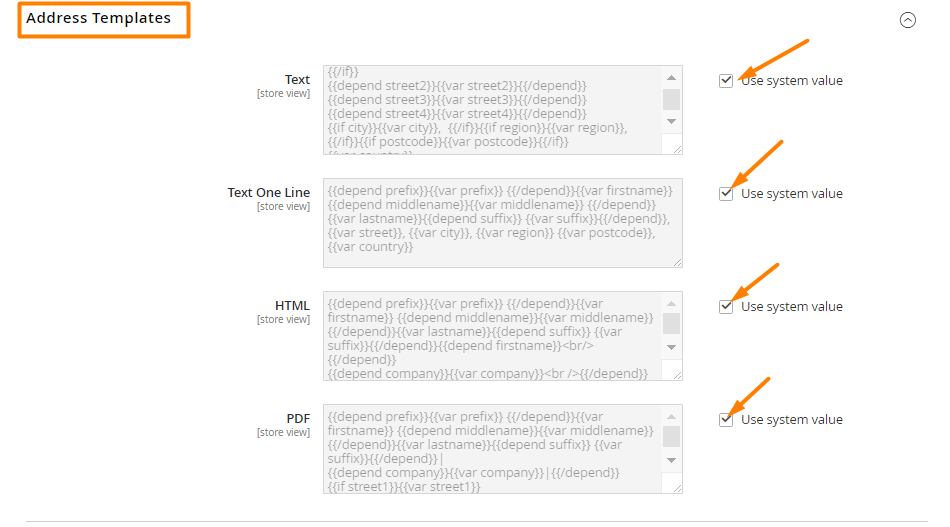
Option 7: Address Templates
Text: All addresses that are recordedText One Line: The address will be ordered from the customer’s shopping cart address book listHTML: It is under the Customer Addresses area and on the Add New Address page when a customer creates a new billPDF: Billing and shipping addresses will be displayed in the printed invoices, shipments, and credit memos
-
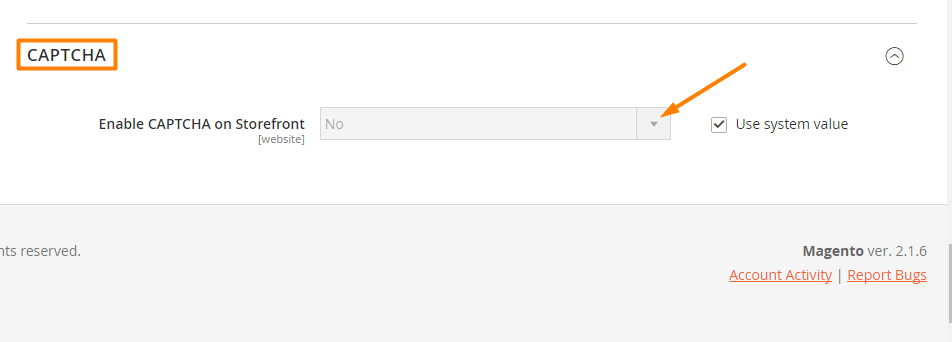
Option 8: CAPTCHA
- Choose Yes to enable Captcha for avoiding spam accounts
Step 4: Save Config
- Click
Save Config
THINGS TO REMEMBER
Setting Consumer Configuration makes your stores can manage customers more effective.
Related posts:
Looking for
Customization & Development Services?
8+ years of experiences in e-commerce & Magento has prepared us for any challenges, so that we can lead you to your success.
Get free consultant
Recent Tutorials

Change Store Email Addresses

Fix Magento 2 'Invalid Form Key. Please refresh the page'

Magento 2 Search Settings: Default Magento vs Mageplaza AJAX Search
Explore Our Products:
People also searched for
- Magento 2 Customer Configurations
- Customer Configurations
- 2.3.x, 2.4.x
Stay in the know
Get special offers on the latest news from Mageplaza.
Earn $10 in reward now!


